Touchboards Royal iRover Standard User manual

IR100 IR101 - Version A - 23 February 2010 - Copernicus Educational Products Inc.
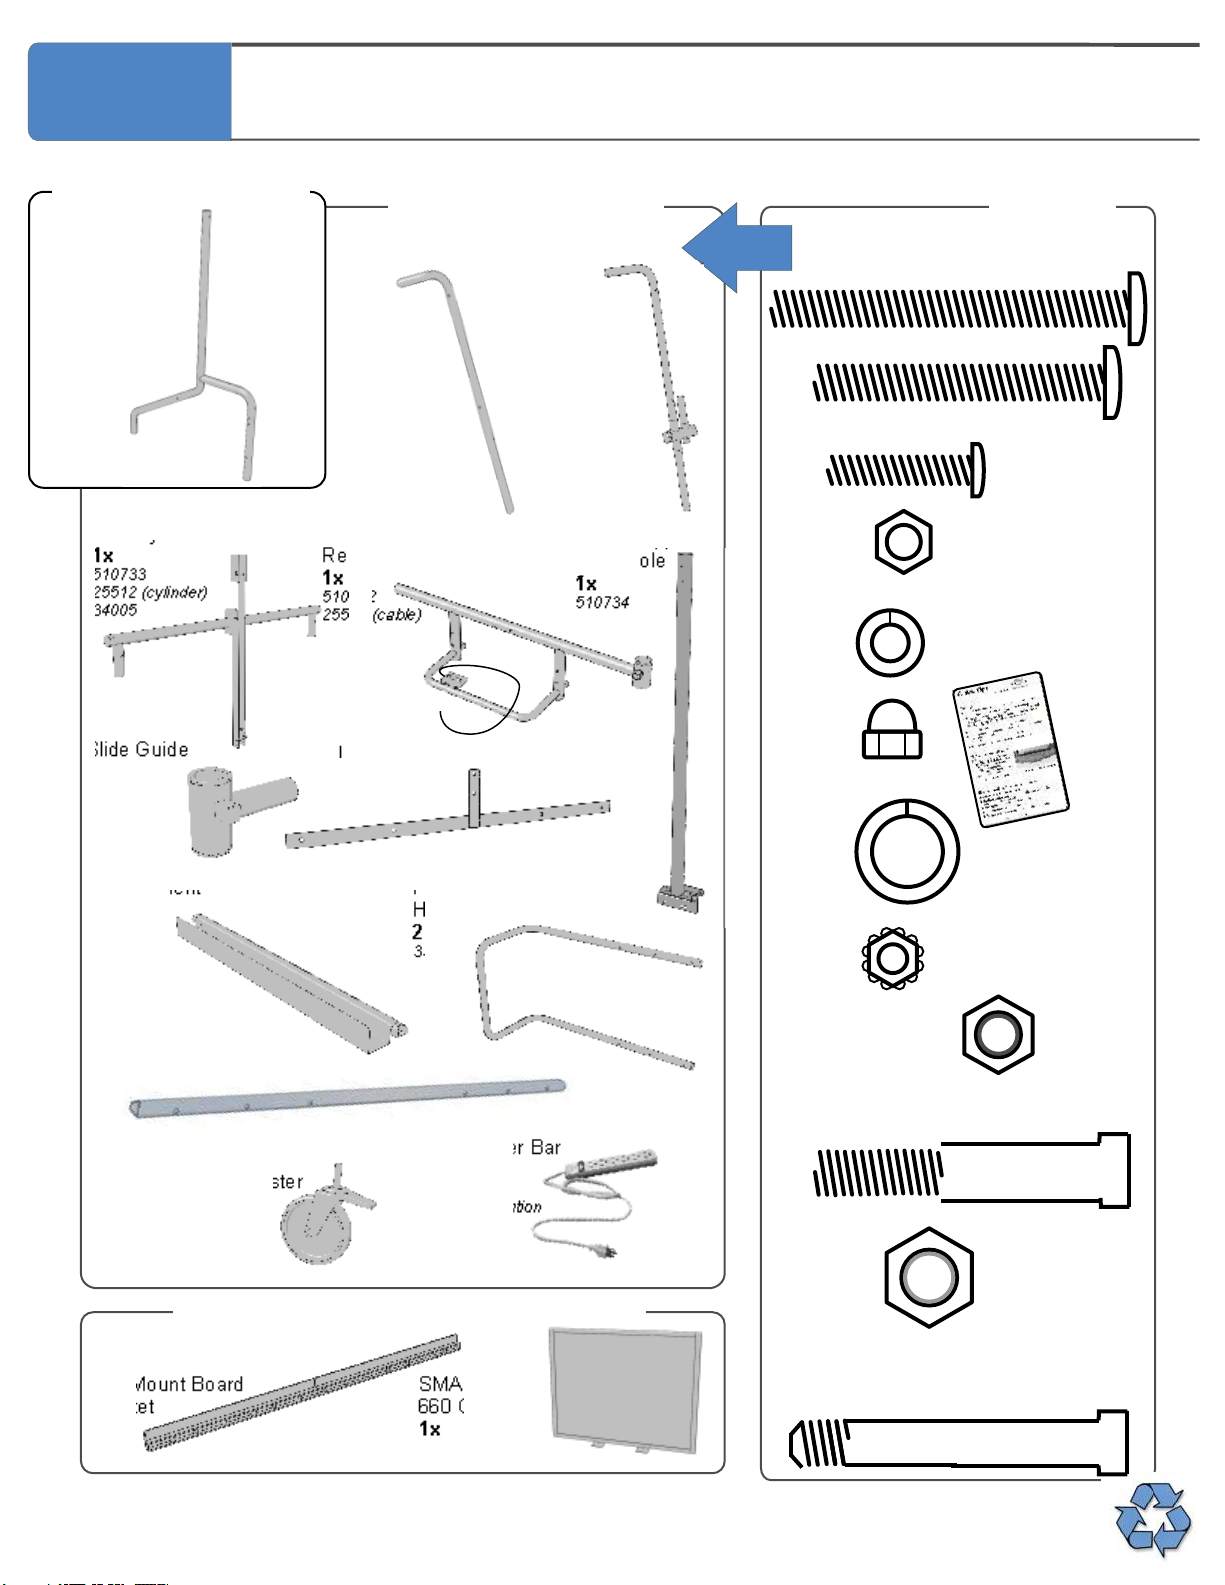
Protective
Handle (2)
Please Recycle
SMARTBoard
660 OR 680 (1)
(Sold Separately)
Leg (2)
Caster
(4)
Wire Management
Channel (1)
Remaining parts
are hidden
To validate your three year frame warranty, submit the ON-LINE form at www.copernicused.com
Enter a draw to win a Copernicus Product for your classroom at the same time!
Validate Your Warranty & Enter to Win!
3
Warranty
Year
Frame
!
Front
Back Lock Box (1)
Board Mounting
Bracket (1)
Back Support
(2)
Upper Frame (1)
Frame Upper
Slide (1)
Frame Upper
Slide Pole (1)
Shock Bracket
(1)
Slide Guide
(1)
Gas Cylinder
(1)
Projector Arm
Faceplate (1)
Projector Arm
Pre-Assembly (1) Projector
Slide (1)
Bottom Rollbar Round Tube (1)
Laptop
Arm
Pre-Assembly (1)
?This Product is meant to be assembled by an adult.
?In its unassembled state, small parts present a hazard.
?To be used under direct supervision of an adult.
WARNING
IR100/IR101_2010_A
This Assembly Guide provides instructions
to build the Premium or Standard models of
the iRover.
Check out our other products online at
www.copernicused.com
For assistance, please contact us:
1-800-267-8494
Have your packing slip ready for reference
Royal® iRover Standard/Premium - Assembly Guide
IR100
IR101
Installation instructions for either
the Lock Box or Shelf included
PLEASE KEEP THIS GUIDE WITH THE PRODUCT
WATCH OUR ASSEMBLY VIDEO AT WWW.I-ROVER.INFO
Additional tools required: OR
Phillips or Robertson Head Screwdriver
Wrenches (2 of Each): 7/16”, 9/16” & 1/2”
OR Two Adjustable Wrenches
Rubber Mallet

IR100 IR101 - Version A - 23 February 2010 - Copernicus Educational Products Inc.
This symbol denotes a 2 or 3 Person Task. For safety, please ensure that there are the
suggested number of people working on steps displaying this symbol
Watch for this symbol throughout the Assembly Instructions. Wherever you see it, pay
close attention. The symbol denotes a step needing extra attention to ensure it is done
correctly
The Star symbol highlights an advisory note
Tips for Assembly
!
Watch for These Helpful Symbols
Before You Begin
As You Assemble the Unit
Layout and identify all of the included parts
The hardware has been packed according to size, separate them based on those sizes
Read the assembly instructions over once to familiarize yourself with them
Please note that in its unassembled state, this product contains parts that can be a
hazard to small children; it should be assembled by an adult
Follow the steps in sequence
Before beginning each step, find the part(s) that you need for that step
Pay attention to the labeling on the parts, they are there to help direct you at certain stages
The title of each step states what you will be doing. Review the text and the pictures as you
build the unit
2 Person Task
!
My SMARTBoard isn’t working, who should I call?
Please call the reseller that you bought the product from first (reseller information can be found on your packing slip), OR
Please call Smart Tech Support, where someone will be happy to assist you. 1.866.518.6791. 5:00 a.m. – 6:00 p.m. Mountain Time
My Projector isn’t working, who should I call?
Epson 410W Projector - Please call Epson Customer Service, where someone will be happy to assist you.
(905)709-3839 in Canada; (562)276-4394 in the United States. Monday to Friday 6:00am - 6:00pm PST
NEC NP600S Projector -
My height adjust system is not working. What do I do?
I lost the key to my Lock Box. What do I do?
Please call Copernicus Customer Service, where we will be happy to help. 1-800-267-8434. Monday - Friday 8:30am - 4:30 pm EST
Monday to Friday
Please call the reseller that you bought the product from first (reseller information can be found on your packing slip), OR
Please call NEC Technical Support, where someone will be happy to assist you.
1-800-836-0655 or 1-800-366-5213
Sharp PG-F267X Please call Sharp Customer Service, where someone will be happy to assist you.
1-800-237-4277 (1-800-BE-SHARP)
Please call Copernicus Customer Service, where we will be happy to help. 1-800-267-8434. Monday - Friday 8:30am - 4:30 pm EST
The Gas Cylinders are not working properly. What do I do?
Please call Copernicus Customer Service, where we will be happy to help. 1-800-267-8434. Monday - Friday 8:30am - 4:30 pm EST
FAQ’s
?
?
?
3 Person Task
IR100 IR101 - Version A - 23 February 2010 - Copernicus Educational Products Inc.
Before beginning, you should have:
Hardware
Actual Size
43204
Contents - Box IR00-0-A
A - 430083
6x
B - 430081
14x
C - 430141
4x
In Box
IR100-0-A
Frame Upper
Slide Pole
1x
510734
Royal® iRover Premium - Parts
Back Support
1x
33044
Frame Upper Slide &
Release Cable
1x
510732
25513 (cable)
Upper Frame &
Gas Cylinder
1x
510733
25512 (cylinder)
34005
Slide Guide
1x
33043
Protective
Handle
2x
33048
Wire
Management
Stretcher
1x
33046
Upper Mount Bracket
1x
34006
Upper Stretcher
(6 thru holes)
2x
33047 4” Total
Lock Caster
4x
41008
Wall Mount Board
Bracket
1x
SMARTBoard
660 OR 680
1x
Contents - From the SMARTBoard Box
F - 430110
8x
H - 430161
4x
I - 430104
Lock Nut with plastic insert
2x
E - 430102
20x
Contents - Box IR100-0
Leg
2x
510731
Power Bar
1x
25514
Illustration
Only
G - 4301021
4x
D - 430112
2x
Regular nut
Quick Tips
Label
1x
Not to Scale
23021
J
2x
43310
K -
Lock Nut with
plastic insert
2x
430120
silver colored
L - 430238
2x
silver colored
Back Support
with Laptop
Connector
1x
33044
330501 (connector)

IR100 IR101 - Version A - 23 February 2010 - Copernicus Educational Products Inc.
Before beginning, you should have:
Laptop
Arm Pre-
Assembly
1x
Lock Box
1x
320411
Marker Bin
1x
320413
Contents - Box IR100-LA
Contents - Box IR100-LB
Royal® iRover Premium - Parts
P - Black
One-Wrap
Velcro Strap
3x
43321
Not to Scale
Contents - Box IR100-PA
Projector Slide
1x
330494
Projector Arm
Pre-Assembly
1x
330493
330491
330492
Projector Arm
Faceplate
1x
330497
Bottom Rollbar
1x
330496
Round Tube
VGA
Cable
1x
25517
Split Black
Wire Loom
1x
25505
Gas Cylinder
2x
Pre Assembled
25511
330503 330502
320391
320392
In Box
IR100-LA
Lower Stretcher
2x
33045 Shelf Stretcher
2x
33051
In Box
IR100-LB
Shelf
1x
32040
Contents - Box IR100-S
Top Rollbar
Square Tube
1x
330495
Projector Mount
Plate Assembly
1x
34010, 34009,
34008
U -430162
6x
B - 430081
6x
Key
2x
43044
Not to Scale
Hardware
Actual Size
In Box
IR100-LB
In Box
IR100-PA
Hardware
Actual Size 43205
M - 430061
4x
N - 430237
1x
O - 43210
5x
E - 430102
4x
I - 430104
Lock Nut with
plastic insert
1x
P - Black
One-Wrap
Velcro Strap
9x
43321
Not to Scale
430424
Allen Key
1x
Q - 430315
Spacer -
White
4x
R- 43211
4x
E - 430102
12x
A - 430083
8x
S - 430071
4x D - 430112
Regular nut
4x
T- 430314
Nylon Spacer
4x
Hardware
Actual Size
For use with Sharp PG-F267X

IR100 IR101 - Version A - 23 February 2010 - Copernicus Educational Products Inc.
1
Install Casters
Leg x 2Caster x 4
You will need: (Not to Scale)
Actual Size:
Do not tighten any fasteners, unless instructed
x 4
G
G
Lock Casters to tighten, & leave
locked for remainder of Assembly
To tighten casters
use a large adjustable wrench
This manual suits for next models
3
Table of contents
Popular Educational Equipment manuals by other brands


Quanser
Quanser 6 DOF Hexapod Laboratory guide

Surefire
Surefire Flying Model Rocket Kit How to use

ACROME
ACROME myCONTROL STEWART PRO user manual

SmartMan
SmartMan Baby Manikin manual

Nasco
Nasco Life/form LF03840U instruction manual

Pitsco Education
Pitsco Education BUILDERSPACES SPACEPORT Assembly instructions