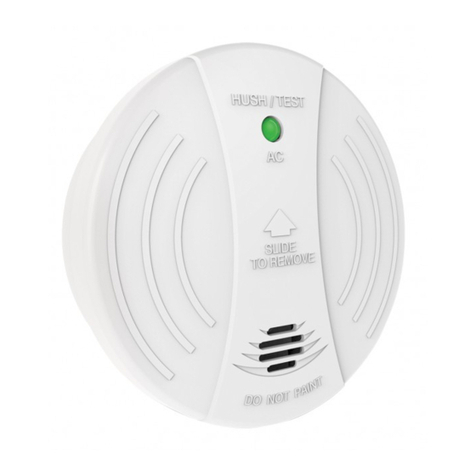
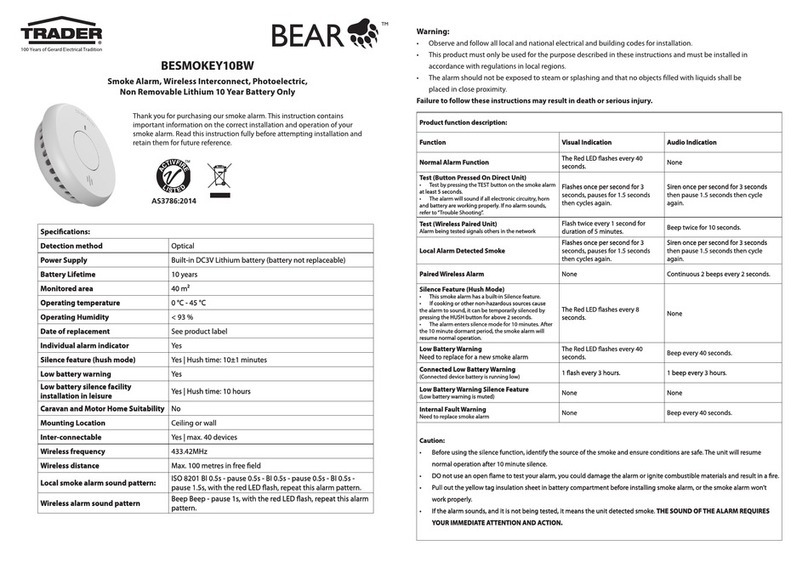
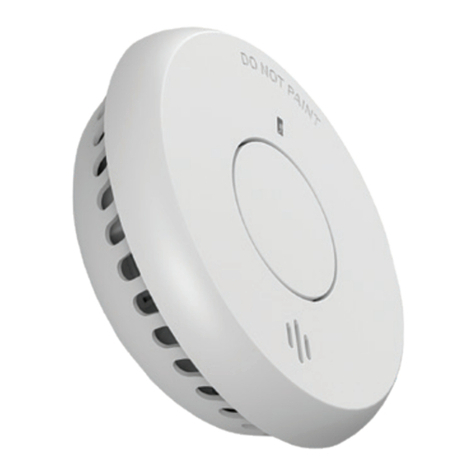
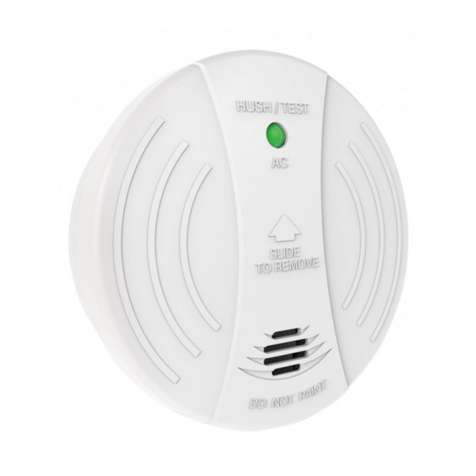
Trader BEAR BESMOKEY10 User manual

BESMOKEY10
Smoke Alarm, Photoelectric
220-240V AC Lithium Battery Wireless Ready
Thank you for purchasing our smoke alarm. This instruction contains
important information on the correct installation and operation of your
smoke alarm. Read this instruction fully before attempting installation and
retain them for future reference.
AS3786:2014
Warning:
• This product must only be installed and serviced by an appropriately qualied electrician.
• Observe and follow all local and national electrical and building codes for installation.
• This product must only be used for the purpose described in these instructions and must be installed in
accordance with the wiring rules and regulations in local region.
• Hazardous voltage may be presented at the wire leads of this product.
• Disconnect the AC power before installing or removing the smoke alarm.
• Ensure that the product has been correctly installed and tested for safe operation before reconnecting the
electrical supply.
• DO NOT connect the interconnection wire to Active or Neutral.
• A non-pure sinusoidal power sources is not suitable for this smoke alarm (e.g. derived from square-wave
invertors).
• The apparatus shall not be exposed to steam or splashing and that no objects lled with liquids, such as
vases, shall be placed on the apparatus.
Failure to follow these instructions may result in death or serious injury.
Specications:
Main Power Source 220-240 V AC/50 Hz
Secondary Power Source DC 3V battery: Pairdeer CR17450 or Huiderui CR17450
AC Operating Current <100mA
Interconnecting Max. 24 alarms (wired 150m maximum)
Operating Temperature 0 °C to 40 °C
Ambient Humidity ≤ 93%
Alarm Sensitivity 0.122-0.182 dB/m
Alarm Volume ≥ 85dB(A) @ 3m
Sound Pattern
ISO8201(BI 0.5s - pause 0.5s - BI 0.5s - pause 0.5s - BI 0.5s
- pause 1.5s, with the RED LED ashing, repeat this alarm
pattern)
Comply with AS3786:2014
Product function description:
Function Indication Description
Standby status The Red LED ashes every 40 seconds. The unit is working.
Alarm Memory Mode Flashes twice every 20 seconds. Shows which alarm in network has fault.
AC power indication The Green LED illuminates continuously. The unit is receiving AC power.
Low battery warning The unit chirps with Red LED ashing
every 40 seconds.
The battery voltage is too low, need to replace a new
smoke alarm.
Fault warning The unit chirps between the Red
LED two times ashing.
The unit is faulty, get helps from the section: “Trouble
Shooting.
Self-test fault warning The Red LED ashes twice every
40 seconds. The buzzer fault or buzzer detection circuit fault.
Test function
The Red LED ashes once every second
with alarm sounding until the TEST
button is released.
• Test by pressing the TEST button on the smoke alarm
at least 5 seconds.
• The alarm will sound if all electronic circuitry, horn
and battery are working properly.
• If no alarm sounds, refer to“Trouble Shooting”.
Hush Mode The Red LED ashes every 8 seconds.
• This smoke alarm has a built-in Silence feature.
• If cooking or other non-hazardous sources cause the
alarm to sound, it can be temporarily silenced by
pressing the HUSH button for above 2 seconds.
• The alarm enters silence mode for 10 minutes.
• After the 10 minute dormant period, the smoke
alarm will resume normal operation.
Fire alarm The Red LED ashes every second, with
alarm sounds. Generate alarm sounds when re happening.
Interconnection alarm The unit generate alarm sounds without
Red LED ashing.
The unit will enter the interconnection alarm mode when
received wire interconnection alarm signals.
Do Not Disturb The Red LED ashes every 40 seconds.
The unit will stop nuisance warning about 10 hours
under low battery or fault mode when the HUSH button
is pressed.
End-of-life warning The unit chirps between the Red
LED two times ashing.
The unit sends end-of-life warning after working 10 years.
Need to replace a new smoke alarm.
Caution:
• Before using the silence function, identify the source of the smoke and ensure conditions are safe. The unit will resume
normal operation after 10 minute silence.
• DO not use an open ame to test your alarm, you could damage the alarm or ignite combustible materials and result in a re.
• Pull out the yellow tag insulation sheet in battery compartment before installing smoke alarm, or the smoke alarm won’t
work properly.
• If the alarm sounds, and it is not being tested, it means the unit detected smoke. THE SOUND OF THE ALARM REQUIRES
YOUR IMMEDIATE ATTENTION AND ACTION.

Installation planning
• Recommended location of smoke alarms
• Standard guidelines should be followed and locations should be planned for optimum performance when installing
the smoke alarms. The Building Code or Australia and regional Government Legislations provide direction.
• For optimal performance, alarms should be mounted as close to the centre of the rooms as practical and on the ceiling
for residential applications (see diagram 2).
• Smoke alarms should be located in the vicinity of sleeping areas, bed rooms and along the path to the exit as the
sleeping quarters are usually further from building exits.
• Smoke alarms should be mounted near each end of hallways longer than 9 metres.
• Smoke alarms on ceiling must be installed at least 300mm away from walls or corners (see diagram 3).
• Where it is necessary to mount smoke alarms on a wall, use the inside wall of the room and position them between
300mm and 500mm from the ceiling. (See diagram 3).
• The alarm should be at least 500mm away from the apex of any angled ceiling surface and no greater than 1500mm
(see diagram 3).
• Alarms should be located in every room where electrical appliances are used.
Multi Storey
• Alarms should be installed on every oor level.
• Stairwells can act like chimneys as smoke can rise through them, so additional alarms should be located in these areas
(see diagram 1).
Mobile Homes
• For modern mobile homes or caravans with ecient insulation, install smoke alarms as recommended, refer
‘Recommended location of smoke alarms’.
• For older and mobile homes and caravans that are not well insulated on external surfaces compared to current
standards, external temperatures can vary to extreme heat or cold. In these cases the smoke alarm should be
mounted on an inside partition between 300mm and 500mm from the ceiling surface. This is to overcome the
problem where the temperature conditions on external surfaces may create a thermal barrier where smoke may not
reach the ceiling.
• If unsure of the insulation in the mobile home it is recommended to install the alarm on an inside wall panel, and for
minimum protection install at least one alarm near bedrooms.
• Note: for smoke alarm use in mobile homes it is recommended to test them before each excursion and at least once
a week during use, particularly if travelling on rough roads.
Locations to avoid:
• Air-conditioner ducts or appliance outlets that create airow such as heaters where combustion heat particles rise
and spread horizontally.
• Avoid locating the smoke alarms within 1 metre as it can cause nuisance triggering or smoke particles may be blown
away from alarm.
• Avoid installation in kitchen areas as nuisance triggering can occur from cooking fumes, heat or smoke particles
rising.
• Avoid installation in damp areas or extremely humid locations where relative humidity may reach 90%.
• Avoid installing in areas where there are large temperature variations such as 5 to 45 degrees as performance may
vary in extreme conditions and battery life may be reduced.
• Avoid installing alarms in areas that are considered“dead air space”where smoke will unlikely reach the alarm (see
diagram 3).
• It is recommended not to locate your alarm in the garage - products of combustion that are present when you start
your vehicle may cause nuisance triggering.
• Do not locate your alarm less than 500mm from the peak of an“A” frame type ceiling (see diagram 3).
• Avoid dusty areas or areas where insects may infest the unit as it may cause nuisance triggering or premature failure.
• Avoid installation in close proximity to other electrical equipment or uorescent lights as electromagnetic
interference may cause nuisance triggering.
Caution
• All interconnected smoke alarms must be supplied from the same circuit.
• A common Neutral wire must be used for Interconnect to function.
• MAX. Interconnected alarms: 24.
• MAX. Wiring length between rst and last alarm: 150m.
• DO NOT connect the interconnect wires to Live or Neutral.
• Observe and follow all local and national electrical and building codes for installation.
• Use a minimum of 1.0 mm 250V insulated wire for all wiring, including
interconnecting wiring.
Bedroom
Bedroom Bedroom
Living Room
Lounge Room
Kitchen / Dining
Diagram 1 Diagram 2 - Suggest alarm location
Diagram 3

Procedure for mains wired and interconnected alarm installation
1. Plan out and select the appropriate locations for the alarms to be installed following building code or local
requirements and all workmanship must follow AS/NZS3000.
2. Mark out positions and install ceiling plugs and create holes for cabling (diagram 4).
3. Isolate power and establish required mains wired circuit to the locations for the alarms and connect to the appropriate
terminals on the rear of the units. If more than one alarm is used, then the alarms must be interconnected either using
the link wire on the I-connect terminal or using a wireless module BESMOKEY10WM.
See section: ‘Introducing Wireless Alarm option into network.’
4. Follow wiring shown in diagram 5.
5. Insert the battery, remove the yellow tag and close alarm.
Introducing Wireless Alarm Option into the network with the BESMOKEY10WM module
1. Prior to installation determine if there is a need for the use of wireless alarms in the network.
2. This module can be installed into the BESMOKEY10 by rst disconnecting the power and opening one of the mains
powered alarms and disconnecting the battery, (if yellow tag has already been removed for battery to connect, then
remove the battery from alarm), replace the blank housing with the BESMOKEY10WM wireless module (diagram 6).
3. The BESMOKEY10WM communicates at 433MHz and can operate at range greater than 60m.
4. With the power o select one mains wired alarm to be the master for the wireless link and install the BESMOKEY10WM.
Caution: Only install one pluggable BESMOKEY10WM module into a group of mains-wired interconnected alarms. If
there is more than one installed with wired connections, it will not work.
5. Insert the battery, remove the yellow tag and close alarm. The alarm will automatically search for the module after being
closed. The red LED ashes continuously while the unit checks if the module is installed.
6. If no other alarms are found to pair with, the red LED will extinguish after 8 seconds, and unit will beep 3 times in quick
succession. The red LED will then ash twice quickly, every 8 seconds. This indicates that while the module has been
recognized, the unit is not yet paired.
7. If the module was not installed correctly, or otherwise not recognized by the alarm, the red LED will extinguish after 8
seconds, no beeps will be heard, and the red LED will not ash twice every 8 seconds.
8. Repeat these steps with all alarms to be interconnected.
9. Additional Wireless 10 Year Lithium powered alarms can be added to the network by combining the BESMOKEY10 and
inserting the BESMOKEY10WM module without wiring to the mains and using the 10 Year Lithium Battery option only.
These can be paired with the wireless master (Pairing the Alarm, g 5).
10. If no wireless alarms are in circuit, jump from Step 3 to 11
11. Turn ON Mains power
12. To test the alarms, press the TEST button for at least 2 seconds. The unit will alarm, and the light will ash for as long as
the TEST button is pressed.
WARNING: To prevent injury, this unit must be securely attached to ceiling in accordance with the installation instructions.
Diagram 4
NETWORK CONFIGURATION EXAMPLE
BESMOKEY10
(wired)
MASTER
BESMOKEY10 (wired)
+ BESMOKEY10WM
BESMOKEY10
+ BESMOKEY10WM
Holes
Plastic Plugs
Screws
Holes
Plastic Plugs
Screws
Holes
Plastic Plugs
Screws
Holes
Plastic Plugs
Screws
Pairing the Alarm
1. Press the TEST button of the rst alarm 3 times in the space of 2 seconds. The Red LED should remain illuminated. This
alarm remains the Master. (It is best to use the mains powered alarm as the Master if there is a mix)
2. Move to the next alarm and press the TEST button of this alarm 3 times in the space of 2 seconds. The red LED will
illuminate briey, and the unit will give one loud 0.5 second beep. The unit is now paired.
3. Repeat this process with all remaining alarms to be paired.
4. Return to the Master (rst) alarm. The Red LED should still be illuminated. Press the TEST button for 1 second, to complete
pairing.
5. All paired units will have the red light ashing once every 40 seconds (example of network diagram 7).
6. To run a test, press the alarm button for at least 2 seconds and the alarm will sound and the other interconnected alarms
should go through their test cycle, with a series of beeps, within a few seconds.
Active
Neutral
220-240 V a.c Interconnection
Terminal:
I-Connect : Interconnection
N : Neutral
E-Loop : No Wiring
A : Active
BESMOKEY10WM
Pluggable module
Diagram 5
Diagram 6
Diagram 7

Trouble Shooting:
Problem Cause and Remedy
The green LED does not light when AC power
supplied
• Check the AC line is properly connected to the smoke alarm.
• Ensure that the AC power is turned on.
The Red LED does not ash every 40s • Ensure the Insulating sheet is pulled out
• Ensure that the AC power are properly connected.
Smoke alarm does not sound when tested
• Ensure the AC power are properly connected.
• Ensure the Insulating sheet is pulled out
• Turn o the AC power and clean the smoke alarm.
Low battery warning • Replace a new smoke alarm.
Fault warning • Clean smoke alarm. Wait 5 minutes.
Self test fault warning • Press the TEST button at least 15s, then release.
False alarm
• Press the HUSH button to silence it.
• Clean smoke alarm device.
• Move the smoke alarm device to new location.
• Dust or insect contamination - vacuum around Smoke Alarm to remove
web or insects or blow with cool air dryer to clear dust to prevent false
triggering.
Self test fault warning
• Ensure that the battery is not low voltage.
• Clean smoke alarm. Turn o the AC power. Wait 3 minutes, then turn on
the AC power.
The alarm can’t interconnection alarm
• Check the Live, Neutral, Interconnection wires are properly connected
• Check the interconnected smoke alarm s are supplied from the same
circuit.
If the problem still exists, please return to your electrical wholesaler.
If the unit is out of warranty, please replace another new alarm.
10 Year Manufacturer’s Warranty
This product has been manufactured to the highest quality standards.
This product is warranted to the original purchaser and is not transferable.
The product is guaranteed to be free from defects in workmanship and parts for a period of 10 Years from the
date of purchase. Defects that occur within this warranty period, under normal use and care will be repaired,
replaced or refunded. The benets conferred by this warranty are in addition to all other rights and remedies
of the consumer under Commonwealth, State and Territory laws in relation to the goods or services to which
this warranty relates and Australian Consumer Law. Risk in regard to the product to be repaired shall at all
times remain with the Purchaser. The warranty is given on the condition that the product to which it applies is
used for the purpose and in the manner intended by its construction and for no other purposes whatsoever.
GSM Electrical (Australia) Pty Ltd shall not be responsible for damage of any kind, caused by accidents, power
surges, electrical storm damage, incorrect power current, infestation (vermin or insect), incorrect installation,
incorrect electricity or plumbing installation, improper use of controls or failure to use the product in
accordance with the operating instructions, general misuse or abuse or from normal wear and tear. Any
attempt by an unauthorised person to repair or tamper with the equipment shall render the warranty
null and void.
GSM Electrical (Australia) Pty Ltd’s liability under this warranty is limited to the replacement and/or repair of
the defective parts within the warranty period and does not extend to installation or removal of the product.
Acceptance of liability by GSM Electrical (Australia) Pty Ltd contained herein is to the exclusion of any other
remedy whatsoever and howsoever arising in respect of any equipment to which it applies.
Disposal:
Waste electrical products and batteries should not be disposed of with your other household waste.
The alarm is ideally suited for disposal within the waste electronic and electrical equipment (WEEE)
recycling scheme. Please recycle where facilities exist. Check with your local authority, retailer or
contact our Technical Support team for recycling/disposal advice as regional variations apply. Once
the batteries are removed, the low battery warning chirp will stop. The batteries should always be
removed before disposal.
10
Warranty
10
Warranty
Yr
Yr
Cleaning and Maintenance
Periodically apply the Test Procedure to test the alarm. Smoke Alarms are prone to dust and insect ingress which can cause false
alarms. It is prudent to clean the smoke alarm periodically. The Smoke Alarm must be kept clean so that excess dust does not
build up. Any insects or cobwebs in the vicinity of the Smoke Alarm should be promptly removed. Vacuum the outside of the
Smoke Alarm to remove any dust build up. Do not spray any cleaning liquids directly onto the smoke alarm.
Alarm Memory Feature
In an interconnected group, only the LED on the triggered alarm ashes twice approximately every 20 seconds for 72 hours. This
can be used to identify the triggered unit.
Hush Mode
In the event of an alarm condition, pressing the HUSH button on the alarm unit will silence the alarm for approximately 10
minutes. NOTE: Where multiple alarms are interconnected, the HUSH function WILL NOT OPERATE EXCEPT ON THE UNIT THAT
THE ALARM WAS TRIGGERED FROM. The triggered unit can be identied by the RED LED ashing.
Do Not Disturb Mode
When the unit indicates a low battery alarm or internal fault, pushing the HUSH button will silence the alarm for 10 hours and
the red LED will ash every 40 seconds
Periodically apply the Test Procedure to test the alarm.
Smoke Alarms are prone to dust and insect ingress which can cause false alarm, it is important to clean the smoke alarm
periodically. The Smoke Alarm must be kept clean so that excess dust does not build up. Any insects or cobwebs in the vicinity
of the Smoke Alarm should be promptly removed. Vacuum the outside of the Smoke Alarm to remove any dust build up. Do not
spray any cleaning liquids directly onto the smoke alarm. Replace the battery Audio and Visual Indication System
Develop an Escape Plan
As part of your plan, all family members should know and/or practice:
1. The two quickest ways out of each room
2. How to exit from upstairs, for homes with a second storey. A rope or chain may be required.
3. An agreed upon meeting place outside, such as the letterbox
4. The sound of the smoke alarm and practice leaving your home when they hear it.
5. A re drill at least every six months including drills at nights. Practice allows you to test your plan before an emergency. You
may not be able to reach your children. It is important that they know what to do!
What to do if the Alarm sounds
1. Alert any small children and elderly persons.
2. Leave immediately by your plan of escape. Every second counts, so don’t waste time getting dressed or picking up valuables.
3. In leaving, don’t open any inside door without rst feeling its surface. If hot, or if you see smoke seeping through cracks, don’t
open that door! Instead, use your alternate exit. If inside door is cool, place your shoulder against it, open it slightly and be ready
to slam it shut if heat and smoke rush in.
4. Stay close to the oor if air is smoky. Breathe shallowly through a wet cloth if possible.
5. Once outside, go to your selected meeting place and make sure everyone is there.
6. Call the Fire Brigade on 000.
7. Don’t return to your home until ocials say that it is safe to do so. For further information on re safety contact your local Fire
Brigade.
Other Trader Smoke Alarm manuals
Popular Smoke Alarm manuals by other brands

safewith.me
safewith.me NANO PV-20 installation instructions
Lince
Lince ZENITH GOLD 869 Series Installation, Programming and Operating Instructions
ELRO
ELRO Sensus7M instruction manual

First Alert
First Alert SA304 user manual
Heatit
Heatit Z-SMOKE quick start guide
Hochiki
Hochiki ESP FIREbeam installation manual
Bentel Security
Bentel Security FC400PH manual

Fenwal
Fenwal DH-60 (2W) manual
System Sensor
System Sensor 7251 Installation and maintenance instructions
Home2Link
Home2Link Shelly Plus Smoke General user and safety guide
FCI
FCI 301PL Series quick start guide

Spectrex
Spectrex SafEye 200 Series User and maintenance manual
