Trane BAYAIR30CNVENT Assembly instructions

Model:
INSTALLER'S GUIDE
ALL phases of this installation must comply with
NATIONAL, STATE AND LOCAL CODES.
IMPORTANT — This Document is customer property and is to remain with this unit. Please return to service information pack upon completion of work.
Concentric Vent Kit for
Condensing Furnaces and Boilers
DO NOT APPLY TO A NON-CONDENSING FURNACE.
NOTE: If these instructions differ from those packaged with
the furnace or boiler, follow these instructions.
DESCRIPTION AND USAGE
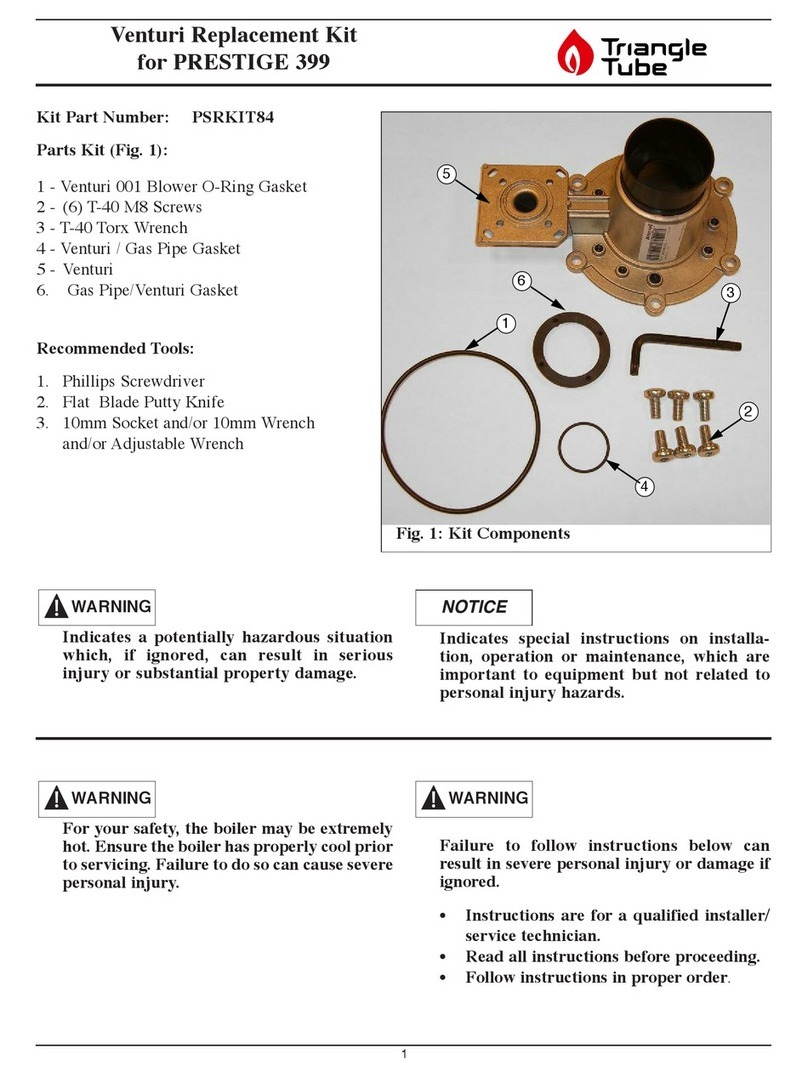
Kit Contents:
1—Raincap
1—4"DiameterSDR-26Pipe,23.75"Long
1—21/2"DiameterSDR-26Pipe,33.12"
1—WyeconcentricFitting
Only one vent kit per each furnace or boiler is allowed.
Ventkitisfor2,2-1/2or3in.diameterpipesystems,(See
Figures3,4,5,and6forthedifferentapplications.)Both
thecombustionairandventpipesmustattachtothevent
kit.Theventkitmustterminateoutsideofthestructureand
shouldbeinstalledverticallyasshowninFigures3and4,or
horizontalasshowninFigures5and6.
NOTE: The roof vent location is preferred since it is less
susceptible to damage, has reduced chances to intake con-
taminants, and vent vapors are less visible.
NOTE: Codes and local utility requirements governing the
installation of gas red equipment, wiring, plumbing, and
ue connections must be adhered to. In the absence of local
codes, the installation must conform with the Nation Fuel
Gas Code ANSI Z223.1 "latest edition", or CAN/ CGA B149
Installation Codes. The latest code may be obtained from the
American Gas Association Laboratories 400 N. Capitol St.
NW, Washington D.C. 20001, 1-800-699-9277 or www.aga.
com
NOTE: Read the Installer's Guide before starting the instal-
lation. Refer to the Furnace or boiler Installer's Guide for
equivalent vent lengths. The BAYAIR30CNVENT is 5 equiva-
lent feet.
INTRODUCTION
ThisInstaller'sGuidecoversinstallationoftheconcentricvent
kitonallgasfireddirectventcondensingfurnaces.
BAYAIR30CNVENT
s
s
WARNING
INSTALLATION OR REPAIRS MADE BY UNQUALIFIED
PERSONS CAN RESULT IN HAZARDS TO YOU AND OTH-
ERS. INSTALLATION MUST CONFORM WITH LOCAL CODES
OR, IN THE ABSENCE OF LOCAL CODES, WITH CODES OF
THE COUNTRY HAVING JURISDICTION. THE INFORMATION
CONTAINED IN THESE INSTRUCTIONS IS INTENDED FOR
USE BY A QUALIFIED SERVICE TECHNICIAN FAMILIAR WITH
SAFETY PROCEDURES AND EQUIPPED WITH THE PROPER
TOOLS AND TEST INSTRUMENTS. FAILURE TO CAREFUL-
LLY READ AND FOLLOW ALL INSTRUCTIONS IN THESE
INSTRUCTIONS CAN RESULT IN FURNACE OR BOILER
MALFUNCTION, PROPERTY DAMAGE, PERSONAL INJURY
AND/ OR DEATH.
RAIN CAP
4" SDR-26 PIPE
2-1/2" SDR-26 PIPE
WYE - CONCENTRIC FITTING
CONCENTRIC VENT KIT
s
s
WARNING
INSTALLING AND SERVICING HEATING EQUIPMENT CAN
BE HAZARDOUS DUE TO GAS AND ELECTRICAL COMPO-
NENTS. ONLY TRAINED PERSONNEL SHOULD INSTALL OR
SERVICE HEATING EQUIPMENT. FAILURE TO FOLLOW THIS
WARNING CAN RESULT IN PRODUCT DAMAGE, PERSONAL
INJURY AND/OR DEATH.
s
s
WARNING
THIS VENT KIT IS ONLY TO BE USED FOR VENTING CAT-
EGORY IV FURNACES AND CONDENSING BOILERS. DO
NOT USE TO VENT CATEGORY I, II OR III VENT FURNACES
OR BOILERS. FAILURE TO FOLLOW THIS WARNING COULD
RESULT IN FIRE, PERSONAL INJURY OR DEATH.
Field supplied pipe and fittings are required to complete the
installation.
Thecombustionairandventpipeandfittingsmustconformto
AmericanNationalStandardsInstitute(ANSI)andAmerican
Society for Testing and Materials (ASTM) standards D1785
(schedule-40 PVC), D2665 (PVC-DWV), D2441 (SDR-21 and
SDR-26PVC),D2661(ABS-DWV),orF628(schedule-40ABS).
PipecementandprimermustconformtoASTMstandardsD2564
(PVC)orD2235(ABS).InCanada,constructallcombustionair
andventpipesforthisunitofCSAorULCcertifiedschedule-40
PVC/ABS-DWVpipeandpipecement.
s
s
WARNING
DISCONNECT POWER SUPPLY BEFORE BEGINNING IN-
STALLATION TO PREVENT PERSONAL INJURY OR DEATH
FROM ELECTRICAL SHOCK AND EQUIPMENT DAMAGE.
①
Forusewith*UH,*DH,M95,*UY,*DY,*UX,*DX,
*UC,*DC,S-SeriesFurnaces,TGCW130A90M0A
andTGXWW130A90M0Aboilers
*maybeAorT
NOTE:
Canada requires that all Category IV heating appliances use
venting material that meets ULC S636. This kit meets the
requirements to be used in a venting system.
18-CH83D1-1A-EN

INSTALLER'S GUIDE
18-CH83D1-1A-ENPage 2
MAINTAIN 12 IN.
MINIMUM CLEARANCE
ABOVE HIGHEST
ANTICIPATED SNOW
LEVEL. MAXIMUM OF
24 IN. ABOVE ROOF.
VENT
COMBUSTION
AIR
CONCENTRIC VENT
ROOF TOP APPLICATION
CONCENTRIC VENT KIT ASSEMBLED
4.5" DIA
35.2" (typ.)
3" DIA PVC
VENT/EXHAUST
3" DIA PVC INTAKE/
COMBUSTION AIR
MAY BE
LENGTHENED TO 60" MAXIMUM
WITH FIELD REPLACEMENT PIPING.
DO NOT EXTEND MAIN BODY PIPES
WITH PIPE COUPLINGS.
MAIN BODY PIPES
21.125" (typ)
INSTALLATION - ROOF TERMINATION (SEE FIG. 3)
1. Determinebestlocationforterminationkit.
2. Cutonehole(5in.diameter)forventkit.
NOTE: Ensure termination height is above the roof surface
or anticipated snow level (1 ft. in USA or 1 1/2 ft. in Canada)
as shown in Figure 4.
NOTE: If assembly is too short to meet the height require-
ment, the two pipes supplied in the kit may be replaced by
using same diameter, eld supplied SDR-26 PVC (ASTM
D2241) pipe. Do not extend the 4" pipe (24" as shipped) to
more than 60 in. (See Figure 2).
s
s
WARNING
DO NOT OPERATE THE FURNACE OR BOILER WITHOUT
THE RAIN CAP IN PLACE AS RECIRCULATION OF COM-
BUSTION PRODUCTS MAY OCCUR. WATER MAY ALSO
COLLECT INSIDE THE LARGER COMBUSTION AIR PIPE
AND FLOW TO THE BURNER ENCLOSURE. FAILURE TO
FOLLOW THIS WARNING COULD RESULT IN PRODUCT
DAMAGE OR IMPROPER OPERATION, PERSONAL INJURY
OR DEATH
CAUTION
DO NOT USE FIELD SUPPLIED COUPLINGS TO EXTEND
MAIN BODY PIPES (4" AND 2-1/2" PIPES). AIRFLOW RE-
STRICTION WILL OCCUR AND THE FURNACE OR BOILER
PRESSURE SWITCH MAY CAUSE INTERMITTENT OPERA-
TION.
3. Partiallyassembletheventkit.Cleanthepipeendsand
adjoiningsocketswithPVCprimer(ASTMF-656)and
cementusingPVCcement(ASTMD-256).
a.CementtheWyeconcentricfittingtolargerdiameterkit
pipe.(SeeFigure1)
b.Cementtheraincaptosmallerdiameterkitpipe.(See
Figure1)
NOTE: Instead of cementing the smaller pipe to the rain cap,
RTV silicon sealant may be used to permit future eld disas-
sembly for cleaning
4.InstallWyefittingandpipeassemblyfromtheinsidethrough
structure'shole.Installfieldsuppliedroofboot/flashing.
NOTE: Do not allow insulation or other materials to accumu-
late inside pipe assembly when installing through hole.
5.SecureassemblytoroofstructureasshowninFigure4using
fieldsuppliedmetalstrappingorequivalentsupportmaterial.
6. Remove ribs from rain cap. Install the rain cap and the
small diameter pipe assembly in the Wye fitting and pipe
assembly.Ensurethatthesmalldiameterpipeiscemented
andbottomedintotheWyefitting.
s
s
WARNING
DRILL A PILOT HOLE IN THE VENT PIPE FOR THE SCREW
SIZE BEING USED. FAILURE TO DRILL ADEQUATE HOLES
MAY CAUSE CRACKING OF THE PVC COMPONENTS, AL-
LOWING FLUE GASES TO BE RECIRCULATED. FAILURE TO
FOLLOW THIS WARNING COULD RESULT IN PROPERTY
DAMAGE, PERSONAL INJURY OR DEATH.
② ③
7.Cementthefurnaceorboilercombustionairandventpipes
totheconcentricventterminationassembly.SeeFigure4
forproperpipeattachment.
8.CHECKOUT:OperatethefurnaceorboilertomakesureALL
pipejointsarefastenedandsealedtopreventtheescapeof
combustionproductsintothebuilding.
NOTE: Two or more installations require a minimum separa-
tion distance of approximately one inch between vent kits.
s
s
WARNING
FAILURE TO REMOVE RIBS FROM RAIN CAP FOR VERTI-
CAL VENT KIT INSTALLATIONS MAY CAUSE ICE OR SNOW
TO FORM ON THE RAIN CAP, LEADING TO AN INOPERABLE
FURNACE. FAILURE TO FOLLOW THIS WARNING COULD
RESULT IN PROPERTY DAMAGE, PERSONAL INJURY OR
DEATH.
NOTE: Kit supplied stainless steel screw will be used to se-
cure the rain cap to the pipe.
REMOVE RIBS
FROM CAP

INSTALLER'S GUIDE
18-CH83D1-1A-EN Page 3
REMOVE RIBS
FROM CAP
COMBUSTION
AIR
ROOF BOOT
(FIELD SUPPLIED)
COMBUSTION
AIR
VENT
ELBOW
(FIELD SUPPLIED)
MAINTAIN 12 IN.
(18 IN. FOR CANADA)
MINIMUM CLEARANCE
ABOVE HIGHEST
ANTICIPATED SNOW
LEVEL. MAXIMUM OF
24 IN. ABOVE ROOF
SUPPORT
(FIELD SUPPLIED)
VENT
CONCENTRIC VENT
ROOF INSTALLATION
④
INSTALLATION -SIDE WALL VENT (SEE FIGURE 5)
1. Determinethebestlocationfortheventkit.
NOTE: Consider the following when determining the vent kit
location:
A. Vent kit positioned where the vent vapors will not damage
planting/ shrubs or air conditioning equipment or building
structure.
B. Vent kit positioned so it will not be affected by wind eddy
that may allow recirculation of combustion products, or air-
borne leaves, or light snow.
C. Vent kit positioned where it will not get damaged or be
subjected to foreign objects, such as stones, balls, etc.
D. Vent kit positioned where the vent vapors will not be ob-
jectionable.
2. Cut1hole(5in.diameter)forVentkit.
3. Partiallyassembletheventkit.Cleanthepipeendsand
adjoiningsocketswithPVCprimer(ASTMF-656)and
cementusingPVCcement(ASTMD-256).
a.CementtheWyeconcentricfittingtolargerdiameterkit
pipe.(SeeFigure1)
b.Cementtheraincaptosmallerdiameterkitpipe.(See
Figure1)
4. InstallWyeconcentricfittingandpipeassemblythrough
structure'shole.
NOTE: Kit supplied stainless steel screw will be used to
secure the rain cap to the pipe.
7.Cementfurnaceorboilercombustionairandventpipesto
concentricvent assembly. SeeFigure 6for properpipe at-
tachment.
8.CHECKOUT:OperatethefurnaceorboilertomakesureALL
pipejointshavefastenedandsealedtopreventtheescapeof
combustionproductsintothebuilding.
NOTE: Two or more installations require a minimum separa-
tion distance of approximately one inch between vent kits.
CONCENTRIC VENT
SIDE WALL
COMBUSTION
AIR VENT
12" MIN TO
OVERHANG
1"
MAINTAIN 12 IN
MINIMUM CLEARANCE
ABOVE HIGHEST
ANTICIPATED SNOW
LEVEL OR GRADE
WHICHEVER IS GREATER
12
"
⑤
RAIN CAP
COMBUSTION AIR
STRAP
(FIELD SUPPLIED)
COMBUSTION
AIR
VENT
ELBOW
(FIELD
SUPPLIED)
VENT
1" + 1/2"
CONCENTRIC VENT
SIDE WALL INSTALLATION
⑥
NOTE: To prevent the possiblility of condenate freeze-up, do
not install vent kits one above the other.
NOTE: FLUE GAS DEGRADATION
The moisture content of the ue gas may have a detrimental
effect on some building materials. This can be avoided by
using the roof or chimney venting option. When wall venting
is used on any surface that can be affected by this mois-
ture, it is recommended that a corrosion resistance shield
(24 inches square) be used behind the Vent Terminal. This
shield can be made of wood, plastic, sheet metal, etc. Also,
silicone caulk all cracks, seams, and joints within 3 feet of
the Vent Terminal.

INSTALLER'S GUIDE
6. SecureassemblytostructureasshowninFigure6usingfield
suppliedmetalstrappingorequivalentsupportmaterial.
NOTE: Ensure termination location clearance dimensions as
shown in Figure 5. Do not locate the vent cap directly to the
wall surface. A distance of 1" ± 1/2" is required to prevent
water accumulating between the vent ns.
NOTE: If assembly needs to be extended to allow side wall
thickness requirement, the two pipes supplied in the kit may
be replaced by using same diameter, eld supplied SDR-26
PVC (D2241) pipe. Do not extend the 4" pipe (24" as shipped)
to more than 60 in. (See Figure 2). The 4" pipe may be short-
ened to 14" minimum.
NOTE: Do not allow insulation or other materials to accumu-
late inside pipe assembly when installing through hole.
s
s
WARNING
DRILL A PILOT HOLE IN THE VENT PIPE FOR THE SCREW
SIZE BEING USED. FAILURE TO DRILL ADEQUATE HOLES
MAY CAUSE CRACKING OF THE PVC COMPONENTS, AL-
LOWING FLUE GASES TO BE RECIRCULATED. FAILURE TO
FOLLOW THIS WARNING COULD RESULT IN PROPERTY
DAMAGE, PERSONAL INJURY OR DEATH.
CAUTION
DO NOT USE FIELD SUPPLIED COUPLINGS TO EXTEND
MAIN BODY PIPES (4" AND 2-1/2" PIPES). AIRFLOW RE-
STRICTION WILL OCCUR AND THE FURNACE OR BOILER
PRESSURE SWITCH MAY CAUSE INTERMITTENT OPERA-
TION.
5. Installraincap andsmalldiameter pipeassemblyin Wye
concentric fitting and large pipe assembly. Ensure small
diameterpipeisbottomedandcementedinWyeconcentric
fitting.
IMPORTANT:
TheCommonwealthofMassachusettsrequirescompliance
withregulation248CMR4.00and5.00forinstallationof
through–the–wallventedgasappliancesasfollows:
Forallsidewallhorizontallyventedgasfueledequipment
installedineverydwelling,buildingorstructureusedin
wholeorinpartforresidentialpurposes,includingthose
ownedoroperatedbytheCommonwealthandwheretheside
wallexhaustventterminationislessthanseven(7)feetabove
finishedgradeintheareaoftheventing,includingbutnot
limitedtodecksandporches,thefollowingrequirementsshall
besatisfied:
1.INSTALLATIONOFCARBONMONOXIDE
DETECTORS.Atthetimeofinstallationofthesidewall
horizontalventedgasfueledequipment,theinstalling
plumberorgasfittershallobservethatahardwiredcarbon
monoxidedetectorwithanalarmandbatteryback-upis
installedonthefloorlevelwherethegasequipmentisto
beinstalled.Inaddition,theinstallingplumberorgasfitter
shallobservethatabatteryoperatedorhardwiredcarbon
monoxidedetectorwithanalarmisinstalledoneach
additionallevelofthedwelling,buildingorstructureserved
bythesidewallhorizontalventedgasfueledequipment.It
shallbetheresponsibilityofthepropertyownertosecurethe
servicesofqualifiedlicensedprofessionalsfortheinstallation
ofhardwiredcarbonmonoxidedetectors.
a. Intheeventthatthesidewallhorizontallyvented
gasfueledequipmentisinstalledinacrawlspaceoran
attic,thehardwiredcarbonmonoxidedetectorwithalarm
andbatteryback-upmaybeinstalledonthenextadjacent
floorlevel.
b. Intheeventthattherequirementsofthissubdivision
cannotbemetatthetimeofcompletionofinstallation,the
ownershallhaveaperiodofthirty(30)daystocomplywith
theaboverequirements;provided,however,thatduringsaid
thirty(30)dayperiod,abatteryoperatedcarbonmonoxide
detectorwithanalarmshallbeinstalled.
2.APPROVEDCARBONMONOXIDEDETECTORS.Each
carbonmonoxidedetectorasrequiredinaccordancewiththe
aboveprovisionsshallcomplywithNFPA720andbeANSI/UL
2034listedandIAScertified.
3.SIGNAGE.Ametalorplasticidentificationplateshall
bepermanentlymountedtotheexteriorofthebuildingata
minimumheightofeight(8)feetabovegradedirectlyinline
withtheexhaustventterminalforthehorizontallyvented
gasfueledheatingapplianceorequipment.Thesignshall
read,inprintsizenolessthanone-half(1/2)inchinsize,
“GASVENTDIRECTLYBELOW.KEEPCLEAROFALL
OBSTRUCTIONS”.
4.INSPECTION.Thestateorlocalgasinspectorofthe
sidewallhorizontallyventedgasfueledequipmentshallnot
approvetheinstallationunless,uponinspection,theinspector
observescarbonmonoxidedetectorsandsignageinstalled
inaccordancewiththeprovisionsof248CMR5.08(2)(a)1
through4.
Thisappliancerequiresaspecialventingsystem.If
BAYAIR30CNVENTorBAYVENT200Bareused,acopyof
theinstallationinstructionsforthekitshallremainwiththe
applianceorequipmentatthecompletionofinstallation.The
ventingsysteminstallationinstructionscanbeobtainedfrom
themanufacturerbywritingtothefollowingaddress:
ResidentialSystems
6200TroupHighway
Tyler,TX75707
Attention:ManagerofFieldOperationsExcellence
The manufacturer has a policy of continuous data improvement and it reserves the right to change design and specifications without notice. We are
committed to using environmentally conscious print practices.
© 2020
18-CH83D1-1A-EN 01 Jul 2020
Supersedes 18-CH83D1-1 (December 2015)
About Trane and American Standard Heating and Air Conditioning
Trane and American Standard create comfortable, energy efficient indoor environments for residential applications.
For more information, please visit www.trane.com or www.americanstandardair.com
Other Trane Boiler Supplies manuals