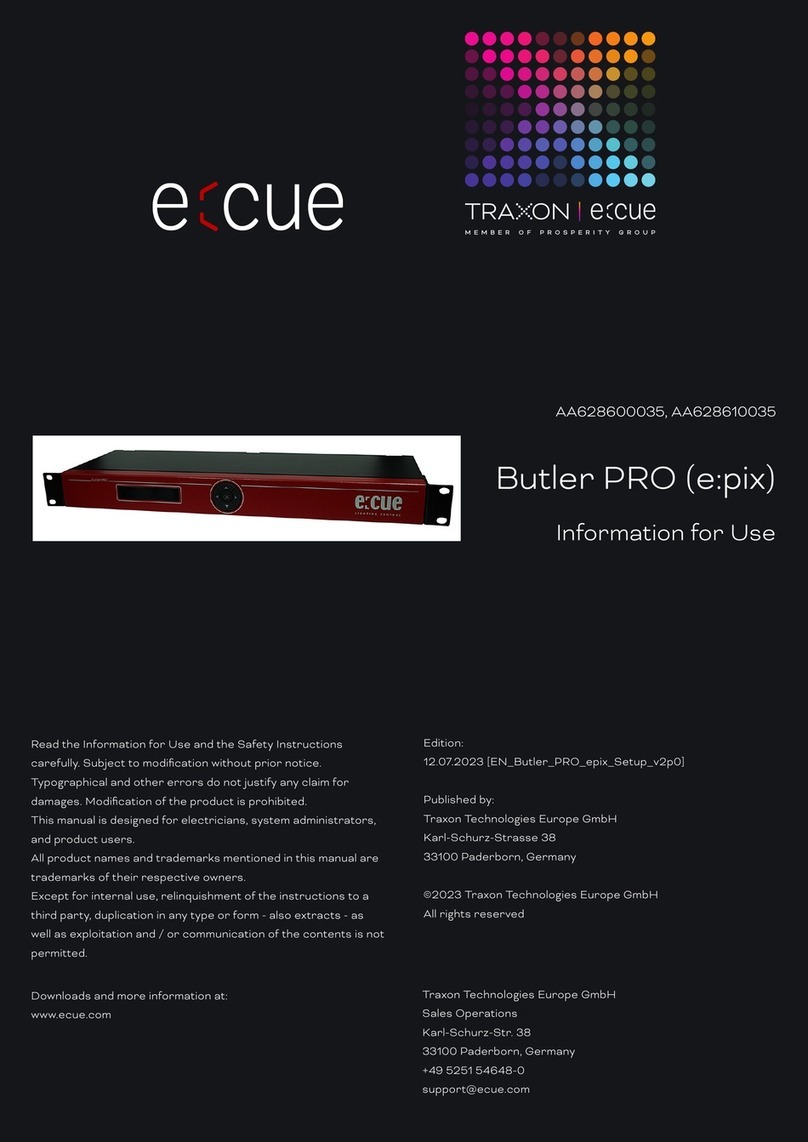
Traxon ecue Butler PRO DC Specification sheet

AB317520035
Butler PRO DC
Information for Use
Edition:
12.07.2023 [EN_Butler_PRO_DC_Setup_v2p0]
Published by:
Traxon Technologies Europe GmbH
Karl-Schurz-Strasse 38
33100 Paderborn, Germany
©2023 Traxon Technologies Europe GmbH
All rights reserved
Read the Information for Use and the Safety Instructions
carefully. Subject to modication without prior notice.
Typographical and other errors do not justify any claim for
damages. Modication of the product is prohibited.
This manual is designed for electricians, system administrators,
and product users.
All product names and trademarks mentioned in this manual are
trademarks of their respective owners.
Except for internal use, relinquishment of the instructions to a
third party, duplication in any type or form - also extracts - as
well as exploitation and / or communication of the contents is not
permitted.
Traxon Technologies Europe GmbH
Sales Operations
Karl-Schurz-Str. 38
33100 Paderborn, Germany
+49 5251 54648-0
Downloads and more information at:
www.ecue.com

WWW.TRAXON-ECUE.COM ©2023 traxon technologies. All rights reserved. Information for Use 07/23 Sheet: 2 / 16
Table of Contents
1 Safety instructions 3
1.1 Symbols 3
1.2 General safety instructions 3
2 General device description 3
2.1 Delivery content 4
3 General remarks 4
3.1 Transport 4
3.2 Unpacking 4
3.3 Warranty regulations 4
3.4 Maintenance and Repair 4
3.5 Disposal 5
3.6 Support 5
4 System diagram 5
5 Connections 5
6 Terminal pinning 6
7 Power supply 6
8 Mounting and installation 6
8.1 Unit distribution 6
9 User interface 7
10 Operational messages 7
10.1 Display and keypad use 8
11 Parameter setup 8
11.1 Device Info mode 8
11.2 Setup mode 8
11.3 Setup parameters and values 9
11.4 Advanced Settings mode 9
11.5 Test mode 10
12 OnlinecongurationwithProgrammer 11
12.1 Network parameters 12
12.2 Connecting more than one Butler PRO DC 13
13 Firmware update 14
14 Technicalspecications 14
15 Troubleshooting 15
16 Dimensions 16
Butler PRO DC — Information for Use

WWW.TRAXON-ECUE.COM ©2023 traxon technologies. All rights reserved. Information for Use 07/23 Sheet: 3 / 16
1 Safety instructions
Please read the safety instructions, provided in a separate manual, carefully. Make sure that the
environmental, mounting, and installation prerequisites are met. This manual should be kept at a safe place
and in reach of the device.
1.1 Symbols
!
The exclamation mark warns about possible
damage of the device itself, to connected devices,
and to the user.
i
The information symbol gives general hints and
informs about handling and procedures for use of
the device.
1.2 General safety instructions
.
2 General device description
The e:cue Butler PRO DC is a 16 channel DMX/RDM or e:pix interface that acts as an interface between a
server running the e:cue Lighting Application Suite and devices with DMX512 or e:pix connections. The Butler
Only work on the product when it is de-energized to prevent
electrical shocks. Incorrect handling may damage the unit.
Device components can reach high temperatures! Let unit
cool down after operation before mounting or removing unit
to avoid burnings.
!
— The product must only be installed and put into operation
by a qualied electrician. The applicable safety regulations
and accident prevention regulations must be observed.
Otherwise the unit may be damaged.
— Do not route network, DMX or any other communication
line together with power lines. Data trac or functions
can be disturbed.
— The product may only be operated in the operating modes
described in the manual. All other applications are
considered to be inappropriate use. If the product is not
used as intended, there is no guarantee that it will operate
safely.
— To prevent the device from overheating, only operate it in
well-ventilated environment. The ventilation slots may not
be obstructed. Otherwise the unit may overheat and fail.
— Repairs may only be carried out by authorized, specially
trained personnel to ensure reliability. When in doubt,
contact e:cue service. Incorrect handling may damage the
unit
— The device must be supplied by a separate certied SELV
Class 2 power supply.
i
If safety instructions are missing, please contact Traxon
e:cue to receive a new copy.
Butler PRO DC — Information for Use | Safety instructions
content

WWW.TRAXON-ECUE.COM ©2023 traxon technologies. All rights reserved. Information for Use 07/23 Sheet: 4 / 16
PRO DC usually gets mounted in a universal 19-inch rack system or on walls or ceilings.
The server connection is a standard CAT5 RJ45 based Ethernet interconnect. The device connection is also
RJ45 based. All usual CAT5 RJ45 cables can be used.
Highlights
yControls up to 8,192 DMX512 channels in 16 DMX/RDM universes
yControls up to 40,960 e:pix channels in 16 e:pix universes
ySupports RDM protocol over DMX for bidirectional communication (ANSI/ESTA E1.20, RDM over
USITT DMX512)
yBasic conguration via LC display and cursor keys
yDisplay of status messages while operating
y100 MBit system interconnect for e:net over Ethernet
2.1 Delivery content
yButler PRO DC AB317520035
yRack mounting brackets
yPower chords DE, US, UK
yWelcome note
3 General remarks
3.1 Transport
Only transport the device in its original packaging. This protects the device from damage.
3.2 Unpacking
Only unpack the e:cue Butler PRO DC at its installation location. To protect the device against condensation
water, unpack it and wait until all moisture remaining in the device has evaporated. Condensation can occur
when the device is moved from a cold to a warm location. Keep the packaging for use in case of further
transport. Inspect all parts for completeness regarding chapter „2.1 Delivery content“ on page 4. If there
is apparent damage to the device or parts are missing from the delivery scope, please contact the Traxon
e:cue Support service.
3.3 Warranty regulations
Depending on the product, warranty regulations are of dierent duration. The warranty time is usually noted
in the quote and in the order conrmation. See www.traxon-ecue.com/terms-and-conditions for details. Legal
warranty regulations apply in any case.
3.4 Maintenance and Repair
This device requires no maintenance.
i
Please note that e:net requires an isolated network segment
and cannot operate properly when using e. g. Internet trac
or video/audio streaming in the same network simultaneously.
!
— Before dismounting, appropriate measures must be taken
to protect the respective components against damage
caused by electrostatic discharge (ESD protection).
— Do not try to repair the device. Return it to your Traxon
e:cue distributor for replacement or repair.
Butler PRO DC — Information for Use | General remarks
content

WWW.TRAXON-ECUE.COM ©2023 traxon technologies. All rights reserved. Information for Use 07/23 Sheet: 5 / 16
To update the rmware see „13 Firmware update“ on page 14.
3.5 Disposal
The proper disposal of packing materials and of the device is the responsibility of the respective user and for
his account; in all other matters, the retrieval obligation for packing materials and the device is subject to the
statutory regulations.
3.6 Support
In case of technical problems or questions regarding installation and repair please contact:
Traxon Technologies Europe GmbH
Customer Service
Karl-Schurz-Str. 38
33100 Paderborn, Germany
+49 (5251) 54648-0
4 System diagram
e:cue LAS
Butler PRO Butler PRO Butler PRO
16 x output channels
DMX512/RDM or e:pix
Ethernet switch
16 x output channels
DMX512/RDM or e:pix
16 x output channels
DMX512/RDM or e:pix
Use standard CAT5 RJ45 Ethernet cabling between server, switch and Butler PRO DC. Connection without
Ethernet switch and with an Ethernet cross cable is not recommened. To connect DMX using a XLR5 type
plugs, please use a adaptor cable, item number 40005, available as accessory or contact your nearest e:cue
distributor for a suitable adaptor cable.
5 Connections
Frontplane
System display
Cursor keys
OK key (center)
OK
Status >
online DMX 35Fps
Batteries and technical appliances must not be disposed of
with domestic waste, but should be handed in at the
appropriate collection and disposal points.
Butler PRO DC — Information for Use | System diagram
content

WWW.TRAXON-ECUE.COM ©2023 traxon technologies. All rights reserved. Information for Use 07/23 Sheet: 6 / 16
Backplane
1 3 5 7
2 4 5 6
9 11 13 15
10 12 14 16
Ethernet
Output ports 1 ... 16
Ethernet/e:net Power
6 Terminal pinning
pin no. signal
1DMX-/ e:pix-
2DMX+/ e:pix+
3GND
4nc
5nc
6nc
7nc
8nc
7 Power supply
The Butler PRO DC power connection on the backplane has 2 + 2 poles for
daisy chaining power lines. Take care not to change the DC poles.
8 Mounting and installation
Mount the Butler PRO DC in a standard 19-inch rack system. Use appropriate rack screws, cage nuts and
spring clips for mounting.
8.1 Unit distribution
As the Butler PRO DC has no active cooling, place a maximum of two units together,
leave one unit free or place a passive device, followed by the next two units.
Additionally care for:
yclosing of unused units with rack plates
ymounting in a fan-ventilated closed rack
yplacement of the rack in an air conditioned room
Connect the Butler PRO DC with the outputs of the Ethernet switch and with power.
i
Every DMX bus should be terminated with a 120 ohms
resistor to stabilize the DMX connection.
24 V DC
12 W max.
i
When installing and mounting more than one Butler PRO DC
in factory state, make sure that only one Butler PRO DC gets
connected and congured at one time. If connecting more
than one device with the factory IP address (192.168.123.1)
the Ethernet connection will not work
Butler PRO DC — Information for Use | Terminal pinning
content

WWW.TRAXON-ECUE.COM ©2023 traxon technologies. All rights reserved. Information for Use 07/23 Sheet: 7 / 16
9 User interface
The Butler Pro comes with a circular keypad and an LC display for operation and setup. During regular
operation the Butler PRO DC displays status and operational messages on the display. When in setup mode,
parameters and values are displayed, the keypad is used for selecting parameters and changing values. Only
keypads, that are allowed at a certain state, are lit up, either in operational or in setup mode. This picture is
the Butler PRO DC DMX.
System display
Cursor keys
OK key (center)
OK
Status >
online DMX 35Fps
After powering up the Butler PRO DC, the loader shows the loading progress and revision levels of the loader
and the rmware. After loading is completed, the Butler PRO DC enters operational mode. The setup mode
must be selected separately.
During online operation, usually the IP address and other network parameters are shown, also the host
address of the server running the Programmer of the Lighting Application Suite. All used values for
parameters are just examples, they depend on the conguration of your Butler PRO DC.
10 Operational messages
After powering-up and loading the Butler PRO DC cycles through this set of status messages (DEVICENAME
is the name given via manual or online setup):
Butler PRO DC <DMX>
©2013 traxon/ecue
Start screen of the Butler PRO DC DMX.
Butler PRO DC <EPIX>
©2013 traxon/ecue
Start screen of the Butler PRO DC e:pix.
*** ERROR ***
no snapshot found
After booting the Butler PRO DC is oine (no LAS server present) and no
snapshot was stored for oine state. Press the OK-key to clear the message
and save a snapshot for oine state as shown later.
DEVICENAME
<oine>
The Butler PRO DC is in oine mode and not connected to the Programmer of
the LAS.
DEVICENAME
no output
The Butler PRO DC does not output any data (no snapshots dened).
DEVICENAME
IP: 192.168.123.123
The IP address of this Butler PRO DC.
DEVICENAME
MASK: 255.255.255.0
The netmask that is used for the IP connection, default is 255.255.255.0
DEVICENAME
<online>
The Butler PRO DC is in online mode, connected to the Programmer of the LAS.
DEVICENAME
Mode: DMX 35 Fps
The Butler PRO DC DMX name and speed, the maximum possible framerate is 35
fps
DEVICENAME
Mode: EPIX 31 Fps
The Butler PRO DC e:pix name and speed, the maximum possible framerate is 35
fps
DEVICENAME
Connected to:
DEVICENAME
192.168.123.100
The IP address of the LAS server the Butler PRO DC is connected to.
Butler PRO DC — Information for Use | User interface
content

WWW.TRAXON-ECUE.COM ©2023 traxon technologies. All rights reserved. Information for Use 07/23 Sheet: 8 / 16
*** WARNING ***
temperature high!
The Butler PRO DC has exceeded the allowed internal temperature. The actual
temperature is displayed. Switch o the Butler PRO DC to cool it down. Check
mounting conditions in the installation chapter of this manual.
10.1 Display and keypad use
Displayed messages without a right angle bracket ( ) are info messages. Messages with a right angle bracket
are entries into submenues. Use the key to enter submenues and parameter settings. Use the key to
return. Use the and keys to select parameters. Use OK to acknowldge settings or selections with a
checkmark or a cross. Only keys that are valid entries are lit up on the keypad.
11 Parameter setup
Using the and key from the main menue you can step manually through the rst-level menu.
Device Info > Enter Device Info mode with key
Setup > Enter Setup mode with key.
Status >
online DMX 35 Fps
Enter Status mode with key for the Butler PRO DC DMX.
Status >
online EPIX 31 Fps
Enter Status mode with key for the Butler PRO DC e:pix.
DEVICENAME
<online>
Returned to the default display.
11.1 Device Info mode
Info IP
192.168.123.250
The IP address of this Butler PRO DC.
Info MAC
00:16:1c:f1:17:b7
The MAC address of this Butler PRO DC.
Info FW Version
1.0.123
The current rmware version installed.
Info FPGA Version
1.0.1
The FPGA command set version installed.
Info HW rev.
1
The hardware revision level of this Butler PRO DC.
Info Keypad Version
1.0.5
The rmware version of the keypad controller.
Info connected to
192.168.123.100
The IP address of the LAS server.
Info temperature
37 C
The internal temperature of the Butler PRO DC in degree Celsius.
Leave the Device Info mode by pressing the key.
11.2 Setup mode
Selecting and changing parameter values
Butler PRO DC — Information for Use | Parameter setup
content

WWW.TRAXON-ECUE.COM ©2023 traxon technologies. All rights reserved. Information for Use 07/23 Sheet: 9 / 16
yCycle through the parameters with the and the keys.
ySelect the parameter to change with the OK key.
yUse the and keys to select the position to change.
yUse the and key to change the value. Keep the key pressed for a fast change.
yMove the cursor to the right and select the cross to cancel the change, select the checkmark to make
the entry valid. Press the OK key
yFor the device name press the OK key to initialize editing mode and select position and value as above.
Press OK again to get to the command selection in the top row. With the or key select to save, cancel
or delete characters. Select the cross to cancel, the checkmark to apply the changes or the back-arrow
to delete the characters in the name. Press the OK key.
With the parameter Advanced settings > an additional level of functions is entered for special features. Use
the key to leave this menu or any other menu level to return to operational mode. In the setup parameters
there is an additional command set for Test Mode. Select this test mode by pressing the right-key when Enter
Test Mode > is displayed.
11.3 Setup parameters and values
Standard parameters
enter Password With the cursor keys and select position and with or characters. Press OK
to enter the password.
Setup IP
192.168.123.200
The IP address of the Butler PRO DC. Factory default is 192.168.123.1
Setup Subnet Mask
255.255.255.000
The subnet mask. Default is
255.255.255.0
Setup Gateway
192.168.123.001
The network gateway. If no gateway is use,
set to 0.0.0.0
Setup NAME
Butler PRO DC
The device name, used in most displays.
Setup GROUPID
001
Set the group id for synchronisation of snapshots in a set of Butler PRO DC.
Setup STARTUP
show snapshot1
Setup the show to display on startup, snapshot 1, snapshot 2 or no output.
Setup OFFLINE
show snapshot2
Setup the show to display if the Butler PRO DC is oine, select snapshot 1,
snapshot 2 or no output.
Advanced settings
>
Enter the Advanced Settings mode.
Use the to leave the setup mode.
11.4 Advanced Settings mode
Reset to defaults Resets all parameters, including IP address, to the default values.
i
In delivery state the setup dialogue is password-protected.
The default password is “ecue”. The password can be
changed or deleted in the online conguration with the
Programmer.
Butler PRO DC — Information for Use | Parameter setup
content

WWW.TRAXON-ECUE.COM ©2023 traxon technologies. All rights reserved. Information for Use 07/23 Sheet: 10 / 16
Reset device Resets the device and reboots the Butler PRO DC. Does not change the
parameter settings of the Butler PRO DC.
Enter Loader Mode Enters the loader mode and waits for commands, e. g. to update the rmware.
With the and keys you can view the Butler PRO DC main parameters and the
escape step. To escape and leave the loader mode, select START APP with or
and press OK. The Butler PRO DC loads its rmware now.
Enter Test Mode > Calls the Test Mode command set, Press OK to enter Test Mode.
Capture Output SLOT1 Captures the current state as snapshot 1 for oine or startup display. All Butler
PRO DCs with the same GroupID also capture this state.
Capture Output SLOT2 Captures the current state as snapshot 2 for oine or startup display. All
Butler PRO DCs with the same GroupID also capture this state.
Contrast
<bar line>
Set the contrast of the display.
11.5 Test mode
In Test Mode you can test all or a single output of the Butler PRO DC and the connected xtures. There are
three test modes: value, fade and strobe. In value mode a xed DMX value is sent to all channels as white
value. In fade mode the channels are faded from zero to a denes value in a loop. In strobe mode all channels
get a square signal to realize a strobe eect.
After selecting from the advanced settings you reach level one of the test mode:
select Output
none
Select the outputs to test. Press the OK key and select the tested outputs with the
next step.
select Output
>none
With the or key select all, none or a single output of the Butler PRO DC. Press
the OK key again to set the output channel(s) and return.
Press the to select the maximum brightness in test mode.
Set Level
255
Press OK, use the cursor keys to select and set position and value of test
brightness. The maximum value is 255. Press OK to set this value.
Press to select the test mode.
select Test Mode
value
Press Ok, with the or key select the test mode: value, fade or strobe. Press OK
again to select the test mode. The test mode runs until you leave test mode with the
key.
Output Mode
dmx
Select the output mode dmx or epix.
Butler PRO DC e:pix only.
For the test of a subset of xtures you can select a block size and block move value with the key. This
submenu is reached in every position of the rst level as a second level. Use or to navigate.
Block size
<value>
To select a block size, press OK and select 1, 2, 3, 4, 5, 6, 48, 192 or 512 channels.
Press OK again to set the block size (Butler PRO DC DMX)
Universe size
512 (def DMX)
Select the size of one universe for the Butler PRO DC e:pix only.
Block move
>manual
To select block move speed, press the OK key. Select a timing of 50 ms, 100 ms, 500
ms or 1 s for automatic movement. Select manual for manual stepping through
channels. Press OK to set the block move speed.
i
If you want to have all xtures turned o at startup, send a
pattern with all zeroes for all channels to the Butler PRO DC.
Use this pattern as snapshot for startup display to make
sure that all xtures are o.
Butler PRO DC — Information for Use | Parameter setup
content

WWW.TRAXON-ECUE.COM ©2023 traxon technologies. All rights reserved. Information for Use 07/23 Sheet: 11 / 16
Return from the second level submenu to the rst level with the key.
While the test is running you can switch to a third level menu from the second level with the key. In this third
level menu the current DMX or e:pix address is displayed.
Start Address
<value>
In automatic (timed) mode the current DMX start address of the block. With the
and keys running direction is switch to up or down direction. Keeping the key
pressed a fast change is possible. With the OK key toggling the test mode gets
paused and restarted again.
In manual mode the start address is stepped up or down with the or keys.
Return to the second and rst level of the test mode menu with the key.
Pressing again returns to the Advanced Settings.
12 Online conguration with Programmer
Connect the Butler PRO DC via a switch to a system runnung e:cue’s Lighting Application Suite; start the
Programmer.
Select the Network tab
in the status window in the upper left. Any Butler PRO DC devices
which are connected to the network should appear in the list. If
they do not show up in the list, check if the IP address settings for
your computer are correct and the network range is
192.168.123.*, the default address of any new Butler PRO DC is
192.168.123.1. Please also make sure your re wall does not
prevent communication between the computer and the Butler
PRO DC. The Butler PRO DC should become visible.
Click on the Butler PRO DC line in the Network display, this opens the device conguration dialog. Here you
can set all driver properties of the Butler PRO DC. The IP address typically this
should read 192.168.123.1 at this stage, when the Butler PRO DC is still set to factory defaults.
yAssign a new IP address e.g. 192.168.123.200.
yUse the same procedure for the remaining network
parameters: Subnet Mask - usually 255.255.255.0, Gateway – no
gateway
yGive the Butler PRO DC a unique name.
yApply the changes with the Ok button.
The parameters to congure in online mode are the same as
conguring the Butler PRO DC manually. Additionally a new password
may be set and the DMX parameters can be changed. Parameters in
grey are read-only and cannot be changed, like the MAC address or
the version numbers. If the password is omitted, the setup will not be
protected.
Butler PRO DC — Information for Use | Online conguration with Programmer
content

WWW.TRAXON-ECUE.COM ©2023 traxon technologies. All rights reserved. Information for Use 07/23 Sheet: 12 / 16
12.1 Network parameters
Device Basics
Device Name The device will be displayed with this name in the e:cue programmer.
IP address The IP address of the device (default: 192.168.123.1)
Subnet Mask The netmask of the device (Default: 255.255.255.0)
Gateway address The default gateway of the device (Default: no gateway)
MAC address The physical address of the device (read only)
Startup Setting The snapshot to be used in startup phase or none.
Oine Setting The snapshot to be used in oine phase or none.
Cong Password The password to enter manual conguration mode.
Versions
Hardware Build Version The hardware version (read only).
Software Build Version The software version (read only).
FPGA Build Version The command set for the internal FPGA (read only).
Loader Build Version The version of the rmware loader.
Cluster Mode
Group ID The cluster ID of this Butler PRO DC.
Advanced Setup (do not modify unless instructed so)
Lock Settings Checkmark, set by default, avoids changes for DMX/e:pix and RDM by chance.
BRK Length Break signal length in µs for the DMX/e:pix protocol.
MAB Length Mark after break length in µs for the DMX/e:pix protocol.
BRK Length RDM Break length in µs for the RDM protocol.
Butler PRO DC DMX only
MAB Length RDM Mark after break length in µs for the RDM protocol.
Butler PRO DC DMX only
RDM Switch Time The RDM Tx to Rx length in in µs.
Butler PRO DC DMX only
To add the Butler PRO DC to
the Programmer conguration start the Device Manager.
Execute the Automatic Setup Wizard. The Butler PRO DC will be
found and displayed:
Butler PRO DC — Information for Use | Online conguration with Programmer
content

WWW.TRAXON-ECUE.COM ©2023 traxon technologies. All rights reserved. Information for Use 07/23 Sheet: 13 / 16
Set the checkmark for the Butler PRO DC to add it to
your setup or click the Select button. To set the driver
properties for the Butler PRO DC double-click the Butler PRO
DC in den device overview of the Device Manager.
Click Ok to add the Butler PRO DC to the Programmer
conguration, the Butler PRO DC is now available.
Double-click the new Butler PRO DC in the Device Manager and
an additional conguration dialog gets displayed to set more
parameters for the Butler PRO DC.
Using this device setup
dialog you can set the DMX universes as well as the required
RDM feedbacks for the channels of the Butler PRO DC
When nished close the device setup dialog with Ok.
12.2 Connecting more than one Butler PRO DC
In case you have several Butlers PRO DC they need to be congured one at a time. Do not connect all of them
to the network immediately! This is due to the fact that the devices all come with the same IP-address by
factory default. If they are connected simultaneously an IP-address conict will occur and conguration is not
possible. Instead, connect the Butlers PRO DC one at a time. Connect the rst Butler PRO DC and assign a
new IP-address to the device (e.g. 192.168.123.11). Repeat this sequence until all devices have been assigned
with an individual IP-address. In a next step all devices can be hooked up to the connecting network.
Butler PRO DC — Information for Use | Online conguration with Programmer
content

WWW.TRAXON-ECUE.COM ©2023 traxon technologies. All rights reserved. Information for Use 07/23 Sheet: 14 / 16
13 Firmware update
To update the rmware of the Butler PRO DC proceed the
following way:
yStart the Patchelor of the e:cue Lighting Application Suite.
yIn the list of found devices select the appropriate Butler
PRO DC.
yPress the right mouse button and select Update Firmware.
ySelect the le with the new rmware (*.bxt).
yAfter the download is complete the Butler PRO DC will
restart.
yThe new rmware is available now.
14 Technical specications
Generalspecications
Dimensions 482 x 44 x 142 mm /19 x 1.7 x 5.6 in
(incl. mounting brackets)
Weight 1.2 kg / 2.65 lbs
Power supply input 20 ... 28 V DC
Power consumption max. 12 W
Operating/storage temp. 0 … 40 °C/32 … 104 °F
Operating/storage hum. 0 … 80%, non-condensing
Protection class IP20
Housing Aluminium, polyamide 6.6
Mounting on 35 mm DIN rail
Enginespecications
User interface 4-cursor keys, OK key
System links 1 x e:net (RJ45 Ethernet)
16 x DMX/RDM (RJ45) or 16 x e:pix
Display 2-lines, 40 characters/line display
Data storage micro SD card, internal
e:netspecication
Connection RJ45, 8P8C
Speed 100 MBit/s
POE capability no
DMXoutputspecication
Number of outputs 16 DMX universes, 8,192 channels
Short circuit protection yes, reversible
DMX operation USITT DMX512-A,
RDM ANSI E1.20
Connectors RJ45 receptacle connector,
Traxon pin conguration
e:pixoutputspecication
Butler PRO DC — Information for Use | Firmware update
content

WWW.TRAXON-ECUE.COM ©2023 traxon technologies. All rights reserved. Information for Use 07/23 Sheet: 15 / 16
Number of outputs 16 e:pix universes, 32,768 channels
Short circuit protection yes, reversible
e:pix Traxon standard
Connectors RJ45 receptacle connector,
Traxon pin conguration
4006376
Conforms to ANSi/UL Std. 60950-1.
Certied to CAN/CSA Std. C22.2#60950-1.
15 Troubleshooting
Problem Check Reason See also
The Butler PRO
DC does not go
online in the
Programmer/
Patchelor
Does the LAS server have a
xed network address? Is a
correct IP address assigned?
Are Butler PRO DC and LAS
server in the subnet?
The Butler PRO DC must be in
the same IP subnet as the
Computer. Example:
192.168.123.xxx
Setup Manual
Is the network adapter in the
LAS server and in the
Programmer/ Patchelor
Network Card congured
correctly?
The e:net interface IP address
must be assigned in the
Programmer/ Patchelor.
LAS Setup Manual
More than one Butler PRO DC
with the same IP Address?
Factory default of Traxon
products is IP: 192.168.123.1
Setup Manual
Is there a direct connection
between the LAS server and
the Butler PRO DC without a
Ethernet switch?
Some network adapters do not
support a direct connection.
Use an Ethernet switch in any
case.
Setup Manual
RDM without
function
Is RDM enabled in the
Programmer’s Device Manager
for the Butler PRO DC?
RDM “Enable for DMX 1 to 16”
must be activated in the Device
Properties in the Programmer
for this Butler PRO DC.
LAS Setup Manual
Butler PRO DC — Information for Use | Troubleshooting
content
This manual suits for next models
4
Table of contents
Other Traxon Controllers manuals

