4
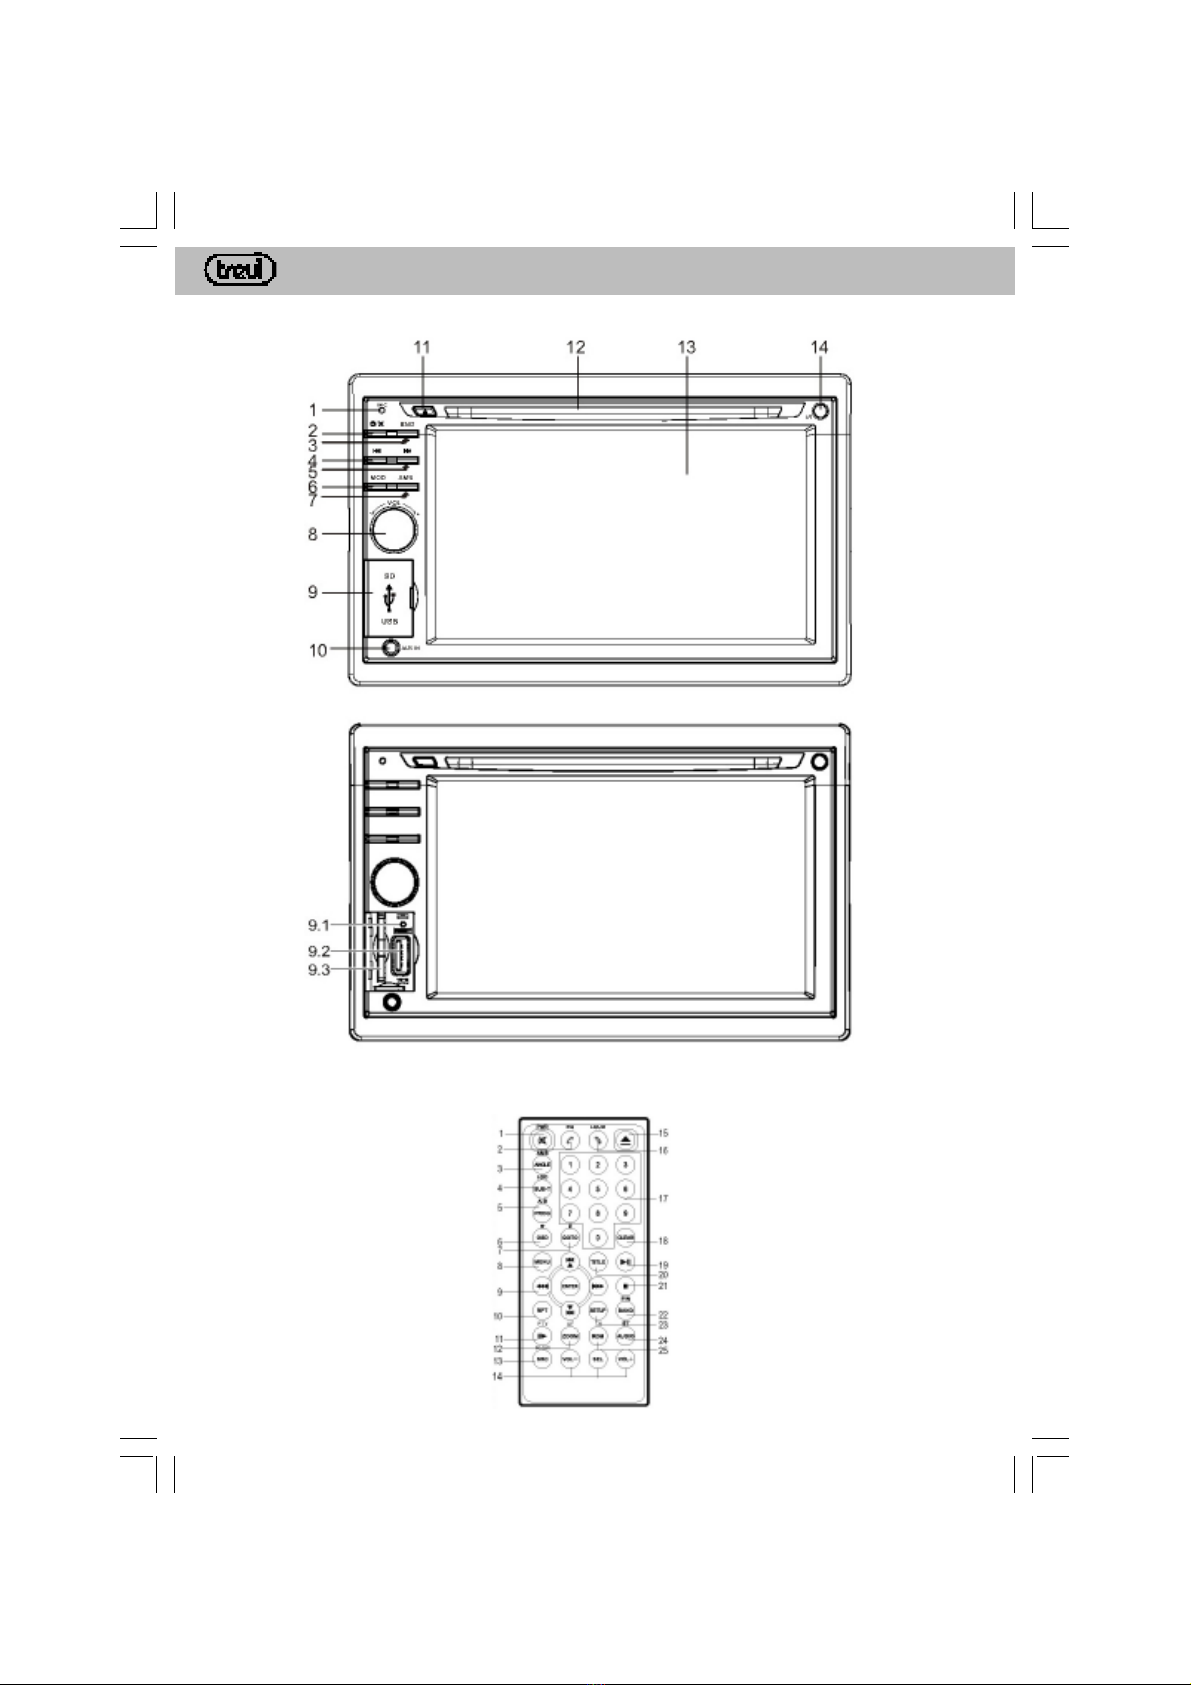
MDV 6300 BTITALIANO
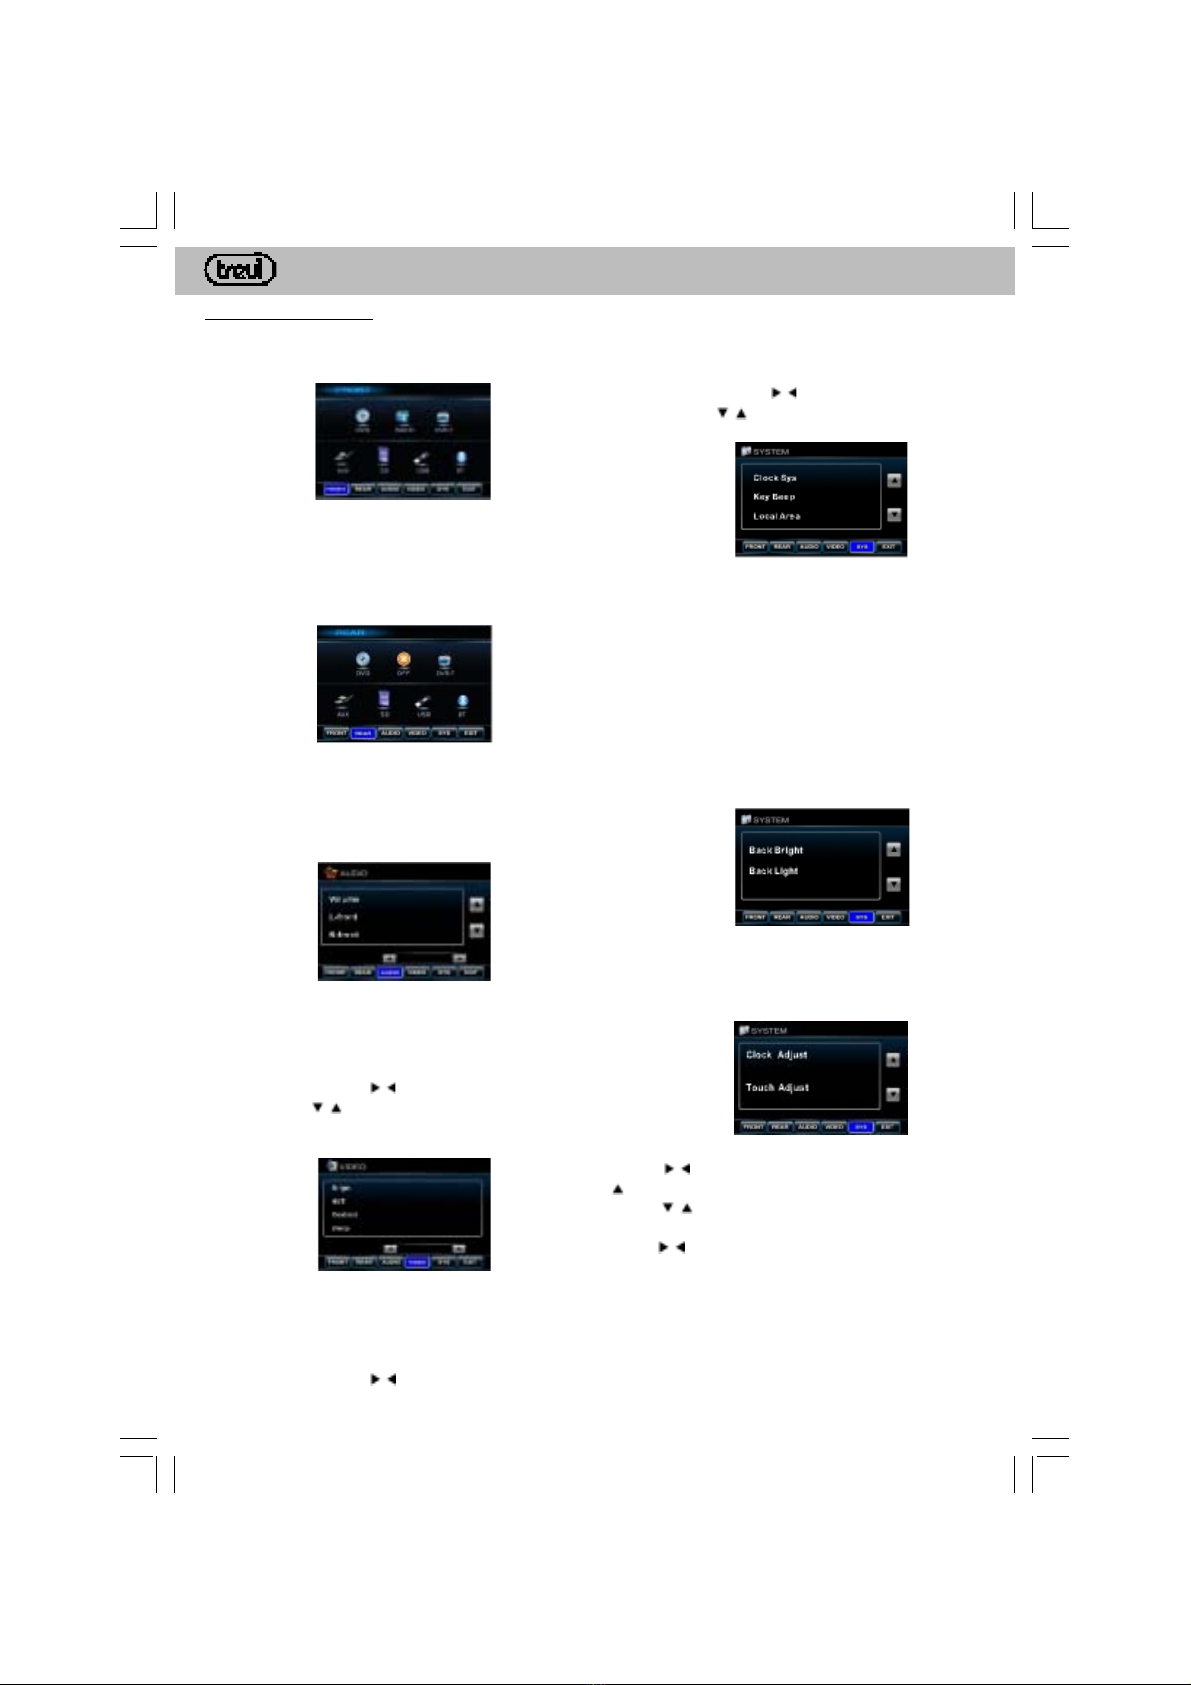
MENU PRINCIPALE
Premere l'angolo in alto a sinistra dello schermo LCD
per entrare nella selezione delle sorgenti e nel menu
principale. Comparirà la seguente schermata:
Toccare le corrispondenti funzioni nella parte bassa
dello schermo LCD.
FRONT
Selezione sorgente per la zona FRONT. La zona
FRONT è quella visualizzata sul display principale
riprodotta dall'impianto audio dell'auto.
REAR
Selezione sorgente per la zona REAR. La zona REAR
è quella visualizzata e riprodotta dai monitor supple-
mentari. Attivando una sorgente nella zoan REAR, il
display principale, corrispondente alla zona FRONT,
diverrà blu con scritte bianche.
AUDIO
Regolazioni impostazioni audio.
E' possibile impostare i livelli di VOLUME, L-FRONT,
R-FRONT, L-REAR, R-REAR, SUBWOOF, BASS,
MIDDLE e TREBLE.
Toccare direttamente l'impostazione sullo schermo
LCD e usare le frecce per regolarla.
Usare le frecce per passare da una pagina all'altra
delle impostazioni presenti.
VIDEO
Regolazioni impostazioni video.
E' possibile impostare i livelli di BRIGHT (luminosità),
HUE (tonalità), CONTRAST (contrasto), SHARP (in-
tensità).
Toccare direttamente l'impostazione sullo schermo
LCD e usare le frecce per regolarla.
SYSTEM
Regolazioni impostazioni di sistema.
Toccare direttamente l'impostazione sullo schermo
LCD e usare le frecce per regolarla o impostarla.
Usare le frecce per passare da una pagina all'altra
delle impostazioni presenti.
Clock Sys: si imposta la modalità dell'orario in 12/24
ore.
Key Beep: si attiva/disattiva il beep ad ogni pressione
di un tasto o ad ogni tocco dello schermo LCD.
Local Area: si imposta la frequenza radio in base
all'area di ricezione.
Bass freq: si imposta la frequenza dei toni bassi.
Middle freq: si imposta la frequenza dei toni medi.
Treble freq: si imposta la frequenza dei toni alti.
Subwoof freq: si imposta la frequenza del subwoofer.
BassQ factor: si imposta il fattore di qualità dei toni
bassi.
MidQfactor:siimposta ilfattore di qualitàdei tonimedi.
Back Bright: si imposta la luminosità della
retroilluminazione: 80%, 60%, 40% o 20%.
Back Light: si imposta il tempo di durata di accensione
della retroilluminazione del display: Off, 15, 30 o 60
secondi.
Clock Adjust: si imposta l'orario. Spostarsi con le
frecce in corrispondenza dell'ora, una freccia
che indica la possibilità di modificarla: utilizzare le
frecce per regolare l'ora. Effettuare la stessa
operazione con i minuti e i secondi spostandosi con le
frecce in corrispondenza dei minuti e dei secondi.
Touch Adjust: si imposta il Touch Screen. Utilizzare
questa funzione quando non corrispondono più i co-
mandi una volta toccati sullo schermo LCD.
Premere per 2 secondi sulle X che vengono mostrate.
Altermineverrà mostrato unmessaggiodiimpostazione
avvenuta.