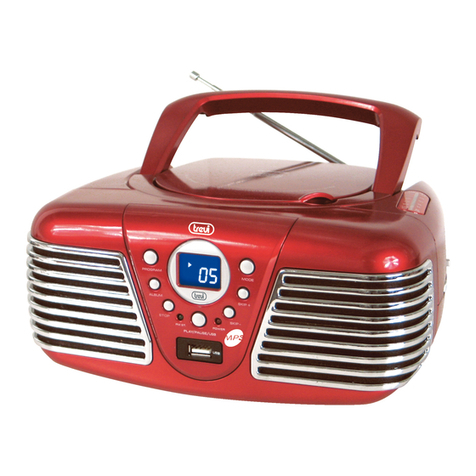
Trevi DHP 549USB User manual

LETTORE CD/MP3 STEREO HIGH POWER
CON RADIO AM/FM STEREO
Manuale d'uso e installazione
HIGH POWER CD/MP3 PLAYER WHITH
AM/FM STEREO RADIO
Instruction manual
LECTEUR DE CD/MP3 HIGH POWER STÉRÉO
AVEC RADIO AM/FM
Mode d’emploi et installation
STEREO-CD/MP3-PLAYER HIGH POWER
MIT RADIO AM/FM
Gebrauchs- und Installationshandbuch
UNIDAD LECTORA DE CD/MP3 ESTÉREO HIGH POWER
CON RADIO AM/FM STEREO
Manual de uso e instalación
LEITOR CD/MP3 ESTÉREO HIGH POWER
COM RÁDIO AM/FM
Manual de uso e instalação
ÓÕÓÊÅÕÇ CD/MP3 STEREOÌÅ ÑÁÄÉÏ AM/FM
Ïäçãüò ÷ñÞóçò êáé åãêáôÜóôáóçò
USB
INPUT
SDCARD
INPUT
DHP 549USB
Guida d’uso
User guide

2
DHP549USB
811 9
13
1719
6
10
21
14
18
4
5
2
12
3
7
120
22
15
16
14
23

3
DHP549USB ITALIANO
VOLTAGGIOPERICOLOSO
Questosimbolo riportatosulretro dell'ap-
parecchioed inquesto manualesegnala
lapresenza all'internodiquesto apparec-
chio di componenti operanti ad alta ten-
sione, non apritelo per evitare il rischio di
scosse elettriche.
ATTENZIONE
Questosimbolo riportatosulretro dell'ap-
parecchioed inquestomanuale indicano
la presenza sugli stessi di importanti
istruzioni per la sicurezza d'uso. Legge-
teleattentamente primadi utilizzarel'ap-
parecchio.
AVVERTENZESULLASER
Questo apparecchio è dotato di un siste-
ma di lettura con raggio laser. Benché il
laser sia di bassa potenza e con dispo-
sitivo di sicurezza che ne impedisce il
funzionamentoa sportelloapertoattene-
tevi scrupolosamente alle seguenti av-
vertenze:
Nonavvicinate l'occhioallalentedel laser
con l'apparecchio aperto, pericolo di le-
sione della retina.
Non tentate di smontare o manomettere
l'unità laser, pericolo di assorbimento di
radiazioni.
NOTE D'USO
Questo apparecchio è uno strumento elettronico di alta precisione, evitate quindi di utilizzarlo nei seguenti casi:
• Vicino a forti fonti di calore come caloriferi e stufe.
• In luoghi molto umidi come stanze da bagno, piscine, ecc.
• In luoghi molto polverosi.
• In luoghi soggetti a forti vibrazioni.
Posizionate l'apparecchio in modo che ai suoi lati ci sia sempre abbastanza spazio per la libera circolazione di aria (almeno 5 cm).
Non ostruite le feritoie di ventilazione.
Se dei liquidi penetrano all'interno dell'apparecchio scollegate immediatamente la spina dalla presa e portate l'apparecchio al più
vicino centro assistenza autorizzato TREVI.
Controllate sempre prima di accendere l'apparecchio che i cavi di alimentazione e di collegamento siano installati correttamente.
CURA E MANUTENZIONE
Per la pulizia si consiglia l’ uso di un panno morbido, leggermente inumidito. Evitate solventi o sostanze abrasive.
IMPORTANTE
Labuona costruzionediquesto apparecchionegarantisce perlungotempo ilperfettofunzionamento.Se tuttaviadovessepresentarsi
qualche inconveniente, sarà opportuno consultare il più vicino Centro Assistenza autorizzato.
TREVIpersegue una politica di continua ricerca e sviluppo. Pertanto i prodotti possono presentare caratteristiche diverse da quelle
descritte.
DESCRIZIONE COMANDI
1. Selettore funzioniOFF/CD-MP3-USB/RADIO
2. ControlloVOLUME
3. Tasto SKIP -, salto brano precedente
4. Tasto STOP, arresto CD
5. Tasto SKIP +, salto brano successivo
6. Display LCD
7. Vano CD
8. Tasto ALBUM, selezione directory
9. Tasto MODE, ripetizione casuale del CD
10. TastoPROG., programmazioneCD
11. Tasto PLAY/PAUSE/USB,riproduzione/pausaCD/selezio-
ne lettore MP3
12. Ingresso USB
13. IndicatoreFM STEREO
14. Altoparlanti
15. Selettore bandaAM/FM/FM STEREO
16. ControlloTUNING, sintonia
17. Tasto SET, impostazione orario
18. Tasto HOUR, incrementa ore
19. Tasto MIN, incrementa minuti
20. Antenna FM
21. Vano batterie
22. Ingresso alimentazione AC
23. Ingresso SD Card

4
DHP549USB
ALIMENTAZIONE
BATTERIE
Aprireil vanobatterie (21)ed inserire8 batterieformato "C"(UM-2) avendo curadi rispettareattentamente lepolarità indicate.Sostituire
immediatamente le batterie scariche e toglierle se prevedete di non utilizzare l' apparecchio per lungo tempo.
RETE
Collegare il cavo di alimentazione alla presa AC(22). Inserire la spina in una presa di corrente C.A. 230V - 50Hz. Non collegare
l'apparecchio a prese con tensione diversa da quella indicata.
ACCENSIONE/SPEGNIMENTO
1. Per attivare il funzionamento spostare il selettore OFF/CD/MP3/USB/RADIO(1) sulla funzione desiderata.
2. Per spegnere l'apparecchio portare il selettore funzioni OFF/CD/MP3/USB/RADIO(1) in posizione OFF.
FUNZIONAMENTO
REGOLAZIONE OROLOGIO
1. Posizionare il selettore funzioni(1) CD/MP3/USB/RADIO su CD/MP3/USB, il display LCD mostrerà l'orario.
2. Tenere premuto il tasto SET(17).
3. Contemporaneamente per regolare l'orario premere più volte il tasto HOUR(18).
4. Premere più volte il tasto MIN(19) per regolare i minuti.
5. Il display LCD(6) mostrerà l'ora stabilita.
FUNZIONAMENTO RADIO
1. Posizionare il selettore funzioni(1) su RADIO, il display LCD(6) della radio digitale s'illumina.
2. Selezionare la banda che desiderate ascoltare (AM/FM/FM stereo) con il selettore (15).
3. Sintonizzatevi sull’emittente desiderata con il controllo TUNING(16).
4. Se la stazione che state ascoltando è stereo l'indicatore (13) si illuminerà.
5. Regolare il volume come desiderate con il controllo VOLUME(2).
6. Se durante l’ascolto di una emittente FM stereo avvertite forti rumori di fondo e fruscii portare il selettore(15) sulla posizione
FM.
NOTE
Per ottenere la migliore ricezione in FM estendete e orientate l’antenna (20). Se la ricezione non è buona provate
aregolare diversamente la lunghezzae l’orientamento dell’antenna, comunquela qualità dellaricezione in FM
dipende molto dal luogo dove è posto l’apparecchio.
L’antennaAM è interna all’apparecchioper cui orientate l’apparecchioper ottenere la migliorericezione.
Lavicinanza di apparecchi TV,lampade al neono altri elettrodomestici può provocare disturbi nellaricezione
diprogrammi radio, in questocaso allontanate il radioregistratoredall’apparecchio che disturba.
FUNZIONAMENTO LETTORE CD-MP3
RIPRODUZIONE
1. Posizionare il selettore funzioni(1) sulla posizione CD/MP3/USB, il display LCD(6) s'illumina.
2. Aprire il vano CD(7) e inserire il disco con il lato scritto rivolto verso l'alto. Richiudere lo sportello con cura.
3. Dopo qualche secondo il display LCD(6) mostra il numero delle tracce (brani) presenti sul disco.
4. La riproduzione partirà in automatico.
5. Premere il tasto PLAY/PAUSE(11) per attivare la pausa; il simbolo di riproduzione inizia a lampeggiare.
6. Per disinserire la pausa premere ancora una volta il tasto PLAY/PAUSE(11).
7. Premere il tasto STOP(4) per fermare definitivamente la riproduzione, il display LCD mostrerà le tracce presenti sul CD.
SALTO TRACCIA
1. Premendo il tasto SKIP +(5) durante l’ascolto si passa alla traccia successiva, mentre con il tasto SKIP - (3) si passa alla
traccia precedente.
2. Tenendo premuto il tasto SKIP +(5) o SKIP -(3) durante l'ascolto si ricerca velocemente un particolare passaggio musicale.
3. Rilasciare il tasto per tornare alla normale riproduzione.
4. Il display LCD(6) mostra sempre quale traccia si sta ascoltando.
RIPRODUZIONE ININTERROTTA DI UNA SINGOLA TRACCIA
- In modalità di riproduzione.
1. Premere il tasto MODE (9).
2. L’indicatore “ REP ” apparirà sul display.
3. Il lettore CD riprodurrà ininterrottamente la traccia visualizzata sul display.
4. Per cancellare la riproduzione continua della singola traccia, premere il tasto STOP (4).
RIPRODUZIONE ININTERROTTA DELL'INTERA CARTELLA (ALBUM)
NB: funzione valida solo per cd MP3.
- In modalità di riproduzione.
1. Premere due volte il tasto MODE(9).
2. L’indicatore “ REP ALBUM ” apparirà sul display.
3. Il lettore CD riprodurrà ininterrottamente il numero della cartella visualizzata sul display.
4. Per cancellare la riproduzione continua della singola album, premere il tasto STOP(4).
RIPETIZIONE ININTERROTTA DELL’INTERO DISCO
- In modalità di riproduzione.
1. Premere tre volte il tasto MODE(9).
ITALIANO

5
DHP549USB
3. L’indicatore “ REPEAT ALL ” apparirà sul display.
4. Il lettore CD riprodurrà ininterrottamente l’intero disco.
5. Per cancellare la riproduzione continua dell'intero disco, premere il tasto STOP(4).
RIPRODUZIONE CASUALE DEI BRANI
- In modalità di riproduzione.
1. Premere quattro volte il tasto MODE(9).
2. Sul display compare la scritta RAND.
3. Il lettore CD riproduce i brani secondo una sequenza casuale.
4. Per interrompere la riproduzione casuale dei brani premete il tasto STOP(4).
PROGRAMMAZIONE
È possibile selezionare l'ordine con cui vengono riprodotti i brani.
1. Premere il tasto STOP(4) per fermare la riproduzione.
2. Premere il tasto PROG.(10), sul display appare la scritta "PROGRAM P01” lampeggiante.
3. Selezionare il brano che desiderate riprodurre per primo con i tasti SKIP +(5) o SKIP -(3).
4. Premere il tasto PROG.(10) per confermare.
5. Ripetere i punti 3 e 4 per memorizzare e riprodurre i brani che desiderate; per i cd audio si possono memorizzare un massimo
di 20 brani, mentre per i cd MP3 si possono memorizzare un massimo di 99 brani.
6. Premere il tasto PLAY/PAUSE(11) per iniziare la riproduzione.
7. Premere due volte il tasto STOP (4) per annullare la programmazione.
FUNZIONE ALBUM
NB: funzione valida solo per cd MP3 contenenti directory o cartelle.
1. Se si intende cambiare directory durante l'ascolto di un brano MP3, premere il tasto ALBUM (8) per cambiare cartella.
2. Sul display mostra la scritta ALBUM assieme al numero di cartella.
3. Premere i tasti SKIP +(5) o SKIP -(3) per cambiare il numero di brano all'interno della cartella ALBUM selezionata.
4. Premere il tasto PLAY/PAUSE(11) per iniziare la riproduzione di quella directory.
FUNZIONAMENTO INGRESSO USB
RIPRODUZIONE
1. Per un corretto funzionamento del lettore mp3, assicuratevi che non sia presente alcun CD nel vano cd.
2. Collegare un lettore MP3 dotato di presa USB all'ingresso USB (12).
3. Posizionare il selettore funzioni(1) sulla posizione CD/MP3/USB, il display LCD(6) s'illumina.
4. Inserire il lettore mp3 nell'ingresso USB(12).
5. Sul display LCD(6) compare la scritta USB, attendere qualche secondo che il lettore carichi tutti i file MP3.
6. La riproduzione partirà in automatico.
7. Per inserire la pausa premere una volta il tasto PLAY/PAUSE(11).
8. Per disinserire la pausa premere una seconda volta il tasto PLAY/PAUSE(11).
9. Premere il tasto STOP(4) per fermare definitivamente la riproduzione.
- Fare riferimento al paragrafo "funzionamento lettore cd-mp3" per il resto delle funzioni.
FUNZIONAMENTO SD CARD
RIPRODUZIONE
1. Per un corretto funzionamento di lettura, assicuratevi che non sia presente alcun CD nel vano cd.
2. Inserire la scheda SD Card all'ingresso SD(23).
3. Posizionare il selettore funzioni(1) sulla posizione CD/MP3/USB, il display LCD(6) s'illumina.
4. Sul display LCD(6) compare la scritta CARD, attendere qualche secondo che il lettore carichi tutti i file MP3.
6. La riproduzione partirà in automatico.
7. Per inserire la pausa premere una volta il tasto PLAY/PAUSE(11).
8. Per disinserire la pausa premere una seconda volta il tasto PLAY/PAUSE(11).
9. Premere il tasto STOP(4) per fermare definitivamente la riproduzione.
- Fare riferimento al paragrafo "funzionamento lettore cd-mp3" per il resto delle funzioni.
CARATTERISTICHE TECNICHE
GENERALI
Alimentazione: ..................................................... C.A. 230V - 50Hz 8 Batterie "C" (UM2) non incluse
Consumo: ............................................................ 18 W
Potenza massima in uscita: ................................ 2W + 2W
Dimensioni: .......................................................... 300x150x220mm
Altoparlanti: ......................................................... 2 x 4 ohm
SEZIONE CD
Sistema di lettura: ............................................... Laser a semiconduttori
Lunghezza d'onda del raggio Laser: ................... 790nm
Quantizzazione: .................................................. 16 bits lineari per canale
S/N ratio: ............................................................. 60dB
SEZIONE RADIO
Bande di frequenza: ............................................ FM87,5-108MHzAM 540-1600KHz
ITALIANO
6
DHP549USB
ENGLISH
WARNING
1. WARNING:Please refer the information on exterior bottom enclosure for electrical and safety
information before installing or operating the apparatus.
2. WARNING:To reduce the risk of fire or electric shock, do not expose this apparatus to rain or
moisture. The apparatus shall not be exposed to dripping or splashing and that no objects filled with
liquids, such as vases, shall not be placed on apparatus.
3. WARNING: The battery (battery or batteries or battery pack) shall not be exposed to excessive heat
such as sunshine, fire or the like.
4. WARNING: The mains plug is used as disconnect device, the disconnect device shall remain
readily operable.
5. Invisible laser radiation when open and interlocks defeated. Avoid exposure to beam of laser.
6. Correct Disposal of this product. This marking indicates that this product should not be disposed
with other household wastes throughout the EU. To prevent possible harm to the environment or
human health from uncontrolled waste disposal, recycle it responsibly to promote the sustainable
reuse of material resources. To return your used device, please use the return and collection systems
or contact the retailer where the product was purchased. They can take this product for environmental
safe recycling.
7. No naked flame sources, such as lighted candles, should be placed on the apparatus.
8. Attention should be drawn to environmental aspects of battery disposal.
9. Use of the apparatus in moderate climates.
10. The rating and marking information are located at the bottom of the unit.
11. Excessive sound pressure from earphone and headphones can cause hearing loss.
12. The mains plug of unit should be obstructed or should be easily accessed during intended use.
13. To be completely disconnect the power input, the mains plug of apparatus shall be disconnected from the mains.
Danger of explosion if battery is incorrectly replaced.
Replace only with the same or equivalent type
CAUTION

7
DHP549USB
ENGLISH
WARNING
TO PREVENT FIRE ORSHOCK HAZARD DO NOT EXPOSE THIS APPLIANCE TO RAIN OR MOISTURE.
WARNING : SHOCK HAZARD-DO NOT OPEN
RISK OF ELECTRIC SHOCK
DO NOT OPEN
CAUTION
LIGHTNING FLASH WITH ARROWHEAD SYMBOL -
within an equilateral triangle, is intended to alert the
user tothe presence of uninsulated dangerous
voltage within the products enclosure that may be of
sufficient magnitude toconstitude a risk of electric
shock to persons.
EXCLAMATION POINT - within an equilateral triangle,
is used to indicate that a specific component shall be
replaced only by the component specified in that
documentation for safety reason.
The following label has been affixed to the unit, listing the proper procedure for working with the laser beam:
CLASS 1LASERPRODUCT LABEL -
This label is attached tothe place as illustrated to inform that the
apparatus contains a laser component.
WARNING LABEL INFORMING OF RADIATION -
This label is placed inside the unit. As shown in the illustration. To
warn against further measures on the unit. The equipment contains
a laser radiating laser rays according to the limit of laser product of
class 1.
CLASS 1LASERPRODUCT
KLASS 1LASER APPARAT
LUOKEN 1 LAISERLAITE
KLASSE 1LASERPRODUKT

8
DHP549USB
ENGLISH
SAFETY INSTRUCTIONS
1. READ INSTRUCTIONS - All the safety and operating instructions should be read before the appliance is operated.
2. RETAIN INSTRUCTIONS - The safety and operating instruction should be retained for future reference.
3. HEED WARNINGS - All warnings on the appliance and in the operating instructions should be adhered to.
4. FOLLOW INSTRUCTIONS - All operating instructions should be followed.
5. WATER AND MOISTURE - The appliance should not be used near water, for example, near a bathtub, washbowl,
.tnemesabtewaniroloopgnimmiws,butyrdnual,knisnehctik
6. VENTILATION - The appliance should be situated so that its location or position does not interfere with its proper
ventilation. Do not place on bed, sofa, rug or similar surface that may block the ventilation openings, in a built-in
installation, such as a bookcase or cabinet that may impede the flow of air through the ventilation openings.
7. HEAT - The appliance should be situated away from heat sources such as radiators, stoves, or other appliances
(including amplifiers) that produce heat.
8. POWER SOURCE - The appliance should be connected to power supply only of the type described in the
operating instructions or as marked on the appliance.
9. POWER CORD PROTECTION - Power supply cords should be routed so that they are not likely to be walked
on or pinched by items placed upon or against them.
10. POWER LINES - An outdoor antenna should be located away from power lines.
11. OBJECT and LIQUID ENTRY - Care should be taken so that objects do not fall and liquids are not spilled into
the enclosure through openings.
12. ESD WARNING - The display does not function properly or no reaction to operation of any the control may due
to the electrostatic discharge. Switch off and unplug the set. Reconnect after a few seconds.
13. DAMAGE REQUIRING SERVICE - The appliance should be serviced by qualified service personnel when:
a. The power-supply cord or plug has been damaged.
b. Objects have fallen into, or liquid has been spilled into the appliance enclosure.
c. The appliance has been exposed to rain.
d. The appliance has been dropped, or the enclosure damaged.
e. The appliance does not appear to operate normally.
14. SERVICING - The user should not attempt to service the appliance beyond that described in the user operating
instructions. All other servicing should be referred to qualified service personnel.
Notes:
a. Dirty or scratched CD may cause a skipping problem. Clean or replace the CD.
b. If an error display or malfunction occurs, disconncet the AC cord and remove all the batteries. Then turn the power
back on.
BEFORE OPERATION
Notes: CONCERNING COMPACT DISCS.
Since dirty, damaged or warped discs may damage the appliance, care should be taken of the followings items:
a. Usable compact discs. Use only compact disc with the mark shown below.
b. CD compact disc only with digital audio signals.

9
DHP549USB
ENGLISH
BATTERY POWER
Insert 8 x “C” size batteries into the battery compartment. Be sure that the batteries are inserted
correctly to avoid damage to the appliance. Always remove the batteries when appliance will not be
used for a long period of time, as this will cause leakage to the batteries and subsequently damage
to your set.
Notes:
- Use batteries of the same type. Never use different types of batteries together.
- To use the appliance with batteries, disconnect the AC power cord from it.
POWER SOURCES
AC POWER
You can power your portable system by plugging the detachable AC power cord into the AC inlet at
the back of the unit and into a wall AC power outlet. Check that the rated voltage of your appliance
matches your local voltage. Make sure that the AC power cord is fully inserted into the appliance.
Insert 8 x “C” size batteries
into the battery compartment
to AC IN to a wall outlet

DHP549USB
ENGLISH
LOCATION OF CONTROL
CD DOOR
TUNING CONTROL
OPEN / CLOSE
BAND SELECTOR
LCD DISPLAY
VOLUME
CONTROL
FUNCTION
SELECTOR
USB SLOT
MINUTE
FM ANTENNA
HOUR
PROGRAM
ALBUM
PLAY / PAUSE
CARD SLOT
TIME SET
FM STEREO
INDICATOR
SKIP +
STOP
SKIP -
MODE
10

DHP549USB
ENGLISH
11
GENERAL OPERATION
1. Set the “FUNCTION” selector to “RADIO” mode.
2. Select desired band by using the “BAND” selector.
3. Adjust radio frequency to your desired station by using the “TUNING” control.
4. Adjust the “VOLUME” control to the desired level.
FM / FM-STEREO RECEPTION
- Set the “BAND” selector to FM mode for MONO reception.
- Set the “BAND” selector to FM ST. mode for FM STEREO reception. The Stereo indicator light up
to show FM ST. mode.
RADIO OPERATION
FOR BETTER RECEPTION
- Reorient the antenna for better reception.
- Reorient the appliance to get better AM reception.

DHP549USB
ENGLISH
12
CD / MP3 OPERATION
GENERAL OPERATION
PLAY / PAUSE
Press to start playing CD / MP3 disc.
Press again to stop playing CD / MP3 operation temporarily.
Press again to resume playback.
SKIP + & Press to go to the next track or back to the previous track.
SKIP - Press and hold while playing until you find the point of the sound.
STOP Press to stop all CD / MP3 operation.
PLAYBACK
1. Set the “FUNCTION” selector to “CD / MP3 / USB” mode.
2. Open the CD door and place a CD / MP3 disc with the label up on the CD compartment.
3. Close the CD door.
4. Focus search is performed if disc is inside. Total number of tracks is read and appears on the display.
5. Playback will start automatically from the first track.
6. Adjust the “VOLUME” control to the desired level.
7. Press the “PLAY / PAUSE” button again when you want to stop playback temporarily.
8. Press the “STOP” button when finished.

DHP549USB
ENGLISH
13
MODE
Press the “MODE” button before or during playing CD / MP3 disc,
each press switches the mode function as follows:
1 - REPEAT 1
2 - REPEAT ALBUM ( *MP3 ONLY )
3 - REPEAT ALL
4 - RANDOM
5 - NORMAL PLAYBACK
REPEAT 1
REP REP
ALBUM REP
ALL
REPEAT
ALBUM REPEAT
ALL
NORMAL
PLAYBACK
RAND
RANDOM
CD / MP3 OPERATION
PROGRAM
Up to 20 tracks of CD disk, 99 tracks of MP3 disc can be programmed for disc play in any order.
Be sure to press the “STOP” button before use.
1. Press the “PROGRAM” button, the display will show “P01” and flash.
2. Select desired track by using the “SKIP +” or “SKIP -” button. ( You may select a desired album by
pressing “ALBUM” button for MP3 disc. )
3. Press the “PROGRAM” button again to confirm desired track into the program memory.
4. Repeat step 2 and 3 to enter additional tracks into the program memory.
5. When all the desired tracks have been programmed, press the “PLAY / PAUSE” button to play the
disc in the order you have programmed.
6. Press the “STOP” button twice to terminate programmed playback.

DHP549USB
ENGLISH
14
PROGRAM, MODE
The operation of PROGRAM, MODE are as the same as that of CD / MP3. Please refer to CD / MP3
OPERATION.
USB / SD OPERATION
GENERAL OPERATION
PLAY / PAUSE
Press to start playing tracks from the USB / SD card.
Press again to stop playing USB / SD operation temporarily.
Press again to resume playback.
SKIP + & Press to go to the next track or back to the previous track.
SKIP - Press and hold while playing until you find the point of the sound.
STOP Press to stop all USB / SD operation.
PLAYBACK
1. Plug or slot in USB / SD card device to the port.
2. Set the “FUNCTION” selector to “CD / MP3 / USB” mode.
3. It will read and automatic playing USB / SD card, if no disc on disc tray.
4. It will read and automatic playing DISC, if have disc on disc tray.
5. Press and hold the “PLAY / PAUSE” button for a few seconds to entry USB / SD mode.
6. Press and hold the “STOP” button for a few seconds to change play USB or SD card.
OTHER FEATURES
CLOCK SETTING
To adjust clock setting, make sure in CD mode.
1. Press the “TIME SET” button. (Do not release “TIME SET” button during time setting)
2. Press the “HOUR” button to set hour.
3. Press the “MINUTE” button to set minute.
4. Release all button to confirm setting. Confirmed setting will appear on the display.

10
DHP549USB
FRANÇAIS
811 9
13
1719
6
10
21
14
18
4
5
2
12
3
7
120
22
15
16
14
23

11
DHP549USB FRANÇAIS
VOLTAGE DANGEREUX
Ce symbole apposé sur le dos de l’appareil et
reproduit dans ce manuel indique la présence
d’élémentsfonctionnant à haute tension àl’intérieur
de cet appareil; ne l’ouvrez pas, afin d’éviter le
risque de décharges électriques.
ATTENTION
Ce symbole apposé sur le dos de l’appareil et
reproduit dans ce manuel indique la présence
d’instructions importantes pour la sécurité
d’emploi. Lisez-les avec attention avant d’utiliser
l’appareil.
AVERTISSEMENT SUR LE
LASER
Cet appareil est pourvu d’un système de lecture à
rayon laser. Bien que le laser soit de faible puissance
et muni d’un dispositif de sécurité empêchant son
fonctionnement lorsque le volet est ouvert, suivez
scrupuleusement les précautions suivantes:
n’approchez pas les yeux de la lentille du laser
lorsque l’appareil est ouvert; danger de lesion de
laretine.
n’essayezpas de demonter ou d’alterer l’uni-
te laser; danger d’absorption de radiations.
AVERTISSEMENT
NOTES D’EMPLOI
Cet appareil est un instrument électronique de haute précision; évitez donc de l’employer dans les cas suivants:
• A proximité de fortes sources de chaleur telles que des radiateurs ou tout appareil de chauffage.
• Dans des lieux très humides tels que des salles de bains, des piscines, etc.
• Dans des lieux très poussiéreux.
• Dans des lieux sujets à des fortes vibrations.
■Positionner l’appareil de façon à laisser toujours de l’espace pour la libre circulation de l’air à ses côtés (au moins 5 cm).
■N’obstruez pas les fentes d’aération.
■Si des substances liquides pénètrent à l’intérieur de l’appareil, débranchez immédiatement la fiche et apportez l’appareil au
centre d’assistance agréé TREVI le plus proche.
■Avant de mettre l’appareil en fonction, vérifiez toujours que les câbles d’alimentation et de connexion soient correctement
installés.
SOIN ET ENTRETIEN
Pour le nettoyage on conseille l’emploi d’un chiffon doux, légèrement imbibé. Evitez les solvants ou les substances abrasives.
IMPORTANT
Labonne construction de cet appareilgarantit pour longtemps son parfait fonctionnement.Si toutefois des inconvénients devaientse présenter,
contactez le Centre d’Assistance agréé le plus proche.
TREVIpoursuit une politique de recherche et de développement continus. Par conséquent, les produits peuvent présenter des caractéristiques
différentes par rapport aux données mentionnées.
TREVIpoursuit une politique de recherche et de développement continus. Par conséquent, les produits peuvent présenter des caractéristiques
différentes par rapport aux données mentionnées.
DESCRIPTION DES COMMANDES
1. Sélecteur fonctions OFF/CD-MP3-USB/RADIO
2. Réglage du VOLUME
3. Touche SKIP -, passage au morceau précédent
4. Touche STOP, arrêt du CD
5. Touche SKIP +, passage au morceau suivant
6. Afficheur LCD
7. LogementCD
8. Touche ALBUM, sélection répertoire
9. Touche MODE, répétition aléatoire du CD
10. TouchePROG., programmation CD
11. Touche PLAY/PAUSE/USB, lecture/pause CD/sélection lecteur MP3
12. Port USB
13. IndicateurFM STEREO
14. Haut-parleurs
15. Sélecteur bandeAM/FM/FM STEREO
16. RéglageTUNING, accord
17. Touche SET, réglage de l’horloge
18. Touche HOUR, réglage de l’heure
19. Touche MIN, réglage des minutes
20. Antenne FM
21. Logement des piles
22.Prise d’alimentation CA
23. Port SD
ALIMENTATION
PILES
Ouvrez le logement des piles (21) et introduisez 8 piles format « C » (UM-2) en respectant attentivement les polarités indiquées.
Remplacez immédiatement les piles déchargées et enlevez-les si l’appareil n’est pas utilisé pendant une longue période.
CONNEXION AU RÉSEAU ÉLECTRIQUE
Connectez le câble d’alimentation sur la prise (22). Branchez la fiche d’alimentation sur une prise de courant C.A. 230V - 50Hz. Ne
branchez pas cet appareil sur des prises ayant une tension autre que celle indiquée.

12
DHP549USB
FRANÇAIS
MARCHE/ARRÊT
1. Pour activer l’appareil, portez le sélecteur OFF/CD/MP3/USB/RADIO (1) sur la fonction souhaitée.
2. Pour arrêter l’appareil, portez le sélecteur fonctions OFF/CD/MP3/USB/RADIO (1) sur la position OFF.
FONCTIONNEMENT
RÉGLAGE DE L’HORLOGE
1. Placez le sélecteur fonctions (1) sur CD/MP3/USB, l’afficheur LCD affiche l’horaire.
2. Gardez la touche SET (17) appuyée.
3. Au même temps, appuyez sur la touche HOUR (18) pour régler l’horaire.
4. Appuyez plusieurs fois sur la touche MIN (19) pour régler les minutes.
5. L’afficheur LCD (6) affiche l’heure réglée.
FONCTIONNEMENT RADIO
1. Positionnez le sélecteur fonctions (1) sur RADIO, l’afficheur LCD (6) de la radio à affichage numérique s’allume.
2. Sélectionnez la bande que vous désirez écouter (AM/FM/FM stéréo) à l’aide du sélecteur (15).
3. Syntonisez l’émetteur souhaité à l’aide de la commande TUNING (16).
4. Si la station écoutée est en stéréo, l’indicateur (13) s’allume.
5. Réglez le volume à votre gré, à l’aide du réglage VOLUME (2).
6. Si pendant l’écoute d’une station FM stéréo, vous entendez des bruits de fond trop forts, positionnez le sélecteur (15) sur
FM.
REMARQUES
Déployez et orientez l’antenne (20), afin d’obtenir la meilleure réception FM possible. Si la réception n’est pas bonne, essayez de régler de
manière différente la longueur et l’orientation de l’antenne, la qualité de réception FM dépend toutefois beaucoup de l’endroit où est
placél’appareil.
Puisquel’antenne AM setrouve à l’intérieurde l’appareil, orientezce dernier de façon à obtenir la meilleure réception possible.
Laproximité d’appareils télé, de lampes au néonou d’autres électroménagerspeut provoquer desbrouillages dans la réception de
programmesradio ;si c’est le cas,éloignezla radiocassette de l’appareilen question.
FONCTIONNEMENT DU LECTEUR CD-MP3
LECTURE
1. Positionnez le sélecteur de fonction (1) sur la position CD/MP3/USB, l’afficheur LCD (6) s’allume.
2. Ouvrez le logement CD (7) et introduisez le disque avec la face étiquetée tournée vers le haut. Refermez le volet en appuyant
délicatement.
3. Après quelques secondes l’afficheur LCD (6) affiche le nombre de pistes (morceaux) présentes sur le disque.
4. La lecture démarre automatiquement.
5. Appuyez sur la touche PLAY/PAUSE (11) pour activer la pause. Le symbole de lecture commence à clignoter.
6. Pour désactiver la pause, appuyez encore une fois sur la touche PLAY/PAUSE (11).
7. Appuyez sur la touche STOP (4) pour arrêter complètement la lecture. L’afficheur LCD montre les pistes présentes dans le
CD.
SAUT DE PISTE
1. En appuyant sur la touche SKIP + (5) pendant l’écoute on passe à la piste suivante ; en appuyant sur SKIP - (3) on passe
à la piste précédente.
2. Gardez la touche SKIP + (5) ou SKIP - (3) appuyée pendant l’écoute pour chercher rapidement un passage particulier d’un
morceau.
3. Relâchez la touche pour revenir à la lecture normale.
4. L’afficheur LCD (6) indique toujours le morceau en exécution.
LECTURE ININTERROMPUE D’UNE SEULE PISTE
- En mode de lecture.
1. Appuyez sur la touche MODE (9).
2. L’indicateur “REP” apparaît sur l’afficheur.
3. Le lecteur CD lira de façon continue la piste indiquée sur l’afficheur.
4. Pour désactiver la répétition continue du morceau, appuyez sur la touche STOP (4).
RÉPÉTITION ININTERROMPUE DU DOSSIER ENTIER (ALBUM)
REMARQUE : Fonction valable seulement pour les cd MP3.
- En mode de lecture.
1. Appuyez deux fois sur la touche MODE (9).
2. L’indicateur “REP ALBUM” apparaît sur l’afficheur.
3. Le lecteur CD lira de façon continue le numéro du dossier indiqué sur l’afficheur.
4. Pour désactiver la répétition continue du morceau, appuyez sur la touche STOP (4).
RÉPÉTITION ININTERROMPUE DU DISQUE ENTIER
- En mode de lecture.
2. Appuyez trois fois sur la touche MODE (9).
3. L’indicateur “REPEAT ALL” apparaît sur l’afficheur.
4. Le lecteur de CD lira de façon continue le disque entier.
5. Pour désactiver la répétition continue du disque entier, appuyez sur la touche STOP (4).

13
DHP549USB FRANÇAIS
LECTURE DES MORCEAUX DANS UN ORDRE ALÉATOIRE
- En mode de lecture.
2. Appuyez quatre fois sur la touche MODE (9).
3. L’afficheur indique “RAND”.
4. Le lecteur de CD lit les morceaux selon une séquence aléatoire.
5. Pour interrompre la lecture aléatoire des morceaux, appuyez sur la touche STOP (4).
PROGRAMMATION
Il est possible de sélectionner l’ordre de lecture des morceaux.
1. Appuyez sur la touche STOP (4) pour arrêter la lecture.
2. Appuyez sur la touche PROG. (10) ; l’afficheur montre le message « PROGRAM P01 » clignotant.
3. Sélectionnez le morceau que vous souhaitez écouter en premier à l’aide des touches SKIP+ (5) ou SKIP- (3).
4. Appuyez sur la touche PROG. (10) pour confirmer.
5. Répétez les points 3et 4 pour mémoriser etlire les morceaux que voussouhaitez écouter, jusqu’à un maximumde 20 morceaux
pour les CD audio et de 99 morceaux pour les CD MP3.
6. Appuyez sur la touche PLAY/PAUSE (11) pour commencer la lecture.
7. Appuyez deux fois sur la touche STOP (4) pour annuler la programmation.
FONCTION ALBUM
REMARQUE : fonction valable seulement pour les CD MP3 contenants des répertoires et des dossiers.
1. Lorsque vous écoutez un morceau MP3 et que vous souhaitez changer de répertoire, appuyez sur la touche ALBUM (7) pour
changer de dossier.
2. L’afficheur montre le message “ALBUM” avec le numéro de dossier.
3. Appuyez sur les touches SKIP + (5) o SKIP - (3) pour changer de morceaux à l’intérieur du dossier ALBUM sélectionné.
4. Appuyez sur la touche PLAY/PAUSE (11) pour commencer la lecture de ce répertoire.
FONCTIONNEMENT DU PORT USB
LECTURE
1. Branchez un lecteur MP3 avec interface USB sur le port USB (12).
2. Positionnez le sélecteur de fonction (1) sur la position CD/MP3/USB, l’afficheur LCD (6) s’allume.
3. Pour le fonctionnement correct du lecteur mp3, enlevez toujours le CD du logement CD.
4. Branchez le lecteur mp3 sur le port USB (12).
5. Le message USB apparaît sur l’afficheur LCD de votre appareil ; attendez quelques secondes pour que le lecteur charge tous
les fichiers MP3.
6. La lecture démarre automatiquement.
7. Pour activer la pause, appuyez une fois sur la touche PLAY/PAUSE (11).
8. Pour désactiver la pause, appuyez une deuxième fois sur la touche PLAY/PAUSE (11).
9. Appuyez sur la touche STOP (4) pour arrêter définitivement la lecture.
- Consultez la section “fonctionnement du lecteur cd-mp3” pour l’utilisation des autres fonctions.
FONCTIONNEMENT DU SD CARD
1. Branchez une carte SD sur le port SD (23).
2. Positionnez le sélecteur de fonction (1) sur la position CD/MP3/USB, l’afficheur LCD (6) s’allume.
3. Pour le fonctionnement correct du lecture, enlevez toujours le CD du logement CD.
4. Le message CARD apparaît sur l’afficheur LCD de votre appareil ; attendez quelques secondes pour que le lecteur charge
tous les fichiers MP3.
5. La lecture démarre automatiquement.
6. Pour activer la pause, appuyez une fois sur la touche PLAY/PAUSE (11).
7. Pour désactiver la pause, appuyez une deuxième fois sur la touche PLAY/PAUSE (11).
8. Appuyez sur la touche STOP (4) pour arrêter définitivement la lecture.
- Consultez la section “fonctionnement du lecteur cd-mp3” pour l’utilisation des autres fonctions.
CARACTÉRISTIQUES TECHNIQUES
GÉNÉRALITÉS
Alimentation : ...................................................... C.A. 230V - 50Hz 8 Piles « C » (UM2) pas fournies
Consommation: ................................................... 18 W
Puissance de sortie maximale : .......................... 2W + 2W
Dimensions : ........................................................ 300x150x220 mm
Haut-parleurs : ..................................................... 8 ohm
SECTION CD
Système de lecture : ........................................... Laser à semi-conducteurs
Longueur d’onde du rayon laser : ........................ 790 nm
Quantification : .................................................... 16 bits linéaires par canal
Facteur S/B : ....................................................... 60dB
SECTION RADIO
Bandes de fréquence : ........................................ FM87,5-108MHz AM 540-1 600KHz

14
DHP549USB
DEUTSCH
811 9
13
1719
6
10
21
14
18
4
5
2
12
3
7
120
22
15
16
14
23

15
DHP549USB DEUTSCH
GEFÄHRLICHE
SPANNUNGEN
Dieses Symbol, das auf der Rückseite des Gerätes
und auf diesem Handbuch abgebildet ist, weist den
Benutzer auf das Vorhandensein von mit
Hochspannung betriebenen Bauteilen im Innern
des Gerätes hin. Um elektrische Schläge zu
vermeiden, muß das Gerät nicht geöffnet werden.
ACHTUNG
Dieses Symbol, das auf der Rückseite des Gerätes
und auf diesem Handbuch abgebildet ist, weist den
Benutzer auf wichtige Anweisungen zum sicheren
Gebrauchhin.BevordasGerätinBetrieb genommen
wird, müssen diese Anweisungen aufmerksam
gelesen werden.
HINWEISE IN BEZUG AUF
DEN LASER
Dieses Gerät ist mit einem Laser-Lesesystem
versehen. Der Laser verfügt über eine niedrige
Leistung und ist mit einer Sicherheitsvorrichtung
versehen, die den Betrieb bei geöffneter Klappe
verhindert. Halten Sie sich trotzdem sorgfältig an
folgende Hinweise:bei geöffnetem gerät, das auge
nicht an die linse des lasers nähern. es besteht die
gefahr, dass die netzhaut dabei verletzt wird.
versuchen sie nicht, die lasereinheit abzumontieren
oder unsachgemäss zu behandeln. es besteht die
gefahr, daß strahlen dabei absorbiert werden.
HINWEISE
ANWEISUNGEN ZUM GEBRAUCH
Dieses Gerät ist ein elektronisches Instrument höchster Präzision; vermeiden Sie deshalb, das Gerät in folgenden Fällen zu benutzen:
• In der Nähe von Wärmequellen, wie z.B. Heizkörpern oder Öfen.
• In sehr feuchten Räumen, wie z.B. Badezimmern, Schwimmbädern, usw.
• In sehr staubigen Räumen.
• An Plätzen, die starken Vibrationen ausgesetzt sind.
■Das Gerät muß so aufgestellt werden, daß an den Seiten genügend Raum für den freien Luftumlauf vorhanden ist (mindestens
5 cm.).
■Die Ventilationsöffnungen nicht abdecken.
■Sollten Flüssigkeiten im Innern des Geräts eindringen, ziehen Sie den Stecker sofort aus der Steckdose und bringen Sie das
Gerät in die nächstgelegene TREVI-autorisierte Kundendienststelle.
■VorInbetriebnahme des Gerätes überprüfenSie stets, daß die Netzkabelund die Verbindungskabel ordnungsgemäß installiert
sind.
PFLEGE UND WARTUNG
Zum Reinigen benutzen Sie einen leicht angefeuchteten, weichen Lappen. Verwenden Sie keine Lösungsmittel oder Scheuermittel.
WICHTIG
Die gute Bauweise des Geräts gewährleistet den einwandfreien Betrieb auf längere Zeit hin. Sollten trotzdem irgendwelche Störungen auftreten, wenden Sie sich
an die nächstgelegene TREVI-autorisierte Kundendienststelle.
Die Firma TREVI ist für die ständige Forschung und Entwicklung seiner Produkte engagiert. Auf Grund dieser Tatsache können die Produkte andere Merkmale als
die beschriebenen aufweisen.
BESCHREIBUNG DER BEDIENELEMENTE
1. FunktionswahlschalterOFF/CD-MP3-USB/RADIO
2. Lautstärkeregler VOLUME
3. Taste SKIP -, Sprung zum vorhergehenden Titel
4. STOP-Taste, Abbrechen derCD-Wiedergabe
5. Taste SKIP +, Sprung zum nächsten Titel
6. LCD-Display
7. CD-Fach
8. Taste ALBUM, Verzeichniswahl
9. Taste MODE, Zufallswiedergabe derCD
10. TastePROG., Programmierung der CD
11. Taste PLAY/PAUSE/USB, Wiedergabe/Pause CD/Anwahl
MP3-Player
12. USB-Eingang
13. FM-STEREO-Anzeige
14. Lautsprecher
15. Wahlschalter FrequenzbandAM/FM/FM STEREO
16. TUNING-Regler,Abstimmung
17. Taste SET, Uhrzeiteinstellung
18. Taste HOUR, Erhöhung Stunden
19. Taste MIN, Erhöhung Minuten
20. FM-Antenne
21. Batteriefach
22. EingangStromversorgung AC
23. SD-Eingang
VERSORGUNG
MIT BATTERIEN
DasBatteriefach (21) öffnen und 8Batterien des Formats “C” (UM-2)polaritätsrichtig gemäß der Hinweise einlegen.Leere Batterien
solltenunverzüglich ausgetauscht werden.Bei längerem Nichtgebrauch desGeräts sollten die Batterienherausgenommen werden.
NETZBETRIEB
Das Netzkabel an der Buchse (22) anschließen. Den Stecker in eine Steckdose mit 230V - 50Hz Wechselstrom einstecken. Das
Gerät nicht an einem Netz mit einer Spannung anschließen, die nicht den oben genannten Werten entspricht.
Table of contents
Languages:
Other Trevi MP3 Player manuals

Trevi
Trevi CMP 542 USB User manual

Trevi
Trevi MPV 1704 SR User manual

Trevi
Trevi XP 71 BT User manual

Trevi
Trevi MP 1601 SD User manual

Trevi
Trevi MDV 6300 BT User manual

Trevi
Trevi XCD 5770 USB User manual

Trevi
Trevi DR 750 BT User manual

Trevi
Trevi Mpv 1738 SD User manual

Trevi
Trevi CMP 543 USB User manual

Trevi
Trevi MPV 1725SD User manual