8 CamView HD Pro User Manual CamView HD Pro User Manual 9
www.Triplett.com www.Triplett.com
3. BASIC OPERATION
3.1 Installing the Battery
The CamView HD Pro uses a rechargeable lithium-ion polymer battery. To ensure safety when
transporting, always disconnect the battery from the Tester. The device may leave the factory with
one of the following two battery placements:
• The battery is placed inside Tester and insulated from the contacts with a thin, plastic sheet.
In this case, you should open the battery cover, take out the battery, remove the plastic
sheet, then put the battery back in, and put the battery cover back on.
• The battery is placed outside the Tester. In this case, you should open the battery cover,
place the battery securely into the battery compartment, and put the battery cover back on.
Note — The Tester will automatically turn on when the battery is properly placed in the device for
the first time.
3.2 Charging the Battery
Be sure to fully charge the battery prior to first use. If the battery level is too low, the charge indica-
tor will flash 3 times, and the device won’t turn on.
You should only use the charging cable provided by the manufacturer to charge the battery. To
charge the unit, connect the AC Power Cord supplied with your tester to a standard U.S. power
outlet, and connect the other end to the Power Input port located on the left side of the Tester
(when facing the tester). The port is illustrated in the diagram on Page 6 of this User Manual, and
is #21 in the diagram. It is also labeled “Charge 12V 1A Input” on the Tester itself.
3.3 Frequently Asked Questions About the Battery
• The Tester uses a lithium-ion polymer battery, which does not have a memory effect. You
can recharge the battery whenever you want.
• When recharging, the Charge Indicator on the Tester will light up RED. When the battery
is fully charged, the light will turn off.
• Due to calculation deviation or other reason, the battery level can be as low as 90% when
the charge light turns off. You can ensure the battery Is fully charged by extending the
charge time for up to 60 minutes after the light turns off.
•
3.4 Lanyard & Belt Clip
You can choose to install the lanyard or belt clip.
To install the lanyard, put one end of the lanyard through the hole at the top of the device, turn
back and go through the slip-lock (i.e., the plastic piece similar to a buckle).Tighten the lanyard
and confirm that it is locked in position.
To install the Belt Clip, use a screwdriver to mount it securely to the back of the Tester.
3.5 Basic Starting Instructions
3.5.1 Turning the Device On and Off
To turn on the device, press and hold the SCR button for more than 2 seconds. The Power
Indicator will light up green when the device is turned on.
To turn off the device, press and hold the SCR button for more than 2 seconds. When the
device is turned off, the green Power Indicator light will turn off after the device is fully shut down.
You can also set up the Auto Power Off feature (found in Settings > Auto Power Off).
3.5.2 Selecting Function Mode
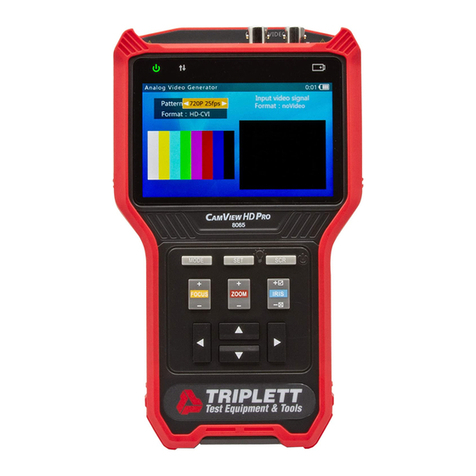
When the device is on, press the MODE button to switch to the Function Select menu. Press
MODE multiple times or use the Arrow Keys to select a function.
Press the Right Arrow key to enter the selected function.
3.5.3 Using the Flashlight
Press and hold the SET button to turn the Flashlight on/off.You can use the Flashlight feature even
if the tester is off.
The Flashlight will automatically turn off every time the device is turned on or off (to avoid draining
the battery if the Flashlight is turned on accidentally).
WARNING
The LEDs are high brightness LEDs. When the LEDs are on, do not look
directly at them or point them at someone’s eyes as doing so may cause injury.
