EN 7
battery charger PBCS 2A
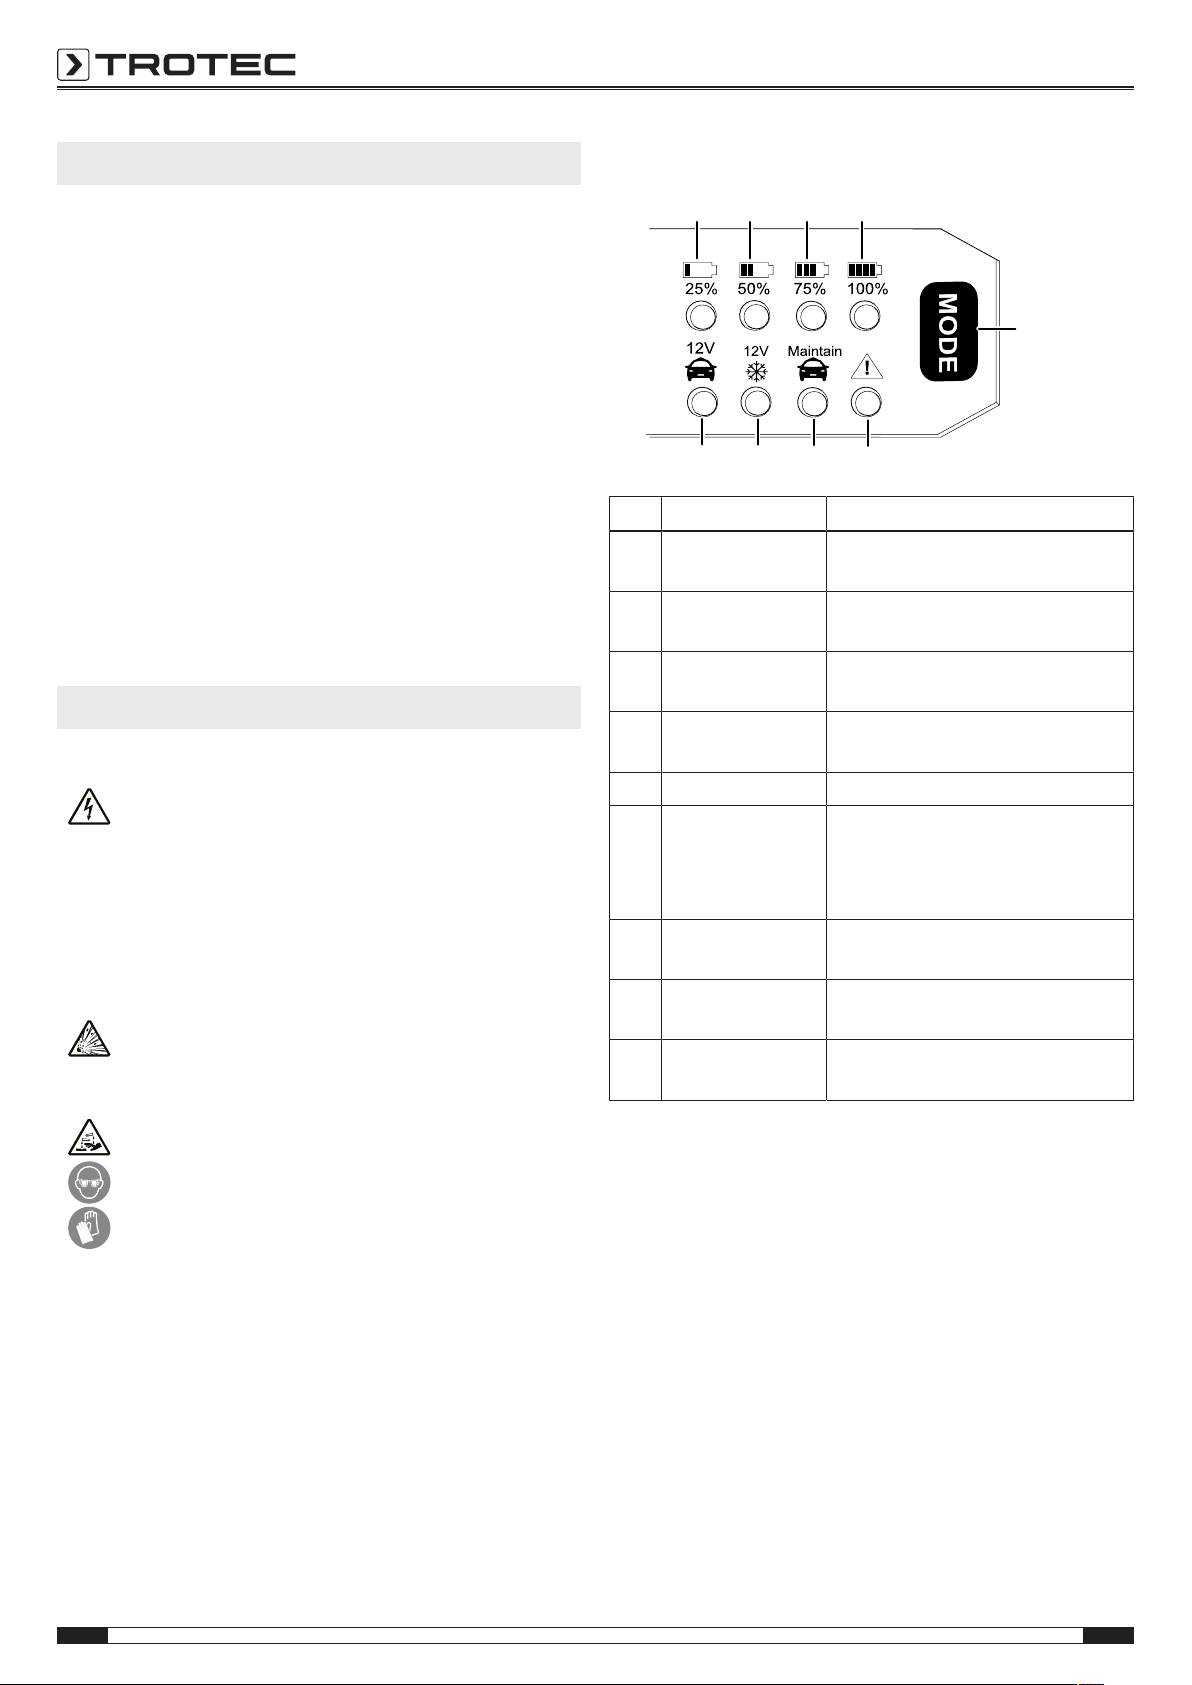
Setting the charging mode
The standard charging mode, winter charging mode and trickle
charging mode can be activated by pressing the Mode
button(9). Depending on the charging mode selected, the
corresponding LED lights up on the control panel (11 - 13).
Standard charging mode
The standard charging mode is suitable for all 12V batteries of
the lead acid, AGM and GEL type.
Trickle charging mode
In the trickle charging mode there is a maximum charging
current of 1A. The trickle charging mode meets the following
functions:
• Charging of 12V batteries of the lead acid, AGM and GEL
type with a low charging capacity.
• Trickle charge of a 12V battery of the lead acid, AGM and
GEL type as protection against deep discharge. The battery
is continuously maintained at a capacity of 95-100% by
means of pulse charging.
Winter charging mode
In the winter charging mode, 12V batteries of the lead acid,
AGM and GEL type can be charged at an ambient temperature
of -20°C to +5°C.
Charging process
Warning
Never use these devices to charge non-rechargeable
batteries. Only charge battery types that are indicated
in the chapter "Intended use".
As a rule, the battery should be charged when removed.
If it is not possible to remove the battery, it can remain inside
the vehicle during the charging process. Note that most vehicles
have a negative grounding. The negative terminal of the battery
is connected to the car body.
In rare cases, however, there may be a positive grounding
where the positive terminal of the battery is connected to the
car body.
For this reason, observe the information on earthing in the
vehicle instructions before using the charger.
Charging process when removed
1. Remove the battery prior to the charging process, taking
the manufacturer instructions and the vehicle instructions
into consideration.
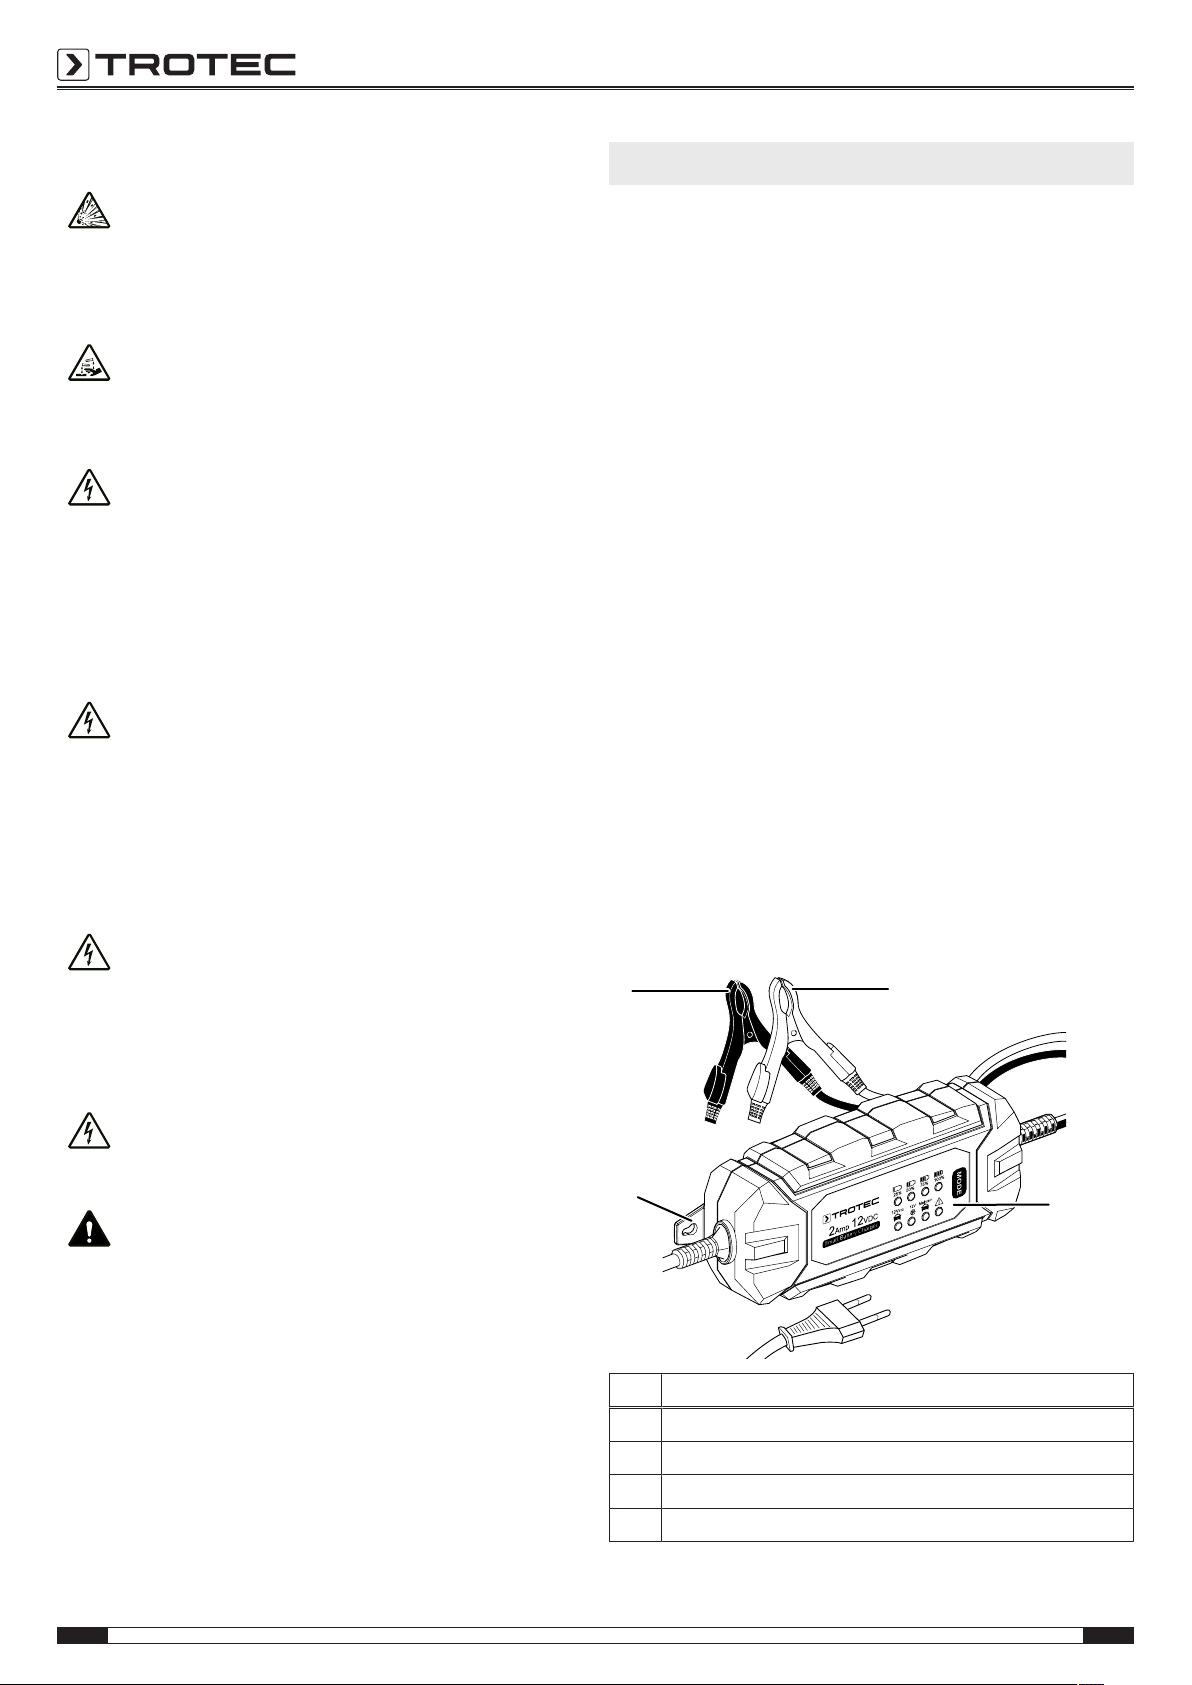
2. Clamp the red cable (2) to the positive terminal of the
battery.
3. Clamp the black cable (1) to the negative terminal of the
battery.
4. Plug the mains plug of the charger into the mains socket.
ðAll LEDs will light up briefly. Afterwards, the LED
indicating the charging mode (11-13) as well as the
LEDs indicating the charging level (5-8) will be
illuminated constantly.
5. Select the desired charging mode as described in the
Setting the charging mode section.
ð
Afterwards, the LEDs indicating the charging level 5-8)
will flash in succession.
When the charging process has been completed and the
battery is fully charged, the LEDs (5-8) will be
illuminated constantly.
If the LED indicating the charging mode (13) is the only
one flashing, the device is not connected properly to the
battery, but only to the mains socket.
6. To stop the charging process, hold onto the mains plug
while pulling the power cable out of the mains socket.
7. Remove the black clamp(1) from the negative terminal of
the battery.
8. Remove the red clamp(2) from the positive terminal of the
battery.
Note
If the mains plug has already been disconnected from
the mains socket and the battery clamps are still
attached, the charger might slightly discharge the
battery. We therefore recommend always removing the
charger completely from the battery after the charging
process.
9. Check the terminal posts of the battery for dirt and
corrosion and, if necessary, clean them as described in the
manufacturer specifications.
10. Reinstall the charged battery in accordance with the
vehicle instructions.
Charging with negative grounding
1. Switch off all electrical loads.
Note
Take into account that any active loads will yet delay
the charging process when the battery remains
installed during the process.
2. Clamp the red cable(2) to the positive terminal of the
battery.
3. Clamp the black cable(1) to the car body, observing the
vehicle instructions and keeping a distance from the
battery and fuel line.
4. Plug the mains plug of the charger into the mains socket.
ðAll LEDs will light up briefly. Afterwards, the LED
indicating the charging mode (11-13) as well as the
LEDs indicating the charging level (5-8) will be
illuminated constantly.