EN 7
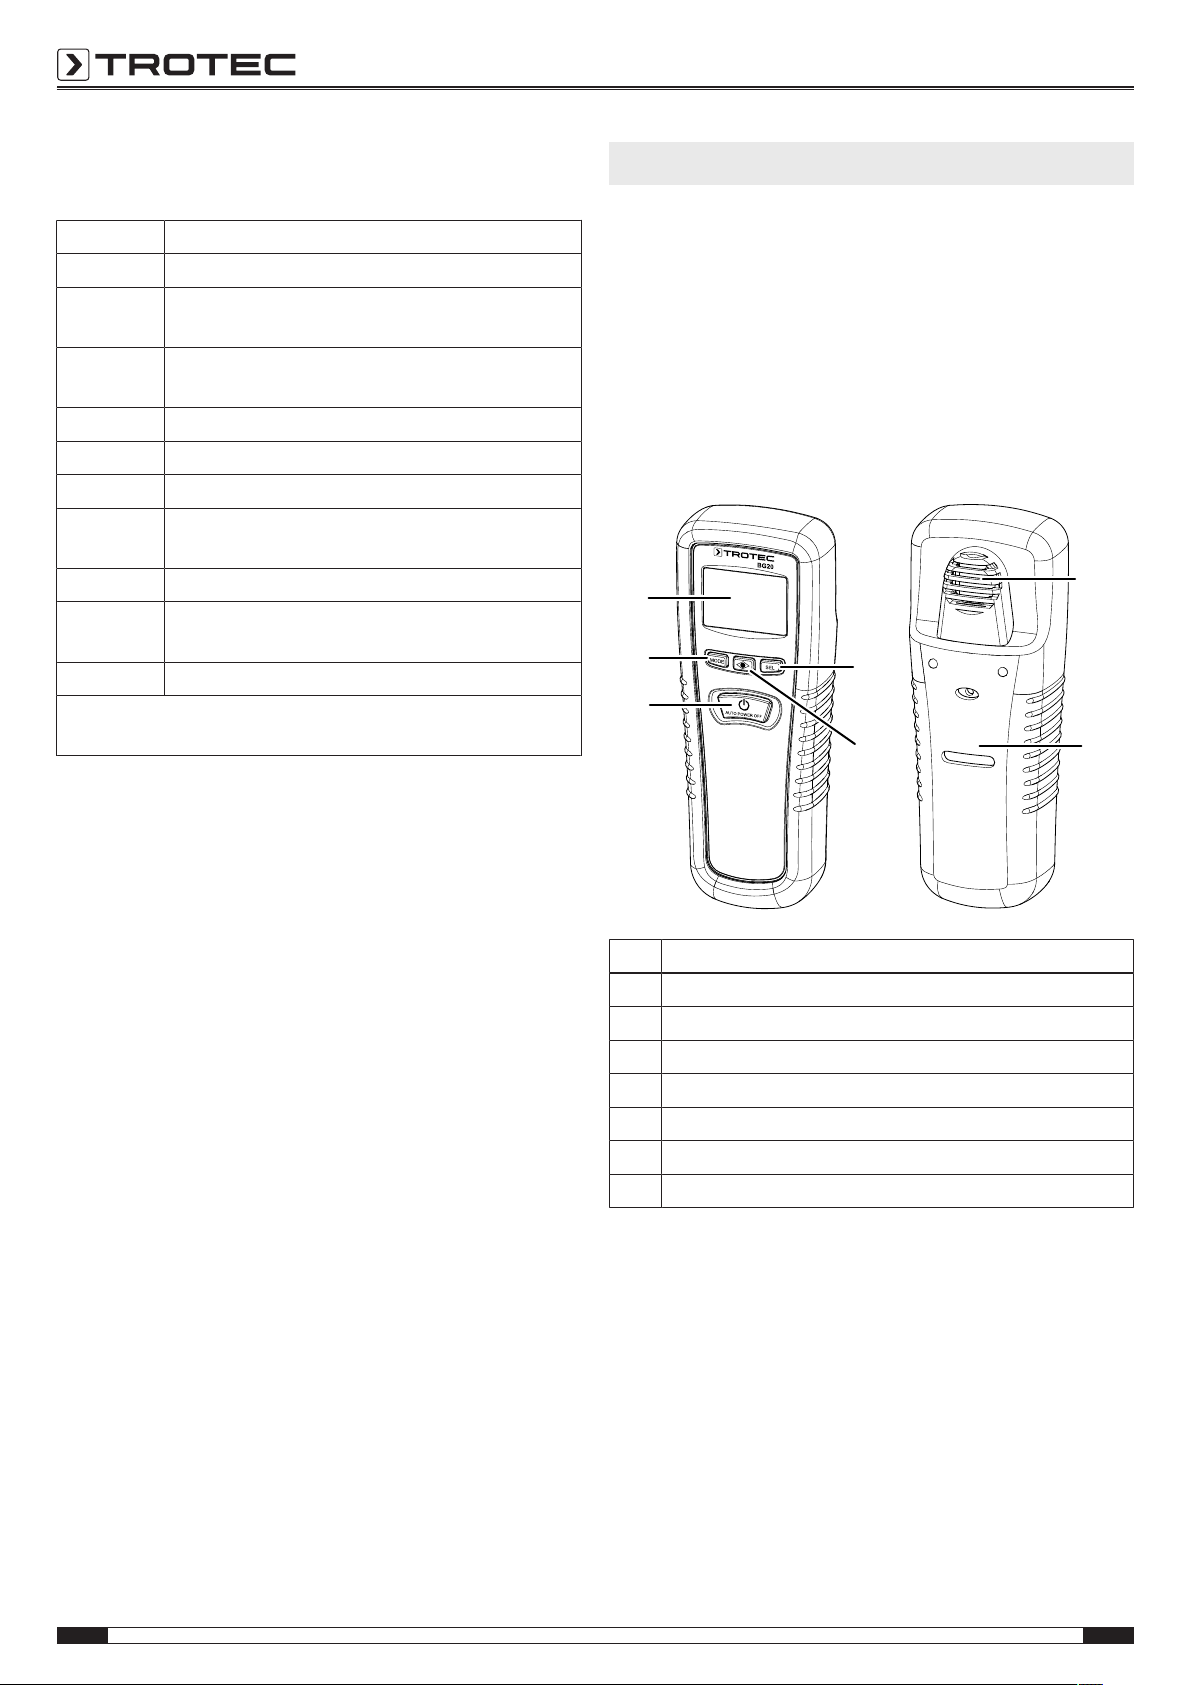
gas detector BG20
Carrying out a measurement
Info
Please note that moving from a cold area to a warm
area can lead to condensation forming on the device's
circuit board. This physical and unavoidable effect can
falsify the measurement. In this case, the display
shows either no measured values or they are incorrect.
Wait a few minutes until the device has become
adjusted to the changed conditions before carrying out
a measurement.
1. Direct the device towards the supposed CO source.
ðThe measured value will be displayed in real time.
ðIf the measured value amounts to more than 30ppm, a
repetitive acoustic warning signal will be emitted. The
higher the CO content, the higher the repetition
frequency. The LED(4) is illuminated in red.
ðIf the measured value amounts to more than 200ppm,
a constant acoustic warning signal will be emitted. The
LED(4) is illuminated in red.
Displaying the maximum value
The device can display the maximum value determined since
the beginning of the measurement. To do so, proceed as
follows:
1. Press the mode button(6) once.
ðThe indications MAX(9) and REC(11) appear on the
display.
ðThe highest value measured appears in the
measurement value display.
Calling up the measured value memory
The device comes equipped with a measured value memory, in
which up to 10measured values can be stored. Saved
measured values are preserved even after switch-off. To call up
saved measured values, please proceed as follows:
1. Press the mode button(6) twice.
ðThe indications MEM(13) and memory space(12)
appear on the display.
2. Repeatedly press the SEL button(3) until the storage
location with the desired number is displayed.
Measured value storage
Up to 10 measured values can be stored. In order to save one or
several measured values, please proceed as follows:
1. Press the mode button(6) three times.
ðThe indications REC(11) and memory space(12) appear
on the display.
ðThe value 0 or else the storage location displayed when
last calling up the measured value memory will appear
in the memory space(12) display.
2. Press the SEL button(3) to save the current measured
value.
Info
The measured value memory is deleted when you
perform a zero point reset (see Resetting the zero
point).
Calling up the alarm threshold
The value for the alarm threshold is stipulated, can however be
called up at any time:
1. Press the mode button(6) four times.
ðThe value 30ppm is displayed in the measurement
value display(16).
Resetting the zero point
By means of resetting the zero point the prevailing CO
concentration and hence the current measured value is defined
as new reference value (see also Switch-on). Therefore,
resetting the zero point should only be effected in the fresh air,
thus in surroundings with the lowest possible CO concentration!
To do so, proceed as follows:
1. Go to a place with a low CO concentration (e.g. fresh air).
2. Press the mode button(6) four times.
ðThe alarm threshold (30ppm) is displayed in the
measurement value display(16).
3. Press and hold the SEL button(3) for approx.8 seconds
until0 appears in the measurement value display.
ðThe digit0 flashes six times.
ðThen the device returns to the measuring mode.
ðThe saved measured values are deleted (see Retrieving
measured values).
Show measuring time
The device saves the measuring time after switch-on. Please
proceed as follows to retrieve the measurement time:
1. Press the mode button(6) five times.
ðThe time indication(10) appears on the display.
ðThe measuring time is indicated in the measured value
display(16) in the format hours:minutes.
Disabling the acoustic warning signal
1. Press the mode button(6) six times until either on or off is
displayed.
2. Press the SEL button(3) to select the desired setting.
ðWhen on, the acoustic warning signal is enabled.
ðWhen off, the acoustic warning signal is disabled. The
MUTE indication(8) appears on the display.
Switching the display illumination on or off
Ex works the display illumination is switched off.
1. Press the SEL button(3) for approx.2seconds, whilst the
device is in normal measuring mode.
ðThe display's background illumination is switched on or
off.