manuals.online logo
Brands
  1. Home
  2. •
  3. Brands
  4. •
  5. Truma
  6. •
  7. Control Unit
  8. •
  9. Truma Mover XT Owner's manual

Truma Mover XT Owner's manual

Other manuals for Mover XT

4

This manual suits for next models

4

Other Truma Control Unit manuals

Truma iNet X User manual

Truma

Truma iNet X User manual

Truma iNet Box User manual

Truma

Truma iNet Box User manual

Truma Mover SX Owner's manual

Truma

Truma Mover SX Owner's manual

Truma iNet Box User manual

Truma

Truma iNet Box User manual

Truma VB 10 Operating instructions

Truma

Truma VB 10 Operating instructions

Truma DuoComfort User manual

Truma

Truma DuoComfort User manual

Truma Vicon 2 User manual

Truma

Truma Vicon 2 User manual

Truma iNet Box User manual

Truma

Truma iNet Box User manual

Truma BCU 120 Operating instructions

Truma

Truma BCU 120 Operating instructions

Truma iNet Box User manual

Truma

Truma iNet Box User manual

Truma Panel MES Module A Operating instructions

Truma

Truma Panel MES Module A Operating instructions

Truma FrostControl User manual

Truma

Truma FrostControl User manual

Truma CP 25-UK User manual

Truma

Truma CP 25-UK User manual

Popular Control Unit manuals by other brands

Seitz 14A80 user manual

Seitz

Seitz 14A80 user manual

Wilo RS485 Installation and operating instructions

Wilo

Wilo RS485 Installation and operating instructions

Becker CentralControl CC41 Commissioning Instruction

Becker

Becker CentralControl CC41 Commissioning Instruction

SICK CDB650 operating instructions

SICK

SICK CDB650 operating instructions

Panduit NetKey NKP5E88M Series installation instructions

Panduit

Panduit NetKey NKP5E88M Series installation instructions

MX Options Concentric Petite Fitting instructions

MX

MX Options Concentric Petite Fitting instructions

Clean Water Systems Fleck 2510 Installation & start?up guide

Clean Water Systems

Clean Water Systems Fleck 2510 Installation & start?up guide

Fairchild FSB44104A user guide

Fairchild

Fairchild FSB44104A user guide

LEGRAND Wattstopper LMIN-104 installation instructions

LEGRAND

LEGRAND Wattstopper LMIN-104 installation instructions

PMK ATT10BNCS instruction manual

PMK

PMK ATT10BNCS instruction manual

Tektronix TDS3FFT user manual

Tektronix

Tektronix TDS3FFT user manual

Woodward easYgen Technical manual

Woodward

Woodward easYgen Technical manual

Balluff BNI EIP-502-105-R015 user guide

Balluff

Balluff BNI EIP-502-105-R015 user guide

NXP Semiconductors TWR-LS1021A Getting started

NXP Semiconductors

NXP Semiconductors TWR-LS1021A Getting started

Advantech PCM-3117 Startup manual

Advantech

Advantech PCM-3117 Startup manual

Danfoss MCO 101 manual

Danfoss

Danfoss MCO 101 manual

Moons' Lin Engineering R701P user manual

Moons'

Moons' Lin Engineering R701P user manual

Aventics RV1 operating instructions

Aventics

Aventics RV1 operating instructions

manuals.online logo
manuals.online logoBrands
  • About & Mission
  • Contact us
  • Privacy Policy
  • Terms and Conditions

Copyright 2025 Manuals.Online. All Rights Reserved.

Mover®XT/XT2/XT4/XTL
Abstimmung der elektronischen Steuerung
mit der Funk-Fernbedienung
Nach dem Austausch der Steuerung oder der Fernbedienung
müssen diese gemäß nachstehender Anleitung erneut abge-
stimmt werden.
Überprüfen Sie die Montage gemäß der Einbauanweisung
und überzeugen Sie sich, dass die Antriebsrollen nicht an-
liegen. Prüfen Sie den ordnungsgemäßen Anschluss und Zu-
stand der Batterie und dass 12 V an der Steuerung anliegen.
Stellen Sie sicher, dass der Wohnwagenstecker in der Sicher-
heitssteckdose steckt.
Fernbedienung ausschalten.
Den Rückstellknopf (k) an der Steuerung drücken und hal-
ten (rote LED – j – blinkt langsam), nach ca. 5 Sek. blinkt die
LED (j) schnell. Dann den Rückstellknopf loslassen und inner-
halb von 10 Sek. auf der Fernbedienung die Taste (c) –An-
schwenken – drücken und halten und Fernbedienung mit dem
Schiebeschalter (a) einschalten. Taste (c) loslassen.
#c
a
jk
Bild 1
Fernbedienung und Steuerung werden aufeinander abge-
stimmt. Nach erfolgreicher Abstimmung leuchtet die rote
LED(j) dauerhaft.
Gemäß der Gebrauchsanweisung sämtliche Funktionen mehr-
mals prüfen.
Information Mover®
Accord de la commande électronique avec la
télécommande radio
Après le remplacement de la commande ou de la télécom-
mande, celles-ci doivent être de nouveau accordées confor-
mément aux instructions ci-après.
Vérifiez le montage selon les instructions de montage et assu-
rez-vous que les rouleaux d’entraînement n’adhèrent pas.
Vérifiez le bon raccordement et le bon état de la batterie, ainsi
que la présence d’une tension de 12 V sur la commande.
Assurez-vous que la fiche de caravane est enfoncée dans la
prise de courant de sécurité.
Mettre la télécommande hors tension.
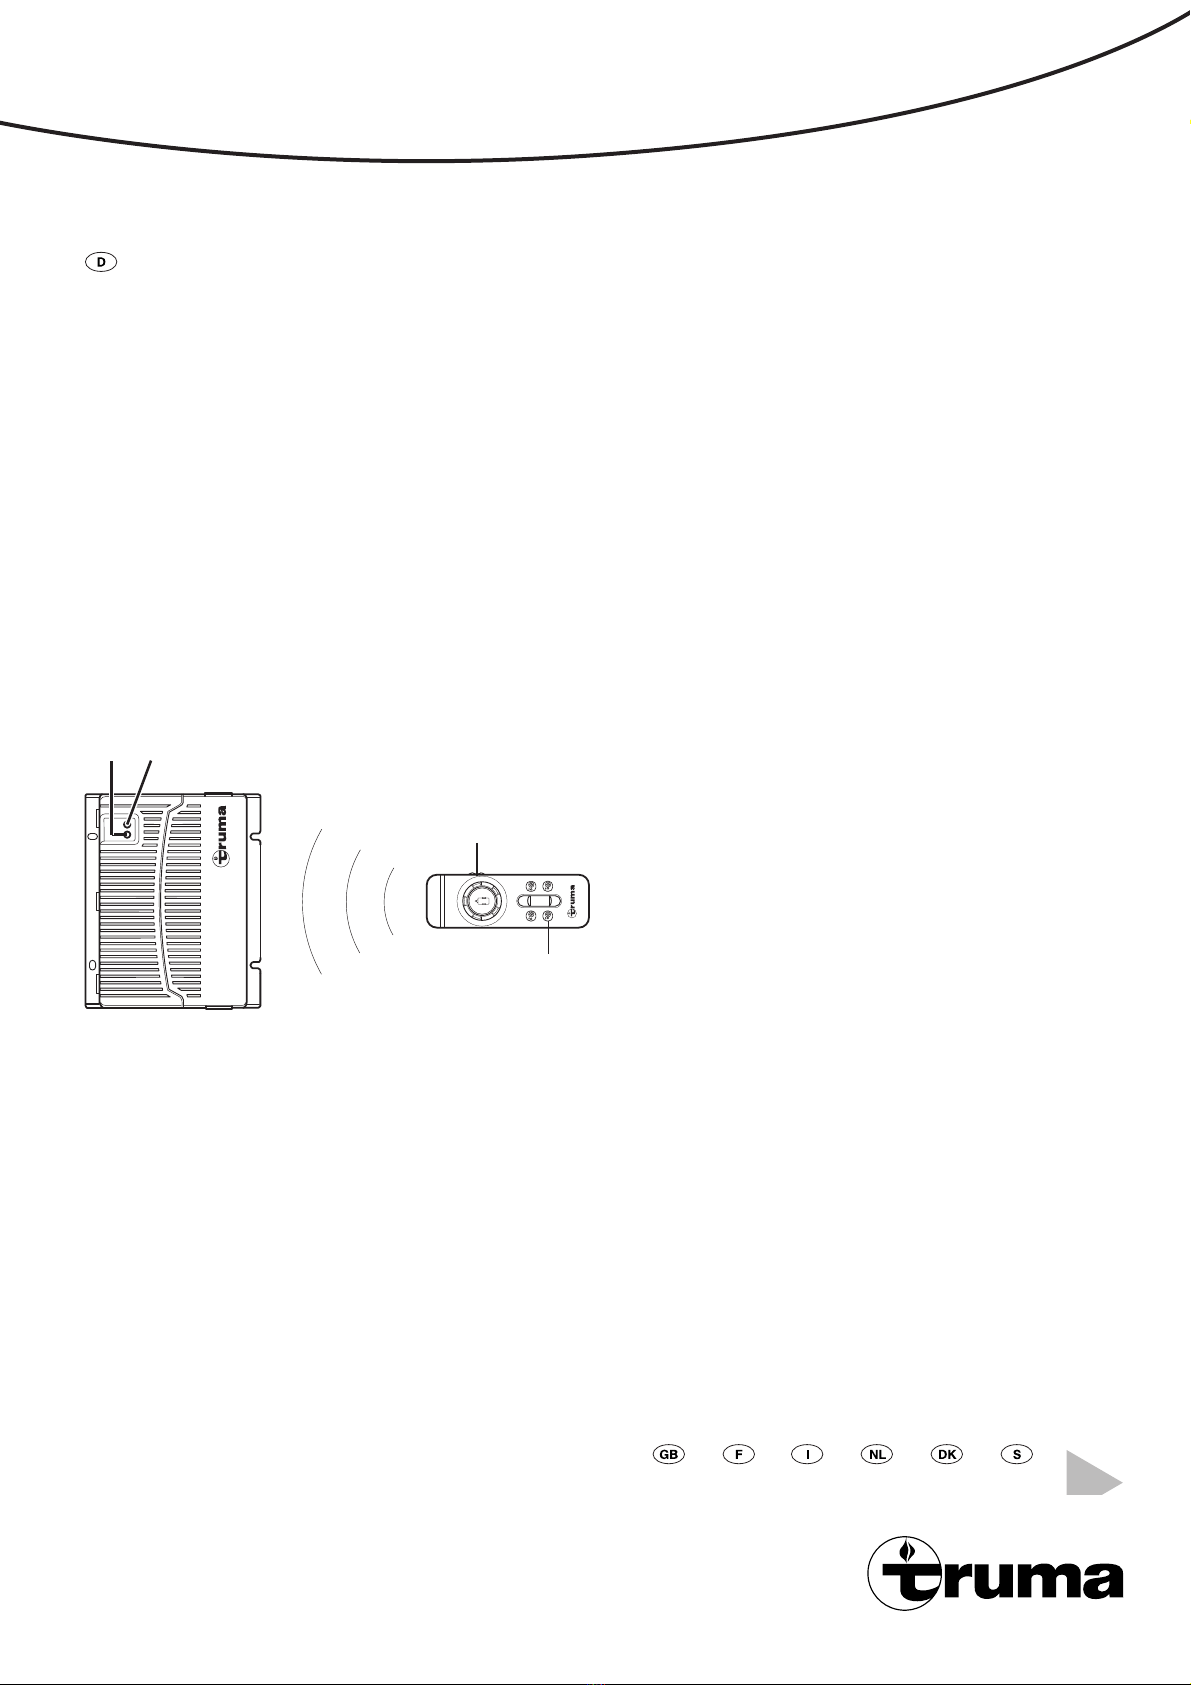
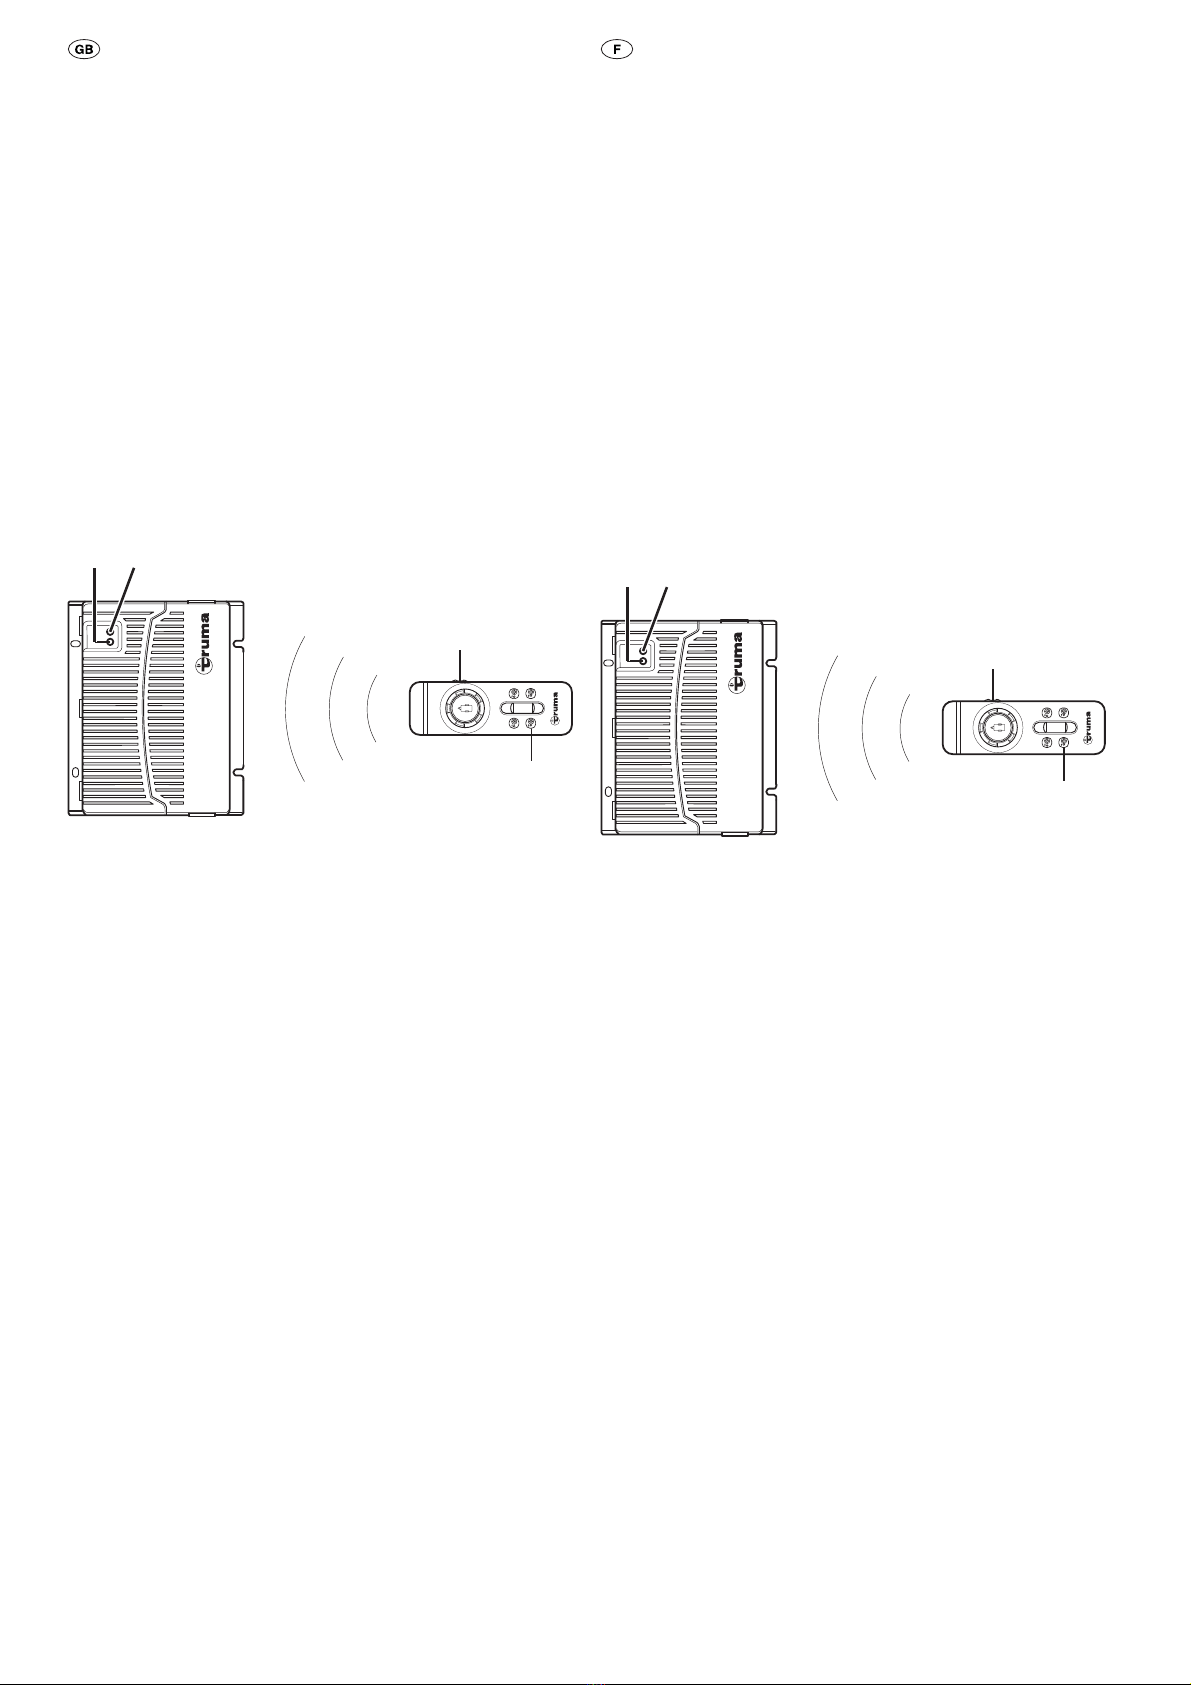
Presser le bouton de remise à zéro (k) sur la commande et
le maintenir enfoncé (la LED rouge – j – clignote lentement),
laLED (j) clignote rapidement après environ 5 secondes.
Ensuite, relâcher le bouton de remise à zéro et, presser la
touche (c) – plaquer – de la télécommande dans les 10se-
condes tout en mettant la télécommande en marche avec
l’interrupteur à coulisse (a). Relâcher la touche (c).
#c
a
jk
Figure 1
L’accord de la télécommande avec la commande est effectué.
Une fois l’accord effectué, la LED rouge(j) est allumée en
permanence.
Vérifier toutes les fonctions plusieurs fois conformément au
mode d’emploi.
Tuning the electronic control unit to the radio
remote control
If the control unit or the remote control is replaced, they must
be tuned to each other again in accordance with the instruc-
tions below.
Check that installation has been carried out in accordance
with the installation instructions, and make sure that the drive
rollers are not engaged. Check that the battery is properly
connected and in good condition, and that the control unit is
being supplied with 12 V. Make sure that the caravan connec-
tor is plugged into the safety socket.
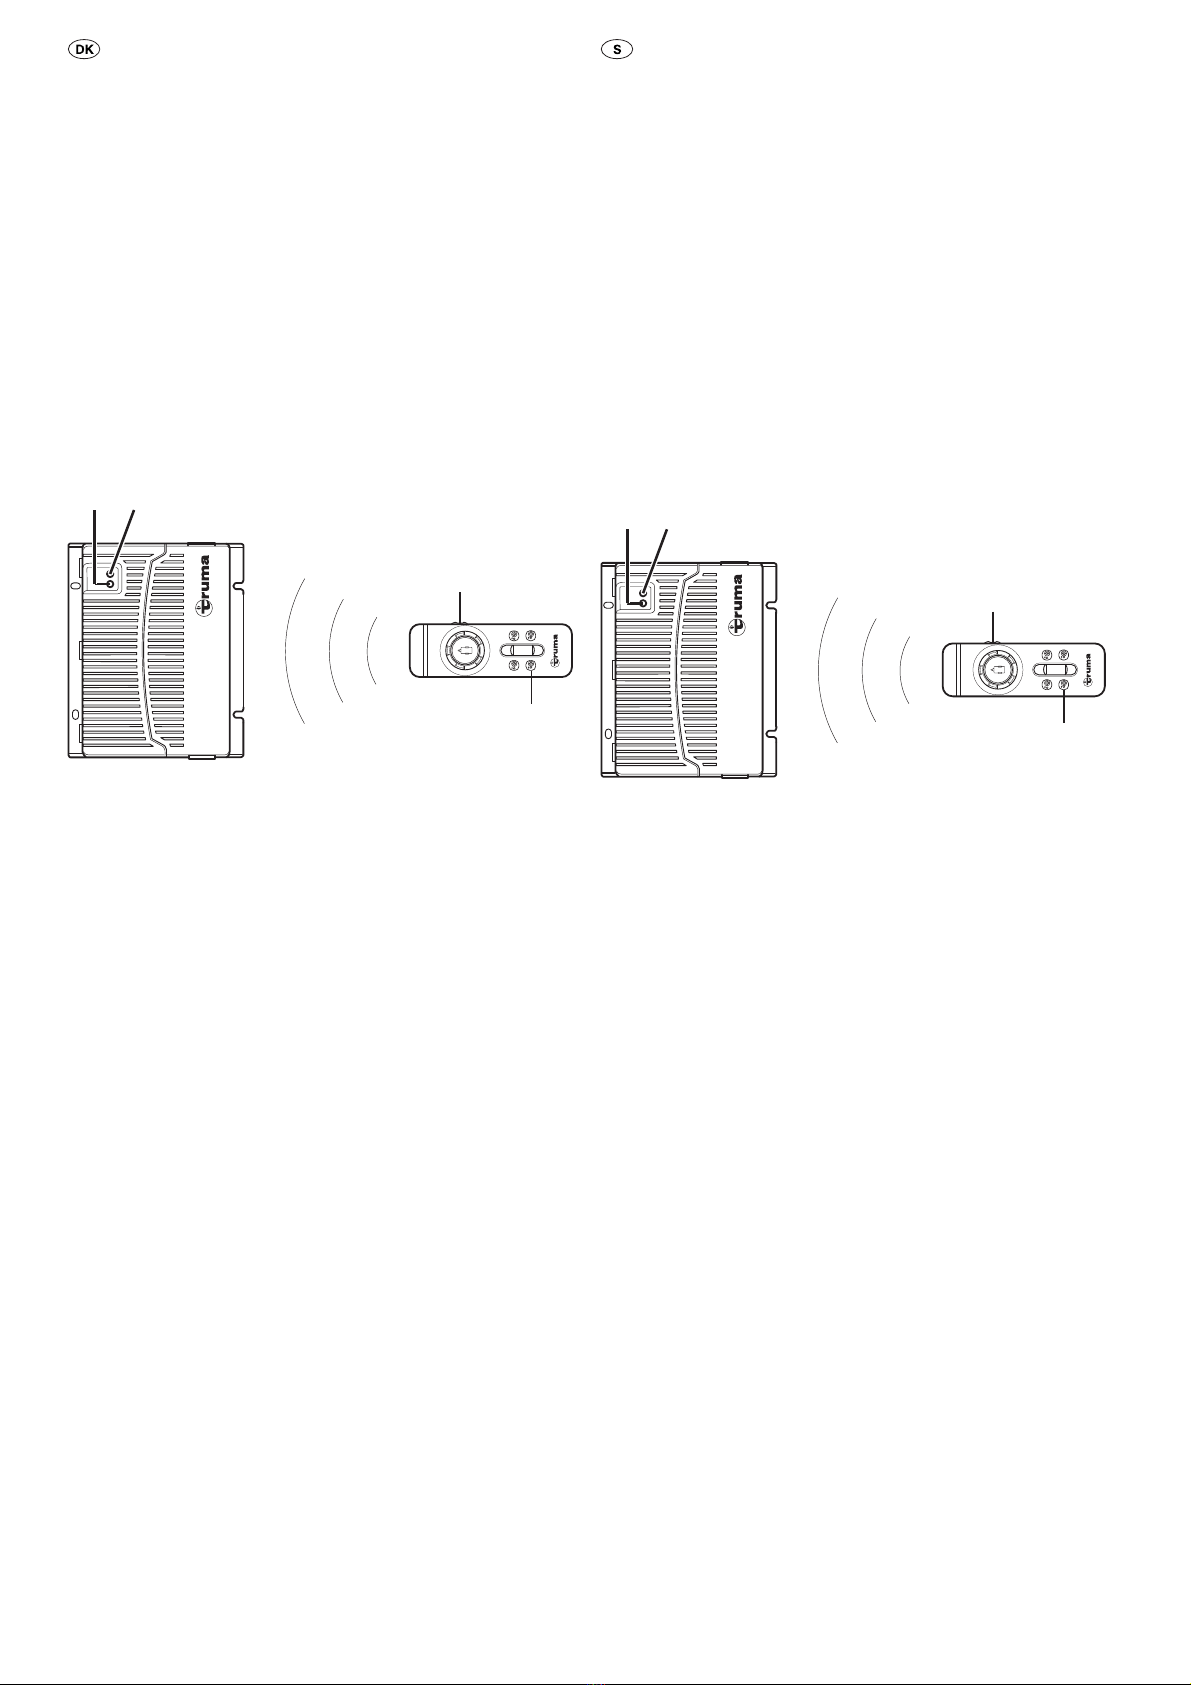
Switch off remote control.
Press and hold the reset button (k) on the control unit
(red LED – j – flashes slowly), and after approx. 5 sec the
LED (j) flashes rapidly. Release the reset button and within
10sec press and hold button (c) – Engage – on the remote
control, at the same time switching the remote control on us-
ing the slide switch (a). Release button (c).
#c
a
jk
Fig. 1
The remote control and the control unit are now tuned to one
another. Once tuning is complete, the red LED (j) comes on
and stays on.
Check all functions several times in accordance with the oper-
ating instructions.
Sintonizzazione della centralina di comando
elettronica con il radiotelecomando
Dopo la sostituzione della centralina di comando o del teleco-
mando, questi devono essere nuovamente sintonizzati in base
alle seguenti istruzioni.
Verificare il montaggio in base alle istruzioni di montaggio e
accertarsi che non siano presenti i rulli di trasmissione. Con-
trollare il corretto collegamento e lo stato della batteria e che
nella centralina di comando siano presenti 12 V. Accertarsi
che la spina del caravan sia inserita nella presa di sicurezza.
Spegnere il telecomando.
Premere il pulsante di ripristino (k) sulla centralina di comando
e tenerlo premuto (il LED rosso – j – lampeggia lentamente),
dopo circa 5 sec il LED (j) lampeggia velocemente. Quindi
rilasciare il pulsante di ripristino ed entro 10 sec premere
il tasto (c) – Avvicinamento – sul telecomando e attivare il
telecomando con l’interruttore a scorrimento (a). Rilasciare
iltasto (c).
#c
a
jk
Figura 1
Il telecomando e la centralina di comando sono sintonizzati
tra loro. A sintonizzazione riuscita, il LED rosso (j) rimane sta-
bilmente acceso.
Controllare più volte tutte le funzioni in base alle istruzioni per
l’uso.
Elektronische besturing en draadloze
afstandsbediening op elkaar afstemmen
Na vervanging van de besturing of de afstandsbediening
moeten deze volgens onderstaande instructie opnieuw op
elkaar worden afgestemd.
Controleer de montage volgens de inbouwhandleiding en
overtuig u ervan dat de aandrijfrollen niet aanliggen. Contro-
leer de correcte aansluiting, staat van de accu en dat 12 V bij
de besturing aanwezig is. Zorg ervoor dat de caravanstekker
in het veiligheidsstopcontact is gestoken.
Afstandsbediening uitschakelen.
Op de resetknop (k) op de besturing drukken en deze vasthou-
den (rode LED – j – knippert langzaam), na ca. 5 sec knippert
de LED (j) snel. Dan de resetknop loslaten en binnen 10 sec.
op de afstandsbediening de toets (c) – caravan aanzwenken
– indrukken en vasthouden en de afstandsbediening met de
schuifschakelaar (a) inschakelen. Toets (c) loslaten.
#c
a
jk
Afbeelding 1
Afstandsbediening en besturing worden op elkaar afge-
stemd. Na een succesvolle afstemming brandt de rode LED (j)
continu.
Volgens de gebruiksaanwijzing alle functies meerdere malen
controleren.
Truma Gerätetechnik GmbH & Co. KG
Wernher-von-Braun-Straße 12
85640 Putzbrunn
Deutschland
Service
Telefon +49 (0)89 4617-2142
Telefax +49 (0)89 4617-2159
[email protected]
www.truma.com
60020-50200 · 01 · 07/2013 ·
Avstämning av den elektroniska styrenheten
och fjärrkontrollen
Om styrenheten eller fjärrkontrollen har bytts ut måste de
stämmas av på nytt enligt följande anvisning.
Kontrollera monteringen enligt monteringsanvisningen och
försäkra dig om att drivhjulen inte ligger an. Kontrollera att
anslutningen och batteriets tillstånd är korrekt och att 12 V
ligger an på styrenheten. Förvissa dig om att husvagnens
stickkontakt sitter i säkerhetsuttaget.
Stäng av fjärrkontrollen.
Tryck på återställningsknappen (k) på styrenheten och håll
den nedtryckt (röd lysdiod – j – blinkar långsamt), efter ca
5sekunder blinkar lysdioden (j) snabbt. Släpp sedan återställ-
ningsknappen och tryck inom 10sekunder på knappen (c) –
framsvängning – på fjärrkontrollen och aktivera fjärrkontrollen
med skjutreglaget (a). Släpp knappen (c).
#c
a
jk
Bild 1
Fjärrkontrollen och styrenheten stäms av mot varandra.
När avstämningen är avslutad lyser den röda lysdioden (j)
konstant.
Kontrollera samtliga funktioner flera gånger enligt
bruksanvisningen.
Indstilling af den elektroniske styring med den
trådløse fjernbetjening
Efter udskiftning af styringen eller fjernbetjeningen skal disse
indstilles på ny iht. nedenstående vejledning.
Kontroller, at monteringen er udført iht. monteringsanvisningen,
og at rullerne ikke ligger tæt. Kontroller, at batteriets tilslutning
og tilstand er korrekt og at der er 12 Vpå styringen. Kontroller,
at campingvognens stik er sat i sikkerhedsstikdåsen.
Sluk fjernbetjeningen.
Tryk på tilbagestillingsknappen (k) på styringen og hold den
nede (rød LED – j – blinker langsomt), efter ca. 5 sek. blinker
LED’en (j) hurtigt. Slip derefter tilbagestillingsknappen og tryk
inden for 10 sek. på fjernbetjeningen på tasten (c) – Tilkobling –
og hold den nede og tilkobl fjernbetjeningen med skydekontak-
ten (a). Slip taste (c).
#c
a
jk
Fig. 1
Fjernbetjening og styring tilpasses til hinanden. Efter vellykket
tilpasning lyser den røde LED (j) konstant.
Kontroller samtlige funktioner flere gange iht.
brugsanvisningen.
Fo · ©