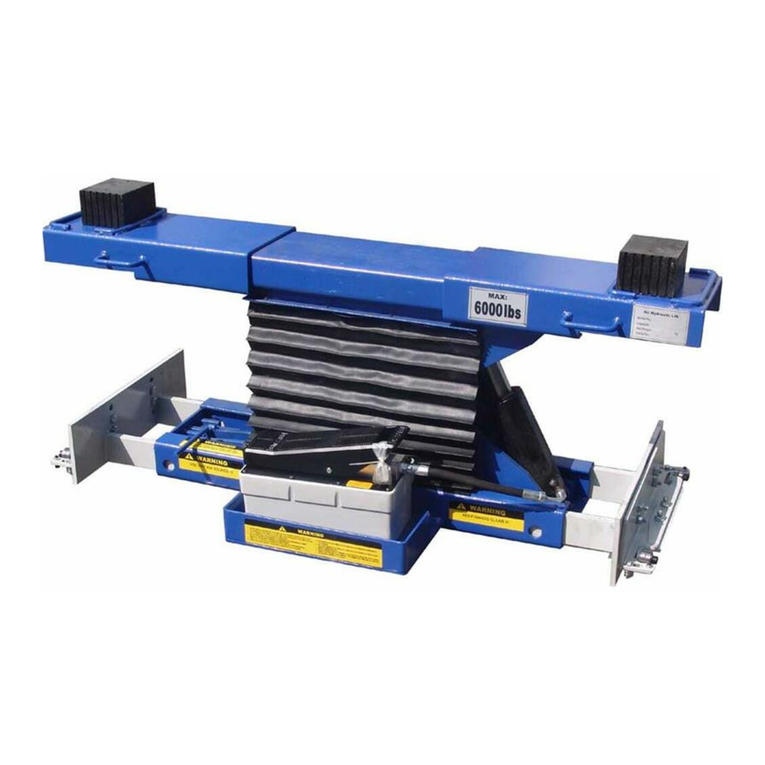
Tuxedo SJ-35 Parts list manual

SJ-35
SLIDING SCISSOR JACK
3,500lbs. Capacity

May 2017
SJ-35
Sliding Bridge Jack
3,500 lbs. Capacity
ASSEMBLY & OPERATION INSTRUCTION MANUAL

2
SJ-35
May 2017
TABLE OF CONTENTS
Specifications.......................................................................................................... 2
Description & Features……………………………………………………………......... 3
Installation Instructions........................................................................................... 4
Safety Instructions.................................................................................................. 4
Operating Instructions............................................................................................ 5
Maintenance Instructions....................................................................................... 6
Trouble Shooting.................................................................................................... 7
Exploded View........................................................................................................ 8
Parts List................................................................................................................ 9 - 10
Warranty................................................................................................................. 11
SPECIFICATIONS
Model Number: SJ-35
Max
Capacity
Size
L x W x H
*Height
(Min/Max)
Pad Width
(Min/Max)
Slider
Body Asy
Width (Min/Max)
3,500 lbs. 33.9” x 20.5” x 7.8” 7.8” - 11.4” 33.9” - 59.8” 30.9” - 45.7”
*Height Adaptors not included
Net Weight: 275 lbs. / Gross Weight: 307 lbs.
Fig. 1
Fig. 1Fig. 1
Fig. 1

3
SJ-35
May 2017
DESCRIPTION
This SJ-35 jack is a hand pump operated, scissor style sliding bridge jack, designed to be
mounted on the four-post lift’s runway edges between runways. It is capable of lifting the
wheels off runways to provide ‘wheels free’ service for brake, suspension, tire repairs and
maintenance.
FEATURES
A. Lifting capacity of the sliding jack is 3500 lbs. (1600 kg).
B. The sliding body assembly arms are adjustable for an inside runway width of 30" (762 mm)
minimum to a 45.7” (1162 mm) maximum. (Fig.1)
E. The SJ-35 Sliding Jack is equipped (1) pair of contact pad adaptors with rubber pad inserts
and two (2) different sizes of stackable height adaptors at 1.5” & 5”.
F. The SJ-35 Sliding Jack is equipped with a locking latch assembly that will lock at full-rise
and other two positions that is released by actuating the lock release lever.
H. The SJ-35 Sliding Jack is maneuvered on the heavy duty nylon pads. Actual vehicle load
is transferred to jack’s end sections via the sliding body load bars, positioned on the top /
inside edge of the runways.
Fig. 2
height adaptor
storage bracket
contact pads &
height adaptors
5” & 1.5”
slider body
assembly

4
SJ-35
May 2017
INSTALLATION INSTRUCTIONS
1. Carefully remove sliding jack from its package.
2. Pump jack to top by the hand pump. Check that the hydraulic oil quantity is enough and
hose is properly connected.
3. Lower the jack completely down by moving the lock release lever to the right, while turning
the hydraulic release valve knob counter-clockwise.
4. Slide out the slider body assembly extensions on both sides to match the width between
the runways.
5. Put the jack on the edges of the runways (Fig. 3), while ensuring to center the jack
between the runways.
6. Remember to secure the roller body assembly extensions into position by tightening the
bolts after the jack is centered (Fig. 3).
NOTE: Make sure the jack can slide freely on the runways with both nylon pads
making full contact with top edges of runways.
Fig. 3
SAFETY INSTRUCTIONS
•Never allow unauthorized or untrained persons to operate the sliding jack.
•Thoroughly train all employees in the use and care of sliding jack.
•Never overload sliding jack. Capacity of sliding jack is stated on the nameplate.
Capacity should not be exceeded.
•Observe and avoid any pinch point areas of the linkage mechanism.
DO NOT OVERLOAD JACK!!!
roller body
extension bolts

5
SJ-35
May 2017
OPERATING INSTRUCTIONS
WARNING!!!
To avoid personal injury and/or property damage, permit only trained personnel to operate jack.
After reviewing these instructions, get familiar with jack controls by running the jack through a
few cycles before loading vehicle on jack. Observe and avoid any pinch point areas of the
linkage mechanism.
1. Before loading a vehicle onto lift, ensure jack(s) are fully lowered. Make sure the adapters
are in their most inbound and lowest position. Also ensure the jack(s) (are) pushed toward
the center of lift before driving vehicle on or off lift. This will provide maximum vehicle
clearance when loading and unloading vehicles.
CAUTION! Always fully lower jack(s) to prevent damage to the vehicle on lift.
2. After vehicle has been loaded, chock tires on the opposite side in which the sliding jack is
to be used. If two sliding jacks are to be used, chock the tires on the opposite side of the
sliding jack to be raised first.
WARNING! Engage runway locks before raising vehicle on jacks!
Do not operate lift while jacks are engaged with a vehicle!
3. Place jack under vehicle at manufacturer’s recommended pick-up points. Pull out the arms
to the proper pick-up points. Take up clearance with contact pads & height extensions.
CAUTION! Allow 12” minimum clearance between vehicle and nearest overhead
obstruction before raising vehicle above runways. Failure to comply could
damage vehicle and/or cause personal injury.
4. To Raise Rolling Jack: (Ensure the release valve knob is rotated to be fully closed.)
Depress the pump lever repeatedly until the jack is raised to the desired lock position,
followed by turning the hydraulic release valve knob counter-clockwise to lower jack onto
locks.
5. To Lower Rolling Jack: Slightly raise jack to release off locks, followed by moving the
lock release lever to the right, while carefully turning the hydraulic release valve knob
counter-clockwise until the jack lowers completely.
CAUTION! Always fully lower jack to prevent damage to the vehicle or lift.

6
SJ-35
May 2017
MAINTENANCE INSTRUCTIONS
WARNING! If you are not completely familiar with automotive lift maintenance
procedure, please contact your distributor for instructions before any
practice.
TO AVOID PERSONAL INJURY, permit only qualified personnel to perform maintenance on
this equipment.
Daily:
•Inspect sliding jack adapters for damage or excessive wear.
•Inspect hydraulic system for leaks.
•Inspect for loose bolts, broken/damaged components.
•Inspect linkages for damage, wear and tear.
Monthly:
•Inspect the slider body assemblies.
Six Months
•Check fluid level in hydraulic reservoir.
Fluid Level Checking Procedure:
1. Completely lower rolling jack.
2. Wipe reservoir clean to prevent contamination of fluid.
3. Remove fill plug and check fluid level. Fill as required to bottom of fill hole with AW32
hydraulic fluid. Take care to prevent contamination during filling operation.
4. Reinstall plug hand tight only.
NOTE: Repair/Replace as required with original equipment parts.

7
SJ-35
May 2017
TROUBLE SHOOTING
TROUBLE CAUSE REMEDY
Sliding Jack will
not raise after
contacting load
1. Jack loaded beyond capacity. 1. Use Jack only to rated capacity.
2. External fluid leak at pump,
hose or cylinder. 2. Repair leak, refill reservoir.*
3. Internal leakage. 3. Have pump serviced by an
authorized service center.
4. Release mechanism damaged
or parts missing. 4. Replace damaged or missing
parts.
5. Pump low on fluid. 5. Lower Jack
and check fluid level.
Fill with AW32 hydraulic fluid.
Locate and correct leak.*
6. Pump malfunctioning. 6. Have pump serviced by an
authorized service center.
Sliding Jack will
not raise to full
height.
1. Pump low on fluid. 1. Lower Jack
and check fluid level.
Fill with AW32 hydraulic fluid.
Locate and correct leak.*
Jack drifts down
- will not hold.
1.Release mechanism damaged
or parts missing 1. Replace damaged or missing
parts.
2. External leakage.
2. Locate leak and repair. Refill
reservoir.*
3. Internal leakage.
3. Have pump serviced by an
authorized service center.
Jack lowers slow
or not at all.
1. Release mechanism damaged
or parts missing. 1. Replace damaged or missing
parts.
2. Return flow of fluid restricted or
blocked. 2. Eliminate blockage.
CAUTION! * Do not overfill reservoir. Jack must be completely lowered prior to adding
hydraulic fluid.
WARNING! If sliding jack is in the raised position, be sure to activate the mechanical
locking device prior to attempting to service the unit. Failure to do so
may cause jack to drop out of control.

8
SJ-35
May 2017
EXPLODED VIEW

9
SJ-35
May 2017
PARTS LIST
ITEM
Tux P/N M-Ref P/N DESCRIPTION QTY
1 SJ-35-001 LJ03-00005-000 Nylon Pad 4
2 SJ-35-002 LJ03-07000-000 Slider Body Frame 2
3 SJ-35-003 5107-05010-000 Screw, M5x10 16
4 SJ-35-004 LJ03-08000-000 Base Weldment 1
5 SJ-35-005 5101-08016-000 Screw, M8x16 7
6 SJ-35-006 5114-06010-000 Threaded Pin, M6x10 10
7 SJ-35-007 LJ03-00002-000 Arm 2
8 SJ-35-008 LJ03-10100-000 Contact Pad 2
9 SJ-35-009 SJ03-00008-000 Rubber Pad 2
10 SJ-35-010 5110-06012-000 Screw, M6x12 2
11 SJ-35-011 LJ03-01000-000 Top Weldment 1
12 SJ-35-012 5304-00020-000 Circlips, D20 4
13 SJ-35-013 LJ03-00004-000 Middle Axle 1
14 SJ-35-014 LJ03-00001-000 Short Axle 2
15 SJ-35-015 LJ03-00003-000 Pin #1 1
16 SJ-35-016 LJ03-00014-000 Pin #2 1
17 SJ-35-017 LJ03-00013-000 Roller 2
18 SJ-35-018 LJ03-06003-000 Small Roller 2
19 SJ-35-019 LJ03-06001-000 Roller Pin 2
20 SJ-35-020 LJ03-06002-000 Large Roller 2
21 SJ-35-021 5307-00020-000 Flat Washer, D20 4
22 SJ-35-022 LJ03-00006-000 Latch Pull Bar 2
23 SJ-35-023 LJ03-00009-000 Bushing 1
24 SJ-35-024 5114-08010-000 Threaded Pin, M8x10 1
25 SJ-35-025 LJ03-000017-000 Lifting Bar 1
25.1 SJ-35-025.1
LJ03-00017-000 Lifting Bar Axle 1
26 SJ-35-026 LJ03-03000-000 Inner Scissor 1
27 SJ-35-027 LJ03-04000-000 Safety Latch 1
28 SJ-35-028 LJ03-00008-000 Latch Axle 1
29 SJ-35-029 5402-05050-000 Cotter Pin, D5x50 1
30 SJ-35-030 LJ03-00011-000 Release Handle 1
30.1 SJ-35-030.1
LJ03-00012-000 Handle Ball, 35DxM10 1
31 SJ-35-031 LJ03-00015-000 Fitting 1
32 SJ-35-032 5307-00008-000 Flat Washer, D8 3
33 SJ-35-033 LJ03-00016-000 Hand Pump 1
34 SJ-35-034 5306-00008-000 Lock Washer, D8 4

10
SJ-35
May 2017
35 SJ-35-035 5101-08030-000 Screw, M8x30 2
36 SJ-35-036 5201-00008-000 Nut, M8 2
37 SJ-35-037 LJ03-09000-000 Cylinder 1
37.1 SJ-35-037.1
LJ03-09006-000 Duct Ring 1
37.2 SJ-35-037.2
LJ03-09004-000 guide ring 1
37.3 SJ-35-037.3
LJ03-09005-000 Guide Ring 2# 1
37.4 SJ-35-037.4
LJ03-09007-000 Piston Rod 1
37.5 SJ-35-037.5
LJ03-09003-000 Piston 1
37.6 SJ-35-037.6
LJ03-09002-000 Guide Ring #1 1
37.7 SJ-35-037.7
5901-00447-000 O-Ring 1
37.8 SJ-35-037.8
LJ03-09001-000 Seal Ring 1
37.9 SJ-35-037.9
LJ03-09100-000 Cylinder Body 1
38 SJ-35-038 LJ03-00007-000 Cylinder Pin 1
39 SJ-35-039 5404-03050-000 Split Pin, D3x50 2
40 SJ-35-040 LJ03-02000-000 Outer Scissor 1
41 SJ-35-041 LJ03-00010-000 Hose 1
42 SJ-35-042 SJ01-03002-000 Angle Fitting 1
47 SJ-35-047 LJ03-00018-000 Tall Height Adaptor-5” 2
48 SJ-35-048 LJ03-00019-000 Short Height Adaptor-1.5”
2

11
SJ-35
May 2017
Table of contents
Other Tuxedo Jack manuals
Popular Jack manuals by other brands

haacon
haacon S 2000 Plus User manual and service instructions

SCA
SCA PLU 382375 Owners and installation manual

Cattini Oleopneumatica
Cattini Oleopneumatica Yak 214/P Operating and maintenance manual

Evercraft
Evercraft 776-1006 manual

Sealey
Sealey JKIT01.V2 manual

Norco
Norco 71245A Setup, operating, maintenance instructions