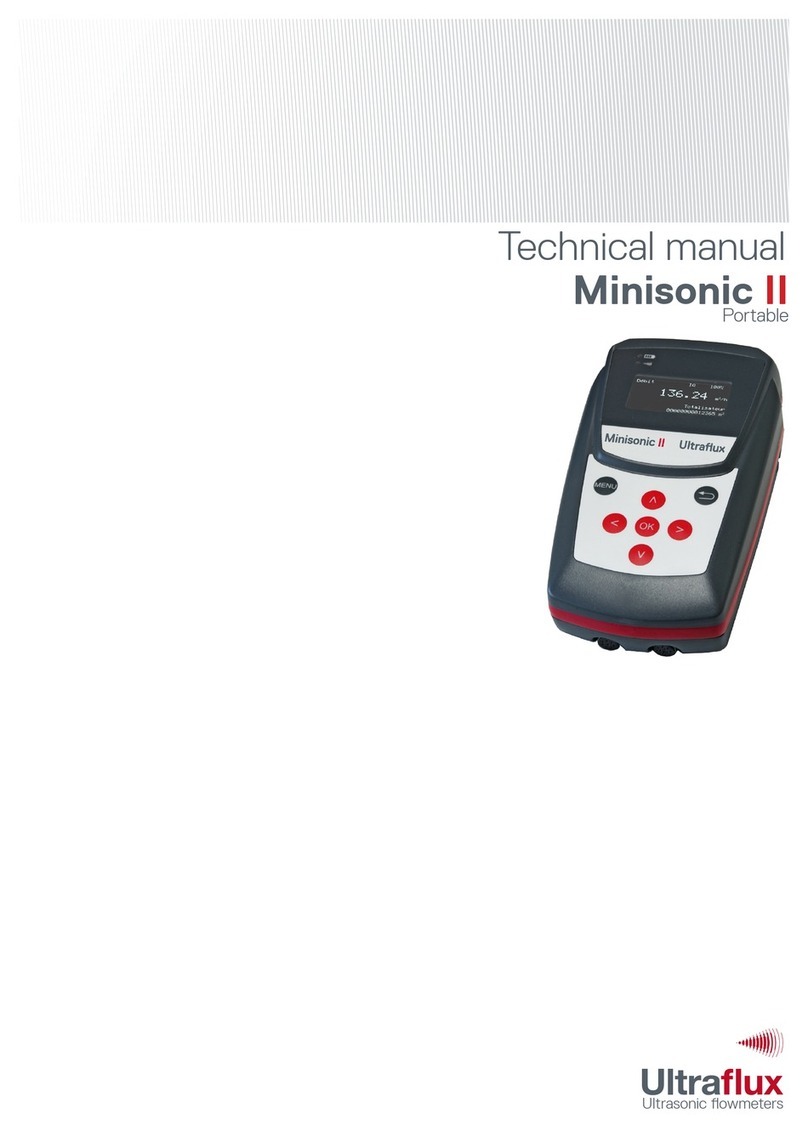
Ultraflux MiniSonic P User manual

NT214B GB1 1 / 26
Ultraflux NT 214B GB1
Revision : 26/08/2008
MiniSonic _ P
MiniSonic _ P-B
Portable Flowmeters
Le Technoparc
17 rue C.E. JEANNERET
78306 Poissy Cedex – France
Tel: +33 (0) 1 39 79 26 40
Fax : +33 (0) 1 39 79 91 22
Web : www.ultraflux.com

NT214B GB1 2 / 26
PREAMBLE :
Thank you for choosing Ultraflux to make your flow measurement.
We offer a full range of portable or fixed flowmeters backed by 30 years’ expertise and
experience using Ultrasonic techniques:
®The Digisonic and UF 801-P families of Portable flowmeters with integral
loggers and signal analysis functions
®The UF322 and UF 8xx families of fixed installation flowmeters:
L - liquids,
G - Gas ,
MC – Multi-chord applications for Liquid and Gas measurement,
CO / RV - Open Channel and River Measurement.
®The MiniSonic family with :
P – Portable Metering with also a two pipe or dual path version P-B
600/2000 single-channel fixed flowmeters,
600-2 and 2000-2 for dual-chord flow metering ,
600-B and 2000-B for dual-pipe flow measurement configurations,
Speed ( 1 or 2 ) is for open channel flow velocity measurements.
This manual is specifically concerned with an element from the family and has been
drafted to guide you in the stages of installation and commissioning.
Other documents and tools are available on paper or in electronic format:
•A training manual concerning ultrasound measurement, reference NT 122
•A guide about the use of our software in the Windows environment Ref NT 204
•The PC software that is specific to your application, Ref LS 600W _version *** ,
with an interconnection cord to the PC.
•The JBUS communication protocol with its address table NT 207
All our flowmeters work on the principle of transit time of ultrasonic waves and can be
associated with clamp-on or wetted probes as well, depending on the application.

NT214B GB1 3 / 26
SUMMARY :
1 – Typical Applications:
Liquid flow measurements and controls
Clamp on or insertion transducers
Use for official control or as a standard for calibration
2 – Composition of a measurement point.
Certifications
Applicable standards
MiniSonic limitations
Recommended accessories
3 – Ergonomics and dimensions
4 – Connections
Use of an external data logger
Use of our software and PC for records
5 – Converter first handling instructions
Charging batteries and other preliminary operations
What to do before transducers installation
6 – Probes installation.
How to insure fast and good results
How to manage a temporary installation
What about the safety in Ex
7 – Setting and commissioning.
8 – Detailed Menu layout:
Measurement Display Menu
Calibration Allowed Menu
Pipe Settings Menu
Q Settings Menu – Flow and Fluid
Probe and Echo Menu.
General Parameters Menu
Zero / Auto-Zero Menu.
Current Output Menu
Factory Settings Menu.
Input / Output Test Menu
Echo Analysis Menu.
9 – Recommendations – Final checks and tests
10 - Investigations – Spare parts.
11 – Appendix
Example of calibration file
Print out of records done on a PC

NT214B GB1 4 / 26
1–TYPICAL APPLICATIONS
MiniSonic P and P-B main purpose is to offer a performing flow measurement solution at a
very competitive price by saving any installation costs.
With clamp-on transducers, there is no need of any spool piece or tapping by keeping the
same final accuracy than any flowmeter.
Their conception permits a smart use of the hardware and firmware resources to adapt
them end to user flow problem.
For instance the two 4-20 mA outputs can copy other data than the flow (sound speed,
gain …) to offer a complete diagnostic on actual flow and liquid quality or density …
The MiniSonic P gives the actual flow value and its direction.
Normally used as a portable instrument, it can also be use for temporary replacement of any
flowmeter: flow indication, regulation but also volume counter.
1-1 – Principle of measurement:
The principle of measurement is detailed and commented on in our training manual NT
106.
To summarize, note that it bears on the velocity difference (and therefore the ultrasound
wave transit times) in a moving medium, depending on whether the movement is with or
against the current.
To achieve this, it is necessary to establish dialogue between two sensors using an L-
shaped route whose projection D on the control axis is sufficient, and to measure
alternatively the route times T 1>2 and T 2>1.
The time measurement, combined with knowledge of the geometry parameters (diameter /
thickness of pipe / L / D) allows the volume flow rate to be calculated whatever the
developments of the product, its temperature or its pressure.
Precision is even better when the Delta T measurement resolution increases (0.01
nanosecond for MiniSonic) and when the geometrical parameters are controlled, not to
forget considerations of a hydraulic order (straight lengths, flow configurations, zero setting)
or the frequency of the probes.
An order of magnitude of this Delta T in nanoseconds can be obtained simply by multiplying
the flow velocity (V in m/s) times D (in mm) or by the diameter of the pipe (mm).
NT214B GB1 5 / 26
1-2 - The clamp on solution is available for most of the liquids flowing in metallic or plastic
pipes.
Ultraflux offers a very wide transducers range with different sizes and frequencies to be
selected depending on the application and pipe diameter from 10 mm I.D. to more than 3
metres.
This solution is very convenient for petrochemical products but also for any water quality
including demineralised water with no limitation from the conductivity.
When pipe wall material (concrete …) or condition ( corrosion …) is not suitable for clamp
on transducers , we propose insertion transducers with installation possibility by hot tapping.
When the instrument must have an official use, it is recommended to compare it to a
standard and obtain a calibration certificate on a flow rig.
Then, after some reserves concerning a correct use, the unit can be accepted as a
secondary standard.
Basically, we practice a dry calibration. It reliability is sufficient for a standard use.
Beside its accuracy, MiniSonic P offers a very good reproducibility.
If you place transducers at the same location and enter the same settings, you can follow
up in the time any pump characteristics or any other flowmeter actual accuracy.
Example with Direct mode:
Meanwhile, Reflex mode (V)
Is more usual ( > 90 % )
and much more easy l.

NT214B GB1 6 / 26
2 - COMPOSITION OF A MEASUREMENT POINT
- The converter MINI-P or P-B with its carrying bag.
- Its standard accessories: batteries (NIMH) charger and cable
- One or more set of two probes depending on your request / applications
- Integral or optional supports (SU
- Coupling gel (BT = low temperature / HT = high temp.) for clamp-on probes
- Probe / converter link cables (L = 2.5 m) and optionally extensions (L= 5 m)
- PC / converter link cable and software (CD Rom). This cable permits also analog
outputs.
CERTIFICATIONS
All equipment is CE certified.
ATEX certification for the relevant probes and standards when this quality is required,
accepted and documented. All equipment will be labeled accordingly.
IP Rated as shown on each item.
The MiniSonic-P has a typical IP 67 rating. This requires that all seals are ok and screws
correctly tight.
Meanwhile, when the immersion risk exists, we can offer a heavy duty protection case
with an IP 67 characteristic.
APPLICABLE STANDARDS :
•Concerning high voltage human safety risks: N/A – Only low voltage ( < 60 V ) .
•Concerning EMC : EN 61000, EN 55022 et EN 50204
•Concerning tightness ( IP ) : EN 60529
•Concerning ATEX : Directive 94 / 4 / CE
MiniSonic-P could be only concerned by Ex m IIC T6 transducers with cables
+ EN 60079-0: General rules.
+ EN 60079-1 : Ex d enclosures.
+ EN 60079-7 : Ex e protection for connections.
+ EN 60079-18 : Ex mb x – protection by encapsulation.
+ EN 60079-11 : Ex ia - Intrinsic safety
+ EN 60079-25 to guide you for your I.S. systems
MINISONIC LIMITATIONS :
MiniSonic-P is designed for pipes up to 3300 mm O.D.
The maximum lengths between transducers (L) are 6600 mm (SM probes)
The maximum axial distances (D) are respectively 4400 mm.(SM probes)

NT214B GB1 7 / 26
ON/OFF
Push-push
switch
Connectors to Probes
Cable with a Y ending
( 1 = upstream )
Active touch
LCD display
3 - ERGONOMICS AND DIMENSIONS OF THE MINISONIC-P and P-B CONVERTERS
All operations can be done while keeping MiniSonic–P inside its protection bag.
®MINISONIC P interfaces location view
®MiniSonic-P or P-B mechanical characteristics:
MiniSonic-P & P-B enclosure is in ABS plastic. The case can be cleaned with water, alcohol
or detergent by using a sponge or a soft cloth. Never use abrasive or solvents.
MiniSonic-P & P-B outside dimensions are approximately 220 x 115 x 64 mm.
It weights less than 1 kg.
MiniSonic-P & P-B tightness protection is IP 67 but the charger or other accessories.
MiniSonic-P & P-B can be used from –10 °C up to 50 °C as long LCD display permits
readings.
LCD display
Pipe 2
Mini P-B
Pipe 1
Parameters
Modifications
Function
Menus
Choice
In
menu
Connection to PC
+ Othe
r
out
p
ut si
g
nals
Connection
To
Charger

NT214B GB1 8 / 26
4 –USUAL CONNECTIONS ON MINISONIC-P or P-B :
When there is no need of automatic records, connections as described in § 3 are sufficient.
> To permit records and connection to an external data-logger or to a PC , or to any
recorder or transmission device , please use our cable and add if necessary
connections on 15 pins male connector . Its pin out is as follows:
> There are two categories of External data-logger:
•Those which are designed to receive 4–20 mA signals as the USB-4.
•They permit to set records rate and some permit to delay the acquisition or stop it at
a given time or other condition. Do wiring on analog output 1 (SA 1) or 2 (SA 2). Do
wiring of relay 1 or 2
Flow records are samples. There is no record about what could happen between.
•Those which are designed to record time events. If this event is the volume pulses
unit as transmitted by one of our relays, the time between two successive pulses
permits to build a curve representing the average flow during this period. These data
loggers are normally delivered with the corresponding Software.
Flow information rate depends on the flow itself. For instance a survey on a potable water
pipe will give few points during night and many at peek flow period.
Relays : solid state
R on = 10 Ohm
V < 100 V
I < 0.1 A
Analog outputs SA :
Active from battery
Max loop Resistor =
150 Ohm

NT214B GB1 9 / 26
> Automatic records by using our Software on a desk top or lap top PC :
Please refer to our LS 600W x x Software manual (CD Rom)
- Once this software installed on your laptop PC you can set in its configuration menu a
sampling period and also the duration of the records. If you want to control manually this
duration, you must enter “ 0 “.
- When the RS dialog is established between this PC (master) and the MiniSonic-P or P-B,
the records start after a click on the Diskette icon and a given name to the new file.
- The main advantage of these records is their richness: you keep trace of all available
informations on MiniSonic. Totalizer can be automatically reset before a new record.
You can also record the corresponding calibration file.
- Moreover, our Software includes a Spreadsheet Macro for Excel, which permits an
automatic transfer and edition of your results to help your technical report.
Let you guide up to such a final result (example – not contractual):
Attention! To have this Macro accepted by Excel and Windows, you must set Excel security
level at medium or low (Excel/Tools/Security…)
Flow (l/mn)
0
20
40
60
80
100
120
00:00 01:00 02:00 03:00 04:00 05:00 06:00 07:00 08:00 09:00 10:00 11:00 12:00
26/09/02 - 17:29:40
Average Q : 102,00 l/mn
C.V. : 0,507 %
Volume : 1027 l
Minisonic SN : 37/02/00051

NT214B GB1 10 / 26
5 – CONVERTER FIRST HANDLING INSTRUCTIONS:
®Charging Batteries - Charger/ Adapter + Auxiliary supply
Cords : EU – Optionally other ( US …)
Approval = CE and CB/UL
AC Input Voltage : 100 -240 V 47/63Hz
Output Voltage : 15 V DC - 1 A
Charging time = 14 hours
A green LED is On when supplied.
Batteries : NIMH – No memory effect
Autonomy: up to 35 h. Depends on use
( 4-20 mA ; backlight … )
MiniSonic–P has a battery level
indicator (%). It takes its calibration
from a complete cycle 100 % down to
0% (Real stop occurs on V Batt < 8V)
Be sure that batteries are sufficiently charged before you start your operations.
®Please read § 7 and § 8 before any measurement try.
®Select one probes set depending on your application (see § 6)
®Start settings and controls in following order:
- Switch the MiniSonic-P on and wait for the welcome displays.
- Enter in “Probes / Echo menu” and set correct transducers with mounting mode
- Enter in “Pipe settings “ menu and enter corresponding data .
- Enter in “Q settings“ menu and confirm liquid characteristics .
- After the measurement menu has displayed requested distance between probes,
- Fix these probes with coupling gel or tape and do connections to MiniSonic - See § 6
- Read results and attached information in “Measurement menu” - See § 8-1
- If not satisfying, proceed to possible corrections - See § 9
- Start measurement records or hand note results upon your own choice.

NT214B GB1 11 / 26
L , D D
L
D.S
6- PROBES INSTALLATION – General Procedures.
The MiniSonic P & P-B accept all standard or special transducers of Ultraflux
catalogue with frequency from 250 KHz up to 2 MHz : clamp-on , insertion or wetted …
®Unless specified and instructed otherwise in the order, refer to the probe data sheet
of the model used .
®The installation of the probes in a conduit should allow for the best the straight lengths,
particularly upstream, but also downstream, in order to benefit from a predictable and
stabilized hydraulic profile. Provide upstream a minimum of 15 times the pipe
diameter.
®Similarly, to avoid the nuisance of deposits or accumulation of gas, planes close to
vertical (+/- 30°) will be avoided. A horizontal plane is a good choice excepted when
the conduit is vertical.
®For intrusive probes, adjust the insertion then the alignment or orientation of the
probes for the same pair (> parallel faces).
Important! : once these adjustments finished , it is necessary to measure with
accuracy the distance L between transducers face to face and its projection D on flow
axis and note these values on a “as built ” data sheet for further entering in instrument
menu .
! The final accuracy depends on.
®For external probes, the freedom offered should not prompt the user to ignore
the above rules.
However, the choice of direct (\), reflex (V) or even (N or W) installation mode will
depend on the decision regarding the conduit (state) and the fluids to be measured.
Therefore, we advise initially a provisional installation known as a validation
installation (coupled with gel or grease) and final assembly (supports, solid coupling)
once the conditions have been validated.
Since the MiniSonic calculates for you the distance D.S required between the probes,
the setting up operations will, in theory, take place once the converter parameters
have been set.
Particular attention will be paid to cleaning the conduit at the probe location.

NT214B GB1 12 / 26
Probes installation : particular recommendations for a portable use :
Please read general recommendations as detailed in our training manual NT 122.
Under header § 2, we give some information about expected accuracy depending on
available straight length and transducers mounting modes.
When you will arrive in front a new pipe to be measured, you must have some good
reflex, and your experience will help for.
®First , you must have in hands suitable probes for the application .
We propose different sizes having each its own frequency: larger they are, lower is the
frequency.
- High frequency and small probes are suitable for small pipes, thin pipe wall and highest
accuracy in Delta T measurement. But signal could be distorted or damped if pipe or liquid
conditions are becoming difficult.
Example: our SE_1586-E2 – F=2 MHz
- Lower frequency transducers are less sensitive to above conditions and are more suitable
for large pipes. For such pipes, the Delta T is more important and thus weights less on the
results.
Example: our SE_1599-I or SE_1595 – F=0.5 MHz
- Between them, we offer a compromise with probes F = 1 MHz
Example: our SE_1662-A or SE_1596 or better SE_1515 which accept up to 200 °C
®Most of these above probes are delivered with a support which doesn’t let other
choice than to place them in Reflex mode. This Vmode must be preferred to all other mode
as far you can place the transducers (distance D.S. and signal = OK).
The probes coupling and its duration are very important for reliable results.
Try always to have a compromise for pipe access and straight lengths. All becomes
easier. When you have to do a measurement after a pump, please try as far as possible
from it. You will have fewer disturbances or remaining bubbles from cavitations.
®After installation finished and accepted, you shall be the first critic of the
measurements you are doing.
For this, MiniSonic delivers you complementary information on signal (Gain), on physical
measurement (Delta T, on sound speed (C – relation with T °C ?) and on hydraulics
(Reynolds number – Kh).
What to do with?
- A too high amplification gain would request to use lower frequency transducers.
- A low Delta T must be compared to the offset risk (Delta To). You have to decide about a
possible zero flow compensation.
- A sound speed very different from expected value would signify some mistake in pipe
data.
- A Reynolds number near the turbulent to laminar transition area would request the highest
attention to the probes location. Even if Reynolds number can predict a laminar flow, it is
necessary to have more than 20 x Diam. to establish it after a disturbance.

NT214B GB1 13 / 26
7- COMMISSIONING AND PARAMETERING OF MINISONIC P / P-B :
1. Once the cabling has been carried out and verified, power up the system:
> The MiniSonic must display its home screens:
- Hardware version = MiniSonic P or P-B and P.C. Board version (MK4_M).
- Firmware version = 18.10-01 (e.g. – make a note of the first figure)
- Serial number = see if it is identical to the company nameplate
- Technical information: parameterized probes
Then it automatically switches to the measurement function (Q = …)
> Check the consistency of these messages with respect to your application. If your
instrument is set ready to be used, you can start readings and records.
> However, it is recommended you to check and, if necessary, to optimize the
adjustments, taking into consideration the exact dimensions and, if possible, zero flow
conditions (see the “Self-zero Adjustment” menu).
2. Parameter settings using the PC software : Use same version than Firmware
> Refer to the manual supplied with the software (CD-ROM) .
> The fields of the main values to be entered are listed below under Heading 8.
> The software offers extended configuration possibilities.
> At the end of the manual, a printout of a typical file is given.
3. Parameter settings using the keyboard
Successive pressing on the Fkey, or F then + or - gives access from the
“Measurements Display” menu to the titles of the different menus :
> Access (Authorization) to Adjustments
> Pipe parameters
> Flow rate / Fluid parameters
> Probe parameters
> General parameters including Outlets
> Zero adjustment
> Tests
> Optionally : “Current outputs setting” and “Factory Adjustments”.
To enter the Menu, use the ∇key in the same way as to move to the next field to be
filled in .
To modify (text or values), use –or +
Exit from the menu is by the Fkey with return to the “Measurement Display” menu
If there is no action on the keypad for 1 mn , the MiniSonic automatically returns to “
Measurement Display” menu .
When inside a menu, the browser only scrolls forwards. When necessary, do a
complete scroll.

NT214B GB1 14 / 26
8- DETAILED REVIEW OF MENUS – MiniSonic Versions P and P-B :
Here below we list first the standard P version and at the end of this chapter 8 , in 8-11, we
had the extra screen or readings concerning the P-B version .
8 -1 : “ Measurement Display ” menu:
Every time you return to this menu, MiniSonic displays:
chosen probes and interprobe distances D.S.( if S.E. )
Then Flow rate (or other choice as first screen)
and associated messages .
∇Gains (mode and value)
and I.Q. quality indicator.
If I.Q. is less than 33 %, the last
Measurement cycle is rejected.
∇Velocity of fluid and speed of sound
N.B.: This sound speed is a characteristic
of the fluid at actual conditions .
Compare this value to expected one
at a actual temperature (see NT 122 )
It is a good indicator for water applications.
∇Physical measurements: time of flight T
and difference delta T
∇Totalizers - Reset possible by
simultaneously pressing + and -
∇Date and time
®
Change by PC + Software
∇Hydraulic Information
Calculated KHand Reynolds number
∇Return to menu header
T= xxx.x µs
DT= ns
t1= xxxx m
3
t2= xxxx m3
06/02/2003
15 : 46 : 22
Kh = 1. 055
Rey = 3,1E5
Probe = SE xxxx
D.S. = xxxx mm
Gain (ESC) = xx dB
I.Q. = 100 %
Q = xxx.xx m3/h
Seek Echo , Fault Q
V = x.xxx m/s
s.sound = xxxx.x m/s

NT214B GB1 15 / 26
8-2 : « Calibration Allowed » Menu :
®Access = press Fonce from the Measurement Display menu
®If the display is:
Enter this code (1 to 65535)
®If the display does not request “Code?”, there is none (code = 0 )
®Press ∇
®Enter a code:
! This code will become active after de-energizing.
Remember to make a note of it. It will be required for any subsequent
intervention.
®In case of loss, contact Ultraflux giving the following information’s; the serial number of
your MiniSonic MK4*/xx/xx/xxxx as it appears during energizing and the date or dates
on which you want action to take place. An operation will be requested, allowing a
provisional code to be calculated.
®A second press on ∇will provide access to the existing Languages choice field.
8-3 : « Pipe Settings » menu :
®Access = Press twice on For F once, then +and Enter by ∇
(Operations are common to all the menus).
∇External diameter (mm)
or pipe circumference
∇Chosen pipe material
from programmed list :
If Other: Characterization of this material by its velocity or CM
This selection will resolve new or special cases and also optimize the parameters
for composite pipes having several materials (steel or cast iron + cement)
∇Total pipe thickness:
∇If other:
N.B. :only one input .
ext D = xxxx.x
ext C = xxxx.x
Pipe =
STEEL… PVC … OTHER
Thickness = xx.x
mm
CM = xxxx m/s
Calibration Allowed : 0
Code ?
Access Code = xxxx

NT214B GB1 16 / 26
8-4 : « Q Settings » menu ( Flow / Fluid )
®
Following data are common to the two pipes.
∇Choice of Flow unit:
( l/h …tot … m3/s );
∇Scale (graphics on PC only):
Outputs: see menu « General »
∇Product (+ / -):
®If WATER: C = 1300 to 1600 m/s
®If OTHER:
∇Fluid Characteristic
and speed of sound range :
∇Hydraulic corrections (+ / -)
Prefer mode AUTO.
∇Entry of Coefficient KH or data to do
its calculation.
®If MANUAL: entry of coefficient
depending on profile : Laminar = 1.333
or Turbulent = 1.02 to1.08
®If AUTO: entry of parameters:
∇Fluid viscosity:
∇Pipe roughness:
As well as the critical Turbulent /
Laminar flow transition:
∇Critical Reynolds Number (Rey C)
∇Transition range (LBR):
(Recommended values)
Q unit = m3/h
Qmax (unit)
+/xxxxx.x
Product =
WATER / OTHER
Viscosity (cst)
x.x
Delta C = xxx m/s
Co = xxxx m/s
K Hydro =
AUTO / MANUAL
K Hydro = 1.xxx
Roughness ( m m)
xx.xx
LBR = 3
ReyC = 2800

NT214B GB1 17 / 26
8-5 : « Probe / Echo parameter settings » menu :
∇Choice of probe
From this choice, it results Emitting
Frequency, D.S. calculation (S.E.) or
Opening of L and D fields (SM)
∇®if SE (External probes)
/= single traverse
V= reflex mode
N , W = 3 or 4 paths
®
If SM (wetted internal probes)
See parameters L & D
∇Management of amplification gains:
ESC Mode recommended.
(ESC= Echo Shape Control)
Otherwise :
®If MANUAL :
(Gain adjustment)
®If AUTO : Margin
(Over-amplification compared to
critical gain Go. )
∇If SM choice: position of probes depending
on geometrical measurements.
®as distance L between probes,
face to face ( chord )
∇®as projected distance onto flow axis
(Part of L concerned with the flow)
Gain = ESC
Margin = xx dB
Length = xxx.x mm
Probe mounting = V
( or / , N , W )
Gain = xx dB
Probe = SE xxxx
(
or SM ou SP. A/B
)
Ax. D = xxx.x mm

NT214B GB1 18 / 26
8-6 : « General Settings » menu
∇Setting of LCD back-lighting
(Depending on MiniSonic version )
∇Filter rate of measurements
(Number of 0.5 s cycles)
∇Last accepted measure (IQ > 33%)
memorising time :
(Mode ESC : enter Mém. = > 20 )
∇Setting of Totalizers 1 & 2
®depending on flow direction:
∇®depending on weight or unit :
( rom 1 cl to 100 m3)
∇Setting of Relays 1 & 2
®by assignment :
∇®If copy of TOT 1 or TOT 2 :
= relay closing time > F maxi
∇®If Threshold: enter value for Q:
∇Reset to Zero of TOT t1 & t2
This function may be prohibited
∇Parameter settings of two outputs
4-20 mA, SA 1 & SA 2
®by assignment :
®by range ( depending on unit )
∇RS 232 ou 485 Communication
Jbus slave No and Baud Rate:
Back Light
ON / OFF / TIMED
Mémory (s)= ∗∗
Threshold R2 (unit)
V
alue
Reset t1 & t2
NO / YES
+ , - , +/-
Closed/Open /TOT.1 ou 2 /
Fault Q/ Dir.Q/ Threshold Q
Pulse width ( ms )
N. JBUS = 1
BAUD = 9600
Filter = ∗∗
SA 1/ SA2 Type
Q , V , C , GAIN
4mA SA 1 & SA 2
+ / - xxxx.x
Pulse weight =
1 m3
20 mA SA 1 & SA 2
+ / - xxxx.x

NT214B GB1 19 / 26
8-7 : « Zero / Autozero Settings » menu
∇Status display:
Modification by + / -:
®no compensation ( reset ) :
®performs the zero under actual
conditions ( flow must be null )
Exit by F
! Caution = to carry out Self-zeroing, the flow rate must be absolutely zero
while the display indicates « *dTo * » .
8-8 : « Output Current Settings» menu ( normally reserved to Ultraflux )
It permits adjustment of coefficients
to convert min / max range to 4 / 20mA
! Caution : use an a approved instrument
to measure milliamperes .
8-9 : « Factory Settings » menu (normally reserved to Ultraflux)
It permits to adjust a coefficient which
optimises the compensation with
clamp on probes ( value 0.6 to1.4)
Another parameter named “ Delta T band ” permits to set a compromise between filtering
an response time for some difficult applications: please contact Ultraflux .
Factory settings menu includes another facility but only through PC software: the
entering of a linearization curve .
8-10 : « I / O Test » menu : simulation on outputs and relays .
∇Simulated current on SA 1 or SA 2:
(action by + / -)
∇Simulation of status on Re 1 or Re 2:
(action by + / -)
Delta To (ns)
= xx.xx
(
ns
)
RST Delta To
Autozero
Current 1 & 2 = xx.xx
mA
Relay 1 & 2 =
O
p
en / Closed
4 mA ( 1 & 2 ) = xxxx
20mA ( 1 & 2 ) = xxxx
Correction S.E. = 1.0

NT214B GB1 20 / 26
8-11 : Optional menus or readings concerning MiniSonic P-B two-pipes version
The optional menus concern the second pipe and permit to validate the second probes
connector. The first and more important is in the Echo menu : Nb of Chords = 1 or 2
The MiniSonic P-B can calculate a QTresult from Q1 & Q2 : sum , difference … Its
calculation formula must be entered by using our PC Software .
Concerning specific menus or displays available on LCD and Keypad , we can mention :
Measurement Display menu :
- Display of distance D.S. 1 & 2 for the two sets of probes (same reference)
- Display of calculated flow QTfrom entered formula
- Display of Gains 1 & 2 plus I.Q. 1 & 2 for the two pipes.
- Display of the two different flows Q1 & Q2 in the two pipes.
- Display of the two flow velocity and also the two sound speeds.
- Display of the two time of flight and the two Delta T on the two pipes.
- Display of the two hydraulic information’s Kh 1 & 2 and Reynolds number Rey 1 & 2
Calibration Allowed menu : identical to MiniSonic-P version
Pipe Settings menu :
- Entering for pipe 1 & 2 diameter and circumference: ext D 1 = xxxx.x / ext D 2 = xxxx.x
- Entering of pipe 1 & 2 materials: Pipe 1 = / Pipe 2 = …
- Entering of pipe 1 & 2 thickness: Thickness 1 = xx.x / Thickness 2 = xx.x (mm)
Q Settings menu : identical to MiniSonic-P version . These data are common to the two
pipes.
Probe / Echo Settings menu :
- Number of pipes / chords = 1 or 2
•If transducer choice is SE, mounting mode ( / , V , N , W ) must be the same for
the two pipes
•If choice is SM, it is possible to set separately the distances L 1 & 2 and D & & 2
- Management of amplification gains 1 & 2: Gain 1 = ESC … / Gain 2 = Auto …Manual
- Management of the two gains in Manual mode: Gain 2 = xx dB or
- Management of the two margins in Auto mode: Margin 2 = xx dB
General Settings menu : identical to MiniSonic-P menu but
- Possibility to copy QT or Q1 or Q2 as a 4 – 20 mA output
- Possibility to set Tot 1 or Tot 2 on flows Q& or Q2 or QT
Zero / Auto-Zero Settings menu:
- Possibility to do the Auto-Zero separately on pipes 1 & 2
- Possibility to set or reset separately Delta To 1 & 2
Ouuput current Settings , Factory settings and I/O Test menus: as MiniSonic-P
Echo Display menu: it put multiplexing off for signal controls with oscilloscope.
This manual suits for next models
1
Table of contents
Other Ultraflux Measuring Instrument manuals

Ultraflux
Ultraflux UF 831 User manual

Ultraflux
Ultraflux Uf 841 User manual

Ultraflux
Ultraflux Minisonic Series User manual

Ultraflux
Ultraflux Uf 821 User manual

Ultraflux
Ultraflux UF 801-PB User manual

Ultraflux
Ultraflux Minisonic II Portable User manual

Ultraflux
Ultraflux Uf 811 CO User manual

Ultraflux
Ultraflux Minisonic_600-2 User manual

Ultraflux
Ultraflux UF 831 User manual

Ultraflux
Ultraflux UF 801-P User manual