01865 767676
www.unicol.com
3
Revised 14/12/20
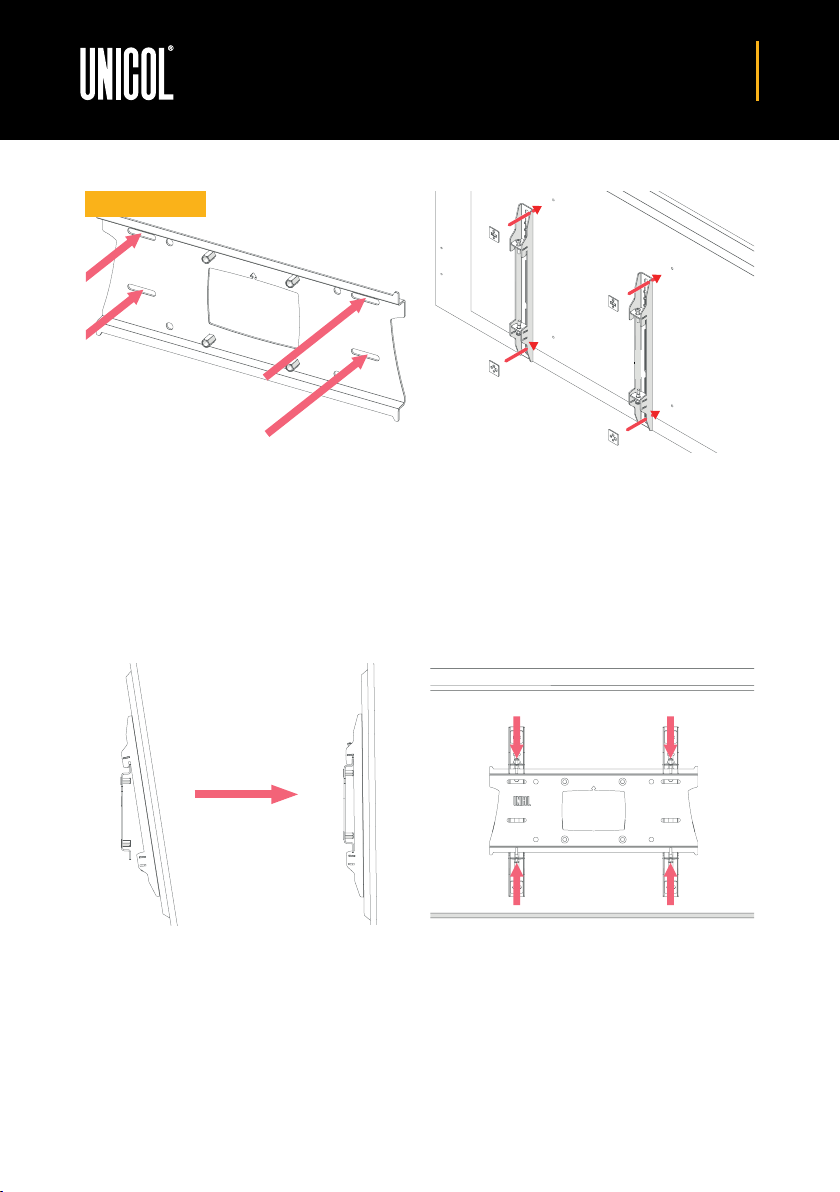
STEP 1
Using the 4 - 8 wall mounting slots cut out on the
back plate, determine where you want to install
your mount, mark it and fix into position.
Please consider cabling and wall fixings prior to
installation. Please check surface is capable of
supporting 5x the combined solutions weight.
STEP 2
Utilising the tag locks and fixing pack provided with
your mount, attach the arms to the back of your
screen.
Ensure the arms are the correct way up before
tightening - the ‘hook’ part of the arm should be at
the top.
STEP 3
Using another team member, lift the screen up and
gradually offer it up to the back plate. Gently tilting
the screen forward, hook the arms over the lip of
the back plate and lower once in position.
Centre the screen horizontally by sliding from side
to side until you are happy with the position.
STEP 4
Once centered, ensure the bottom screws are not
screwed tight and screw down the top screws to
level the screen. Once level tighten bottom screws
to secure the mount. ALT: If using tilting arms, this
is when you can adjust them to suit.
Note that you won’t be able to adjust the screens
position after the screws have been tightened.
WALL FIXING