01865 767676
www.unicol.com
3
Revised 15/12/20
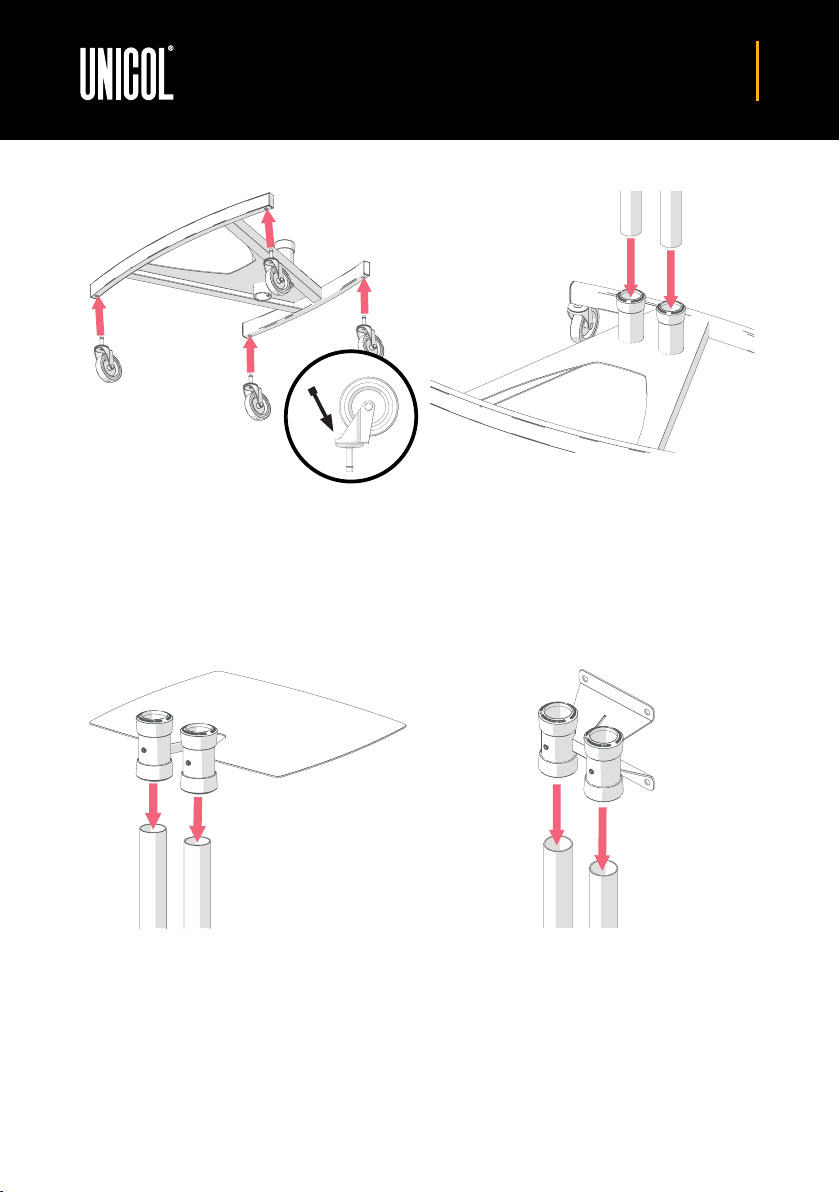
STEP 1
Place base upside down on the floor.
Locate castors and push into the four holes until
they click into place.
Please Note; you may require a mallet - if this is
the case, the point of contact must be on the area
shown above. If your base comes with braked
wheels, they will already be bolted into place.
STEP 2
Placing the base upright again and locking the
brakes on the castors, or ensuring the base is
secure, place the two 1500mm column into the
central sockets. Leave the grub screws, located at
the rear, loose for now.
STEP 3 [OPTIONAL]
If adding a shelf or locking cabinet, place the
sockets over the columns and push down until
at desired height. Gently tighten grub screws as
you may want to adjust the height of this after
completing the assembly.
STEP 4
Place the column adapter over the top of the two
columns (ensuring the grub screws are on the same
side as the rear of the base). Once positioned at
the desired height, tighten the two grub screws
to secure into place. Tighten up the base and
accessory grub screws to secure.