Uniden EZI33XLT User manual

EZI33XLT
Scanner
UB366AV_EZI33XLT_0119.indd 1UB366AV_EZI33XLT_0119.indd 1 2012/01/19 20:58:172012/01/19 20:58:17

PRECAUTIONS
Before you use this scanner, please read and observe the
following:
EARPHONE WARNING!
Use only a genuine Uniden earphone. An incorrect earphone
may be hazardous to your hearing. Turn down volume before
connecting the earphone and then adjust volume to suit.
WARNING!
Uniden does not represent this unit to be waterproof. To
reduce the risk of re or electrical shock, do not expose this unit
to rain or moisture.
IMPORTANT INFORMATION
2
UNIDEN EZI33XLT Scanner
UB366AV_EZI33XLT_0119.indd 2UB366AV_EZI33XLT_0119.indd 2 2012/01/19 20:58:192012/01/19 20:58:19

3
UNIDEN EZI33XLT Scanner
IMPORTANT INFORMATION. . . . . . . . . . . . . . . . . . . . . . . . . . . . . . . .2
PRECAUTIONS. . . . . . . . . . . . . . . . . . . . . . . . . . . . . . . . . . . . . . . . . . . . . . . . 2
ABOUT YOUR EZI33XLT SCANNER. . . . . . . . . . . . . . . . . . . . . . . . . .4
TO CHANGE THE BAND PLAN. . . . . . . . . . . . . . . . . . . . . . . . . . . . . . . . . 4
FEATURES . . . . . . . . . . . . . . . . . . . . . . . . . . . . . . . . . . . . . . . . . . . . . . . .5
WHAT IS SCANNING? . . . . . . . . . . . . . . . . . . . . . . . . . . . . . . . . . . . . . . . . . 7
CONVENTIONAL SCANNING. . . . . . . . . . . . . . . . . . . . . . . . . . . . . . . . . . 7
WHERE TO OBTAIN MORE INFORMATION . . . . . . . . . . . . . . . . . . . . . 7
UNDERSTANDING SCANNING. . . . . . . . . . . . . . . . . . . . . . . . . . . . . .7
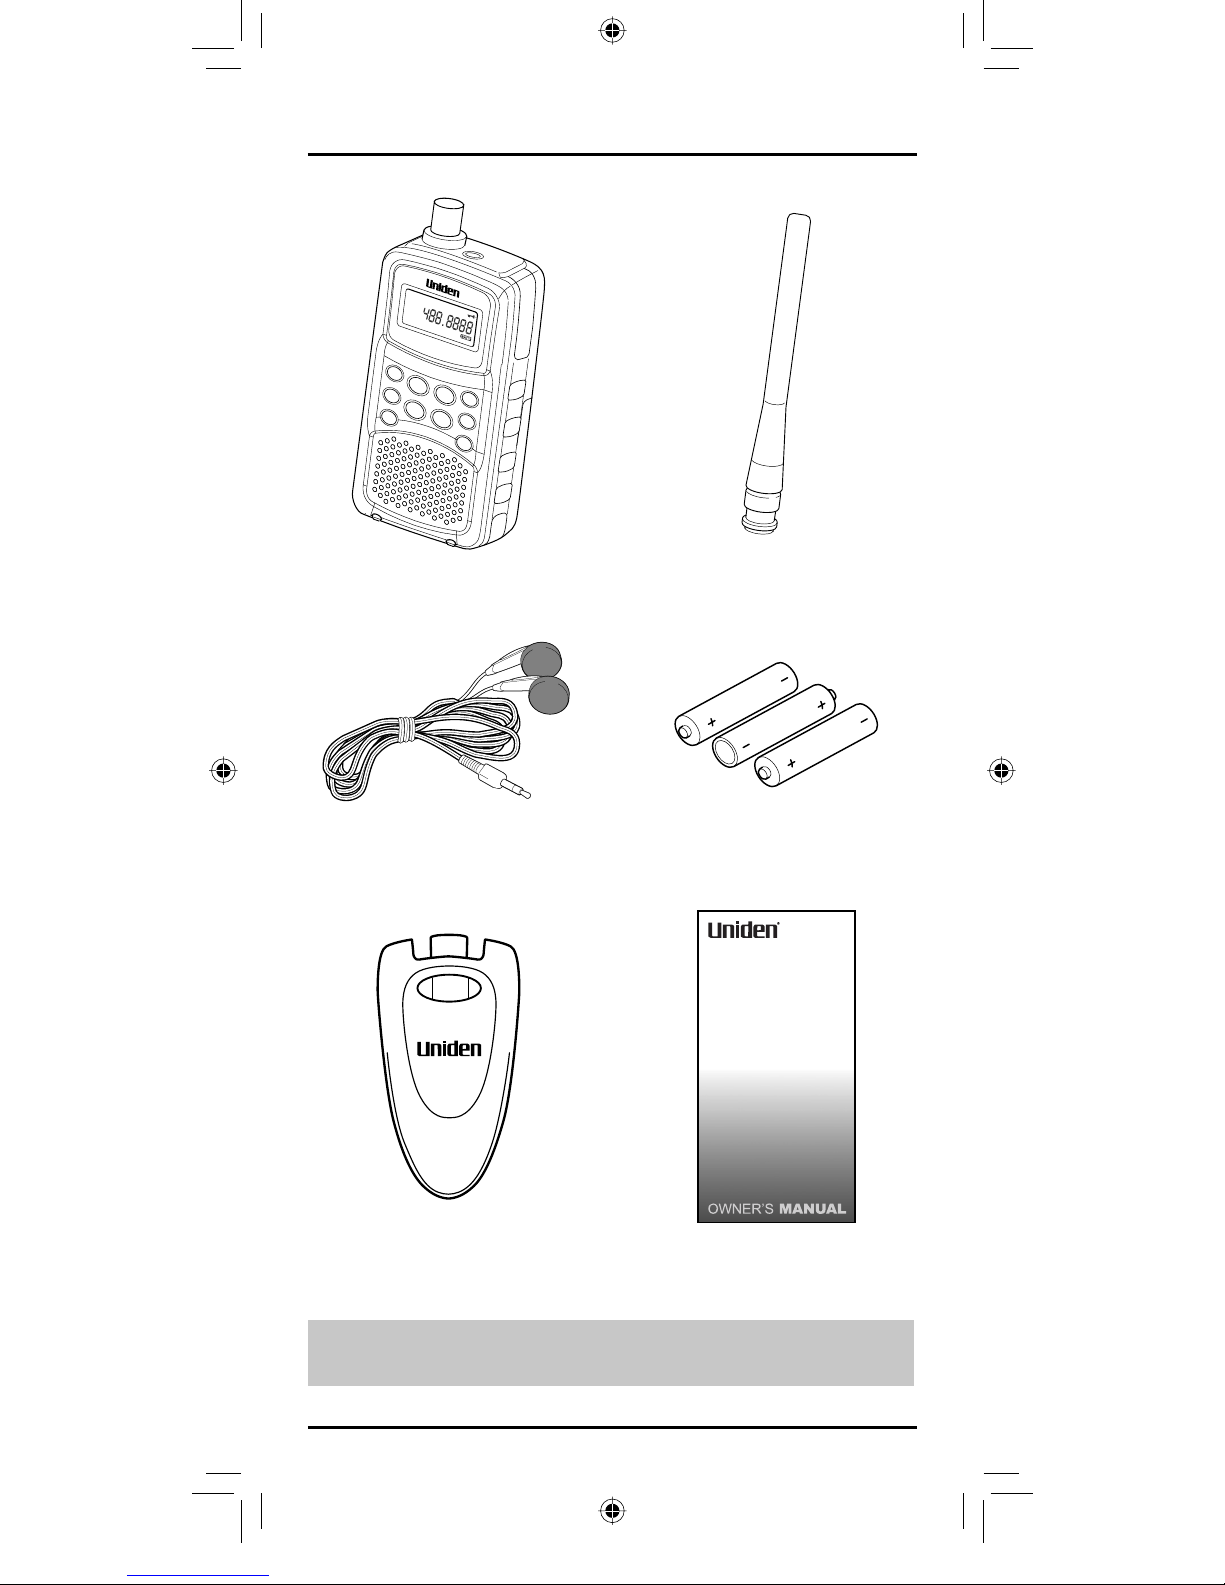
INCLUDED WITH YOUR SCANNER . . . . . . . . . . . . . . . . . . . . . . . . . .8
SETTING UP YOUR SCANNER. . . . . . . . . . . . . . . . . . . . . . . . . . . . . . .9
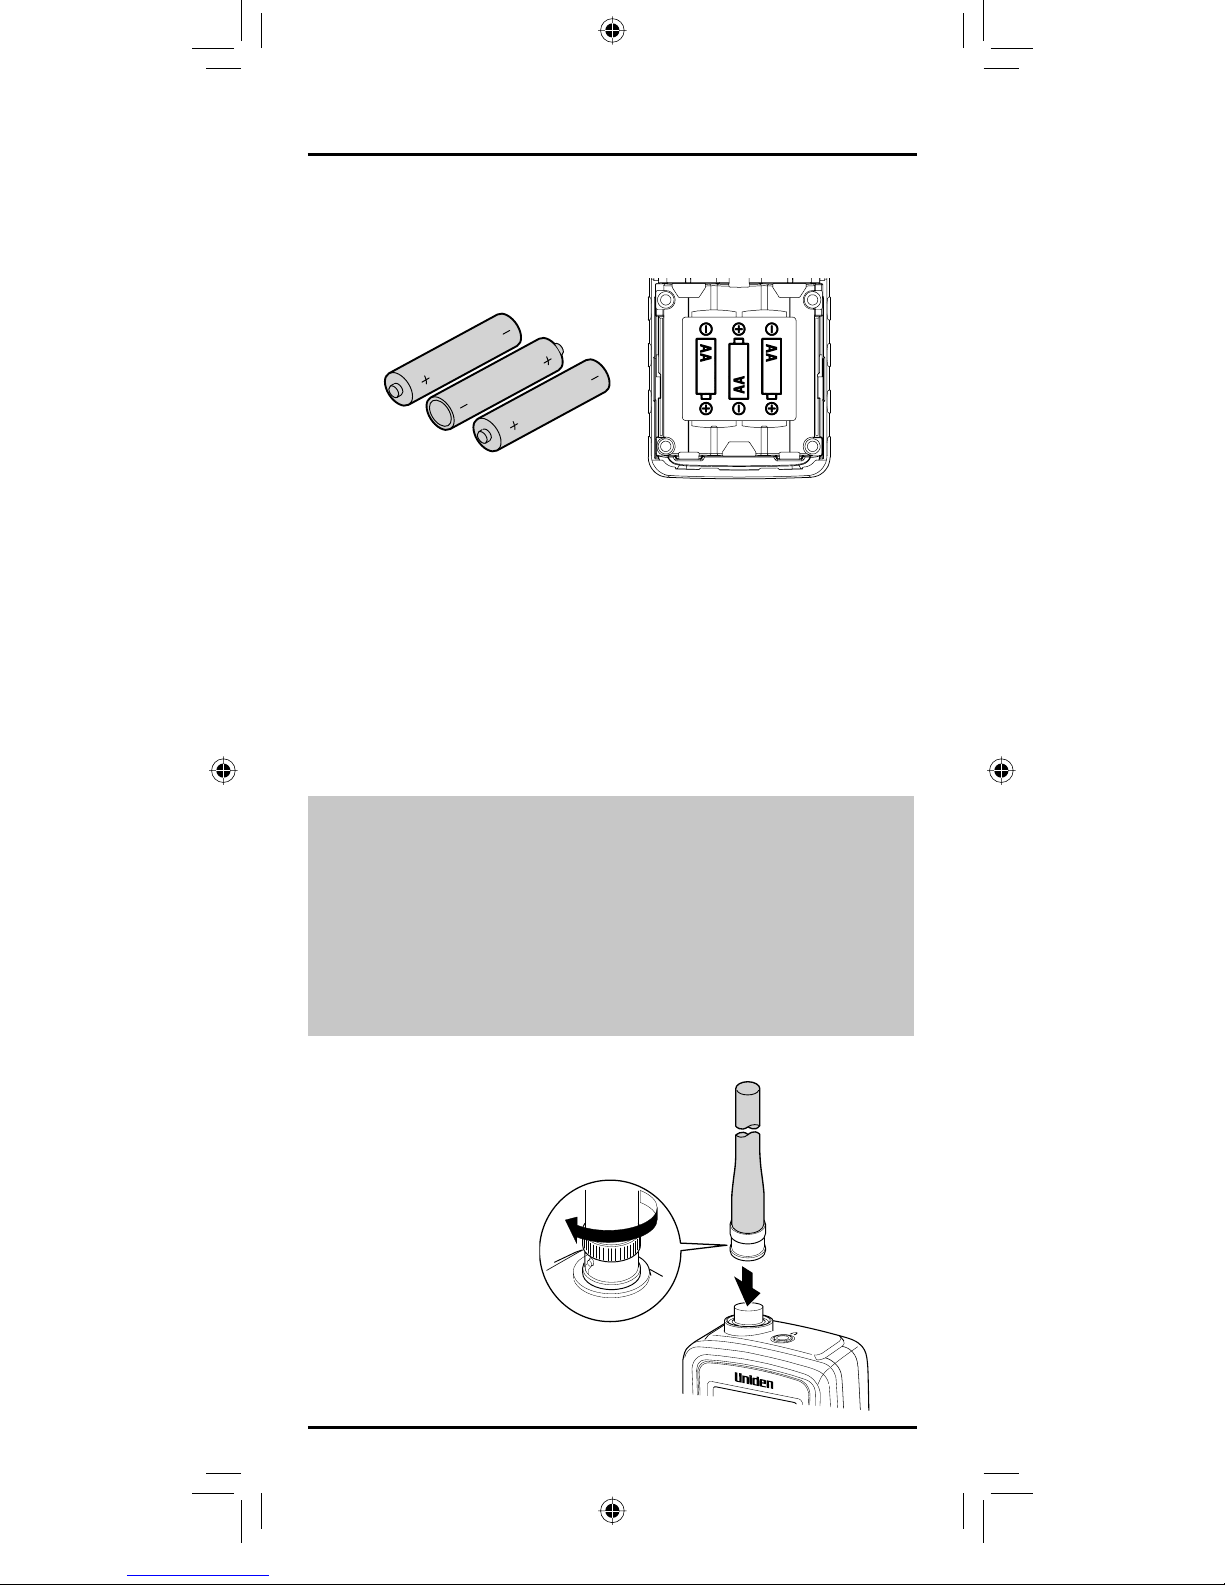
INSTALLING AND REPLACING BATTERIES . . . . . . . . . . . . . . . . . . . . . 9
USING RECHARGEABLE BATTERIES . . . . . . . . . . . . . . . . . . . . . . . . . .10
CONNECTING THE ANTENNA . . . . . . . . . . . . . . . . . . . . . . . . . . . . . . . .10
CONNECTING AN OPTIONAL ANTENNA . . . . . . . . . . . . . . . . . . . . .11
CONNECTING THE EARPHONE. . . . . . . . . . . . . . . . . . . . . . . . . . . . . . .11
ATTACHING THE BELT CLIP . . . . . . . . . . . . . . . . . . . . . . . . . . . . . . . . . .12
EZI33XLT CONTROLS AND DISPLAY . . . . . . . . . . . . . . . . . . . . . . .13
A LOOK AT THE KEYPAD . . . . . . . . . . . . . . . . . . . . . . . . . . . . . . . . . . . . .14
A LOOK AT THE DISPLAY. . . . . . . . . . . . . . . . . . . . . . . . . . . . . . . . . . . . .16
OPERATION . . . . . . . . . . . . . . . . . . . . . . . . . . . . . . . . . . . . . . . . . . . . . .17
TO TURN POWER ON OR OFF . . . . . . . . . . . . . . . . . . . . . . . . . . . . . . . .17
TO ADJUST THE SQUELCH . . . . . . . . . . . . . . . . . . . . . . . . . . . . . . . . . . .17
TO ADJUST THE VOLUME . . . . . . . . . . . . . . . . . . . . . . . . . . . . . . . . . . . .17
OPERATING MODES . . . . . . . . . . . . . . . . . . . . . . . . . . . . . . . . . . . . . . . . .17
INSTANT CHANNELS . . . . . . . . . . . . . . . . . . . . . . . . . . . . . . . . . . . . . . . .18
SERVICE SCAN. . . . . . . . . . . . . . . . . . . . . . . . . . . . . . . . . . . . . . . . . . . . . . .18
FAVOURITES SCAN . . . . . . . . . . . . . . . . . . . . . . . . . . . . . . . . . . . . . . . . . .19
SCANNING SERVICE & FAVOURITES . . . . . . . . . . . . . . . . . . . . . . . . . .19
SELECT STEP FREQUENCY . . . . . . . . . . . . . . . . . . . . . . . . . . . . . . . . . . .20
LOCKOUT PREPROGRAM FREQUENCY . . . . . . . . . . . . . . . . . . . . . .20
LOCKOUT FAVOURITE CHANNEL. . . . . . . . . . . . . . . . . . . . . . . . . . . . .20
STORING FREQUENCIES . . . . . . . . . . . . . . . . . . . . . . . . . . . . . . . . . . . . .21
EDITING FREQUENCIES . . . . . . . . . . . . . . . . . . . . . . . . . . . . . . . . . . . . . .22
USING KEYLOCK. . . . . . . . . . . . . . . . . . . . . . . . . . . . . . . . . . . . . . . . . . . . .22
USING THE DISPLAY BACKLIGHT. . . . . . . . . . . . . . . . . . . . . . . . . . . . .22
TROUBLESHOOTING . . . . . . . . . . . . . . . . . . . . . . . . . . . . . . . . . . . . .23
RESETTING THE SCANNER . . . . . . . . . . . . . . . . . . . . . . . . . . . . . . . . . . .24
CARE AND MAINTENANCE. . . . . . . . . . . . . . . . . . . . . . . . . . . . . . . .25
GENERAL USE . . . . . . . . . . . . . . . . . . . . . . . . . . . . . . . . . . . . . . . . . . . . . . .25
LOCATION. . . . . . . . . . . . . . . . . . . . . . . . . . . . . . . . . . . . . . . . . . . . . . . . . . .25
CLEANING . . . . . . . . . . . . . . . . . . . . . . . . . . . . . . . . . . . . . . . . . . . . . . . . . .25
BIRDIES . . . . . . . . . . . . . . . . . . . . . . . . . . . . . . . . . . . . . . . . . . . . . . . . . . . . .25
SPECIFICATIONS . . . . . . . . . . . . . . . . . . . . . . . . . . . . . . . . . . . . . . . . .26
DECLARATION OF CONFORMITY . . . . . . . . . . . . . . . . . . . . . . . . . .27
CONTENTS
UB366AV_EZI33XLT_0119.indd 3UB366AV_EZI33XLT_0119.indd 3 2012/01/19 20:58:192012/01/19 20:58:19

Thank you for purchasing a Uniden EZI33XLT Handheld
Scanner. The scanner is versatile, compact, and easy to use.
The EZI33XLT comes pre-programmed with frequencies -
organised into 9 Service banks for monitoring emergency,
freenet, PMR, marine, VHF-Low band, FM radio band, Air band,
VHF-High band and UHF band frequencies.
Each Service bank has a Favourites bank for storing your
favourite frequencies. Up to 180 frequencies can be stored
in Favourites banks. Frequencies in Favourites can be copied
from the Service bank. Manually store your favourite sports
or events frequencies found through the internet and other
sources.
Additionally you have 3 Instant channels which are one-touch
keys to store your 3 favourite frequencies.
TO CHANGE THE BAND PLAN
You can change the band coverage by band plan.
To switch the band plan between 1 and 2.
1. Make sure the power is turned o.
2. While holding down (1) or (2) key, turn on the scanner.
Band Plan 1…(1) key
Band Plan 2…(2) key
Notice: Any Band Plan change will modify the factory preset
channel steps settings of all bands and the memory contents
of the Emergency bank.
ABOUT YOUR EZI33XLT SCANNER
4
UNIDEN EZI33XLT Scanner
UB366AV_EZI33XLT_0119.indd 4UB366AV_EZI33XLT_0119.indd 4 2012/01/19 20:58:192012/01/19 20:58:19

5
UNIDEN EZI33XLT Scanner
Band Plan 1
Range (MHz) Step (kHz) Mode
78.0000 - 79.9950 5 FM
80.0000 - 82.9950 5 FM
83.0000 - 84.0100 5 FM
84.0150 - 87.2950 5 FM
87.3000 - 107.9500 50 FMB
108.0000 - 136.99166 8.33 AM
137.0000 - 137.99375 6.25 FM
138.0000 - 143.99375 6.25 FM
144.0000 - 145.99375 6.25 FM
146.0000 - 155.99375 6.25 FM
156.0000 - 157.43125 6.25 FM
157.4375 – 157.99375 6.25 FM
158.0000 - 160.59375 6.25 FM
160.6000 - 162.0250 6.25 FM
162.03125 - 162.59375 6.25 FM
162.6000 - 174.0000 6.25 FM
406.0000 - 439.99375 6.25 FM
440.0000 - 449.99375 6.25 FM
450.0000 - 465.99375 6.25 FM
466.0000 - 469.99375 6.25 FM
470.0000 - 512.0000 6.25 FM
Band Plan 2
Range (MHz) Step (kHz) Mode
78.0000 - 79.9950 5 FM
80.0000 - 82.9950 5 FM
83.0000 - 84.0100 5 FM
84.0150 - 87.2950 20 with 15 Oset FM
87.3000 - 107.9500 50 FMB
108.0000 - 136.99166 8.33 AM
137.0000 - 137.9950 5 FM
138.0000 - 143.9950 5 FM
144.0000 - 145.9875 12.5 FM
FEATURES
UB366AV_EZI33XLT_0119.indd 5UB366AV_EZI33XLT_0119.indd 5 2012/01/19 20:58:192012/01/19 20:58:19

146.0000 - 155.9900 10 FM
156.0000 - 157.4250 12.5 FM
157.4375 – 157.9875 12.5 FM
158.0000 - 160.5875 12.5 FM
160.6000 - 162.0250 12.5 FM
162.0300 - 162.5900 10 FM
162.6000 - 174.0000 10 FM
406.0000 - 439.99375 6.25 FM
440.0000 - 449.99375 6.25 FM
450.0000 - 465.9900 10 FM
466.0000 - 469.9900 10 FM
470.0000 - 512.0000 6.25 FM
“FMB” means FM Broadcast demodulation [WFM (Broadcast)].
PRE-PROGRAMMED SERVICE SCAN
9 banks of pre-programmed frequencies ready for scanning.
FAVOURITE SCAN
Up to 180 user programmable frequencies can be stored and
scanned in Favourites scan mode. Each SERVICE has a FAVOURITES
bank for storing and scanning up to 20 of your favourite frequencies.
INSTANT CHANNEL
3 one-touch keys to store your 3 favourite frequencies.
DROPOUT DELAY
The scanner, during scan, pauses at the end of a transmission to wait
for a reply. Delay time is 2 seconds.
LCD BACKLIGHT
You can turn the orange LCD back light on/o.
KEY LOCK
Lets you lock the scanner’s keys to help prevent accidental changes
to the scanner’s programming.
MEMORY BACK UP
Keeps the frequencies stored in memory for an extended time if the
scanner loses power.
BATTERY LOW ALERT
Warns you when the battery power gets low.
LOCK-OUT
lets you set your scanner to skip over specied channels or
frequencies when scanning.
FEATURES
6
UNIDEN EZI33XLT Scanner
UB366AV_EZI33XLT_0119.indd 6UB366AV_EZI33XLT_0119.indd 6 2012/01/19 20:58:192012/01/19 20:58:19

7
UNIDEN EZI33XLT Scanner
This section provides you with background on how scanning
works. You don’t really need to know all of this to use your scanner,
but some background knowledge will help you get the most from
your EZI33XLT.
WHAT IS SCANNING?
Unlike standard AM or FM radio stations, most two-way
communications do not transmit continuously. Your EZI33XLT
scans programmed channels until it nds an active frequency,
then stops on that frequency and remains on that channel as
long as the transmission continues. When the transmission ends,
the scanning cycle resumes until the scanner receives another
transmission.
CONVENTIONAL SCANNING
Conventional scanning is a relatively simple concept. Each
group of users in a conventional system is assigned a single
frequency (for simplex systems) or two frequencies (for repeater
systems). Any time one of them transmits, their transmission
always goes out on the same frequency. Up until the late 1980’s
this was the primary way that radio systems operated.
Even today, there are many 2-way radio users who operate
using a conventional system:
• Emergency Services (Police/Fire/Ambulance)
• Freenet
• PMR
• Marine Radio
• Aircraft
• Many business radio users
When you want to store a conventional system, all you need
to know is the frequencies they operate on. When you are
scanning a conventional system, the scanner stops very
briey on each channel to see if there is activity. If there isn’t,
the scanner quickly moves to the next channel. If there is,
then the scanner pauses on the transmission until it is over.
WHERE TO OBTAIN MORE INFORMATION
By itself, this manual really only provides part of what you need to
know to have fun scanning – how to program and use the scanner.
UNDERSTANDING SCANNING
UB366AV_EZI33XLT_0119.indd 7UB366AV_EZI33XLT_0119.indd 7 2012/01/19 20:58:192012/01/19 20:58:19

NOTE: If any of these items are missing or damaged, contact
your place of purchase.
INCLUDED WITH YOUR SCANNER
8
UNIDEN EZI33XLT Scanner
EZI33XLT Antenna
Earphone 3x AA Alkaline
Batteries
Owner’s ManualBelt Clip
EZI33XLT
Scanner
UB366AV_EZI33XLT_0119.indd 8UB366AV_EZI33XLT_0119.indd 8 2012/01/19 20:58:192012/01/19 20:58:19

9
UNIDEN EZI33XLT Scanner
These guidelines will help you install and use your new scanner:
• If your scanner receives interference or electrical noise,
move the scanner or its antenna away from the source.
• To improve the scanner’s reception, use an optional
external antenna designed for multiband coverage. (You
can purchase this type of antenna at a local electronics
store). If the optional antenna has no cable, use 50
ohm coaxial cable for lead-in. A mating plug might be
necessary for the optional antennas.
• Do not use the scanner in high-moisture environments
such as the kitchen or bathroom.
• Avoid placing the scanner in direct sunlight or near
heating elements or vents.
INSTALLING AND REPLACING BATTERIES
You can power your scanner using three AA alkaline batteries.
1. Make sure the power is turned o.
2. If the belt clip is attached, remove it (See page 12).
3. Slide the battery compartment cover.
SETTING UP YOUR SCANNER
UB366AV_EZI33XLT_0119.indd 9UB366AV_EZI33XLT_0119.indd 9 2012/01/19 20:58:192012/01/19 20:58:19

4. Install three batteries in the compartment as indicated by
the polarity symbols (+ and -) marked inside.
5. Replace the cover.
USING RECHARGEABLE BATTERIES
You can also use three rechargeable batteries (Ni-MH) to
power your scanner. Before you use rechargeable batteries,
make sure the batteries are fully charged.
CAUTIONS:
• Use only fresh batteries of the required size and
recommended type.
• Always remove old or weak batteries. Batteries can leak
chemicals that destroy electronic circuits.
• Do not mix old and new batteries, dierent types of
batteries (standard, alkaline, or rechargeable), or
rechargeable batteries of dierent capacities.
CONNECTING THE ANTENNA
SETTING UP YOUR SCANNER
10
UNIDEN EZI33XLT Scanner
UB366AV_EZI33XLT_0119.indd 10UB366AV_EZI33XLT_0119.indd 10 2012/01/19 20:58:192012/01/19 20:58:19

11
UNIDEN EZI33XLT Scanner
To attach the supplied exible antenna to the connector on
the top of your scanner, align the slots around the antenna’s
connector with the tabs on the scanner’s BNC connector.
Then slide the antenna’s connector down over the scanner’s
connector and rotate the antenna connector’s outer ring
clockwise until it locks into place.
CONNECTING AN OPTIONAL ANTENNA
The scanner’s BNC connector makes it easy to connect a variety of
optional antennas, including an external mobile antenna or outdoor
base station antenna.
NOTE: Always use 50-ohm, RG-58, or RG-8, coaxial cable to
connect an outdoor antenna. If the antenna is over 15 metres
from the scanner, use RG-8 lowloss dielectric coaxial cable. You
can get a BNC adapter at your local electronics store.
CONNECTING THE EARPHONE
For private listening, you can plug the 3.5mm miniplug
earphone into the headphone jack on top of your scanner.
This automatically disconnects the internal speaker.
WARNING!
If you connect an external speaker to the scanner’s headphone
jack, never connect the audio output line to a power supply
and ground. This might damage the scanner.
SETTING UP YOUR SCANNER
UB366AV_EZI33XLT_0119.indd 11UB366AV_EZI33XLT_0119.indd 11 2012/01/19 20:58:192012/01/19 20:58:19

ATTACHING THE BELT CLIP
To make your scanner easier to carry when you are on the go,
use the supplied belt clip. Slide the belt clip into the hanger
piece on the back of the scanner. To remove, slide up the belt
clip pulling the pinch at the middle of the belt clip.
SETTING UP YOUR SCANNER
12
UNIDEN EZI33XLT Scanner
Pinch
UB366AV_EZI33XLT_0119.indd 12UB366AV_EZI33XLT_0119.indd 12 2012/01/19 20:58:192012/01/19 20:58:19

13
UNIDEN EZI33XLT Scanner
EZI33XLT CONTROLS AND DISPLAY
Antenna
Display
Keypad
Earphone Jack
UB366AV_EZI33XLT_0119.indd 13UB366AV_EZI33XLT_0119.indd 13 2012/01/19 20:58:192012/01/19 20:58:19

A LOOK AT THE KEYPAD
Your scanner’s keys have various functions labelled on the key
tops and below the keys.
Key Name Description
• Press to go to volume control mode.
• Press to go to squelch control mode.
• Press to go to step mode for VHF-Low,
FM, AIR, VHF-High and UHF bank.
• Press & hold this key to disable the
keypad.
• Press to lock out a selected favourite
channel or specied preprogram
frequency.
• Press & hold to clear all lockout
frequencies in Service Scan Mode
(include hold mode).
• Press & hold to clear all lockout channels
in Favourite scan mode (include hold
mode).
• Press & hold to clear channel memory in
Editing Favourite or Instant channel.
• Press to turn on/o the LCD back light.
• Press & hold to turn the power on/o.
• Press to move the digit to right in Edit
Favourite / Instant Channel Mode.
• Press to select Instant channel 1.
• Press & hold to store Instant channel 1.
EZI33XLT CONTROLS AND DISPLAY
14
UNIDEN EZI33XLT Scanner
UB366AV_EZI33XLT_0119.indd 14UB366AV_EZI33XLT_0119.indd 14 2012/01/19 20:58:192012/01/19 20:58:19

• Press to select Instant channel 2.
• Press & hold to store Instant channel 2.
• Press to select Instant channel 3.
• Press & hold to store Instant channel 3.
• Press to move the digit to left in Edit
Favourite / Instant Channel Mode.
• Press to toggle change the service bank.
• Press & hold to toggle between Service
Scan Mode and Favourite Scan Mode. (Or
between Service Scan Hold Mode and
Favourite Scan Hold Mode.)
• Press to Start/Stop Scan Mode.
• Press & hold to go to Programming
Channel Mode in Service Scan Hold
Mode or while monitoring a frequency.
• Press & hold to store the frequency in
Programming Channel Mode.
• Press to change volume level in volume
control mode.
• Press to change squelch level in squelch
control mode.
• Press to change step in step mode.
• Press to change the direction of the scan.
• Press to resume scanning while
monitoring a frequency.
• Press to select channels in Service
/ Favourite Scan Hold Mode or
Programming Channel Mode.
• Press for more than one second to
rapidly select channels upwards or
downwards in Service / Favourite Scan
Hold Mode or Programming Channel
Mode.
• Press to edit frequencies in Edit Favourite
/ Instant Channel Mode.
• Press for more than one second to
rapidly edit frequencies upwards or
downwards in Edit Favourite / Instant
Channel Mode.
EZI33XLT CONTROLS AND DISPLAY
15
UNIDEN EZI33XLT Scanner
UB366AV_EZI33XLT_0119.indd 15UB366AV_EZI33XLT_0119.indd 15 2012/01/19 20:58:192012/01/19 20:58:19

A LOOK AT THE DISPLAY
The display has indicators that show the scanner’s current
operating status. The display information helps you
understand how your scanner operates.
FAV - appears when Favourites or Instant mode is selected.
EMG - appears when Emergency (EMG) bank is selected.
FRN - appears when Freenet (FRN) bank is selected.
PMR - appears when PMR bank is selected.
MRN - appears when Marine bank is selected.
L/O - appears when you manually select a Favourite
channel or specied preprogram frequency you
locked out.
- appears when keylock is activated.
HOLD - appears when Hold is selected during scanning modes.
- appears during Instant mode
V-LO - appears when VHF Low band is selected.
FM - appears when FM Radio band is selected.
AIR - appears when Aircraft band is selected.
V-HI - appears when VHF High band is selected.
UHF - appears when UHF band is selected.
- appears when battery level is low.
EZI33XLT CONTROLS AND DISPLAY
16
UNIDEN EZI33XLT Scanner
UB366AV_EZI33XLT_0119.indd 16UB366AV_EZI33XLT_0119.indd 16 2012/01/19 20:58:192012/01/19 20:58:19

17
UNIDEN EZI33XLT Scanner
TO TURN POWER ON OR OFF
1. Press & hold (Pwr).
When power is turned
on the band plan is
displayed momentarily.
TO ADJUST THE SQUELCH
1. Press (Vol/Sq/Stp) until a squelch level appears and then
adjust using the / keys. The squelch level can range
from 0 (open squelch) to 10 (tight squelch).
TIP! Set the squelch level to 5 to start, you can always adjust it
later.
TO ADJUST THE VOLUME
1. Press (Vol/Sq/Stp).
Then adjust using the / keys.
The volume level can range from 0
(no volume) to 30 (maximum).
OPERATING MODES
• INSTANT Channels (1), (2) and (3)
• SERVICE scan
• FAVOURITES scan
OPERATION
What is the Squelch?
When there is no signal present on a particular frequency
the radio only hears noise. The Squelch feature mutes the
audio when there is no signal or no strong signal present. By
adjusting the squelch level you control how strong a signal
needs to be to open the squelch and unmute the audio.
UB366AV_EZI33XLT_0119.indd 17UB366AV_EZI33XLT_0119.indd 17 2012/01/19 20:58:192012/01/19 20:58:19

INSTANT CHANNELS
The INSTANT channels are 3 one-touch keys
to store your 3 favourite frequencies. The
channels remain empty until you store a
frequency to them.
At any time press (1), (2) or (3) to select the
instant channel.
To store an Instant channel:
1. Select the desired Instant channel
(1), (2) or (3);
2. Press & hold (Store) to enter the
STORE mode. The editable digit
ashes.
3. Use the
/ / / keys to
select the desired frequency.
4. Press & hold (Store) to store the
frequency to the instant channel.
To store a frequency that is displayed during SCAN mode
to an Instant channel;
1. Press & hold (1), (2) or (3) to immediately store that
frequency to the Instant key.
To clear the Instant channel:
1. Press & hold (Store) to enter the STORE mode in instant
channel.
2. Press & hold (Clr) to clear the frequency.
SERVICE SCAN
The Service mode scans the 9 pre-programmed SERVICE banks;
EMG Emergency (EMG) AIR Aircraft Band
FRN Freenet (FRN) MRN Marine Band
PMR PMR V-HI VHF High Band
V-LO VHF Low Band UHF UHF Band
FM FM Radio Broadcast
OPERATION
18
UNIDEN EZI33XLT Scanner
Ex: Display instant
channel number to a
channel number indication
segment.
UB366AV_EZI33XLT_0119.indd 18UB366AV_EZI33XLT_0119.indd 18 2012/01/19 20:58:192012/01/19 20:58:19

19
UNIDEN EZI33XLT Scanner
FAVOURITES SCAN
Each SERVICE bank has a FAVOURITES bank which remains
empty until you store your favourite frequencies to it.
SCANNING SERVICE & FAVOURITES
To go to scan mode or scan the
next bank:
1. Press (Srvc/Fav) until the bank you
want to scan displays.
When HOLD icon appears, press
(Hold) to resume scan. Scan
starts automatically. When there
are no frequencies stored in the
Favourites bank then the display ashes “noCH”.
NOTE: Only one bank can be scanned at a time.
The banks can be changed in the following order;
EMG > FRN > PMR > MRN > V-LO > FM > AIR > V-HI > UHF
To switch scan modes between
Service scan and Favourite scan:
1. Press & hold (Srvc/Fav). In Service
mode the FAV icon does not show
on the display. In Favourites mode
the FAV icon shows on the display.
To pause scan:
1. Press (Hold) at any time to pause scan on the current
frequency. HOLD icon appears.
2. Use the / keys to go to the
previous/next frequency in the
service bank or the previous/next
channel in the favourites bank.
3. Press (Hold) again to resume scan.
Ex: Service scan, AIR bank
Ex: Favourites scan, no
channels
Ex: Favourites scan
Ex: Service scan
Ex: Service scan Hold
OPERATION
UB366AV_EZI33XLT_0119.indd 19UB366AV_EZI33XLT_0119.indd 19 2012/01/19 20:58:192012/01/19 20:58:19

SELECT STEP FREQUENCY
You can change the steps of VHF-Low, FM, Aircraft, VHF-High
and UHF bank.
1. Press (Srvc) until a bank you want to change appears.
2. Press (Stp) until a step mode appears.
3. Use the
/ to select steps from Auto / 5.0 / 6.25 / 10.0 /
12.5 kHz ( The Step for Aircraft bank is 8.33 or 12.5 kHz.)
4. Press (Clr) or (Stp) or wait for 2 seconds to return to the
mode you were in.
LOCKOUT PREPROGRAM FREQUENCY
You can skip up to 40 specied frequencies during a Service scan.
This lets you avoid unwanted frequencies in Service Scan Mode.
To skip a frequency:
1. Press (L/O) when the scanner stops on the frequency in
Service Scan Mode or when you have selected frequency
manually in Service scan hold mode. L/O appears.
To cancel skip for a single frequency:
1.
Manually select the frequency, then (L/O). L/O disappears.
To cancel all skip frequencies:
1. Press (Hold) to stop scanning in Service scan hold mode,
then press & hold (L/O). A conrmation tone sounds.
LOCKOUT FAVOURITE CHANNEL
you can increase the scanning speed by locking out channels
that have a continuous transmission for all the channels in
favourite channel memory.
To lock out a channel:
1. Manually select the channel, then press (L/O). L/O appears.
Note: You can still manually select locked-out channels.
To remove the lockout from a channel:
1. Manually select the channel, then press (L/O). L/O disappears.
OPERATION
20
UNIDEN EZI33XLT Scanner
UB366AV_EZI33XLT_0119.indd 20UB366AV_EZI33XLT_0119.indd 20 2012/01/19 20:58:202012/01/19 20:58:20
Table of contents
Other Uniden Scanner manuals

Uniden
Uniden UBC 61XLT User manual

Uniden
Uniden SDS100 User manual

Uniden
Uniden BC 248CLT User manual

Uniden
Uniden Bearcat UBC 120XLT User manual

Uniden
Uniden BCT8 User manual

Uniden
Uniden BC246T User manual

Uniden
Uniden UBC60XLT User manual

Uniden
Uniden Bearcat BCD396T User manual

Uniden
Uniden UBC396T User manual

Uniden
Uniden UBC 245XLT Trunk Tracker II User manual

Uniden
Uniden BC355C User manual

Uniden
Uniden Bearcat UBC144XLT User manual

Uniden
Uniden BC345CRS User manual

Uniden
Uniden BC 350C User manual

Uniden
Uniden BCD396XT User manual

Uniden
Uniden UBC69XLT User manual

Uniden
Uniden UBCT-9 User manual

Uniden
Uniden Bearcat UBC 70XLT User manual

Uniden
Uniden SC180 User manual

Uniden
Uniden SC230 User manual