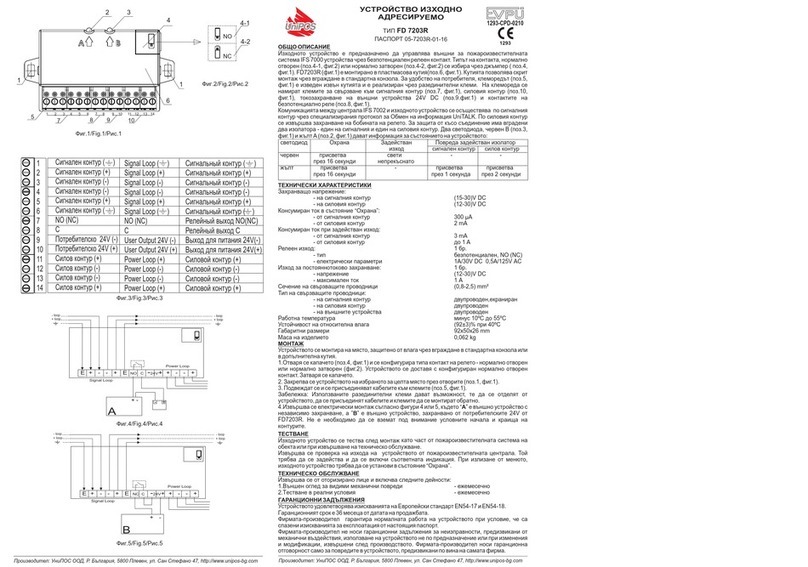
UniPOS FD7203 User manual

Input-Output Device
FD7203
TYPE
1 input / 1 output
Instruction Manual 09-7203-09-19
1293-CPD-0282
General Description
The Input-Output device FD7203 (g.1) is designated to produce and send an electrical signal
to various devices in case of occured events and recording external impacts, typical for a re
condition events.The device is compatible with addressable re control panels IFS7002,
supplementing the possibilities of the addressable systems of series IFS7000.
The device consists of a printed board with elements,
mounted on a plastic base and closed by a cover .The
base has an implemented terminal bus (pos.7 and pos.6,
g.1) through which cabels connect the addressable loop,
the power supply and etc.
Communication between Control Panel IFS7002 and the
input-output device is realized by means of the
addressable loop through a specialized protocol for data
exchanging UniTALK .
Two LED indicators are built-inon the device PCB (pos.1
g.1), illuminated in yellow and red (pos2.g.1) light,
providing device status information.
1
2
3
4
5
6
7
Fig.1 - Picture of input/output module
Теchnical Data
Аddressable loop:
- supply voltage (15÷30)Vdc
- current consumption in duty mode < 350µA
- current consuption in alarm state (2±1)mA
Input: 1 pc.
- “Fault condition” - interruption Rline>25kΩ
- “Fault condition” - short circuit Rline≤2,2kΩ
- “Duty mode” range 5,7kΩ≤Rline<15kΩ
-“Activated input” range (g.3b) 2,2kΩ<Rline<5,7kΩ
-“Activated input” - input does not check for short 0kΩ<Rline<5,7kΩ
circuit (g.3a)
Output: Depending on the conguration and the power supply 1 pc.
(Relay or monitored)
• Relay
- type potential free,
switching functions
- electrical specications 30V DC /1A, 125V AC/0,5A
or
• Monitored
- type potential
- electrical specication (12÷30)Vdc
- peak activation current 400mA
Degree of protection:
IP
30
Operating temperature range from minus 5°С to 40°С
Relative humidity resiatance (no condensation) (95±3) % at 40°C
Dimensions (90x66x22) mm
Weight 0.075 kg
09/09.19
Manufacturer: UniPOS Ltd., 47 San Stefano Street, Pleven 5800, Bulgaria,
http://www.unipos-bg.com

Installation
LED indication (pos.1 и 4, g.1) is providing information for the device condition/status as follows:
- Duty Mode – ashes with discontinuous red and yellow light, every 16 seconds;
- Activated output – ashes with continuous red light;
- Activated input– ashes instantly with red light every 2 seconds;
- Fault condition (short-circuit or interruption in an input or an output ) – ashes with
continuous yellow light;
- Fault condition (activated isolator) - yellow LED ashing briey in 1 second;
- Fault condition (no power to the monitored output (when the supply voltage monitoring is
setted) yellow LED glow constantly;
- Service mode ( successfully created new conguration )- The red LED lights continuously;
- Service mode ( unsuccessfully created new congurationre ) - only yellow LED light;
2. Меchanical installation
2.1 Unpack the 7203 IO module /g. 3, step 1/
2.2 Remove the decorative plastic cover in front of the necessary terminals /g. 3, step 2/
2.3 7203 IO module need to be mounted on the wall using screw /g. 3, step 3A/ or on
DIN rail with 35mm width /g. 3, step 3В/
2.4 The 7203 IO module need to be installed in accordance to one of the connection diagram
described in point 3.2 .
2.5 After Fire panel ON and in case of new module wiring conguration, the module will enter in Fault
condition (exclude the rst module start-up when is connected in according to step 3A - then the module
will enter in Duty mode).
In order to "learn" the new conguration it is required to press and hold for 5 second the tactile button /g
3, step 5/. In case that operation is successfully done the module red LED indication will be activated
(in the left site of the module PCB) /g. 3 step 5/ the module enter in service/system mode. The module will
not communicate with Fie panel.
2.6 Restart the IFS 7002 panel /g. 3, step 6/
*After second or subsequent restart of re panel, the FD 7203 IO module (1 input/ 1 output) will retain the
last congured parameters (operation mode).
1. Conguring of the module operation mode
On the FD 7203 IO module PCB has built-in tactile button (position 2 g. 1). After pressing and holding it
for 5 second (refer point 2.5) the module will congure/recongure the operational mode in accordance to
the electrical installation diagram (point 3).
Note : In order to congure or recongure the FD 7203 IO module need to be powered from the signal loop.
Fig. 2 - Configuration using tactile button
Operating as monitored output
(Checking for power supply)
(Does not check for
power supply)
configuration type
input type
output type
Output is operating as a relay
with potential-free-functions
“C”, “NO” and “NC”
Check for short circuit
of the input
(it will be activated with additional
10КΩ connected in series )
Does not check for short
circuit of the input
(With connected EOL
element 10КΩ )
Manufacturer: UniPOS Ltd., 47 San Stefano Street, Pleven 5800, Bulgaria,
http://www.unipos-bg.com
09/09.19

Фиг. 3
Manufacturer: UniPOS Ltd., 47 San Stefano Street, Pleven 5800, Bulgaria,
http://www.unipos-bg.com
09/09.19

3. Еlectrical installation
The cabels are assigned through terminal bus (pos.7 and 6, g.1).
3.1. Terminal bus
3.1.1. Addressable loop
Terminal 1– shield of the addressable loop;
Terminal 2 – “+“ of the addressable loop;
Terminal 3 – “-” of the addressable loop;
Terminal 4– “-” of the addressable loop;
Terminal 5 – “+” of the addressable loop;
Terminal 6 – shield of the addressable loop;
Note: It is not necessary to note the conditioned beginning and end of addressable loop. Polarity is
mandatory when connecting the device.
3.1.2. Input
Terminal 7 – input “IN”;
Terminal 8 – input “IN”
Note: The input line is balanced and checked for interruption.
3.1.2.1 In case that the input is congured to be activated with 10kohms connected in series (check for
short-circuit check switched ON) g.2 and wires are connected in according to g.3A and g.3C,
the panel monitor the input for short circuit.
3.1.2.2 In case that the input is congured to be activated with short circuit
(check for short circuit switched OFF) g 2 and wires are connected in according to g. 3B and 3D,
the panel does not check/monitor for fault short-circuit.
Important note: Activation of the input is done through non-potential contact (dry contact).
3.1.3. Output and external power supply
Terminals from 9 to15 depends from congurating of the type output
( g.2 and g.3A or 3B or 3C or 3D).
3.1.3.1. Output, congured as monitored
Terminal 9 - “- Out” - negative terminal of monitored output;
Terminal 10 - “+Out” - positive terminal of monitored output;
Terminal 11- it is required to make short circuit between terminal 12;
Terminal 13 - do not use.
Terminal 14 - “+ ” - positive terminal for assignment of external power supply;
Terminal 15 - “- ” - negative terminal for assignment of external power supply;
3.1.3.2. Output, congured as relay with Non-potential contacts
Terminal 9 - do not use;
Terminal 10 - “C” - common contact of the relay;
Terminal 11 - “NC” - normally closed contact of the relay;
Terminal 12 - do not use;
Terminal 13 - do not use;
Terminal 14 - “NO” - normally open contact of the relay;
Terminal 15 - do not use;
Manufacturer: UniPOS Ltd., 47 San Stefano Street, Pleven 5800, Bulgaria,
http://www.unipos-bg.com
09/09.19

3.2. Wiring diagrams
3.2.1. Using as a relay (dry contact) and/or monitored input - check for short circuit
1 2 3 4 5 6 7 8
E + - - + E
10kΩ
NNOO
10kΩ
IN
Address Loop
C NO
NC
9 10 11 12 13 14
RELAY
check for short circuit of the input andmanaging
of external device through reley
with non-potential contacts
1 2 3 4 5 6 7 8
E + - - + E
10kΩ
NC
IN
Address Loop
C NO
NC
9 10 11 12 13 14
RELAY
1 2 3 4 5 6 7 8
E + - - + E
10kΩ
NC
IN
Address Loop
9 10 11 12
5,6kΩ
1N4001
-Out + + -
+ -
13 5
1
41 16
28V
does not check for short circuit of the input and
managing of external device through reley
with non-potential contacts
3.2.2 Using as a monitored output or monitored (technical common) input
1 2 3 4 5 6 7 8
E + - - + E
10kΩ
NNOO
10kΩ
IN
Address Loop
9 10 11 12
5,6kΩ
1N4001
-
Out + + -
+ -
13 5
1
41 16
28V
check for short circuit of the input and
managing of external device through monitored output
does not check for short circuit of the input and
managing of external device through monitored output
Fig.3A Fig.3B
Fig.3C
Fig.3D
Manufacturer: UniPOS Ltd., 47 San Stefano Street, Pleven 5800, Bulgaria,
http://www.unipos-bg.com
09/09.19

4. Set Up of the Input-Output module FD7203 within the system IFS7000.
Programming of the FD7203 (1 input/1 output) module output is realized from menu “Setup/Loops
/Device Parameters”. Please refer “Instruction manual IFS7002”- т.13.4.3.1 - Menu “Device Parameters”.
Complexity
Input-Output device FD7203 (1input/1output)
- 1 бр.
leaet with the installation steps
- 1 бр.
Resistor 5,6 kΩ for the controllable output
- 1 бр.
Resistor 10 kΩ for the input
- 2 бр.
Diode 1N4001
- 1 бр.
Warranty
The warranty period is 36 months from the date of sale, providing that the installation
requirements have been observed.
The manufacturer does not bear warranty liabilities for damages caused through accidental
mechanical damage, misuse, adaptation or modication after production.
Accessory - installation of a modular box/cabinet
For the In-Out module 7203 IO type is available accessory - a modular box consisting of the
module cabinet. The accessory is used to bind (to cover) the cables to the connection terminals.
UniPOS wishes you a successful work !
Manufacturer: UniPOS Ltd., 47 San Stefano Street, Pleven 5800, Bulgaria,
http://www.unipos-bg.com
09/09.19
47, “San Stefano”str., 5800 Pleven, Bulgaria
e-mail: oce_pleven@unipos-bg.com
Oce building UniPOS
1 " Efr..N.Paskalev" str., Mladost 1, Soa 1784, Bulgaria
tel./fax: +359 2 974 44 69, +359 2 974 39 25
e-mail: oce_so[email protected]
www.unipos-bg.com
Table of contents
Other UniPOS Control Unit manuals
Popular Control Unit manuals by other brands

IEI Technology
IEI Technology AC-KIT-888HD user manual

Omron
Omron CS1W-MC221 - 02-2008 Operation manual

Graco
Graco EM5 Series Instructions-parts list

T&S
T&S B-0475 Installation and maintenance instructions

PalmSens
PalmSens EmStat3+ Getting started

Siemens
Siemens SITRANS FM MAG 8000 IIoT operating instructions