thermostat’s reading will start
at the previous temperature
setting and the previous mode
(Heat, Cool or Off).
Normal Operation
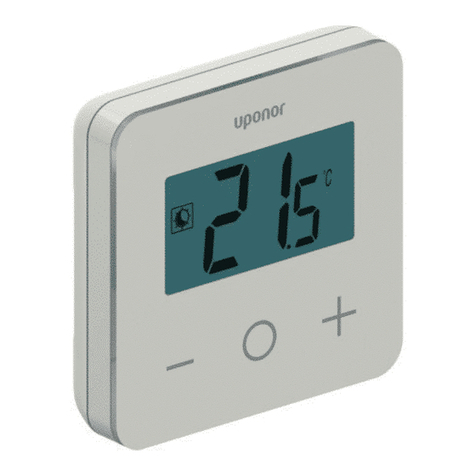
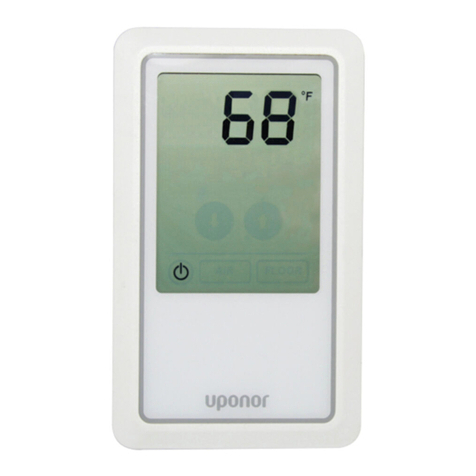
The thermostat displays the current
room temperature measured by the
thermostat along with the mode of
operation. The following icons
indicate the mode of operation.
•None —Thermostat is
turned off.
•Floor with tubing —Heating
mode is active with no call
for heat.
•Floor with tubing and lines
flashing above —Heating
mode is active with a call
for heat.
•Snowflake —Cooling mode is
active with no call for cooling.
•Flashing snowflake —Cooling
mode is active with a call
for cooling.
•Snowflake and radiant panel
—Automatic mode is active.
•Fan —The fan is on.
Adjusting the
Temperature
To adjust the temperature setting,
refer to the following instructions.
Pressing the + (increase or top
button) or – (decrease or bottom
button) changes the desired room
temperature setting.
1. Press either button to enter the
setting program mode.
2. When adjusting the heating
setpoint, the Heating icon will
flash; when adjusting the
cooling setpoint, the Cooling
icon will flash.
Note: In PWM mode, the heating
equipment may temporarily turn off
even when the heating icon is
flashing (indicating a call for heat).
Note: Operating forced-air heat
disables PWM mode. Refer to the
Differential Setting section on
page 4 for further details.
Digital Filtering
The thermostats also feature digital
filtering, meaning the thermostat
continuously measures the room
temperature and employs a digital
filter to create a stable reading and
consistent operation. If each room
temperature reading displayed as it
is sensed, the temperature shown
would appear erratic and
inconsistent. The filtering technique
throws out sensor readings with
large differences from the displayed
temperature and then limits the
amount any individual reading
can affect the overall displayed
reading. This results in a smooth
display and operation.
Note: Due tofiltering, the displayed
room temperature can take up to a
minute to change 1°F (0.5°C).
Important: Uponor thermostats
conform to universal industry
standards. Uponor is not
responsible for damages
resulting from misapplication or
misuse of its products. To avoid
damage tothe thermostat,
install the thermostat with the
power disconnected.
Setting and Adjusting
the Thermostat
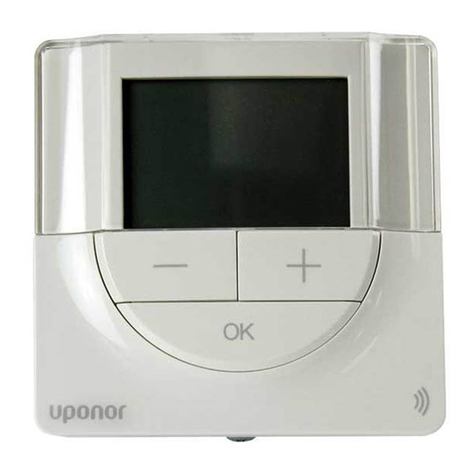
All user functions operate via two
buttons (+ and –) located on the
front of the thermostat case.
Power Up and Power
Interruption
After completing all electrical
connections and properly mounting
the thermostat, apply power to
the system. The thermostat
reading automatically starts at
68°F (20°C) in heating mode,
which is the default temperature
setting and mode.
The Uponor thermostat can recall
the previous temperature setting
and mode if power is interrupted.
When power is restored, the
3. Press the + (top button) to
increase the room setting and
the – (bottom button) to
decrease the room setting. Press
and hold the button to rapidly
change the temperature setting.
4. The thermostat accepts the new
setting five seconds after
pressing the last button; then
the thermostat reverts to
displaying the current room
temperature.
Note: When the mode is set to Off,
temperature settings cannot be
changed or adjusted.
Note: If the thermostat is in
Automatic mode, changing the
setting will change the setpoint that
is currently active. When the
thermostat is set for Automatic
mode, and Cooling mode is active,
changing the setting will affect the
cooling setpoint. When the
thermostat is set for Automatic
mode, and Heating mode is active,
changing the setting will affect the
heating setpoint. The mode icon will
flash to indicate which mode is
active when changing the setpoint
in Automatic mode. To change a
setpoint, that mode must be active
(e.g., if the Cooling mode is active
and the user wants to change the
heating setpoint, the user must
activate the Heating mode to
change the heating setpoint).
Changing Modes
(Heating, Cooling
and Off)
This thermostat does not use a
switch to change the mode from
Heat to Off. To change the modes,
refer to the following instructions.
1. Press both (+ and –) buttons
simultaneously to change
the mode.
2. Ensure the program bar is
flashing to indicate the
thermostat is in the
programming mode.
3. Press the + or – button to
change the mode of operation.
Using the + (top) button or the
–(bottom) button changes the
rotation sequence of the icons
or modes.
3
