manuals.online logo
Brands
  1. Home
  2. •
  3. Brands
  4. •
  5. urban ambiance
  6. •
  7. Outdoor Light
  8. •
  9. urban ambiance UQL1473 User manual

urban ambiance UQL1473 User manual

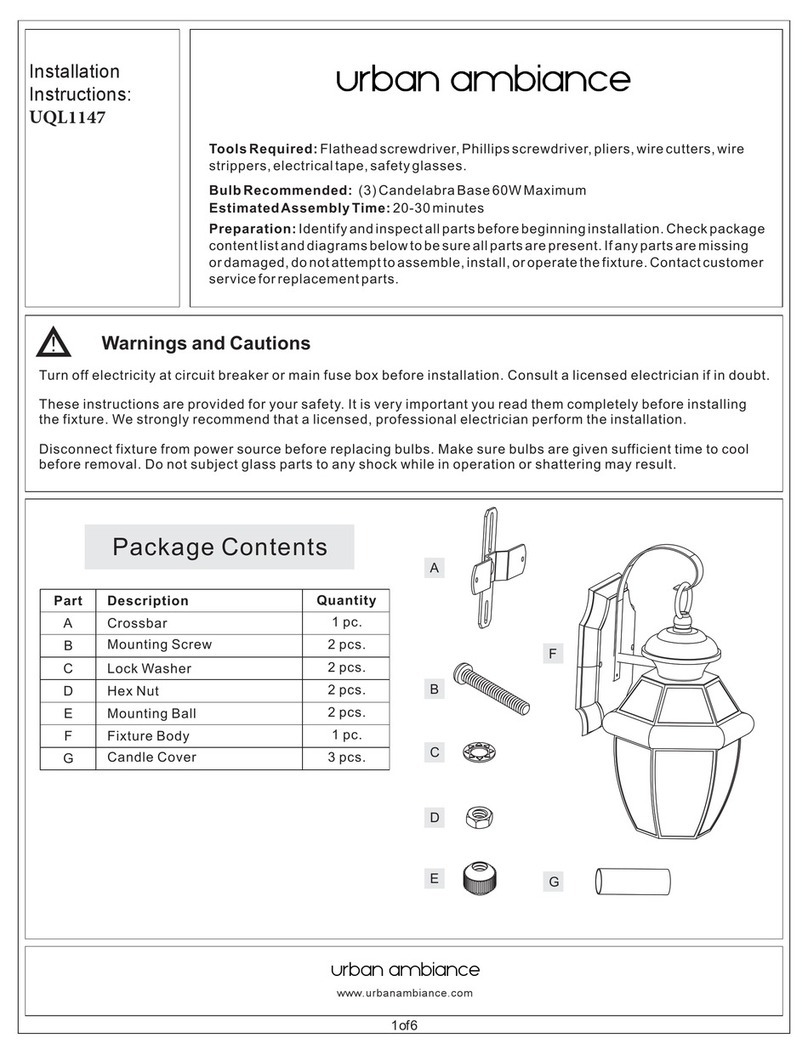
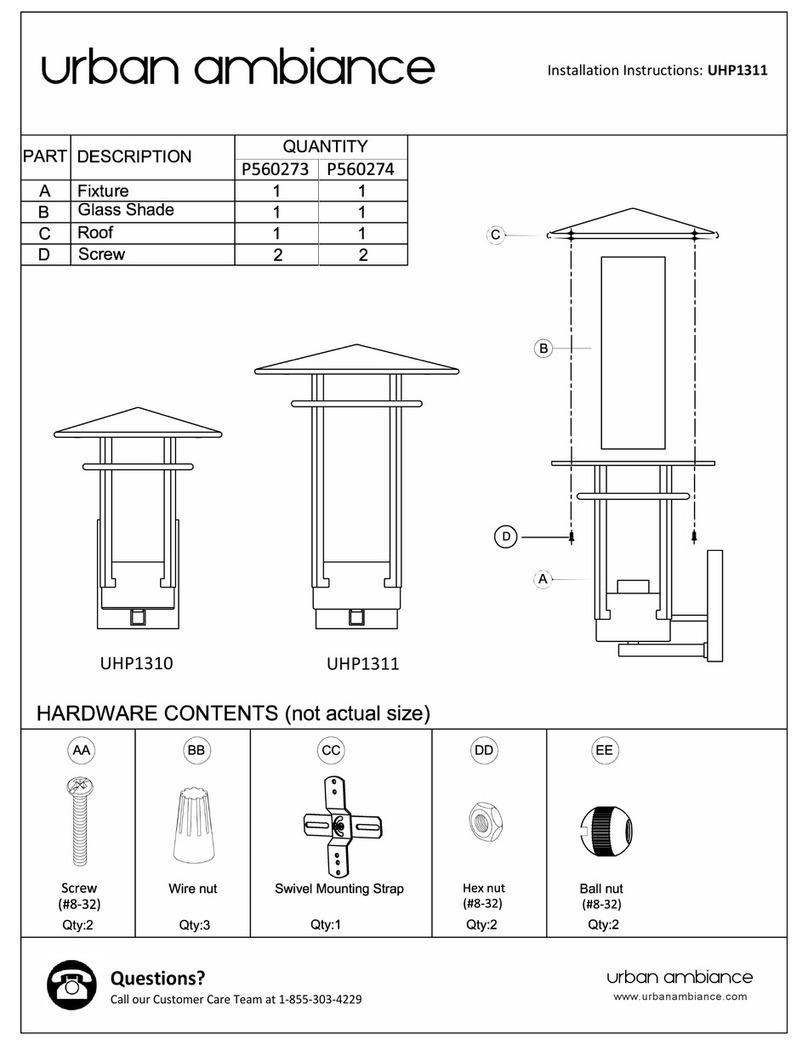
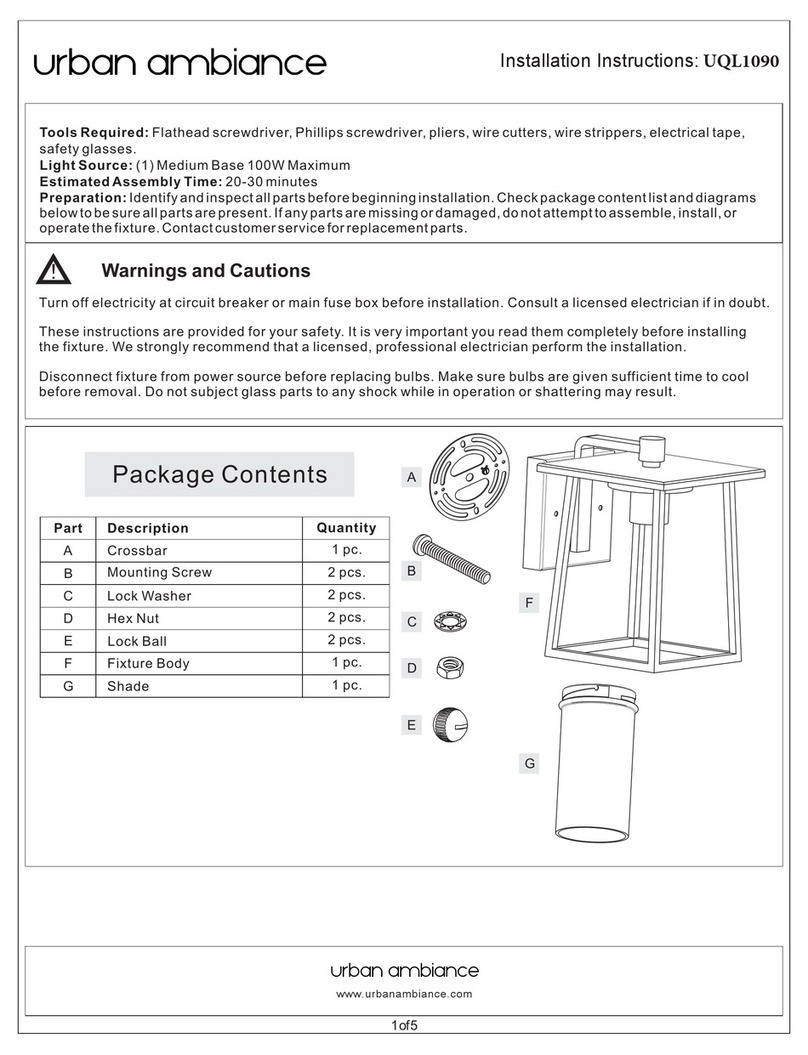
Package Contents
Warnings and Cautions
1of2
Turn off electricity at circuit breaker or main fuse box before installation. Consult a licensed electrician if in doubt.
These instructions are provided for your safety. It is very important you read them completely before installing the fixture. We strongly
recommend that a licensed, professional electrician perform the installation.
Disconnect fixture from power source before replacing bulbs. Make sure bulbs are given sufficient time to cool before removal.
A
Crossbar
Assembly
x1
Pleasegoto forproductcleaningtips.Gotothe selection.
(1)A19MediumBaseBulb100WMaximum,MediumBaseVintageBulbisrecommended,bulbnotincluded.
20-30minutes
Identifyandinspectallpartsbeforebeginninginstallation.Checkpackagecontentlistanddiagramsbelowtoensureallpartsare
present.Ifanypartsaremissingordamaged,donotattempttoassemble,install,oroperatethefixture.Contactyouroriginalplaceofpurchase.
www.quoizel.com Care + Maintenance
LightSource:
EstimatedAssembly Time:
Preparation:
Fixturecanonlybemountedinthedirectionindicatedonpage2.
ToolsRequired:Flatheadscrewdriver,Phillipsscrewdriver,pliers,wirecutters,wirestrippers,electricaltape,safetyglasses.
Fixture Body
x1
C
(Step 2 Continued)
out of the crossbar until the correct length is achieved. Once the
backplate and Fixture Body (E) is secure, remove the mounting ball
and Fixture Body (E).
B
Alternate
Mounting screw
x2
STEP 2 Test Fit the Backplate to the Crossbar Assembly-
A. Remove the mounting balls from the Crossbar Assembly (A). Place
the backplate and Fixture Body (E) onto the Crossbar Assembly (A)
and secure with mounting balls. Note: The backplate and Fixture
Body (E) should be snug against the wall and held tight with the
mounting balls. If it is not, adjust the length of the mounting screws
on the Crossbar Assembly (A) by unscrewing the preassembled hex
nut and lock washer and then screwing the mounting screws in or
E
Mounting Ball
ABackplate
Hex Nut and
Lock Washer Figure 2
E
Mounting Screw
or Alternate Short
Mounting Screw
Lock screw
x2
Arm
x1
D
Cage with
Glass Shade
x1
F
Figure 1
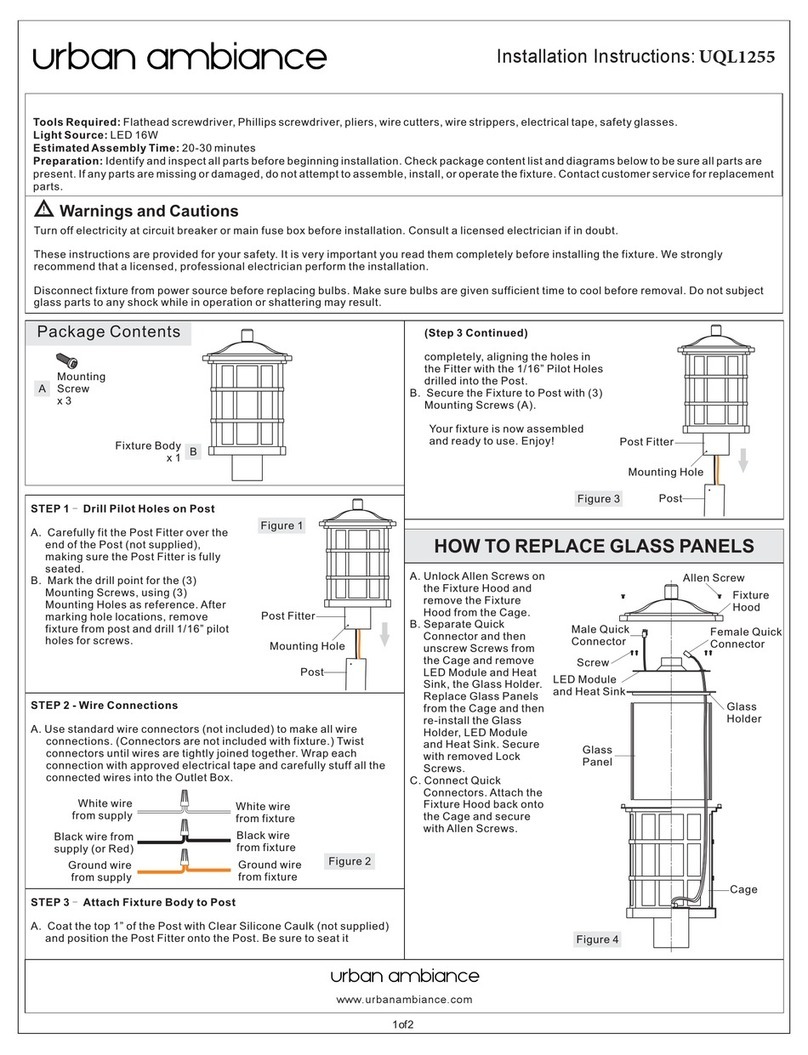
STEP 1 Installing the Crossbar Assembly-
A. Pass the supply wires through the Crossbar Assembly (A). Attach
the Crossbar Assembly (A) to the Outlet Box with the head of the
Green Ground Screw facing you. Secure the Crossbar Assembly (A)
with Outlet Box Screws (not included). Tighten until snug
Note: Use the Alternate Shorter Mounting Screw (B) if your
installation requires a shorter mounting screw.
.
Mounting Screw
or Alternate Short
Mounting Screw
Supply Wires
with Ground Wire
Outlet Box Screws
(not included)
Outlet Box
A
STEP 3 - Install Arm, Bulb and Cage with Glass Shade
A. Remove the lock ball from the top edge of the backplate.
B. Place the scroll end of the Arm (D) into the loop and attach the other
end of the Arm (D) over the bolt on the backplate and secure with
previously removed lock ball. Hand tighten until snug.
C. Insert the bulb onto the socket and screw snugly into place.
D. Place the Cage with Glass Shade (F) over the bulb and socket.
E
F
Vintage Bulb
(recommended
but not included)
C
NeckofSocketCup
D
Lock Ball
Bolt
Backplate
Figure 3
(Scroll End)
Loop
Socket
Installation Instructions: UQL1473
www.urbanambiance.com
2of2
STEP 6 -Apply Silicone Sealer
A. Make sure the exterior wall surface and fixture backplate are free
of dirt before applying caulk. Using exterior grade caulk, caulk over
top of backplate and down both sides. Do not caulk the bottom of
the fixture backplate to ensure proper moisture drainage.
Exterior
Grade Caulk
Exterior
Grade Caulk
Backplate
FINISH: MOTTLED BLACK
NOTE: ALL DIMENSIONS ARE ROUNDED UP
TO THE NEAREST 1/4"
4.5”
14”
Fixture can
only be
mounted in
the direction
indicated
(Step 3 Continued)
Thread Lock Screws (C) onto the cage until it is engaged to the neck
of the socket cup. Carefully release your hands after Cage with
Glass Shade (F) is hung safety by (2) Lock Screws (C).
STEP 4 - Wire Connections
A. Wrap bare or green ground wire around green ground screw on the
crossbar, no less than 2 inches from the end of the wire. Tighten the
green ground screw.
B. Use standard wire connectors (not included) to make all wire
connections. Twist connectors until wires are tightly joined together.
Wrap each connection with approved electrical tape and carefully
stuff all the connected wires into the Outlet Box.
Green Ground Screw
on the Crossbar
White wire
from outlet box White wire
from fixture
Black wire from
outlet box (or Red)
Black wire
from fixture
Bare, or Green
Ground wire
from outlet box
Ground wire
from Fixture
Figure 4
Figure 5
Mounting Ball
A
Backplate
E
Mounting Screw
or Alternate Short
Mounting Screw
Your fixture is now
assembled and
ready to use.
Enjoy!
Figure 6
7.75”
7.75”
7”
7”
STEP 5 - Install the Fixture Body
A. Position the backplate and Fixture Body (E) onto the Crossbar
Assembly (A). Place the holes in the backplate over the mounting
screws or alternative short mounting screws. Secure the Fixture
Body by using the mounting balls and hand tighten the mounting
balls until snug.
www.urbanambiance.com
UQL1473

Other urban ambiance Outdoor Light manuals
urban ambiance UQL1002 User manual

urban ambiance

urban ambiance UQL1002 User manual

urban ambiance UQL1191 User manual

urban ambiance

urban ambiance UQL1191 User manual

urban ambiance UQL1105 User manual

urban ambiance

urban ambiance UQL1105 User manual

urban ambiance UQL1200 User manual

urban ambiance

urban ambiance UQL1200 User manual

urban ambiance UQL1091 User manual

urban ambiance

urban ambiance UQL1091 User manual

urban ambiance UQL1160 User manual

urban ambiance

urban ambiance UQL1160 User manual

urban ambiance UQL1101 User manual

urban ambiance

urban ambiance UQL1101 User manual

urban ambiance UHP4200 User manual

urban ambiance

urban ambiance UHP4200 User manual

urban ambiance UQL1090 User manual

urban ambiance

urban ambiance UQL1090 User manual

urban ambiance Cambridge UQL1142 User manual

urban ambiance

urban ambiance Cambridge UQL1142 User manual

urban ambiance UHP1404 User manual

urban ambiance

urban ambiance UHP1404 User manual

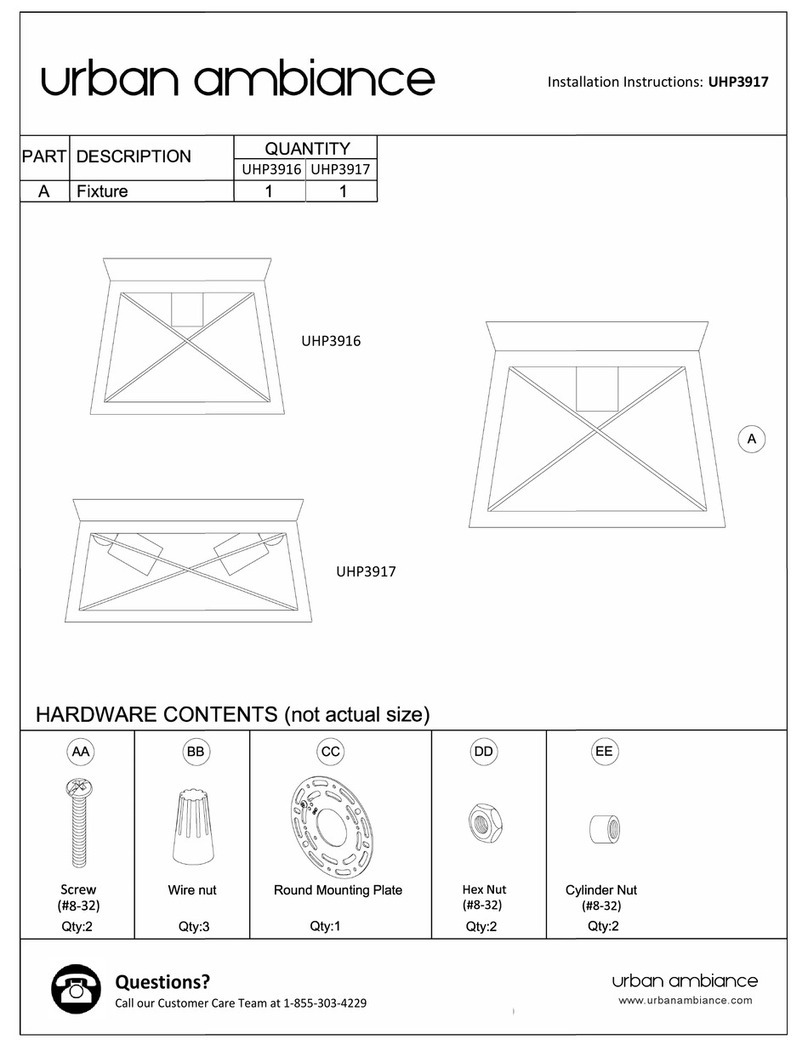
urban ambiance UHP3917 User manual

urban ambiance

urban ambiance UHP3917 User manual

urban ambiance UQL1273 User manual

urban ambiance

urban ambiance UQL1273 User manual

urban ambiance UQL1171 User manual

urban ambiance

urban ambiance UQL1171 User manual

urban ambiance UQL1141 User manual

urban ambiance

urban ambiance UQL1141 User manual
urban ambiance Cambridge UQL1140 User manual

urban ambiance

urban ambiance Cambridge UQL1140 User manual

urban ambiance UHP4065 User manual

urban ambiance

urban ambiance UHP4065 User manual

urban ambiance UHP1305 User manual

urban ambiance

urban ambiance UHP1305 User manual

urban ambiance UHP1325 User manual

urban ambiance

urban ambiance UHP1325 User manual

urban ambiance UHP1376 User manual

urban ambiance

urban ambiance UHP1376 User manual

urban ambiance UQL1244 User manual

urban ambiance

urban ambiance UQL1244 User manual

urban ambiance Paris UQL1375 User manual

urban ambiance

urban ambiance Paris UQL1375 User manual

urban ambiance UQL1402 User manual

urban ambiance

urban ambiance UQL1402 User manual

urban ambiance UQL1154 User manual

urban ambiance

urban ambiance UQL1154 User manual

Popular Outdoor Light manuals by other brands

Kichler Lighting HELEN 37536 instructions

Kichler Lighting

Kichler Lighting HELEN 37536 instructions

Thorn OXANE L installation instructions

Thorn

Thorn OXANE L installation instructions

esotec Solar Globe Light multicolor 20 operating instructions

esotec

esotec Solar Globe Light multicolor 20 operating instructions

mitzi HL200201 ELLIS Assembly and mounting instructions

mitzi

mitzi HL200201 ELLIS Assembly and mounting instructions

HEPER TILA S AFX 3 Module Installation & maintenance instructions

HEPER

HEPER TILA S AFX 3 Module Installation & maintenance instructions

Designplan TRON 180 installation instructions

Designplan

Designplan TRON 180 installation instructions

Sealey LED37 instructions

Sealey

Sealey LED37 instructions

nordlux VEJERS Mounting instruction

nordlux

nordlux VEJERS Mounting instruction

SImx ELITE LED LHTC637 installation instructions

SImx

SImx ELITE LED LHTC637 installation instructions

GEV CAROLINE 10833 manual

GEV

GEV CAROLINE 10833 manual

WE-EF PFL540 LED Installation and maintenance instructions

WE-EF

WE-EF PFL540 LED Installation and maintenance instructions

HEPER DOGO Side LW6048.585-US Installation & maintenance instructions

HEPER

HEPER DOGO Side LW6048.585-US Installation & maintenance instructions

BEGA 84 253 Installation and technical information

BEGA

BEGA 84 253 Installation and technical information

HEPER LW8034.003-US Installation & maintenance instructions

HEPER

HEPER LW8034.003-US Installation & maintenance instructions

HEPER MINIMO Installation & maintenance instructions

HEPER

HEPER MINIMO Installation & maintenance instructions

LIGMAN BAMBOO 3 installation manual

LIGMAN

LIGMAN BAMBOO 3 installation manual

Maretti TUBE CUBE WALL 14.4998.04 quick start guide

Maretti

Maretti TUBE CUBE WALL 14.4998.04 quick start guide

Maxim Lighting Carriage House VX 40428WGOB installation instructions

Maxim Lighting

Maxim Lighting Carriage House VX 40428WGOB installation instructions

manuals.online logo
manuals.online logoBrands
  • About & Mission
  • Contact us
  • Privacy Policy
  • Terms and Conditions

Copyright 2025 Manuals.Online. All Rights Reserved.