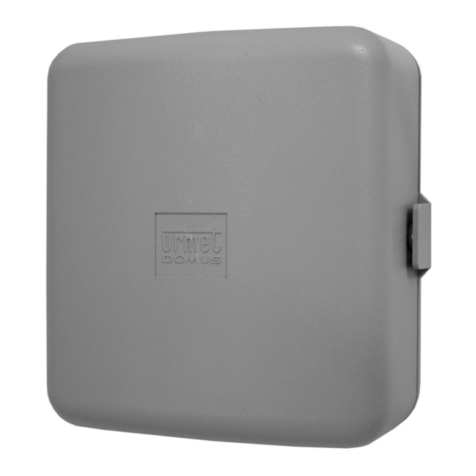
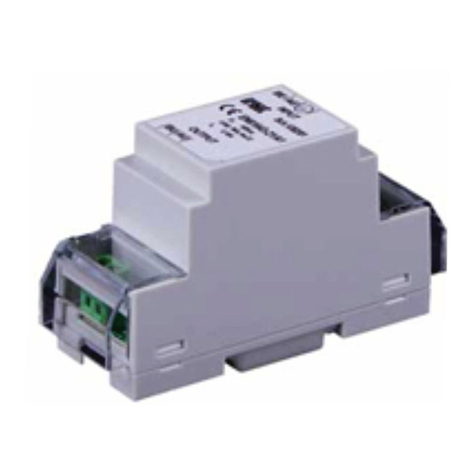
urmet domus YOKIS HUB User manual

1
DS1054-043C
YOKIS, ZAC Paris Nord II, 94 Rue de la Belle Étoile, 95700 Roissy-en-France
www.yokis.com / 01 55 85 86 87 réservé aux professionnels / 0899 79 79 99 réservé aux particuliers
1 seconde
Étape 1 : Passer le YOKISHUB en mode appairage
▶Faire 1 appui de 3 secondes sur le symbole du YOKISHUB.
Les deux leds clignotent alternativement indiquant que le YOKISHUB est en mode
appairage.
3 secondes
Leds du
YOKISHUB
Prérequis :
▶Alimenter tous les modules sur la
même phase.
POWER WLAN LANINTERNET
1 2 3 4
Led
Connect
L
N
▶Raccordez votre YOKISHUB à la box ADSL.
▶Alimenter le YOKISHUB sur la même phase que celle utilisée pour les modules.
230V
GUIDE DE MISE EN SERVICE RAPIDE
Appairage du sans outil (10 modules maximum)*
*votre installation sans limite avec
REMARQUE:YOKISHUB NE doit jamais avoir été préalablement configuré via
l’application YOKISPRO. Toute configuration via l’application YOKISPRO
empêche la mise en service rapide. Même pas la procédure de REMISE À
ZÉRO DE LA CONFIGURATION DU YOKISHUB (voir ci-dessous) ne permet
de revenir aux conditions de programmation de mise en service rapide.
F

2DS1054-043C
YOKIS, ZAC Paris Nord II, 94 Rue de la Belle Étoile, 95700 Roissy-en-France
www.yokis.com / 01 55 85 86 87 réservé aux professionnels / 0899 79 79 99 réservé aux particuliers
YOKIS, ZAC Paris Nord II, 94 Rue de la Belle Étoile, 95700 Roissy-en-France
www.yokis.com / 01 55 85 86 87 réservé aux professionnels / 0899 79 79 99 réservé aux particuliers
▶Les leds du YOKISHUB et du module clignotent 1 fois indiquant la réussite de
l’enregistrement.
Led
Connect
1 impulsion
1 impulsion
▶Appuyer 1 fois sur le symbole de YOKISHUB.
▶Puis, avant 30 secondes, appuyer une fois sur le bouton «connect» du module.
Étape 2 : Enregistrer les modules dans la base de données du YOKISHUB
Étape 3 : Réaliser le bus radio entre les modules
▶Appuyer une fois sur le bouton«connect» du module A (la led du module A com-
mence à clignoter).
▶Avant 30 secondes, appuyer une fois sur le bouton «connect» du module B: le
branchement Bus Radio entre les deux module est établi et les led correspondantes se
mettent à clignoter.
Led
Connect
Led
Connect
Led
Connect
ABC
1 impulsion 1 impulsion
ETC.
▶Faire la même manipulation entre les modules B et C et ainsi de suite avec vos autres
modules.
ATTENTION: pour les raccordements entre les modules, se reporter aux notices d’ins-
tructions et au catalogue YOKIS paragraphe «RACCORDEMENTS POSSIBLES».
Pour CHAQUE module qu’on souhaite enregistrer (jusqu’à 10), répéter les deux étapes
suivantes:

3
DS1054-043C
YOKIS, ZAC Paris Nord II, 94 Rue de la Belle Étoile, 95700 Roissy-en-France
www.yokis.com / 01 55 85 86 87 réservé aux professionnels / 0899 79 79 99 réservé aux particuliers
3 secondes
Étape 4 : Quitter le mode appairage
▶Faire un appui de 3 secondes sur le symbole du YOKISHUB pour quitter le mode
appairage. La led radio clignote rapidement, indiquant que le YOKISHUB n’est
plus en mode appairage.
Étape 5 : Lier le YOKISHUB à l’application YnO
▶Lancer l’App utilisant son Nom d’utilisateur et Mot de passe.
▶Connecter l’App au YOKISHUB.
Pour appairer YnO :
Découvrez comment créer votre
compte YOKIS YnO et l’associer
à votre YOKISHUB.
Flashez le qrcode
pour
voir la vidéo
▶En cas d’ajout d’un nouveau module, déconnectez-vous
puis reconnectez-vous simplement à afin de mettre à
jour l’installation sur l’application.
▶Si on souhaite ultérieurement ajouter de nouveaux modules au Bus Radio, répéter la
procédure à partir de l’Étape 1.
Remarque: à l’Étape 3, ajouter simplement les nouveaux modules au bus radio.

URMET S.p.a., Via Bologna 188/C, 10154 Torino - Tel. Professionisti: +39 011 23 39 810
Tel. Privati: 011.23.39.800 - www.yokis.com
4DS1054-043C
YOKIS, ZAC Paris Nord II, 94 Rue de la Belle Étoile, 95700 Roissy-en-France
www.yokis.com / 01 55 85 86 87 réservé aux professionnels / 0899 79 79 99 réservé aux particuliers
À savoir :
Remise à zéro de la configuration
du YOKISHUB (Effacement de scéna-
rios, associations, programmation, etc...)
▶En mode appairage, faire 10 impulsions
sur le symbole du YOKISHUB. Les
deux leds clignotent simultanément
indiquant la remise à zéro de la
configuration.
3. Cliquez sur «Réglages avancés» en bas de la page.
4. Cliquez sur «Je libère mon installation» en bas de la page.
Pour libérer le YOKISHUB :
1. Cliquez sur l’icone en haut à droite de l’écran d’accueil.
2. Cliquez sur «Modifier les informations» dans le menu latéral.
10 impulsions
Remplacer un module
▶Supprimez les connexions Bus sur les
modules présents dans l’installation :
• Maintenir le bouton connect de
chaque module pendant 3 secondes.
• La led du module fait 2 flashs pour
confirmer la suppression des
connexions radio.
▶Remettre à zéro la configuration du
YOKISHUB.
▶Reprendre la procédure complète depuis
l’étape 1.
▶Déconnectez-vous puis reconnectez-vous
à afin de mettre à jour l’installation
sur l’application.

URMET S.p.a., Via Bologna 188/C, 10154 Torino - Tel. Professionisti: +39 011 23 39 810
Tel. Privati: 011.23.39.800 - www.yokis.com
5
DS1054-043C
1 seconde
Passo 1: Impostare lo YOKISHUB in modalità apprendimento
▶Premere per 3 secondi il simbolo dello YOKISHUB.
I due led lampeggiano alternativamente ad indicare che lo YOKISHUB è in modalità
apprendimento.
3 secondi
Led dello
YOKISHUB
Prerequisiti:
▶Alimentare tutti i moduli
sulla stessa fase.
POWER WLAN LANINTERNET
1 2 3 4
Led
Connect
L
N
▶Collegare lo YOKISHUB al gateway ADSL.
▶Alimentare lo YOKISHUB sulla stessa fase utilizzata per i moduli.
230V
GUIDA DI MESSA IN SERVIZIO RAPIDA
Come configurare lo senza l’uso di App (max. 10 moduli)*
*per installazioni senza limiti, usare l’App
NOTA: lo YOKISHUB NON deve essere mai stato configurato in precedenza tramite
App YOKISPRO. Una qualunque configurazione per mezzo dell’App YOKISPRO
inibisce la possibilità della messa in servizio rapida. Neanche la procedura di
RIPRISTINO DELLA CONFIGURAZIONE DELLO YOKISHUB (vedere più avanti)
permette di tornare nelle condizioni di programmazione di messa in servizio rapida.
1 secondo
IT

URMET S.p.a., Via Bologna 188/C, 10154 Torino - Tel. Professionisti: +39 011 23 39 810
Tel. Privati: 011.23.39.800 - www.yokis.com
URMET S.p.a., Via Bologna 188/C, 10154 Torino - Tel. Professionisti: +39 011 23 39 810
Tel. Privati: 011.23.39.800 - www.yokis.com
6DS1054-043C
▶I led dello YOKISHUB e del modulo lampeggiano 1 volta a conferma della
registrazione.
Led
Connect
1 pressione
1 pressione
▶Fare 1pressione sul simbolo dello YOKISHUB.
▶Poi, entro 30 secondi, fare una pressione sul pulsante “connect” del modulo.
Passo 2: Registrare i moduli nel database dello YOKISHUB
Passo 3: Come creare il Bus Radio tra i moduli
▶Fare una pressione sul pulsante “connect” del modulo A (il led del modulo A inizia a
lampeggiare).
▶Entro 30 secondi, fare una pressione sul pulsante “connect” del modulo B: il col-
legamento Bus Radio tra i due moduli viene realizzato ed i rispettivi led smettono di
lampeggiare.
Led
Connect
Led
Connect
Led
Connect
ABC
1 pressione 1 pressione
ECC.
▶Ripetere la stessa operazione tra i moduli B e C e poi, via via, con tutti gli altri.
ATTENZIONE: per i collegamenti tra i moduli fare riferimento ai libretti di istruzione e al
catalogo YOKIS al paragrafo “COLLEGAMENTI POSSIBILI”.
Per OGNI modulo che si desidera registrare (max. 10) ripetere i due passi seguenti:

URMET S.p.a., Via Bologna 188/C, 10154 Torino - Tel. Professionisti: +39 011 23 39 810
Tel. Privati: 011.23.39.800 - www.yokis.com
7
DS1054-043C
3 secondi
Passo 4: Uscire dalla modalità apprendimento
▶Fare una pressione di 3 secondi sul simbolo dello YOKISHUB.
Il led radio lampeggia velocemente ad indicare che lo YOKISHUB non è più in
modalità apprendimento.
Passo 5: Associare lo YOKISHUB all’App YnO
Chiedere al cliente di:
▶Lanciare l’app utilizzando il suo Nome Utente e Password.
▶Collegare l’App allo YOKISHUB.
Per associare l’App YnO allo YOKISHUB:
Scopri come il tuo cliente può
creare un Account YnO ed
associarlo allo YOKISHUB.
Scansiona il QR
code e guarda il
video
▶In caso di aggiunta di un nuovo modulo, per consentire
l’aggiornamento dell’impianto sull’App, occorre disconet-
tersi e riconnettersi ad . Solo in questo modo i nuovi
moduli potranno essere visti nell’App.
▶Se in seguito si desidera aggiungere nuovi moduli al Bus Radio, occorre ripetere la
procedura a partire dal Passo 1.
NOTA: al Passo 3, limitarsi ad aggiungere al Bus Radio i soli nuovi moduli.

URMET S.p.a., Via Bologna 188/C, 10154 Torino - Tel. Professionisti: +39 011 23 39 810
Tel. Privati: 011.23.39.800 - www.yokis.com
URMET S.p.a., Via Bologna 188/C, 10154 Torino - Customer Service: +39 011 23 39 810
Export Dept. Phone: +39 011 24 00 250/256 - Fax: +39 011 24 00 296 - www.yokis.com
8DS1054-043C
3. Toccare “Configurazioni avanzate” nella parte inferiore della pagina.
4. Toccare su “Rilascio il mio impianto”.
Per disassociare lo YOKISHUB da YnO:
1. Toccare l’icona in alto a destra sulla Home Page.
2. Toccare su “Modificare le informazioni” nella barra laterale.
Utile a sapersi:
Ripristino della configurazione
dello YOKISHUB (Cancellazione sce-
nari, associazioni, programmazione, ecc...)
▶Entrare in modalità apprendimento
premendo per 3 secondi il simbolo
dello YOKISHUB. Fare 10 pressioni sul
simbolo dello YOKISHUB. I due led
lampeggiano contemporaneamente
indicando il reset della configurazione.
10 pressioni
Sostituzione di un modulo
▶Cancellare le connessioni Bus sui moduli
presenti nell’impianto:
• Tenere premuto il pulsante connect
su ciascun modulo per almeno
3 secondi.
• Il led del modulo lampeggia 2 volte
per confermare la cancellazione delle
connessioni radio.
▶Ripristinare la configurazione dello
YOKISHUB.
▶Ripetere la procedura completa dal
passo 1.
▶Chiudere e riavviare per aggiornare
l’impianto sull’applicazione.

URMET S.p.a., Via Bologna 188/C, 10154 Torino - Customer Service: +39 011 23 39 810
Export Dept. Phone: +39 011 24 00 250/256 - Fax: +39 011 24 00 296 - www.yokis.com
9
DS1054-043C
1 seconde
Step 1: Set the YOKISHUB to learn mode
▶Hold symbol on the YOKISHUB pressed for 3 seconds.
The two LEDs will flash alternately to indicate that the YOKISHUB is in learning mode.
3 seconds
YOKISHUB
LED
Prerequisites:
▶Power all modules on the
same phase
POWER WLAN LANINTERNET
1 2 3 4
Led
Connect
L
N
▶Connect the YOKISHUB to the ADSL Gateway.
▶Power the YOKISHUB on the same phase used for the modules.
230V
QUICK START GUIDE
How to configure without using App (max. 10 modules)*
*for unlimited installations, use the App
NOTE: The YOKISHUB must NOT have been previously configured using the YOKISPRO
App. Any configuration using the YOKISPRO App will inhibit the possibility of
using the rapid installation method. Even the HOW TO RESET THE YOKISHUB
CONFIGURATION PROCEDURE (see below) will not allow you to return to fast
commissioning programming conditions.
1 second
GB

URMET S.p.a., Via Bologna 188/C, 10154 Torino - Customer Service: +39 011 23 39 810
Export Dept. Phone: +39 011 24 00 250/256 - Fax: +39 011 24 00 296 - www.yokis.com
URMET S.p.a., Via Bologna 188/C, 10154 Torino - Customer Service: +39 011 23 39 810
Export Dept. Phone: +39 011 24 00 250/256 - Fax: +39 011 24 00 296 - www.yokis.com
10 DS1054-043C
▶The YOKISHUB and module LEDs will flash once to confirm the registration.
Led
Connect
1 touch
1 touch
▶Press symbol on the YOKISHUB once.
▶Then, within 30 seconds, press the “connect” button on the module.
Step 2: Register modules in YOKISHUB database
Step 3: Create the radio bus between different receivers
▶Press the “connect” button on module A (the LED on module A will start flashing).
▶Within 30 seconds, press the “connect” button on module B: the Bus Radio connec-
tion between the two modules is established and the respective LEDs will stop flashing.
Led
Connect
Led
Connect
Led
Connect
ABC
1 touch 1 touch
ETC.
▶Repeat the same operation between modules B and C and then, gradually, for all the
others.
IMPORTANT: see instruction booklets and YOKIS catalogue, “POSSIBLE CONNECTIONS”
paragraph for connections between modules.
Repeat the following two steps for EVERY module to register (max. 10):

URMET S.p.a., Via Bologna 188/C, 10154 Torino - Customer Service: +39 011 23 39 810
Export Dept. Phone: +39 011 24 00 250/256 - Fax: +39 011 24 00 296 - www.yokis.com
11
DS1054-043C
3 seconds
Step 4: Exit learning mode
▶Hold symbol on the the YOKISHUB pressed for 3 seconds.
The wireless LED will flash rapidly to indicate that the YOKISHUB is no longer in
learning mode.
Step 5: Associate YOKISHUB to the YnO App
Ask the customer to:
▶Start the App using his or her Username and Password.
▶Connect the App to the YOKISHUB.
To associate the YnO App to the YOKISHUB:
Find out how your customer can
create a YnO Account and asso-
ciate it with the YOKISHUB.
Scan the QR code
and watch the
video
▶When adding a new module, in order to allow system
update on the App, it is necessary to disconnect and
reconnect to . Only in this way the new modules will be
visible on the App.
▶To add new modules to the Bus Radio at a later time, if required, repeat the procedure
starting from Step 1.
NOTE: In step 3, simply add only new modules to Bus Radio.

URMET S.p.a., Via Bologna 188/C, 10154 Torino - Customer Service: +39 011 23 39 810
Export Dept. Phone: +39 011 24 00 250/256 - Fax: +39 011 24 00 296 - www.yokis.com
URMET S.p.a., Via Bologna 188/C, 10154 Turín - Servicio de asistencia al cliente: +39 011 23 39 810
Exportaciones Teléfono: +39 011 24 00 250/256 - Fax: +39 011 24 00 296 - www.yokis.com
12 DS1054-043C
3. Tap on “Advanced Configurations” at the bottom of the page.
4. Tap on “Release your system”.
To disassociate the HOKISHUB from YnO:
1. Tap on the icon at the top right of the Home Page.
2. Tap on “Edit information” in the sidebar.
Useful information:
How to reset the YOKISHUB
configuration (Delete scenarios,
associations, programming, etc.)
▶Enter learning mode by holding symbol
on the YOKISHUB pressed for
3 seconds. Press symbol on the
YOKISHUB 10 times. The two LEDs
will flash at the same time, indicating
that the configuration has been reset.
10 touches
Replace a module
▶Delete the BUS connections on the
modules in the system:
• Press and hold the connect button
on each module for 3 seconds.
• The LED on module will flash twice
to confirm the deletion of the radio
connections.
▶Reset the YOKISHUB configuration.
▶Repeat the procedure starting from
Step 1.
▶Close and restart to update the
system on the application.

URMET S.p.a., Via Bologna 188/C, 10154 Turín - Servicio de asistencia al cliente: +39 011 23 39 810
Exportaciones Teléfono: +39 011 24 00 250/256 - Fax: +39 011 24 00 296 - www.yokis.com
13
DS1054-043C
1 seconde
Paso 1: Configurar el YOKISHUB en el modo de aprendizaje
▶Pulsar durante 3 segundos el símbolo del YOKISHUB.
Los dos leds parpadean alternativamente, indicando que el YOKISHUB está en el
modo de aprendizaje.
3 segundos
Led del
YOKISHUB
Requisitos previos:
▶Alimentar todos los módulos
en la misma fase.
POWER WLAN LANINTERNET
1 2 3 4
Led
Connect
L
N
▶Conectar el YOKISHUB a la puerta de enlace ADSL.
▶Alimentar el YOKISHUB en la misma fase utilizada para los módulos.
230V
GUÍA DE PUESTA EN SERVICIO RÁPIDA
Cómo configurar el sin utilizar la aplicación (máx. 10 módulos)*
*para instalaciones sin límites, usar la aplicación
NOTA: el YOKISHUB NUNCA se debe haber configurado antes con la aplicación
YOKISPRO. Cualquier configuración mediante la aplicación YOKISPRO inhibe la
posibilidad de puesta en servicio rápida. Ni siquiera el procedimiento de
RESTABLECIMIENTO DE LA CONFIGURACIÓN DEL YOKISHUB (véase más
adelante permite volver a las condiciones de programación de puesta en
funcionamiento rápida.
1 segundo
ES

URMET S.p.a., Via Bologna 188/C, 10154 Turín - Servicio de asistencia al cliente: +39 011 23 39 810
Exportaciones Teléfono: +39 011 24 00 250/256 - Fax: +39 011 24 00 296 - www.yokis.com
URMET S.p.a., Via Bologna 188/C, 10154 Turín - Servicio de asistencia al cliente: +39 011 23 39 810
Exportaciones Teléfono: +39 011 24 00 250/256 - Fax: +39 011 24 00 296 - www.yokis.com
14 DS1054-043C
▶Los leds del YOKISHUB y del módulo parpadean 1 vez para confirmar el registro.
Led
Connect
1 pulsación
1 pulsación
▶Pulsar 1 vez el símbolo del YOKISHUB.
▶Luego, en un lapso de 30 segundos, accionar el pulsador “connect” del módulo.
Paso 2: Registrar los módulos en la base de datos del YOKISHUB
Paso 3: Cómo crear el Bus Radio entre los módulos
▶Accionar el pulsador “connect” del módulo A (el led del módulo A comienza a parpadear).
▶En un lapso de 30 segundos, accionar el pulsador “connect” del módulo B: se realiza
la conexión Bus Radio entre los dos módulos y los respectivos leds dejan de parpadear.
Led
Connect
Led
Connect
Led
Connect
ABC
1 pulsación 1 pulsación
ETC.
▶Repetir la misma operación entre los módulos B y C, y luego, con todos los demás.
ATENCIÓN: para las conexiones entre los módulos, consultar los manuales de instrucciones
y el catálogo YOKIS, apartado “CONEXIONES POSIBLES”.
Con CADA módulo que se quiera registrar (máx. 10) repetir los dos pasos siguientes:

URMET S.p.a., Via Bologna 188/C, 10154 Turín - Servicio de asistencia al cliente: +39 011 23 39 810
Exportaciones Teléfono: +39 011 24 00 250/256 - Fax: +39 011 24 00 296 - www.yokis.com
15
DS1054-043C
3 segundos
Paso 4: salir del modo de aprendizaje
▶Pulsar 1 vez, durante 3 segundos, el símbolo del YOKISHUB.
El led radio parpadea rápidamente indicando que el YOKISHUB ya no está en el
modo de aprendizaje.
Paso 5: Asociar el YOKISHUB a la aplicación YnO
Pedirle al cliente que:
▶Inicie la aplicación utilizando su Nombre de usuario y Contraseña.
▶Conectar la aplicación al YOKISHUB.
Para asociar la aplicación YnO al YOKISHUB:
Descubra cómo es que su clien-
te puede crear una Cuenta YnO
y asociarla al YOKISHUB.
Escanear el
Código QR y
mirar el vídeo
▶Cuando se añade un módulo nuevo, para permitir la actua-
lización del sistema en la aplicación, es necesario desconec-
tarse y conectarse otra vez a . Solo de esta forma los
módulos nuevos se podrán ver en la aplicación.
▶Si luego se quieren añadir nuevos módulos al Bus Radio, se debe repetir el procedi-
miento a partir del Paso 1.
NOTA: en el Paso 3, limitarse a añadir al Bus Radio solo los módulos nuevos.

URMET S.p.a., Via Bologna 188/C, 10154 Turín - Servicio de asistencia al cliente: +39 011 23 39 810
Exportaciones Teléfono: +39 011 24 00 250/256 - Fax: +39 011 24 00 296 - www.yokis.com
URMET S.p.a., Via Bologna 188/C, 10154 Turin - Kundendienst: +39 011 23 39 810
Exportabt. Tel: +39 011 24 00 250/256 - Fax: +39 011 24 00 296 - www.yokis.com
16 DS1054-043C
3. Tocar “Configuraciones avanzadas” en la parte inferior de la página.
4. Tocar “Libero mi instalación”.
Para eliminar la asociación del YOKISHUB de YnO:
1. Tocar el icono de arriba, a la derecha, en la Página principal.
2. Tocar “Cambiar la información” en la barra lateral.
Nota útil:
Restablecimiento de la
configuración del YOKISHUB
(Cancelación de escenarios, asociaciones,
programación, etc.)
▶Entrar en el modo de aprendizaje
pulsando durante 3 segundos el símbolo
del YOKISHUB. Pulsar 10 veces el
símbolo del YOKISHUB. Los dos leds
parpadean simultáneamente, indicando
el restablecimiento de la configuración.
10 pulsaciones
Sustitución de un módulo
▶Cancelar las conexiones Bus en los
módulos presentes en el sistema:
• Mantener presionado el pulsador
connect de cada módulo, al menos
durante 3 segundos.
• El led del módulo parpadea 2 veces
para confirmar la cancelación de las
conexiones radio.
▶Restablecer la configuración del
YOKISHUB.
▶Repetir el procedimiento completo desde
el paso 1.
▶Cerrar y reiniciar para actualizar el
sistema en la aplicación.

URMET S.p.a., Via Bologna 188/C, 10154 Turin - Kundendienst: +39 011 23 39 810
Exportabt. Tel: +39 011 24 00 250/256 - Fax: +39 011 24 00 296 - www.yokis.com
17
DS1054-043C
1 seconde
Schritt 1: Den YOKISHUB in den Einlernmodus stellen
▶Das Symbol des YOKISHUB 3 Sekunden lang betätigen.
Die beiden Led blinken abwechselnd, um anzuzeigen, dass der YOKISHUB sich im
Einlernmodus befindet.
3 Sekunden
Led des
YOKISHUB
Voraussetzungen:
▶Alle Module auf derselben Phase
versorgen.
POWER WLAN LANINTERNET
1 2 3 4
Led
Connect
L
N
▶Den YOKISHUB an das Gateway ADSL
anschließen.
▶Den YOKISHUB auf derselben Phase wie der für die Module verwendeten versorgen.
230V
SCHNELLANLEITUNG ZUR INBETRIEBNAHME
Wie man den ohne Verwendung der App konfiguriert (max. 10 Module)*
*für Installationen ohne Begrenzung die App
HINWEIS: Der YOKISHUB DARF zuvor NIE mit Hilfe der App YOKISPRO konfiguriert
worden sein. Eine beliebige Konfiguration mit Hilfe der App YOKISPRO
unterbindet die Möglichkeit der schnellen Inbetriebnahme. Auch der
Vorgang zur RESET DER KONFIGURATION DES YOKISHUB (siehe
weiter vorn) gestattet es nicht, wieder zu den Programmierbedingungen zur
schnellen Inbetriebnahme zurückzukehren.
1 Sekunde
D

URMET S.p.a., Via Bologna 188/C, 10154 Turin - Kundendienst: +39 011 23 39 810
Exportabt. Tel: +39 011 24 00 250/256 - Fax: +39 011 24 00 296 - www.yokis.com
URMET S.p.a., Via Bologna 188/C, 10154 Turin - Kundendienst: +39 011 23 39 810
Exportabt. Tel: +39 011 24 00 250/256 - Fax: +39 011 24 00 296 - www.yokis.com
18 DS1054-043C
▶Die Led des YOKISHUB und des Moduls blinken zur Bestätigung der Registrierung
einmal.
Led
Connect
1 Betätigen
1 Betätigen
▶1 Mal das Symbol es YOKISHUB betätigen.
▶Dann innerhalb von 30 Sekunden einmal die Taste „connect“ des Moduls betätigen.
Schritt 2: Die Module in der Datenbank des YOKISHUB registrieren
Schritt 3: Wie man einen Funkbus zwischen den Modulen erstellt
▶Einmal die Taste „connect“ des Moduls A betätigen (die Led des Moduls A beginnt zu
blinken).
▶Innerhalb von 30 Sekunden einmal die Taste „connect“ des Moduls B betätigen: die
Funkbus-Verbindung zwischen den beiden Modulen wird hergestellt und die entspre-
chenden Leds hören auf zu blinken.
Led
Connect
Led
Connect
Led
Connect
ABC
1 Betätigen 1 Betätigen
Usw.
▶Den gleichen Vorgang zwischen den Modulen B und C wiederholen und dann nach und
nach mit allen anderen.
ACHTUNG: wegen der Anschlüsse zwischen den Modulen siehe Bedienungsanleitun-
gen und YOKIS-Katalog unter Absatz “MÖGLICHE ANSCHLÜSSE”.
Für JEDES zu registrierende Modul (max. 10) die folgenden Schritte wiederholen:

URMET S.p.a., Via Bologna 188/C, 10154 Turin - Kundendienst: +39 011 23 39 810
Exportabt. Tel: +39 011 24 00 250/256 - Fax: +39 011 24 00 296 - www.yokis.com
19
DS1054-043C
3 Sekunden
Schritt 4: Den Einlernmodus verlassen
▶Das Symbol des YOKISHUB einmal 3 Sekunden lang betätigen.
Die Funk-Led blinkt schnell, um anzuzeigen, dass der YOKISHUB sich nicht mehr
im Einlernmodus befindet.
Schritt 5: Den YOKISHUB mit der App YnO verknüpfen
Den Kunden um Folgendes bitten:
▶Die App zu starten und dazu seinen Benutzernamen und sein Passwort zu verwenden.
▶Die App an den YOKISHUB anzuschließen.
Um die App YnO mit dem YOKISHUB zu verknüpfen:
Entdecken Sie, wie Ihr Kunde ein
YnO-Account erstellen und dieses
dem YOKISHUB zuordnen kann.
Scannen Sie den
QR-Code ein und
sehen Sie sich
das Video an
▶Beim Hinzufügen eines neuen Moduls muss, um das Hinzufü-
gen der Anlage auf der App zu gestatten, das Unterbrechen der
Verbindung und die erneute Verbindung mi erfolgen. Nur
auf diese Weise sind die neuen Module in der App zu sehen.
▶Sollen im Anschluss neue Module zum Funkbus hinzugefügt werden, muss der Vor-
gang ausgehend von Schritt 1 wiederholt werden.
Hinweis: Bei Schritt 3 nur die neuen Module zum Funkbus hinzufügen.

URMET S.p.a., Via Bologna 188/C, 10154 Turijn - Klantenservice: +39 011 23 39 810
Exportafdeling: +39 011 24 00 250/256 - Fax: +39 011 24 00 296 - www.yokis.com
URMET S.p.a., Via Bologna 188/C, 10154 Turin - Kundendienst: +39 011 23 39 810
Exportabt. Tel: +39 011 24 00 250/256 - Fax: +39 011 24 00 296 - www.yokis.com
20 DS1054-043C
3. „ErweiterteEinstellungen“ im unteren Teil der Seite berühren.
4. „Ich gebe meine Anlage frei“ berühren.
Zum Trennen der Verknüpfung von YOKISHUB und YnO:
1. Das Symbol oben rechts auf der Homepage berühren.
2. „Die Informationen bearbeiten“ in der seitlichen Leiste berühren.
Nützlich zu wissen:
Reset der Konfiguration des
YOKISHUB (Löschen von Szenarien,
Zuordnungen, Programmierung, usw.)
▶Sich in den Einlernmodus begeben und
dazu 3 Sekunden lang das Symbol
des YOKISHUB betätigen. 10 Mal das
Symbol des YOKISHUB betätigen.
Die beiden Leds blinken gleichzeitig und
zeigen so den Reset der Konfiguration an.
10 -maliges
Betätigen
Ersetzen eines Moduls
▶Die Bus-Verbindungen auf den in der
Anlage vorhandenen Modulen löschen:
• Die Taste connect auf jedem Modul
mindestens 3 Sekunden gedrückt
halten.
• Die Led des Moduls blinkt 2 Mal,
um den Löschvorgang der
Funkverbindungen zu bestätigen.
▶Die Konfiguration des YOKISHUB wieder
herstellen.
▶Den kompletten Vorgang ab Schritt 1
wiederholen.
▶Herunterfahren und neu starten , um die
Anlage auf der Applikation zu aktualisieren.
Table of contents
Languages:
Other urmet domus Switch manuals

urmet domus
urmet domus 1060/41 User manual

urmet domus
urmet domus 3000 User manual
urmet domus
urmet domus 1382 User manual

urmet domus
urmet domus Agora 2 Assembly instructions
urmet domus
urmet domus GROTHE MISTRAL SE06 User guide

urmet domus
urmet domus 1060 User manual

urmet domus
urmet domus 1090/601 User manual

urmet domus
urmet domus 1375/701 Installation and operation manual

urmet domus
urmet domus 1039/041 Product information sheet
urmet domus
urmet domus 1093 Series User manual