Urrea 2371 Dimensions and installation guide

Grasera a Batería
Cordless Grease Gun
2371
Manual de Usuario y Garantía.
User’s Manual and Warranty.
ATENCIÓN: Lea, entienda y siga las instrucciones de seguridad contenidas en este
manual, antes de operar esta herramienta.
WARNING: Read, understand and follow the safety rules in this manual, before operating this tool.
2371 manual.indd 1 28/05/15 15:12

ENGLISHESPAÑOL
General safety rules
Electric safety
Personal safety
Tool use and care
Specific safety rules for
cordless grease guns
Features
Operation instructions
Maintenance
Troubleshooting
Technical data
Notes
Warranty policy
Normas generales de seguridad
Seguridad eléctrica
Seguridad personal
Utilización y cuidados de las her-
ramientas eléctricas
Advertencias de seguridad para
graseras a batería
Características
Instrucciones de operación
Mantenimiento
Solucionador de problemas
Especificaciones técnicas
Notas
Garantía
9
9
9
10
10
11
11
13
13
13
14
16
3
3
3
4
5
5
5
7
8
8
14
16
CONTENIDO CONTENT
SIMBOLOS SYMBOLS
PELIGRO, ADVERTENCIA, PRECAUCIÓN:
Indica un riesgo personal o la posibilidad
de un daño.
Herramientas tipo II: Doble aislamiento,
protege las herramientas eléctricas.
DANGER, CAUTION, WARNING: Indicates risk of
personal injury and/or the possibility of damage.
Type II power tools: Indicates double insulation.
2
2371 manual.indd 2 28/05/15 15:12

NORMAS GENERALES DE SEGURIDAD
Esta GRASERA A BATERÍA tiene características
que harán su trabajo más rápido y fácil. Seguri-
dad, comodidad y confiabilidad fueron previs-
tos como prioridad para el diseño del mismo,
haciendo más fácil su operación.
ADVERTENCIA: Lea todas las advertencias
de seguridad y todas las instrucciones. La omi-
sión de alguna de las advertencias e instruccio-
nes que se enlistan a continuación puede dar
como resultado un choque eléctrico, fuego y/o
un daños serios.
CONSERVE TODAS LAS ADVERTENCIAS Y
TODAS LAS INSTRUCCIONES.
SEGURIDAD EN EL ÁREA DE TRABAJO
Mantenga el área de trabajo limpia y bien ilu-
minada. Las áreas desordenadas y oscuras pro-
vocan accidentes.
No maneje herramientas eléctricas en atmós-
feras explosivas, tales como en presencia de
líquidos inflamables, gases o polvo. Las herra-
mientas eléctricas crean chispas que pueden
encender el polvo o los humos.
Mantenga alejados a los niños y curiosos
mientras maneja una herramienta eléctrica.
Las distracciones pueden causarle la pérdida
del control.
SEGURIDAD ELÉCTRICA
La clavija de la herramienta eléctrica debe
coincidir con receptáculo. No modificar nunca
la clavija de ninguna manera. No usar ningún
adaptador de clavijas con herramientas eléctri-
cas puestas a tierra. Clavijas no modificadas y
bases coincidentes reducirán el riesgo de cho-
que eléctrico.
Evite el contacto del cuerpo con superficies
puestas a tierra como tuberías, radiadores, co-
cinas eléctricas y refrigeradores. Hay un riesgo
aumentado de choque eléctrico si su cuerpo
está puesto a tierra.
No exponga las herramientas eléctricas a la llu-
via o a condiciones de humedad. El agua que
entre en la herramienta aumentará el riesgo
de choque eléctrico.
No abuse del cable. No usar nunca el cable para
llevar, levantar o desenchufar la herramienta
eléctrica. Mantenga el cable lejos del calor,
aceite, cantos vivos o piezas en movimiento.
Los cables dañados o enredados aumentan el
riesgo de choque eléctrico.
Cuando maneje una herramienta eléctrica en
el exterior, use una prolongación de cable ade-
cuada para uso en el exterior. El uso de una
prolongación de cable adecuada para uso en el
exterior reduce el riesgo de choque eléctrico.
“ESTA HERRAMIENTA CUENTA CON UN
SUJETACABLE TIPO “Y“, EN CASO DE DAÑAR-
SE EL CORDÓN DE ALIMENTACIÓN, ÉSTE DE-
BERÁ SER REEMPLAZADO POR EL FABRICANTE,
SUS CENTROS DE SERVICIO AUTORIZADOS, O
PERSONAL CALIFICADO A FIN DE EVITAR RIES-
GOS.”
EXTENSIONES DE CABLE
NOTA: El uso de cables dañados incrementa el
riesgo de descargas eléctricas o quemaduras.
Si es necesario un cable de extensión, debe ser
usado un cable con el tamaño adecuado de los
conductores. La tabla de la siguiente página,
muestra el tamaño correcto para usar depen-
diendo en la longitud del cable y el rango de
amperaje especificado en la etiqueta de valo-
res nominales del producto. Si está en duda,
use el rango próximo más grande.
Siempre use cables de extensión listados en UL,
CSA ó NOM.
TAMAÑOS RECOMENDADOS DE EXTENSIONES
DE CABLE:
Cuando esté usando el producto afuera, use
una extensión para exteriores marcadas con lo
siguiente: “WA” o “W”. Estas extensiones están
pensadas para trabajar en exteriores y reducen
el riesgo de descarga eléctrica.
SEGURIDAD PERSONAL
Esté alerta, vigile lo que está haciendo y use el
sentido común cuando maneje una herramien-
ta eléctrica. No use una herramienta eléctrica
cuando esté cansado o bajo la influencia de
3
ESPAÑOL•Manual de Usuario
2371 manual.indd 3 28/05/15 15:12

drogas, alcohol o medicamentos. Un momento
de distracción mientras maneja herramientas
eléctricas puede causar un daño personal serio.
Use equipo de seguridad. Lleve siempre pro-
tección para los ojos. La utilización para las
condiciones apropiadas de un equipo de segu-
ridad tal como mascarilla antipolvo, zapatos no
resbaladizos, gorro duro, o protección para los
oídos reducirá los daños personales.
Evite un arranque accidental. Asegúrese de
que el interruptor está en posición apagado
antes de conectar a la red y/o a la batería, co-
ger o transportar la herramienta. Transportar
herramientas eléctricas con el dedo sobre el
interruptor o enchufar herramientas eléctricas
que tienen en interruptor en posición encendi-
do invita a accidentes.
Retire llaves o herramienta antes de arrancar
la herramienta eléctrica. Una llave o herra-
mienta dejada unida a una pieza rotativa de
una herramienta eléctrica puede causar un
daño personal.
No se sobrepase. Mantenga los pies bien asen-
tados sobre el suelo y conserve el equilibrio en
todo momento. Esto permite un mejor control
de la herramienta eléctrica en situaciones in-
esperadas.
Vista adecuadamente. No vista ropa suelta o
joyas. Mantenga su pelo, su ropa y guantes
alejados de las piezas en movimiento. La ropa
suelta, las joyas o el pelo largo pueden ser co-
gidos en las piezas en movimiento.
Si hay dispositivos para la conexión de medios
de extracción y recolección de polvo, asegúre-
se de que éstos estén conectados y se usen co-
rrectamente. El uso de estos dispositivos puede
reducir los peligros relacionados con el polvo.
IMPORTANTE: Este aparato no se destina
para utilizarse por personas (incluyendo niños)
cuyas capacidades físicas, sensoriales o menta-
les sean diferentes o estén reducidas, o carez-
can de experiencia o conocimiento, a menos
que dichas personas reciban una supervisión o
capacitación para el funcionamiento del apa-
rato por una persona responsable de su segu-
ridad. Los niños deben supervisarse para ase-
gurar que ellos no empleen los aparatos como
juguete.
UTILIZACIÓN Y CUIDADOS DE LAS
HERRAMIENTAS ELÉCTRICAS
No fuerce la herramienta eléctrica. Use la he-
rramienta eléctrica correcta para su aplicación.
La herramienta eléctrica correcta hará el tra-
bajo mejor y más seguro al ritmo para la que
fue concebida.
No use la herramienta eléctrica si el interrup-
tor no gira “encendido” y “apagado”. Cual-
quier herramienta eléctrica que no pueda con-
trolarse con el interruptor es peligrosa y debe
repararse.
Desenchufe la clavija de la fuente de alimen-
tación y/o de la batería antes de efectuar
cualquier ajuste, cambio de accesorios, o de
almacenar las herramientas eléctricas. Tales
medidas preventivas de seguridad reducen el
riesgo de arrancar la herramienta accidental-
mente.
Almacene las herramientas eléctricas inactivas
fuera del alcance de los niños y no permita el
manejo de la herramienta eléctrica a personas
no familiarizadas con las herramientas o con
estas instrucciones. Las herramientas eléctricas
son peligrosas en manos de usuarios no entre-
nados.
Mantenga las herramientas eléctricas. Com-
pruebe que las partes móviles no estén des-
alineadas o trabadas, que no haya piezas ro-
tas u otras condiciones que puedan afectar la
operación de las herramientas eléctricas. Las
herramientas eléctricas se reparan antes de su
uso, cuando están dañadas. Muchos acciden-
tes son causados por herramientas eléctricas
pobremente mantenidas.
Mantenga las herramientas de corte afiladas y
limpias. Las herramientas de corte mantenidas
correctamente con los bordes de corte afilados
son menos probables de trabarse y más fáciles
de controlar.
Use la herramienta eléctrica, accesorios y pun-
tas de herramienta, etc. de acuerdo con estas
instrucciones y de la manera prevista para el
tipo particular de herramienta eléctrica, te-
niendo en cuenta las condiciones de trabajo
y el trabajo a desarrollar. El uso de la herra-
mienta eléctrica para aplicaciones diferentes
de las previstas podría causar una situación de
peligro.
4
2371 manual.indd 4 28/05/15 15:12

SERVICIO
Haga revisar su herramienta eléctrica por un
servicio de reparación calificado usando sola-
mente piezas de reemplazo idénticas. Esto ga-
rantizará que la seguridad de la herramienta
eléctrica se mantiene.
ADVERTENCIAS DE SEGURIDAD
PARA GRASERAS A BATERÍA
1. Use el equipo de seguridad completo (Guan-
tes de cuero, zapato de seguridad, tapones au-
ditivos, gafas de seguridad, casco, etc.). Evite
una descarga eléctrica, procure no hacer con-
tacto con las partes aterrizadas como coples,
carcasas, etc.
2. Mantenga su cabello, ropa y guantes aleja-
dos de las piezas móviles. Mantenga las manos
alejadas de la parte expuesta de goma de la
manguera.
3. No opere esta pistola en atmosferas explosi-
vas tal como en presencia de líquidos, gases o
polvo inflamables. Se podrían producir chispas
que causarían un incendio, lo que provocaría
lesiones personales y daños materiales.
4. El agua que se filtre por la pistola incremen-
tará el riesgo de una descarga eléctrica. No ma-
neje el cargador, su conector o la pistola con las
manos mojadas o en lugares húmedos.
5. Para evitar encendidos accidentales, siempre
suelte el interruptor antes de conectar la pisto-
la a la fuente de energía eléctrica.
6. Remueva cualquier herramienta de metal su-
jeta a la pistola antes de encenderla. Una lla-
ve que se deje sujeta a una parte móvil podría
causar lesiones personales.
7. Siempre mantenga un buen agarre y balance
mientras opere la pistola.
8. Use solo mangueras APROVADAS y siga las
instrucciones y advertencias para mangueras
9. Si existe una fuga de la válvula de presión
mientras se usa la pistola, esto es un indicador
que la contrapresión es mayor a 6,000PSI. No
es una falla del producto. Es una indicación de
que la pistola no debe ser usada en estas con-
diciones. Por favor NO trate de ajustar la pre-
sión de la válvula ya que esta ha sido ajustada
a 8 500 PSI.
IMPORTANTE:Por favor NO trate de remo-
ver la válvula, ya que esto podría dar pie a ac-
cidentes.
CARACTERÍSTICAS
CONOZCA SU HERRAMIENTA
Antes de intentar usar este producto, familiarí-
cese con todas sus características de operación
y requerimientos de seguridad.
1. GRASERA A BATERÍA.
2. CONTENEDOR DE GRASA (500 cc).
3. MANGUERA DE ALTA RESISTENCIA.
4. BOQUILLA DISPENSADORA.
5. CARGADOR RÁPIDO.
6. BATERÍA (x2).
INSTRUCCIONES DE OPERACIÓN
CARACTERÍSTICAS DE LA FUNCIONAMIENTO
· Presión de salida de grasa de 8 500 PSI.
· Entrega de hasta 85 g/min de flujo libre.
· Purga de aire automática y barra para llena-
do de grasa por succión.
· Válvula de aire automática.
· Manguera de alta presión de 30" con resor-
tes protectores en ambas terminales (evita
que la manguera se tuerza).
· Cople de alta presión para grasa.
· Batería adicional de 1,5 Ah NiCd para traba-
jos ininterrumpidos
· Cargador rápido de 1 hora (Cada carga pro-
vee la potencia necesaria para operar hasta
6 cartuchos de grasa en condiciones de flujo
libre).
5
ESPAÑOL•Manual de Usuario
1
2
3
4
5
6
2371 manual.indd 5 28/05/15 15:12

6
CARGA DE LA BATERÍA
Para un mejor funcionamiento, no cargue la
nueva batería hasta que esta haya agotado su
carga por completo. Cargar la batería antes de
que haya agotado su carga reducirá el tiempo
de vida de la misma. Todas las pistolas nuevas
vienen de fábrica con un 80% de carga y no
es necesario cargarlas hasta que la batería se
agote.
Cuando la batería se esté descargando, el ren-
dimiento de la pistola caerá. Este es el momen-
to correcto para cargar la batería. Recargar la
batería antes de que esta condición sea alcan-
zada reducirá el tiempo de vida de la misma.
Descargar la batería más allá de este punto
podría dañarla.
• Antes de usar la pistola grasera por primera
vez, si la batería está conectada a la pistola, re-
muévala presionando los dos botones de libe-
ración (un botón a cada lado del estuche de la
batería) y jalando la batería lejos de la pistola.
IMPORTANTE: La temperatura de la batería
se incrementará durante y un poco después de
su uso. Deje enfriar la batería hasta una tem-
peratura ambiente antes de cargarla, de otra
manera la batería podría no aceptar la carga
completa.
• Inserte la batería
dentro del socket del
cargador. Luego co-
necte el cargador a la
terminal eléctrica ate-
rrizada más cercana.
• Para comenzar a car-
gar presione el botón
de “encendido” en
el cargador. Una luz
verde indicará que la
batería está en carga.
Después de que la carga ha concluido (1-2 hrs.
Aprox.), desconecte el cargador de la alimenta-
ción y retire la batería.
PARA COMENZAR
1. Remover el cartucho vacío: Remueva cual-
quier cartucho en el contenedor de la pistola
antes de comenzar el rellenado. Para verificar
si el contenedor tiene un cartucho dentro,
primero comprima el resorte jalando el man-
go del émbolo completamente hacia afuera e
asegure la varilla del émbolo en la ranura del
extremo de la tapa. Remueva la cabeza de la
pistola girándola en sentido anti-horario para
remover cualquier cartucho vacío.
2. Asegurar/liberar la varilla del embolo: Esta
pistola incorpora una cuña en la varilla del ém-
bolo que se enclava dentro de una ranura en
el extremo de la tapa para sostener la varilla
del émbolo cuando está completamente exten-
dida. Antes de empujar la varilla del émbolo
dentro del contenedor, simplemente libérelo
de la ranura, permitiendo así deslizarse hacia
adelante.
3. Cebado: Usualmente después del llenado,
todo equipo de grasa contiene bolsas de aire
atrapadas dentro de la grasa. Las bolsas de aire
causan reducen o causan una nula descarga.
Remover estas bolsas de aire se refiere al Ce-
bado o a la Purga de aire. Es altamente reco-
mendable realizar el cebado de de la pistola
después de cada llenado.
CARGA DEL
CARTUCHO
1. Jale la varilla del
embolo completa-
mente hacia afuera y
asegure la cuña de la
varilla en la ranura del
extremo de la tapa del
contenedor de grasa.
2. Desenrosque el con-
tenedor de la cabeza
de la pistola girán-
dolo en sentido anti-
horario.
3. Cuidadosamente
presione el mango del
embolo para remover
el cartucho vacío del
contenedor de grasa.
4. Remueva la tapa de
plástico del cartucho
de grasa e inserte el
cartucho dentro del
contenedor.
5. Remueva la tapa
desplegable del cartu-
cho y enrosque el con-
tenedor a la cabeza de
la pistola.
Encendido
2371 manual.indd 6 28/05/15 15:12

7
ESPAÑOL•Manual de Usuario
6. Remueva el aire de la grasa siguiendo Ins-
trucciones de cebado.
LLENADO POR SUCCIÓN
1. Desenrosque el con-
tenedor de la cabeza
de la pistola girándolo
en sentido anti-hora-
rio. Inserte el extremo
abierto del contene-
dor 2” dentro del tan-
que de grasa.
2. Lentamente jale el
mango del émbolo
hacia afuera para suc-
cionar la grasa hacia
dentro del contenedor vacío mientras empuja
el contendor hacia adentro de la grasa hasta
que la varilla del émbolo esté completamente
estirada. Esto prevendrá que se formen bolsas
de aire dentro del contenedor.
3. El contenedor de grasa debería estar aho-
ra lleno. La superficie exterior pudiera tener
mucha grasa adherida y debe ser limpiada por
seguridad.
4. Sacuda el contenedor de la pistola para per-
mitir que la grasa se asiente. Enrosque fuerte-
mente el contenedor a la cabeza de la pistola.
5. Saque el aire de la grasa siguiendo las Ins-
trucciones de Cebado.
LLENADO CON BOMBA
1. Limpie la válvula del
llenado por succión
para quitarle cualquier
suciedad o grasa adhe-
rida. Active la bomba
transmisora hasta que
una pequeña por-
ción de grasa salga.
Este paso minimizará le transmisión de cual-
quier bolsa de aire.
2. Enganche la vari-
lla del émbolo con el
seguidor rotando el
mango del émbolo.
Conecte la válvula de
llenado por succión en
la pistola fuertemen-
te al adaptador del
cargador en la línea
de transferencia de la
bomba.
3. Comience a operar
la bomba de transfe-
rencia, manteniendo
su mano sobre la pis-
tola y presionando
ligeramente la pistola
hacia la bomba.
4. Una vez que el contenedor de la pistola esté
lleno, bombear se volverá demasiado difícil. La
varilla de seguimiento estará extendida aproxi-
madamente 8 pulgadas exponiendo la cuña de
la varilla. Deténgase en este momento. Desco-
necte la válvula de llenado por succión de la
línea de transferencia de la bomba.
5. Saque el aire de la grasa siguiendo las Ins-
trucciones de cebado.
INSTRUCCIONES DE CEBADO
1. Después del llenado por cartucho o por suc-
ción de la pistola grasera, cuidadosamente
libere el mango del émbolo de la ranura del
extremo de la tapa (En el caso del llenado con
bomba, la varilla del émbolo ya está suelta de
la ranura)
2. Enganche la varilla del émbolo con el segui-
dor rotando el mango del émbolo, mueva la
varilla del émbolo hacia adelante y hacia atrás
dentro del contenedor para sacar el aire que
pudiera estar atrapado.
3. Desenganche la varilla del émbolo del segui-
dor rotando el mango del émbolo. Inserte la
varilla dentro del contenedor. Limpie la purga
de aire automática para librarla de cualquier
suciedad o bloqueo.
4. Presione el gatillo de la pistola hasta que co-
mience a despachar grasa.
MANTENIMIENTO
1. ANTES DE REALIZAR CUALQUIER ACCIÓN DE
MANTENIMINETO O CUANDO SE GUARDE LA
PISTOLA GRASERA, asegúrese de que el inte-
rruptor esté en la posición de “APAGADO”, la
batería ha sido removida de la pistola y el car-
gador esté desconectado de la fuente de ali-
mentación.
2. ANTES DE CADDA USO, Revise en busca de
daño, desalineación, ruido o amarre de partes
móviles, fugas en la batería, daños en la man-
Válvula de
llenado.
2371 manual.indd 7 28/05/15 15:12

8
guera y cualquier otra situación que pudiera
representar un riesgo.
3. No use equipo defectuoso a menos que la
falla haya sido solucionada.
4. Nunca queme baterías, ya que estas pueden
explotar. No cargue baterías que tengan fugas,
contacte a las autoridades locales de manejo
de residuos sólidos para recibir instrucciones
sobre la correcta disposición o reciclado de los
desechos de baterías.
5. Utilice tela suave y seca para remover toda
la suciedad, grasa y polvo del exterior de la pis-
tola. No utilice solvente para limpiar la pistola.
6. Guarde la pistola y sus accesorios en un lugar
limpio y seco, y lejos del alcance de los niños.
ENGRASADO DE LAS CONEXIÓNES PARA
GRASA/ ENGRASADORES
1. El acoplador al final de la válvula de control
tiene una construcción tipo mordaza. Las mor-
dazas del acoplador se fijaran a presión a un
engrasador y mantendrán un ajuste apretado.
2. Cuando conecte el acoplador al engrasador,
presione el acoplador directamente sobre el
engrasador para realizar un ajuste prefecto.
Comience a operar la válvula de control con el
acoplador tan perpendicular como sea posible
al engrasador.
3. Una vez que el engrasado está completo, in-
cline ligeramente el acoplador, gírelo y jálelo.
La acción de inclinar y girar permitirá una fácil
remoción del acoplador del engrasador.
SOLUCIONADOR DE PROBLEMAS
FUGA DE GRASA POR LA VÁLVULA DE ALIVIO
Contrapresión mayor a 6,000 PSI: No utilice la
pistola en esta condición.
ESPECIFICACIONES TÉCNICAS
Empuje
para conectar
Para quitar
incline, gire
y jale
BATERÍA
ENTRADA DE CARGADOR
SALIDA DE CARGADOR
CONTENEDOR DE GRASA
ENTREGA DE GRASA
PRESIÓN DE TRABAJO
PESO
19,2 V
120 V ~ 60 Hz
19,2 V 1,5 Ah
500 cc
85 g (3 oz)
586 bar (8 500 PSI)
7,4 kg (16,3 lb)
LA PISTOLA NO FUNCIONA
La batería no está cargada: Cargue la batería.
La batería no se instaló correctamente: Remue-
va la batería e instálela correctamente.
LA BATERÍA NO CARGA
El cargador no está conectado a la fuente de
alimentación: Conecte el cargador apropiada-
mente.
La batería no está instalada correctamente en
el cargador: Remueva la batería e instálela co-
rrectamente.
2371 manual.indd 8 28/05/15 15:12

GENERAL SAFETY RULES
Your CORDLESS GREASE GUN has many fea-
tures that will make your job faster and easier.
Safety, performance and reliability have been
given top priority in the design of this tool,
qualities to make easy to maintain and to op-
erate.
WARNING: Read and understand all in-
structions. Failure to follow all indications list-
ed below, may result in electric shock, fire and/
or serious personal injury.
SAVE THESE INSTRUCTIONS.
SAFETY IN WORKING AREA
Keep your work area clean and well lit. Clut-
tered benches and dark areas may cause acci-
dents.
Do not operate power tools in explosive atmo-
spheres, such as in the presence of flammable
liquids, gases or dust. Some power tools create
sparks which may provoke fire.
Keep away observers, children and visitors
while operating a power tool. Distractions can
cause you to lose control.
ELECTRIC SAFETY
Double insulation eliminates the need for the
three wire grounded power cord and ground-
ed power supply system.
Avoid the body contact with grounded surfac-
es such as pipes, radiators and refrigerators.
There is an increased risk of electric shock if
your body is grounded.
Don’t expose power tools to rain or wet condi-
tions. The precense of water into power tools
will increase the risk of electric shock.
Do not abuse of the power cord. Never use the
power cord to carry the tool and do not pull
the plug off the outlet. Keep the cable away of
heat, oil, sharp edges or moving parts. Replace
damaged cords immediately. Damaged cords
increase the risk of electric shock.
When operating a power tool outside, use an
outdoor extension cord marked “W-A” or “W”.
These cords are rated for outdoor use and re-
duce the risk of electric shock.
EXTENSION CORDS
Replace damaged cords immediately. The use
of damaged cords can shock, burn or electric
shock. If an extension cord is necessary, a cord
with adequate size conductors should be used
to prevent excessive voltage drop, loss of pow-
er or overheating. The table below shows the
correct size to use, depending on cord length
and nameplate amperage rating of tools. In
case of doubt use the next heavier gauge. Al-
ways use UL listed extension cords.
SIZE RECOMMEND EXTENSION CABLES
PERSONAL SAFETY
Stay alert, watch what you are doing and use
common sense when operating a power tool.
Don’t use the tool if you are tired or under the
influence of drugs, alcohol or medication. A
moment of unattention while operating pow-
er tools may cause a serious personal injury.
Dress properly. Do not wear loose clothing or
jewellery. Contain long hair. Keep your hair,
clothing and gloves away of moving parts.
Loose clothes, jewellery or long hair can be
caught in moving parts.
Avoid an accidental starting. Be sure that the
switch is OFF before plugging in. Carrying
tools with the finger on the switch or plug in
the tool switch in ON may cause accidents.
Remove the adjusting keys or wrenches be-
fore turning the tool on. A wrench or a key
that is left close to a rotating part of the tool
may provoke a personal injury.
Do not overreach. Keep proper footing and
balance at all times. Proper footing and bal-
ance enables better control of the tools on un-
expected situations.
Use safety equipment. Always wear eye pro-
tection. Dust mask, nonskid safety shoes, hard
hat, or hearing protection must be used for ap-
propriate conditions.
Before connecting the tool to a power source
(receptacle, outlet, etc.) be sure that the volt-
age supplied is the same as that one specified
9
ENGLISH•User’s manual
2371 manual.indd 9 28/05/15 15:12

on the nameplate of the tool. To use a not
specified voltage may cause a serious injury to
the user as well as damage the tool.
IMPORTANT: This appliance is not intended
for use by persons (including children) with re-
duced physical, sensory or mental capabilities
may be different or reduced, or lack of experi-
ence or knowledge, unless such persons are su-
pervised or trained to operate the product by
a person responsible for their safety. Children
should be supervised to ensure they do not use
the devices as toys.
TOOL USE AND CARE
Do not force the power tool. Use the correct
tool for the application. The correct tool will
do the job better and more safely at the rate
that it was designed to work at.
Do not use tools if switch does not turn it on or
off. Any tool that cannot be controlled whith
the switch is dangerous and must be repaired.
Disconnect the plug from the power source
before making any adjustments, changing ac-
cessories or storing the tool. This preventive
safety measures reduce the risk of accidental
starting of the tool.
When the power tool is not in use, store it out
of the reach of children, and do not allow in-
dividuals who are not familiar with the power
tool or these instructions to operate it. Power
tools are dangerous in the hands on untrained
users.
Maintain the power tool. Check for misalign-
ment or binding of moving parts, broken parts,
and any other condition that may affect the
operation of the power tool. If it is damaged,
have it repaired before using. Many accidents
are caused by poorly maintained power tools.
Check for misalignment or bonding of moving
parts, breakage parts, and any other condition
that may affect the tools operation. If you find
a damaged tool, take it to service before use it.
Use only accessories that are recommended by
the manufacturer of your model. Suitable ac-
cessories for one tool, may become hazardous
when are used on another tool.
Keep cutting tools, sharpened and clean. Cut-
ting tools in good condition with sharpened
edges, are less likely to stuck in workpieces or
easier to control.
Is recommendable to use a safety device suit-
able, such a thermal and diferential switch
when you are using an electric equipment.
SERVICE
Tool service must be perfomed only by quali-
fied repair personnel. Service or maintenance
performed by unqualified personnel could re-
sult in a risk of injury.
SPECIFIC SAFETY RULES FOR
CORDLESS GREASE GUNS
1. Use complete safety gear (rubber gloves,
safety shoes, ear plugs, safety goggles, hard
hat etc.). Avoid electric shock by avoiding di-
rect contact with grounded components such
as pipes, couplers etc.
2. Keep your hair, clothing, and gloves away
from moving parts. Keep hands clear of the
exposed rubber portion of Hose.
3. Do not operate this gun in explosive atmo-
spheres such as in the presence of flammable
liquids, gases, or dust. It may create sparks
leading to fire causing personal injury & mate-
rial damage.
4. The water entering the electric grease gun
will increase the risk of electric shock. Do not
handle the charger, its power plug, or the
Grease Gun with wet hands or in damp loca-
tions.
5. To avoid accidental starting, always release
the Switch before connecting the grease gun
to electrical supply.
6. Remove any metal tool attached to the
grease gun before turning the power on. A
wrench or a key that is left attached to a mov-
ing part of the gun may cause personal injury.
7. Always maintain your grip & balance while
operating the gun.
8. Use only APPROVED hoses and follow whip
hose instructions and warnings.
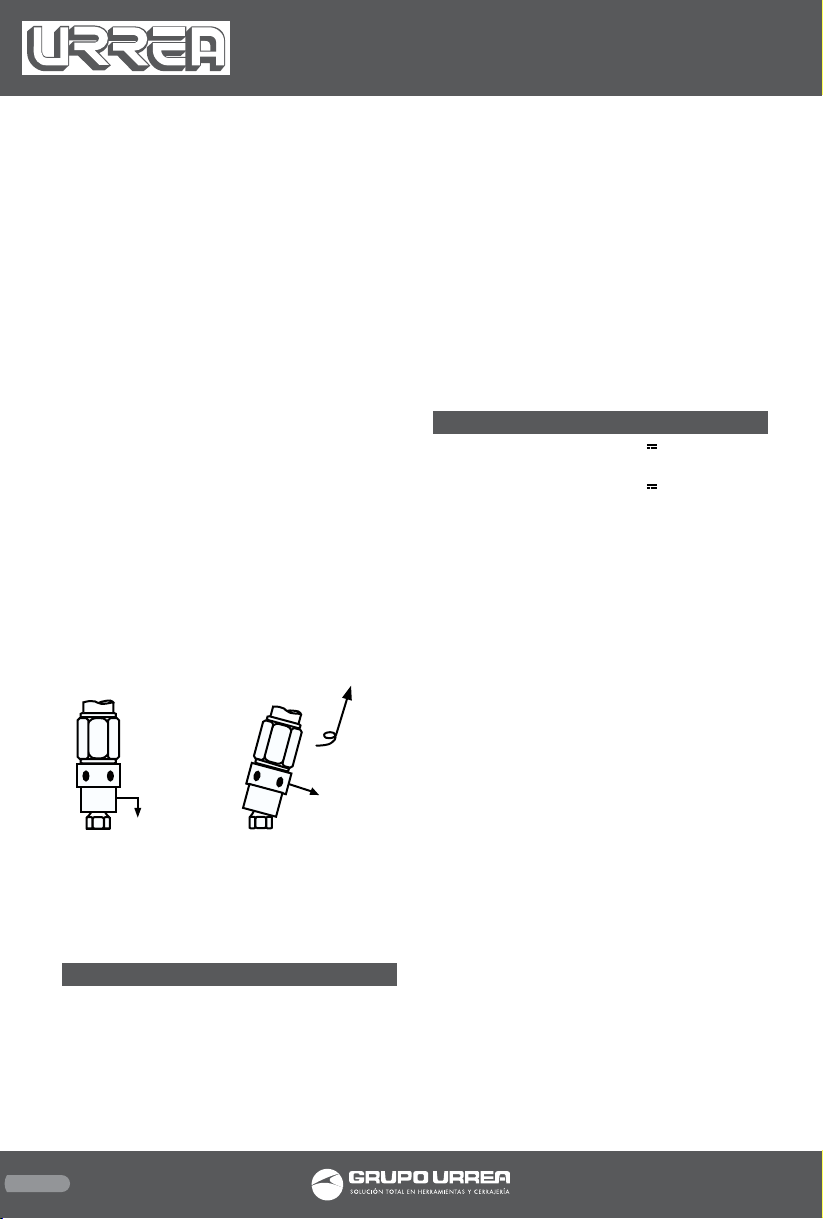
9. If there is leakage from the pressure valve
while using the gun, it indicates that the back
pressure is more than 6,000 PSI. It is not a prod-
uct failure. It is an indication that the gun is
not to be used for this application. Please DO
NOT try to adjust the pressure valve as it has
been set as 8 500 PSI.
Please DO NOT try to remove the valve, as this
may lead to accidents.
10
2371 manual.indd 10 28/05/15 15:12

FEATURES
KNOW YOUR TOOL
Before attempting to use this product, become
familiar with all of its operating features and
safety requirements.
1. BATTERY POWERED GREASE GUN.
2. GREASE CONTAINER (500 cc).
3. HIGH PRESSURE HOSE.
4. GREASE DISPENSER.
5. QUICK CHARGER.
6. BATTERY (x2).
OPERATION INSTRUCTIONS
PRODUCT FEATURES
· 8 500 PSI, Output Grease Pressure
· Grease Output upto 3 oz. (85 g/minute) in
free flow.
· Automatic Air Bleeder & Bulk Loader
· Automatic Pressure Release Valve.
· 30"-High Pressure Hose with Spring Guard
on both ends (prevents hose from kinking).
· High Pressure Grease Coupler.
· An additional 1.5Ah Ni-Cd Battery Pack for
un-interrupted greasing.
· One hour quick charger (each battery charge
provides power to dispense upto 6 Grease
cartridges in free flow condition).
11
ENGLISH•User’s manual
CHARGING THE BATTERY PACK
For best performance, do not recharge the new
battery unless it is completely discharged. Re-
charging the battery pack before its complete
discharge will reduce the total work life of the
pack. All New guns come with 80% charge
from the factory and no charging is needed
until it is used and the battery is run down.
As a battery pack approaches the discharged
state, the tool performance drops. This is the
right time to recharge the battery pack. Re-
charging the battery pack before this condi-
tion is reached will reduce the total work life
of the pack. Discharging the pack beyond this
point can damage the pack.
• Before using Grease Gun for the st time, if
the battery pack is installed in the gun, remove
it by depressing the two battery release but-
tons (one button on each side of battery pack)
and pull battery pack out of gun.
IMPORTANT: Battery temperature will
increase during and shortly after use. Allow
the battery pack to cool to room temperature
before charging otherwise batteries may not
accept a full charge.
• Insert the Battery
Pack into the Charg-
ing Socket of the
Charger. Then, plug
the Charger into the
nearest, grounded,
electrical outlet.
• To start charging,
press the “Set” button
on the Charger.
A green light indicates that the battery is
charging. After termination of the charging
(approx. 1-2 hours), pull charger out of socket
and remove battery.
GETTING STARTED
1. Removing empty cartridge: Remove any
cartridge in the grease gun barrel prior to re-
filling. To check if a cartridge is in the barrel,
first compress the spring by pulling the plunger
handle fully outward & latch the plunger rod
in the slot on the end cap. Remove the grease
gun head by turning it anticlockwise to remove
any empty cartridge.
2. Locking / Releasing the plunger rod: This
gun incorporates a groove in the plunger rod
SET
1
2
3
4
5
6
2371 manual.indd 11 28/05/15 15:12

12
that is latched onto a slot in the end cap to
hold the plunger rod when fully extended. Be-
fore pushing the plunger rod into the barrel,
simply release it from the slot, allowing it to
slide forward.
3. Priming: Usually after loading, all grease
equipment have some trapped air pockets in
grease. Trapped air causes zero or reduced
grease discharge. Removing these air pockets
from grease is referred to as Priming or Air
Bleeding. It is highly recommended to prime
the grease gun after every loading.
CARTRIDGE LOADING
1. Pull the plunger rod
fully backwards and
latch the plunger rod
groove into the slot
on the end cap of the
grease barrel.
2. Unscrew the grease
barrel from the gun
head by rotating anti-
clockwise.
3. Carefully release
the plunger handle
to eject the empty
cartridge from grease
barrel.
4. Remove the plastic
cap from the grease
cartridge and insert
cartridge into the
grease barrel.
5. Remove the pull tab
from grease cartridge
and screw grease bar-
rel into gun head.
6. Release air from
grease by following
Priming Instructions.
BULK LOADING
1. Unscrew the grease
barrel from the gun
head by rotating anti-
clockwise. Insert the
open end of the bar-
rel about 2 into the
grease container.
2. Slowly pull the plunger handle back to draw
in grease into the empty barrel while pushing
the grease barrel deeper into the grease un-
til the plunger rod is fully extended. This will
prevent air pockets from being pulled into the
grease barrel.
3. The grease gun barrel should now be filled
with grease. The outside surface may have a
lot of grease stuck to it and should be wiped
clean for safety.
4. Shake the grease gun barrel to allow grease
to settle down. Screw back the grease gun
head tightly onto the barrel.
5. Release air from grease by following Priming
Instructions.
TRANSFER PUMP LOADING
1. Wipe the grease
gun’s bulk loader
valve free of grease
and possible debris.
Activate the transfer
pump until a small
amount of grease
comes out. This step
will minimize transfer-
ring any trapped air.
Bulk loader valve.
2. Engage the plunger
rod with the follower
by rotating the plung-
er handle. Connect
the Bulk Loader Valve
tightly on the grease
gun to the loader
adapter on the trans-
fer pump line.
3. Start operating the
transfer pump, keep-
ing your hand on the
grease gun, lightly
pushing it down onto
the transfer pump.
4. Once the gun barrel is filled, pumping
would get very hard. The follower rod will be
extended approximately 8 inches exposing the
plunger rod groove. Stop at this time. Discon-
nect the Bulk Loader Valve from the transfer
pump line.
5. Release air from grease by following Priming
Instructions.
Bulk loader
valve
2371 manual.indd 12 28/05/15 15:12

13
ENGLISH•User’s manual
PRIMING INSTRUCTIONS
1. After cartridge or bulk loading of the grease
gun, carefully release plunger handle from the
slot in the end cap (In case of Filler Pump Load-
ing, plunger rod is already free from the slot).
2. Engage plunger rod with the follower by ro-
tating the plunger handle. Move plunger rod
back and forth into the grease barrel to force
out any trapped air.
3. Disengage plunger rod from the follower by
rotating the plunger handle. Push the plunger
rod into the grease barrel. Wipe the Automatic
Air Bleeder to make it free of any blockage or
debris.
4. Press the grease gun switch until the gun
starts dispensing grease.
MAINTENANCE
1. BEFORE PERFORMING ANY MAINTENANCE
OR WHEN STORING THE GREASE GUN, ensure
the Switch is in the ”OFF” position, Battery is
removed from the Grease Gun and the Charger
is unplugged from its electrical outlet.
2. BEFORE EACH USE, check for misalignment,
damage, noise or binding of moving parts,
leaking Battery Pack, damaged Hose, and any
other hazardous condition.
3. Do not use a defective equipment unless the
fault is rectified.
4. Never burn Batteries, as they can explode in
a fire. Do not charge leaking batteries. Contact
local solid waste authorities for instructions
on correct disposal or recycling of the Battery
Pack.
5. Use a soft, dry cloth, remove all dirt, grease,
and debris from the exterior of the Grease
Gun. Do not use solvents to clean the Grease
Gun.
6. Keep the Grease Gun and its accessories in a
clean, dry location and out of children reach.
GREASING A GREASE FITTING (GREASE NIPPLE)
1. The grease coupler provided at the end of
the grease gun hose has a jaw type construc-
tion. The coupler jaws will snap on to a grease
fitting and maintain a tight fit.
2. When connecting the coupler to the grease
fitting, press the coupler straight onto the
grease fitting to form a snug fit. Start operat-
ing the grease gun with the coupler as square
to the grease fitting as possible.
3. Once greasing is completed, slightly tilt the
coupler, twist and pull back. The tilt and twist
action will allow easy removal of the coupler
from the grease fitting.
TROUBLESHOOTING
GREASE LEAKING FORM PRESSURE RELEASE
VALVE
Back Pressure more than 6,000 PSI: Do not use
gun for this application.
GREASE GUN NOT WORKING
Battery not charged: Charge the battery and
then use.
Battery not installed properly: Take out bat-
tery and reinstall correctly.
BATTERY NOT CHARGING
Battery charger not connected to Power Sour-
ce: Connect battery charger properly.
Battery not fixed properly in the charger: Take
out battery from the charger and fix again.
TECHNICAL DATA
To engage,
push straight on
To remove,
Tilt, Twist
& Pull
BATTERY
CHARGER INPUT
CHARGER OUTPUT
GREASE CONTAINER
GREASE DELIVER
WORKING PRESSURE
WEIGHT
19,2 V
120 V ~ 60 Hz
19,2 V 1,5 Ah
500 cc
85 g (3 oz)
586 bar (8 500 PSI)
7,4 kg (16,3 lb)
2371 manual.indd 13 28/05/15 15:12

14
Notas / Notes
2371 manual.indd 14 28/05/15 15:12

15
Notas / Notes
Manual de usuario / User’s manual
2371 manual.indd 15 28/05/15 15:12

2371
Urrea Herramientas Profesionales S.A. de C.V.
Warranties this product for a period of 1 year in
its parts, components and manual labour against
any manufacture defect from the purchasing date.
Purchase date: ____/____/____
Product:____________________
Brand:______________________
Model:______________________
______________________________
Distributor seal and signature
Sold and Imported by:
Urrea Herramientas Profesionales S.A. de C.V.
km 11,5 Carretera A El Castillo, El Salto, Jalis-
co, México. C. P. 45680, Tel. (33) 3208 7900,
RFC UHP900402Q29
Terms:
In order to make warranty effective you must pres-
ent the product along with the warranty properly
fillled and signed to an authorized distributor or
service center.
Urrea Herramientas Profesionales S.A. de C.V.
will cover the transportation cost related to the
warranty.
This warranty is not applicable in the follow-
ing cases:
· When the product has not been used according
to normal conditions or natural wear of its parts.
· When the product has not been used according
with this user’s manual instructions.
· When the product has been fixed or modified by
unauthorized or unqualified person.
Urrea Herramientas Profesionales S.A. de C.V.
garantiza este producto por el termino de 1 año
en sus piezas, componentes y mano de obra con-
tra cualquier defecto de fabricación a partir de la
fecha de entrega.
Fecha de venta: ____/____/____
Producto: ___________________
Marca: ______________________
Modelo: ____________________
______________________________
Sello y firma de distribuidor
Comercializado e Importado por:
Urrea Herramientas Profesionales S.A. de C.V.
km 11,5 Carretera A El Castillo, El Salto, Ja-
lisco, México. C. P. 45680, Tel. (33) 3208 7900,
RFC UHP900402Q29
Condiciones:
Para hacer efectiva la garantía deberá presentar
el producto junto con la poliza de garantia debi-
damente firmada y sellada por el establecimiento
donde la adquirio, en cualquiera de los centros de
servicio autorizados.
Los gastos de transportación que se deriven del
cumplimiento de la garantía seran cubiertos por:
Urrea Herramientas Profesionales S.A. de C.V.
Esta garantía no será valida en los siguientes
casos:
· Cuando el producto haya sido utilizado en condi-
ciones distintas a las normales o al desgaste natu-
ral de sus partes.
· Cuando el producto no haya sido operado de
acuerdo al instructivo de uso que lo acompaña.
· Cuando el producto haya sido alterado o repara-
do por personas no autorizadas.
ESPAÑOL
POLIZA DE GARANTÍA
ENGLISH
WARRANT POLICY
16
2371 manual.indd 16 28/05/15 15:12
Table of contents
Languages:
Other Urrea Tools manuals

Urrea
Urrea TRM300 User manual

Urrea
Urrea 6310 User manual

Urrea
Urrea UP711 User manual

Urrea
Urrea 23RG250 Dimensions and installation guide

Urrea
Urrea EN950 User manual

Urrea
Urrea EN916 User manual

Urrea
Urrea UEXBT Dimensions and installation guide

Urrea
Urrea 6223 Dimensions and installation guide

Urrea
Urrea UPS15 Dimensions and installation guide

Urrea
Urrea 9991A User manual