V-TUF HDC140-110V User manual

HDC140-110V
Please read this manual before using the HDC140-110V

E2
A1-A2-A3-A4
D
B5
B3
C3
C1
C9
L
C10
E1
B4 H
2

12
C10
C10
B7
3
Ø13
3
4
C9
B5
3

3
0
H
I
I
I
D
4

5
I
Volt
230 1~ 3 x 1,5 mm23 x 2,5 mm2
400 3~ 4 x 1,5 mm24 x 2,5 mm2
1 ÷ 25 m 25 ÷ 50 m
230 V 1~ 400 V 3~
L
C1
M
5

1
SAFETY INSTRUCTIONS
1.1 The appliance you have purchased is a technologically advanced product designed by
one of the leading European manufacturers of high pressure washers. To obtain the
best performance from your unit, read this booklet carefully and follow the instructions
each time you use it. During connection, use and servicing of the appliance, take
all possible precautions to protect your own safety and that of the people in the
immediate vicinity. Read the safety regulations carefully and comply with them on all
occasions; failure to do so may put health and safety at risk or cause expensive damage.
2
SAFETY SIGNS
2.1 Comply with the instructions provided by the safety signs and symbols tted to the
appliance and in this manual.
The appliance and manual only feature the symbols relevant to the model purchased.
Check that the symbols and signs axed to the appliance are always present and legi-
ble; otherwise, t replacements in the original positions.
Warning - Caution - Hazard
Please read these instructions carefully before use.
E2 symbol (if symbol appears in manual)- Indicates that the appliance is intended
for professional use, i.e. for experienced people familiar with the relative technical,
regulatory and legislative factors and capable of performing the operations involved in
using and maintaining the appliance. This appliance is not intended for use by children,
persons with impaired physical, sensory or mental capabilities, or persons without the
necessary experience and knowledge.
E3 symbol (if symbol appears in manual)- Indicates that the appliance is intended
for non-professional (domestic) use. This appliance may be used by persons with
impaired physical, sensory or mental capabilities, or who do not have the necessary
experience and knowledge, if they are under supervision or have been instructed in the
safe use of the appliance and understand the risks involved.
Moving parts. Do not touch.
6

0Switch “OFF” position
ISwitch “ON” position
Guaranteed sound power level
Prohibition sign, informs users that local regulations may prohibit connection of
the product to the drinking water supply system.
Danger sign, warns users not to direct the water jet at people, animals, elec-
trical equipment or the product itself.
This product is rated in insulation class II. This means it has reinforced or double
insulation (only if symbol appears on appliance).
This product is rated in insulation class I. This means that it is equipped with a
protective earthing conductor (only if symbol appears on appliance).
The product complies with the relevant European directives.
E1 symbol - Indicates that the appliance must not be disposed of as municipal
waste; it may be handed in to the dealer on purchase of a new appliance. The appli-
ance’s electrical and electronic parts must not be reused for improper uses since they
contain substances which constitute health hazards.
Wear ear defenders.
Wear a protective mask.
Wear respiratory protection.
Wear protective gloves.
Wear safety footwear.
Wear protective clothing.
7

3
SAFETY RULES/RESIDUAL RISKS
3.1 SAFETY “DO NOTS”
3.1.1 WARNING. DO NOT allow children to use the appliance; supervise them to ensure
that they do not play with it.
3.1.2 WARNING. High pressure jets may be dangerous if incorrectly used.
3.1.3 WARNING. DO NOT use the appliance with ammable or toxic liquids, or any
products which are not compatible with its correct operation. Use of the
appliance in a potentially inammable or explosive atmosphere is forbidden.
3.1.4 WARNING. RISK OF EXPLOSION. DO NOT use the appliance to spray ammable
liquids.
3.1.5 WARNING. DO NOT point the water jet at people or animals.
3.1.6 WARNING. DO NOT point the water jet at the unit itself, electrical parts or other
electrical equipment.
3.1.7 WARNING. DO NOT use the appliance with people within its range of action unless
they are wearing protective clothing.
3.1.8 WARNING. DO NOT point the jet at yourself or others to clean clothing or footwear.
3.1.9 WARNING. DO NOT use the appliance outdoors when it is raining.
3.1.10 WARNING. DO NOT allow children, incompetent persons or those who have not
read and understood the instructions to use the appliance.
3.1.11 WARNING. DO NOT touch the plug and/or socket with wet hands.
3.1.12 WARNING. DO NOT use the appliance if the electric cable is damaged. If the
electric cable is damaged, it must be replaced by the manufacturer, one of its
authorised Service Centres or similarly qualied persons in order to avoid a
safety hazard.
3.1.13 WARNING. DO NOT use the appliance if a supply cable or important parts such as
the safety devices, high pressure hoses or gun are damaged.
3.1.14 WARNING. DO NOT jam the trigger in the operating position.
3.1.15 WARNING. Check that the data plate is axed to the appliance; if not, inform your
dealer. Appliances without plates must NOT be used as they are unidentiable
and potentially dangerous.
3.1.16 WARNING. DO NOT tamper with or adjust the setting of the safety valve or the
safety devices.
3.1.17 WARNING. DO NOT alter the original diameter of the spray head nozzle.
3.1.18 WARNING. DO NOT move the appliance by pulling on the ELECTRIC CABLE.
8

3.1.19 WARNING. DO NOT allow vehicles to drive over the high pressure hose.
3.1.20 WARNING. DO NOT move the appliance by pulling on the high pressure hose.
3.1.21 WARNING. When directed towards tyres, tyre valves or other pressurised
components, the high pressure jet is potentially dangerous. Do not use the
rotating nozzle kit, and always keep the jet at a distance of at least 30 cm during
cleaning.
3.1.22 WARNING. The use of non-original accessories and any other spare parts not spe-
cically intended for the model in question is prohibited. All modications to
the appliance are prohibited; any modications shall render the Declaration of
Conformity null and void and relieve the manufacturer of all liability under civil
and criminal law.
3.2 SAFETY “MUSTS”
3.2.1 WARNING. All electrical conductors MUST BE PROTECTED against the water jet.
3.2.2 WARNING. The electric supply connection must be made by a qualied electrician
and comply with IEC 60364-1. Either a residual current device that will cut o
the power supply if the leakage current to earth exceeds 30 mA for 30 ms or a
ground fault interrupt device must be installed.
3.2.3 WARNING. DURING start-up, the appliance may cause network noise.
3.2.4 WARNING. Use of a residual current breaker (RCB) will provide additional
protection for the operator (30 mA).
3.2.5 WARNING. Models supplied without plug must be installed by qualied sta.
3.2.6 WARNING. Use only approved electrical extension leads with suitable conductor
cross-section.
3.2.7 WARNING. Always turn o the switch when leaving the appliance unattended.
3.2.8
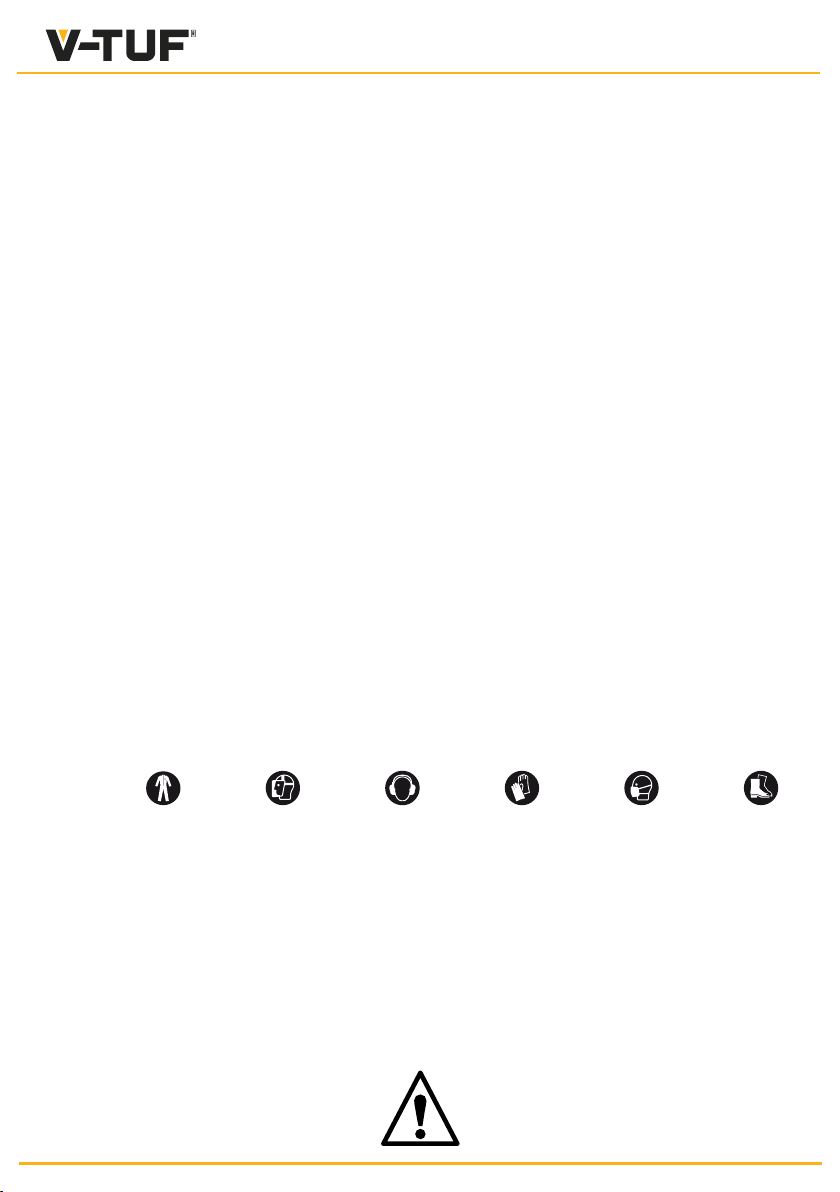
WARNING. High pressure may cause parts to rebound: wear all the protective
clothing (PPE) and equipment needed to ensure the operator’s safety.
3.2.9 WARNING. Before doing work on the appliance, REMOVE the plug.
3.2.10 WARNING. Before pressing the trigger, GRIP the gun rmly to counteract the recoil.
3.2.11 WARNING. COMPLY WITH the local water supply authority regulations. Under IEC
60335-2-79, the appliance may only be connected to the mains drinking water
supply if the supply hose is tted with a backow preventer valve with drain
facility corresponding to EN 12729 type BA. The backow preventer can be
ordered from the manufacturer.
9

3.2.12 WARNING. Water that has passed through backow preventers is considered to
be non-potable.
3.2.13 WARNING. Maintenance and/or repair of electrical components MUST be carried
out by qualied sta.
3.2.14 WARNING. DISCHARGE residual pressure before disconnecting the hose from the
appliance.
3.2.15 WARNING. CHECK before each use and at regular intervals that the screws are fully
tightened and that there are no broken or worn parts.
3.2.16 WARNING. ONLY USE detergents which will not corrode the coating materials of
the high pressure hose / electric cable.
3.2.17 WARNING. ENSURE that all people or animals keep a minimum distance of 16 yd.
(15m) away.
3.2.18 WARNING. This appliance is designed for use with the detergent supplied or
recommended by the manufacturer. The use of other detergents or chemicals
may adversely aect the appliance’s safety.
3.2.19 WARNING. Do not allow the detergent tocome into contact with the skin, and the
eyes in particular! In case of contact with eyes, rinse with plenty of water and
seek medical advice at once!
3.2.20 WARNING. High pressure hoses, ttings and joints are important for the appliance’s
safety. Use only hoses, ttings and joints recommended by the manufacturer.
3.2.21 WARNING. To ensure the appliance’s safety, only use the manufacturer’s genuine
parts, or other parts which carry its approval.
3.2.22 WARNING. Unsuitable extension cables can be dangerous. If an extension cable is
used, it must be suitable for outdoor use, and the connection must be kept dry
and o the ground. Use of a power cable reel which keeps the socket at least 60
mm above the ground is strongly recommended.
3.2.23 WARNING. Switch the appliance o and disconnect it from the power supply before
assembly, cleaning, adjustments, maintenance, storage and transportation.
3.2.24 WARNING. Insert the pipe jet kit down to the red mark before turning the
appliance on.
10

4
4.1 Use of the manual
The manual forms an integral part of the appliance and should be
kept for future reference. Please read it carefully before installing/
using the unit. If the appliance is sold, the seller must pass on this
manual to the new owner along with the appliance.
4.2 Delivery
The appliance is delivered partially assembled in a cardboard box.
The supply package is illustrated in g.1.
4.2.1 Documentation supplied with the appliance
A1 Use and maintenance manual
A2 Safety instructions
A3 Declaration of conformity
A4 Warranty regulations
4.3 Disposing of packaging
The packaging materials are not environmental pollutants but must
still be recycled or disposed of in compliance with the relevant
legislation in the country of use.
5
5.1 Envisaged use
This appliance has been designed for individual use for the cleaning
of vehicles, machines, boats, masonry, etc., to remove stubborn dirt
using clean water and biodegradable chemical detergents.
Vehicle engines may be washed only if the dirty water is disposed of
as per regulations in force.
- Intake water temperature: see data plate on the appliance.
- Intake water pressure: min. 0.1 MPa - max. 1 MPa.
- Operating ambient temperature: above 0°C.
The appliance is compliant with the IEC 60335-1 and IEC 60335-2-79
standards.
5.2 Operator
The symbol illustrated in g. 1 identies the appliance’s intended
operator (professional or non-professional).
5.3 Main components
B2 Lance
B3 Gun with safety catch
B4 Electric cable with plug (on models with this feature)
B5 High pressure hose
B6 Detergent tank (on models with this feature)
B7 Oil cap (on models with this feature)
E Nozzle
F Detergent regulator (on models with this feature)
GPressure regulator (on models with this feature)
L Water lter
5.3.1 Accessories (if included in the supply package – see g.1)
C1
Nozzle cleaning tool
C2
Rotating nozzle kit
C3
Handle
C4
Brush
C5
Hose reel
C6
Water suction kit
C7
Pipe jet kit
C8
Large surface
cleaning brush kit
C9
Adapter
C10
Screws
C11
Brackets
C12
Lever
C13
Detergent kit
C14
Wheels
C15
Lubricating grease tube
5.4 Safety devices
- Starter device (H)
The starter device prevents accidental use of the appliance.
Warning - danger!
Do not tamper with or adjust the safety valve setting.
- Safety valve and/or pressure limiting valve.
The safety valve is also a pressure limiting valve. When the gun
trigger is released, the valve opens and the water recirculates
through the pump inlet or is discharged onto the ground.
- Thermostat valve (D1 where tted) If the water temperature
exceeds the temperature set by the manufacturer, the thermostat
valve discharges the hot water and draws in an amount of cold
water equal to the amount of water discharged, until the correct
temperature is restored.
- Safety catch (D): prevents accidental spraying of water.
- Overload cutout: stops the appliance in case of overload.
6
6.1 Assembly
Warning - danger!
All installation and assembly operations must be per-
formed with the appliance disconnected from the mains power
supply.
The assembly sequence is illustrated in g.2.
6.2 Fitting the pressure release caps (on models with this feature)
To prevent oil leaks, the appliance is delivered with the oil intakes
sealed with red caps which must be replaced with the pressure
release caps supplied.
6.3 Fitting the rotating nozzle
(For models with this feature).
The rotating nozzle kit delivers greater washing power.
Use of the rotating nozzle may cause a reduction in pressure of
25% compared to the pressure obtained with the adjustable nozzle.
However, the rotating nozzle kit delivers greater washing power due
to the rotation of the water jet.
6.4 Electrical connection
Warning - danger!
Check that the electrical supply voltage and frequency
(V-Hz) correspond to those specied on the data plate (g.2).
6.4.1 Use of extension cables
Use cables and plugs with "IPX5" protection level.
The cross-section of the extension cable should be pro-
portionate to its length; the longer it is, the greater its
cross-section should be. See table 1.
6.5 Water supply connection
Warning - danger!
Only clean or ltered water should be supplied to
the appliance. The ow rate of the water inlet tap should be
equal to the pump ow rate.
Place the appliance as close to the water supply system as possible.
6.5.1 Connection points
Water outlet (OUTLET)
Water inlet with lter (INLET)
6.5.2 Connection to the mains water supply
The appliance may only be connected directly to the
mains drinking water supply if the supply hose is tted
with a backow preventer valve as per current regulations
in force. Make sure that the hose is at least Ø 13 mm, that
it is reinforced and that it is not more than 25 m long.
6.5.3 Suction of water from open containers
1) Screw the inlet hose with lter to the water INLET and
insert it down to the bottom of the container.
2) Vent the air from the appliance:
a) Unscrew the lance.
b) Start the appliance and keep the gun open until there
are no air bubbles in the water owing out.
3) Switch the appliance o and screw the lance back on.
N.B.: the maximum suction height is 0.5 m. The suction
hose should be lled before use.
7
7.1 Adjusting the spray nozzle (for models with this feature)
Water ow is adjusted by regulating the nozzle (E).
11

7.2 Adjusting the detergent
To deliver detergent at the correct pressure, set the nozzle (E)
(where tted) on " " or t the detergent kit (C13) (where available)
as shown.
The quantity of detergent delivered is adjusted using the regulator (F).
7.3 Adjusting the working pressure (on models with this feature)
The regulator (G) is used to adjust the working pressure. The pres-
sure is shown on the pressure gauge (where tted).
8
8.1 Controls
- Starter device (H).
Set the starter switch on (ON/I) to:
a) start the motor (in models without TSS device);
b) set the motor ready to start (in models with TSS device).
If there is a pilot light on the starter device, it should light up.
Set the starter device switch on (OFF/0) to stop the appliance.
If there is a pilot light on the starter device, it should go out.
- Water jet control lever (I).
Warning - danger!
During operation the appliance must be positioned as
shown in g. 4 on a rm, stable surface.
8.2 Start-up (see g. 4)
1) Turn on the water supply tap fully.
2) Release the safety catch (D).
3) Depress the gun trigger for a few seconds and start up the appli-
ance using the starter device (ON/I).
Warning - danger!
Before starting up the appliance check that it is receiv-
ing water correctly; use of the appliance without water will
damage it. Do not cover the ventilation grilles when the
appliance is in use.
TSS models - In TSS models with automatic delivery ow cut-o system:
- when the gun trigger is released the dynamic pressure automati-
cally cuts out the motor;
- when the gun trigger is depressed the automatic drop in pressure
starts the motor and the pressure is restored after a very slight delay;
- if the TSS is to function correctly, all gun trigger releasing and
depressing operations must be at least 4-5 seconds apart.
To prevent damage to the appliance, do not allow it to
operate dry and check that it is properly supplied with water.
For models without TSS, to prevent damage to the appliance
due to an increase in water temperature, do not cut o the jet
of water for more than 5 minutes with the appliance running.
8.3 Stopping
1) Set the starter device switch on (OFF/0).
2) Depress the gun trigger and discharge the residual pressure
inside the pipes.
3) Engage the safety catch (D).
8.4 Restarting
1) Release the safety catch (D).
2) Depress the gun trigger and discharge the residual air inside
the pipes.
3) Set the starter device on (ON/I).
8.5 Storage
1) Turn o the water supply tap.
2) Discharge the residual pressure from the gun until all the water
has come out of the appliance.
3) Switch the appliance o (OFF/0).
4) Remove the plug from the socket.
5) Drain and wash out the detergent tank at the end of the working ses-
sion. To wash out the tank, use clean water instead of the detergent.
6) Engage the gun safety catch (D).
8.6 Relling and using detergent
The detergent must be delivered using the accessories and by
the procedures described in point 7.3.
Use of a high pressure hose longer than the one originally supplied
with the appliance, or the use of an additional hose extension, may
reduce or completely halt the suction of detergent.
Fill the tank (B6) with highly biodegradable detergent.
8.7 Recommended cleaning procedure
Dissolve dirt by applying the detergent mixed with water to the
surface while still dry.
When dealing with vertical surfaces work from the bottom upwards.
Leave the detergent to act for 1-2 minute but do not allow the
surface to dry. Starting from the bottom, use the high pressure jet
at a minimum distance of 30 cm. Do not allow the rinse water to run
onto unwashed surfaces.
In some cases, scrubbing with brushes is needed to remove dirt.
High pressure is not always the best solution for good cleaning
results, since it may damage some surfaces. The nest adjustable
nozzle jet setting or the rotating nozzle should not be used on
delicate or painted parts, or on pressurised components (e.g. tyres,
ination valves, etc..).
Eective cleaning depends on both the pressure and volume of the
water used, to the same degree.
9
Any maintenance operations not covered by this chapter should be
carried out by an Authorised Sales and Service Centre.
Warning - danger!
Always disconnect the plug from the power socket
before carrying out any work on the appliance.
9.1 Cleaning the nozzle
1) Disconnect the lance from the nozzle.
2) Remove any dirt deposits from the nozzle hole using the tool (C1).
9.2 Cleaning the lter
Inspect the inlet lter (L) and detergent lter (if tted) before each
use, and clean in accordance with the instructions if necessary.
9.3 Unjamming the motor (on models with this feature)
In case of lengthy stoppages, limescale sediments may cause the
motor to seize. To unjam the motor, turn the drive shaft with a
tool (M).
9.4 Relling the oil (for models with this feature)
Add oil through the intake hole to restore the correct level.
For oil characteristics, refer to the “Oil characteristics” table.
9.5 End-of-season storage
Treat the appliance with non-corrosive, non-toxic antifreeze before
storing it away for winter.
Put the appliance in a dry place, protected from frost.
10
Store the accessories as shown in g. 5.
Transport the machine as shown in g. 5.
12

11
TROUBLESHOOTING
Problem Possible causes Remedy
Pump does not reach working
pressure
Nozzle worn Replace nozzle
Water lter fouled Clean lter (L) (g.5)
Insucient water supply Turn on water supply tap fully
Air being sucked into system Check tightness of hose ttings
Air in pump
Switch o the appliance and keep depressing and releas-
ing the gun trigger until the water comes out in a steady
ow. Switch the appliance back on again.
Adjustable nozzle not positioned correctly Set nozzle (E) on (+) setting (g.3)
Thermostatic valve tripped
Wait for correct water temperature to be restored
Water being sucked from an open container from a
height of more than 0.5 m.
Reduce the suction height.
Pump pressure drops during
suddenly use
Water being sucked from an external tank Connect appliance to the mains water supply
Inlet water too hot Reduce temperature
Nozzle clogged Clean nozzle (g.5)
Inlet lter (L) fouled Clean lter (L) (g.5)
Motor “buzzes" but fails to start
Power supply voltage too low Check that the voltage of the mains power supply line is
the same as that on the plate (g.2)
Voltage drop due to use of extension cable Check characteristics of extension cable
Appliance not used for a long period of time Contact your nearest Authorised Service Centre
Problems with TSS device Contact your nearest Authorised Service Centre
Motor fails to start
No electrical power Check that the plug is rmly in the socket and that the
mains voltage supply is present (*)
Problems with TSS device Contact your nearest Authorised Service Centre
Appliance not used for a long period of time
Using the tool (M) unjam the motor through the hole at the
rear of the appliance (in models with this feature) (g. 5)
Water leakages Seals worn Have the seals replaced at your nearest Authorised
Service Centre
Safety valve tripped and discharging Contact an Authorised Service Centre
Appliance noisy Water too hot Reduce temperature (see technical data)
Oil leakages Seals worn Contact your nearest Authorised Service Centre
TSS versions only: appliance starts
even with gun trigger released High pressure system or pump circuit not watertight Contact your nearest Authorised Service Centre
TSS versions only:no water delivery
when gun trigger is depressed
(with supply hose connected)
Nozzle clogged Clean nozzle (g.5)
No detergent sucked in
Adjustable nozzle on high pressure setting Set nozzle (E) on " " setting (g.3)
Detergent too dense Dilute with water
High pressure hose extension being used Fit original hose
Deposits or restriction in detergent circuit Flush with clean water and eliminate any restrictions. If the
problem persists, contact an Authorised Service Centre
Water escapes from thermo-
stat valve
Water temperature inside pump head has
exceeded max. rated value stated on nameplate
With appliance in operation, do not stop the water
jet for more than 5 minutes at a time
(*) If the motor stops and does not restart during operation, wait 2-3 minutes before repeating the start-up procedure (Overload cutout has been tripped).
If the problem recurs more than once, contact your nearest Authorised Service Centre.
MODEL SERIAL NUMBER
13

WARRANTY
The validity of the warranty is in accordance with the relevant legislation in the country where the product is sold (unless otherwise stated by the producer).
The warranty covers materials, construction and conformity defects during the warranty period, during which time the manufacturer will replace defective
parts and repair the product if not excessively worn, or replace it.
The warranty does not cover components subject to normal wear and tear (valve, piston, water gasket, oil gasket, springs, O-rings, accessories such as the
hose, gun, brushes, wheels, etc.);
The warranty does not cover defects caused by or arising from:
- improper use, misuse, negligence,
- hire or professional use if the product has been sold for domestic use,
- failure to comply with the maintenance instructions provided in this manual,
-
- use of non-genuine parts or accessories,
- damage caused by transport, by dirt or foreign bodies, accidents,
- storage or warehousing problems.
Proof of purchase must be submitted to obtain warranty cover.
For assistance, contact the point of sale where your appliance was purchased
12
HOW TO AVOID DAMAGING SURFACES
WARNING
12.1 Using the appliance to wash tyres may damage the tyre and can be dangerous.
12.2 Never point the high pressure jet straight at the tyre.
12.3 Always use the appliance at the lowest pressure setting when cleaning in the vicinity of wheels and tyres.
12.4 Never use the“Turbo Lance” for washing any part of the vehicle.
12.5 For further information refer to section: “8.7 Recommended cleaning procedure”.
Technical Data
T
echnical Data Unit HDC140-110V
Max Pressure
bar
110
80
Max Rated Flow
l/h
480
Working Rated Flow
l/h
380
Absorber Power
kW
1,6
Motor Power
kW
/
Voltage - Frequency
V-Hz
110 - 50
Motor Type
Phase / Class
1 / induction
Max water inlet
50
Max water outlet
Max burner power
(kW) -
Pump mechanical system
wobble plate
Pump head material
Brass
Subject to technical modication!
14
Working Pressure
bar
T C
T C
Total Stop System
TSS
Self Priming
Made in
Italy
Approval Certication
UKCA
-

15
Table of contents
Other V-TUF Pressure Washer manuals
Popular Pressure Washer manuals by other brands

Generac Power Systems
Generac Power Systems 1293-2 owner's manual

COMPANION
COMPANION 580.76101 owner's manual

Mi-T-M
Mi-T-M GPH-2000-0M1R Operation manual

Craftsman
Craftsman 580.752240 Operator's manual

Simpson
Simpson MegaShot MS60809 use and care manual

Campbell Hausfeld
Campbell Hausfeld PW2120 product manual