V-ZUG 31033 Series User manual

Operating instructions
GK45TEG
Toptronic hob

Thank you for choosing to buy one of our products. Your appliance is made to
high standards and is easy to use. Nevertheless, please take the time to read
these operating instructions in order to familiarise yourself with the appliance
and get the best use out of it.
Please follow the safety precautions.
Modifications
Text, diagrams and data correspond to the technical standard of the appliance
at the time these operating instructions went to press. The right to make tech-
nical modifications for the purpose of the further development of the appliance
is reserved.
Validity
The product family (model number) corresponds to the first alphanumerics on
the identification plate. These operating instructions apply to:
Type Product family
GK45TEGC/U/F 31033
Variations depending on the model are noted in the text.
© V-ZUG Ltd, CH-6301 Zug, 2017
2

Contents
1 Safety precautions 4
1.1 Symbols used ........................................................................................................ 4
1.2 General safety precautions ................................................................................. 5
1.3 Appliance-specific safety precautions............................................................... 6
1.4 Instructions for use ............................................................................................... 7
2 Disposal 9
3 Using for the first time 10
4 Your appliance 11
4.1 Appliance overview.............................................................................................11
4.2 Operating and display elements ......................................................................12
4.3 Cookware .............................................................................................................13
5 Operating the appliance 14
5.1 Switching the appliance on and off.................................................................14
5.2 Selecting a cooking zone..................................................................................14
5.3 Overview of power levels...................................................................................15
5.4 Switching a cooking zone off ...........................................................................15
5.5 Residual heat indicator ......................................................................................15
5.6 Automatic boost ..................................................................................................16
5.7 Operating time.....................................................................................................17
5.8 Timer......................................................................................................................18
5.9 Childproof lock ....................................................................................................19
5.10 Restore function ..................................................................................................20
5.11 Pause cooking.....................................................................................................20
6 Care and maintenance 21
7 Trouble-shooting 22
8 Technical data 24
8.1 Product fiche........................................................................................................24
10 Notes 26
9 Index 25
11 Service & Support 27
3

1 Safety precautions
1.1 Symbols used
Denotes important safety precautions.
Failure to observe said precautions can result in injury or in damage
to the appliance or fittings!
Information and precautions that should be observed.
Information on disposal
Information about the operating instructions
▸ Indicates step-by-step instructions.
–Describes how the appliance reacts to the steps taken.
▪Indicates a list.
4

1 Safety precautions
1.2 General safety precautions
▪Read the operating instructions before using the appliance for
the first time!
▪This appliance can be used by children aged 8 and above
and by persons with reduced physical, sensory or mental cap-
abilities, or lack of experience and/or knowledge, provided
they are supervised or have been instructed on the safe use
of the appliance and have understood the hazards involved.
Children shall not play with the appliance. Cleaning and user
maintenance shall not be undertaken by children without su-
pervision.
▪If an appliance is not equipped with a mains cable and a plug
or other means for disconnecting from the mains with a con-
tact opening on each pole complying with the conditions of
overvoltage category III for full isolation, an isolating device
must be incorporated into the permanently installed electrical
installation in accordance with the installation regulations.
▪If the mains cable of this appliance is damaged, it must be re-
placed by the manufacturer or its Customer Services or a sim-
ilarly qualified person in order to avoid hazard.
5

1 Safety precautions
1.3 Appliance-specific safety precautions
▪WARNING: If the surface has a crack running through the
thickness of the material, switch the appliance off and discon-
nect it from the mains to avoid possible electric shock.
▪WARNING: The appliance and its accessible parts get hot
during use. Be careful not to touch the heating elements.
▪Under no circumstances use a steam cleaner to clean the ap-
pliance.
▪Do not place metal objects such as knives, forks, spoons, lids
or aluminium foil on the hob as they can get hot.
▪WARNING: It can be dangerous to leave the hob unattended
when cooking with fat or oil, as this can lead to fires. NEVER
attempt to extinguish a fire with water. Instead, switch the ap-
pliance off and then carefully smother the flames with, for ex-
ample, a lid or a fire blanket.
▪WARNING: Never store objects on the hob due to the risk of
fire.
▪WARNING: The cooking process should always be super-
vised. Shorter cooking processes, in particular, must be su-
pervised the entire time.
▪Do not operate the appliance using an external time switch or
a separate remote control system.
6

1 Safety precautions
1.4 Instructions for use
Before using for the first time
▪The appliance must be installed and connected to the electricity supply in
accordance with the separate installation instructions. Have a qualified fitter/
electrician carry out the necessary work.
Correct use
▪The appliance is designed for use in the home for preparing food. No liabil-
ity is assumed for any damage caused by improper use or incorrect hand-
ling.
▪Any repairs, modifications or manipulations to the appliance, especially any
electrically live parts, may only be carried out by the manufacturer, its Cus-
tomer Services or a similarly qualified person. Repairs if carried out incor-
rectly may cause serious injury, damage to the appliance and fittings, as
well as affect the functioning of the appliance. If the appliance is not work-
ing properly or in case of a repair order, follow the instructions given in the
'Repair service' section. Contact our Customer Services if necessary.
▪Use original spare parts only.
▪Retain these operating instructions for future reference. If you sell the appli-
ance or pass it on to a third party, please ensure these operating instruc-
tions accompany the appliance, together with the installation instructions.
▪The appliance corresponds to recognized technology standards and the rel-
evant safety regulations. However, proper use of the appliance is essential
to avoid damage and accidents. Please therefore follow the precautions
given in these operating instructions.
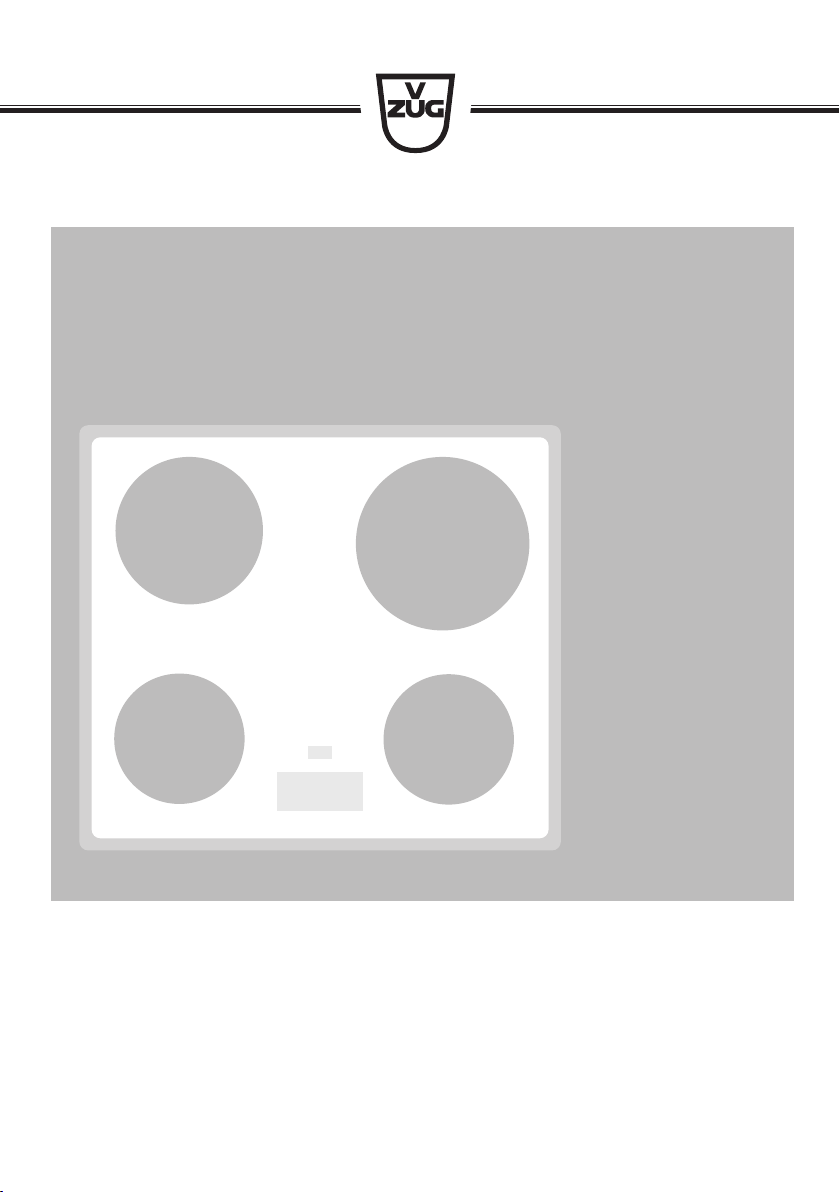
▪The heated surface will remain hot for some time after it is switched off and
will cool down only slowly to room temperature. Please allow sufficient time
for the appliance to cool down before, for instance, cleaning it.
Caution: Burns hazard
▪Overheated fat and oil can easily catch fire. Never attempt to extinguish
burning oil or fat with water. Danger of explosion! Smother the flames with a
fire blanket. Keep doors and windows closed.
Caution: Risk of injury
▪Keep pets away from the appliance.
7

1 Safety precautions
Caution: Risk to life
▪Packaging materials, e.g. plastic film and polystyrene, can be dangerous for
children. Danger of suffocation! Keep packaging material away from chil-
dren.
How to avoid damaging the appliance
▪In case of overheating, switch the hotplate off and allow it to cool down
completely. Do not put any dishes on it. Under no circumstances use cold
water to cool it down quickly.
▪Do not climb on to the appliance.
▪Do not put hot cookware on the hob frame in order not to damage the silic-
one joints.
▪Do not cut or prepare food on the surface and avoid impact with hard ob-
jects. Do not drag cookware across the surface.
▪Take particular care that sugary foods or juices do not get onto the hot
cooking zones as it can damage them. If sugary foods or juices do get on
to the hot cooking zones clean away immediately (while still hot) with a
scraper.
▪Pots with pure copper or aluminium bases should not be used for cooking
as they can leave behind traces that can be difficult to clean. If the traces
are not removed immediately after cooking with a suitable cleaning agent,
they can be permanently burned on and therefore permanently ruin the
visual appearance of the appliance.
▪Sliding pans and cookware across the glass ceramic causes scratches.
This can be largely prevented by lifting pans and cookware up and then pla-
cing them down in position.
▪The hob is designed to be used – signs of use, such as scratches or the
wear and tear from pans and cookware, are normal. The more intensively it
is used, the greater the signs of use; however, the appliance remains in per-
fect working order and therefore does not give a right of complaint. Safety is
guaranteed at all times.
▪There is no such thing as completely scratch-proof glass; scratches can
even develop on sapphire glass, which is used in watches. The glass
ceramic used is of the best quality available on the market.
8

2 Disposal
Packaging
▪All packaging materials (cardboard, plastic film (PE) and polystyrene (EPS))
are marked and should, if possible, be collected for recycling and disposed
of in an environmentally friendly way.
Disconnection
▪Disconnect the appliance from the mains. With a fixed appliance, this is to
be carried out by a qualified electrician!
Safety
▪Disable the appliance to prevent accidents caused by improper use, espe-
cially through children playing.
▪Pull the plug out of the mains socket or have the appliance disconnected
from the mains by an electrician. Then cut the mains cable off flush with the
appliance.
Disposal
▪The old appliance should not be discarded as worthless rubbish. If dis-
posed of correctly, the raw materials can be recovered for recycling.
▪The symbol on the identification plate warns that the appliance may not
be disposed of in normal household waste.
▪The appliance must be disposed of in accordance with local regulations on
waste disposal. For more information on the handling, disposal and recyc-
ling of the product, please contact the local authorities, the local recycling
facilities for household waste or the retailer from whom you purchased the
appliance.
9

3 Using for the first time
The appliance must be installed and connected to the electricity sup-
ply in accordance with the separate installation instructions. Have a
qualified fitter/electrician carry out the necessary work.
During the first few hours of use, a cooking zone can give off an un-
pleasant smell. This is normal for brand new appliances. Ensure that
the room is well ventilated.
Where is the identification plate?
The identification plate and the connection plate are located on the underside
of the hob.
1 2
1Identification plate with serial number (FN)
2Connection plate
A second identification plate is supplied and should be affixed in the fitted unit
underneath the hob.
Note down the serial number (FN) of your appliance on the back page of
these operating instructions.
The serial number is required for identifying the appliance. Only then
can customer services guarantee a faultless service.
10

4 Your appliance
4.1 Appliance overview
GK45TEGC, GK45TEGU, GK45TEGF
▪1 cooking zone Ø 210mm
▪1 cooking zone Ø 180mm
▪2 cooking zones Ø 140mm
11

4 Your appliance
4.2 Operating and display elements
1 2 3 4 5
Buttons
Appliance ON/OFF
Select cooking zone / increase power level
Reduce power level
Pause cooking ON/OFF and restore function
Operating time / timer
Displays
1Pause activated / possibility for restoring saved settings
2Cooking zone power level
3Selection indicator: Cooking zone selected
4Cooking zone indicator lights for the operating time
5Operating time / timer
12

4 Your appliance
4.3 Cookware
Suitable cookware
Cookware should have a stable bottom. When heated, the base of the cook-
ware must lie flat on the surface of the cooking zone.
Cookware made of metal is more suitable than that made of glass or ceramic
as with metal the heat is distributed evenly quicker.
Cookware bases made of aluminium or aluminium alloys can leave stubborn
marks on the glass ceramic surface that are very difficult to remove.
Energy-efficient cooking
For maximum energy efficiency and even heat distribution note the following:
▪The base of the cookware must be clean, dry and smooth.
▪Centre the cookware in the middle of the cooking zone.
▪Use a well-fitting lid.
▪Match the diameter of the cookware to the quantity of food to be cooked.
13

5 Operating the appliance
5.1 Switching the appliance on and off
All the appliances are operated in the same way.
▸ To switch the appliance on: Depress the button for 1second.
– flashes in all the power level displays.
–If no other entry is made, the appliance switches off again after about
10seconds for safety reasons.
▸ To switch the appliance off: Press the button.
5.2 Selecting a cooking zone
▸ Touch the button for the required cooking zone.
– flashes in the corresponding display.
–The selection indicator for this cooking zone illuminates.
▸ Touch the or button.
–The first time is pressed, the cooking zone selected switches on at
power level .
–The first time is pressed, the cooking zone selected switches on at
power level .
▸ Use the or button to set the required power level.
The settings for a cooking zone can only be changed if the corres-
ponding selection indicator is illuminated.
Once the selection indicator goes out, the cooking zone must be se-
lected anew.
14

5 Operating the appliance
5.3 Overview of power levels
Power level Cooking method Use
1Melting, gentle
warming
Butter, chocolate, gelatine, sauces
2
3Swelling Rice
4Continued cooking,
reducing, stewing
Vegetables, potatoes, sauces, fruit,
fish
5
6Continued cooking,
braising
Pasta, soup, braised meat
7Gentle frying Rösti (hash browns), omelettes,
breaded fried foods, sausages
8Frying, deep frying Meat, chips
9Flash frying,
Fast heating
Steaks, boiling water
5.4 Switching a cooking zone off
▸ Press the button for the required cooking zone.
–The selection indicator for this cooking zone illuminates.
▸ Press the and buttons at the same time until flashes in the corres-
ponding display.
–If no other entry is made and the other cooking zones are switched off,
the appliance switches off automatically after 10 seconds.
5.5 Residual heat indicator
After a cooking zone is switched off, remains illuminated as long as there is
a risk of burns.
15

5 Operating the appliance
5.6 Automatic boost
Do not leave the hob unattended when using the automatic boost.
Risk of boiling over, burning on and igniting!
All the cooking zones are equipped with a selectable automatic boost. With
this function, a cooking zone heats at power level for a certain length of time
(see table). Then it automatically switches back to the power level set.
The automatic boost function must be activated anew each time a
cooking zone is switched on.
Power level 12345678
Boost in mins.:secs. 1:00 3:00 4:45 6:30 8:30 2:30 3:30 4:30
Switching the automatic boost on
▸ Touch the button for the required cooking zone.
▸ Use the button to set the power level to 9.
▸ Press the button again.
– and illuminate alternately in the corresponding display.
▸ Use the button to set the required power level at which to resume cook-
ing after the automatic boost.
– and the power level selected illuminate alternately in the display
while the automatic boost is activated.
–When the automatic boost is over, the power level is reduced back to
the level selected.
Switching the automatic boost off before time
▸ Touch the button for the required cooking zone.
▸ Use the button to set a lower power level.
16

5 Operating the appliance
5.7 Operating time
Do not leave the hob unattended during use. Risk of boiling over,
burning on and igniting!
With the operating time function, a Cooking zone switches off automatically
after a set time 1–99 min..
Setting the operating time
▸ Touch the button for the required cooking zone.
▸ Touch the button.
– flashes in the display.
–The indicator light for the cooking zone flashes.
▸ Use the or button to set the required operating time.
–The first time the button is touched, illuminates in the display.
To change the operating time, press and hold the or button.
Changing the operating time
▸ Touch the button for the required cooking zone.
–The remaining operating time for the cooking zone selected is dis-
played.
▸ Touch the button.
–The remaining operating time flashes.
▸ Use the or button to change the operating time.
Switching the operating time off before time
▸ Touch the button for the required cooking zone.
▸ Touch the button.
▸ Touch the and buttons at the same time.
– flashes in the display.
–The cooking zone remains on.
17

5 Operating the appliance
End of operating time
When the operating time is up
–the relevant cooking zone is selected automatically
–the relevant cooking zone switches off
–an acoustic signal is emitted
– and the power level flash.
▸ Press any button to switch off the acoustic signal and the displays.
Several operating times
If operating times are set for several cooking zones,
–the shortest operating time illuminates in the display and as long as no
cooking zone is selected.
–the cooking zone indicator light illuminates for each cooking zone with
a set operating time.
To display another operating time:
▸ Touch the button for the required cooking zone.
5.8 Timer
The timer functions like an egg timer (1–99 min.).
It can only be set when a cooking zone is in operation.
A cooking zone can be put into operation when the timer is running. However,
no operating time can be set.
Setting the timer
▸ Switch the appliance on.
▸ Touch the button.
– flashes in the display.
▸ Use the or button to set the required duration of the timer.
–The first time the button is touched, illuminates in the display.
Press and hold the or button to change the duration of the timer.
18

5 Operating the appliance
Changing the timer
▸ Switch the appliance on.
▸ Touch the button.
–The time left on the timer flashes.
▸ Use the or button to change the duration of the timer.
Switching the timer off before time
If no cooking zone is in use, first switch the appliance on.
▸ Touch the button.
▸ Press the and buttons at the same time until flashes in the dis-
play.
5.9 Childproof lock
The childproof lock is to prevent the appliance from being accidentally
switched on.
Switching the childproof lock on
▸ Switch the appliance on.
Ensure all cooking zones are switched off.
▸ Press the front right and buttons at the same time.
–An acoustic signal is emitted.
▸ Press the front right button again
–An acoustic signal is emitted.
– illuminates in all the power level displays for 10seconds.
Operating the appliance with the childproof lock activated
▸ Switch the appliance on.
▸ Touch the front right and buttons at the same time.
–An acoustic signal is emitted.
–The childproof lock is overridden. The appliance can now be used as
normal.
The childproof lock is automatically reactivated 10 minutes after switching off
the hob.
19

5 Operating the appliance
Switching the childproof lock off
▸ Switch the appliance on.
Ensure all cooking zones are switched off.
▸ Touch the front right and buttons at the same time.
–An acoustic signal is emitted.
▸ Touch the button again.
–A double acoustic signal is emitted.
– flashes in all the power level displays for 10seconds.
5.10 Restore function
If the appliance has been inadvertently switched off with the button, the set-
tings can be restored within 6seconds.
▸ Switch the appliance on.
–The indicator light for the button flashes.
▸ Touch the button.
5.11 Pause cooking
After pause cooking, the appliance can continue to be operated using the pre-
vious settings.
▸ Touch the button.
–The indicator light for the button illuminates.
–The power level of the cooking zone switched on changes to .
–The operating time is interrupted.
–The timer continues to run.
–All buttons are inactive except for and .
If the pause cooking function is not turned off within 10minutes, the
appliance switches off completely.
▸ Touch the button again to resume cooking.
20
This manual suits for next models
4
Table of contents
Other V-ZUG Hob manuals

V-ZUG
V-ZUG GK21TI User manual

V-ZUG
V-ZUG GK22 Series User manual

V-ZUG
V-ZUG GAS411GSBZ User manual

V-ZUG
V-ZUG CookTop V2000 I604 User manual

V-ZUG
V-ZUG 31089 User manual

V-ZUG
V-ZUG GK36TI User manual

V-ZUG
V-ZUG V2000 A604 User manual

V-ZUG
V-ZUG GAS641 User manual

V-ZUG
V-ZUG GK16TIWSF User manual

V-ZUG
V-ZUG CookTop V4000 A604 User manual

V-ZUG
V-ZUG CookTop V2000 I302 User manual

V-ZUG
V-ZUG GK46TIAKS User manual

V-ZUG
V-ZUG GK41TG User manual

V-ZUG
V-ZUG Home User manual

V-ZUG
V-ZUG Maxi-Flex GK46TIMPS User manual

V-ZUG
V-ZUG GK45TEAS User manual

V-ZUG
V-ZUG GK16TIWF User manual

V-ZUG
V-ZUG 005 Series User manual

V-ZUG
V-ZUG GK36TI/C/F User manual

V-ZUG
V-ZUG GK46TI User manual