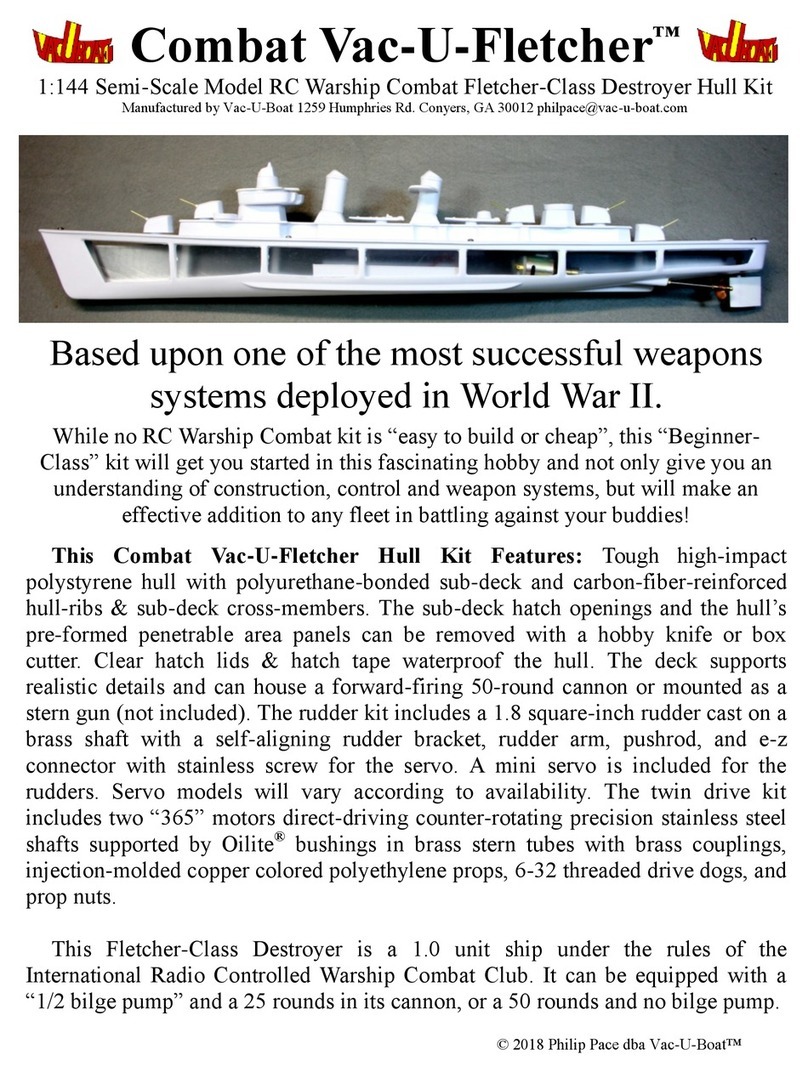
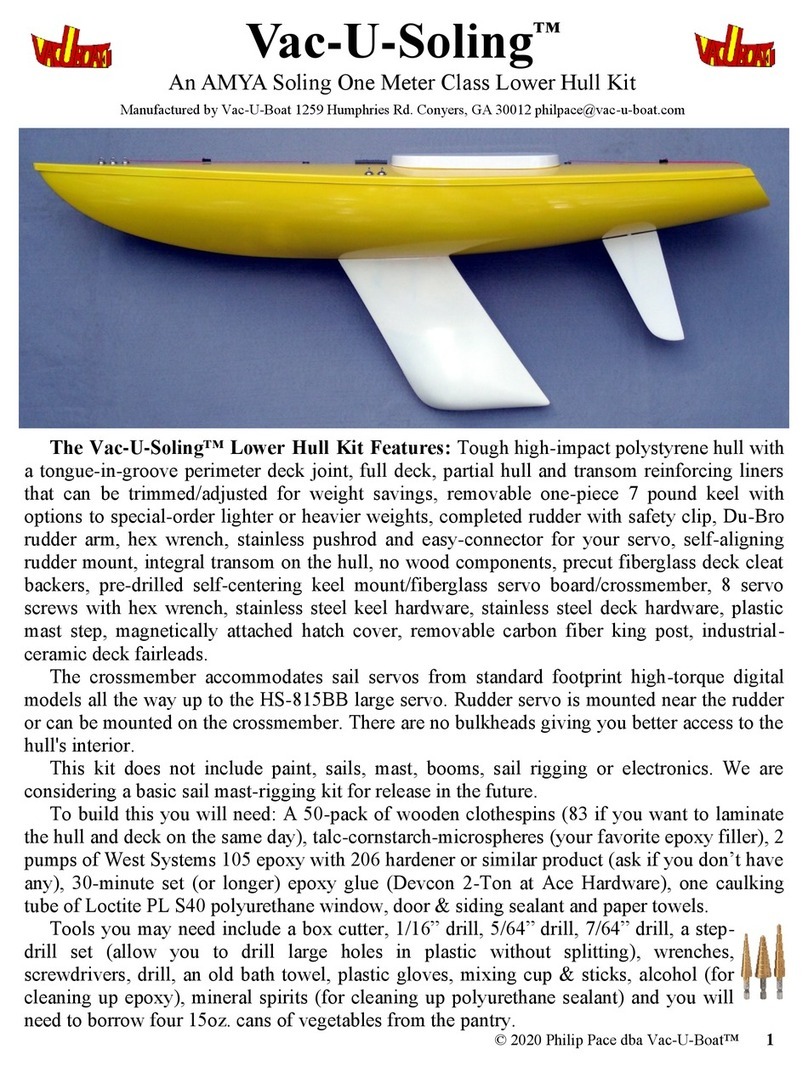
Vac-U-Boat Vac-U-Vee Jr. User manual

Vac-U-Vee Jr.™
Mono Vee Hull Kit
Manufactured by Vac-U-Boat™
1259 Humphries Rd.
Conyers, GA 30012
philpace@vac-u-boat.com
This “High Impact Polystyrene” model boat is engineered for racing. It has minimum
freeboard and an aerodynamic bow design to let it fly in straight-a-ways yet turn solid without
flipping. The deck comes from the 1/10-scale Vac-U-Cracker with a large hatch cover for easy
hardware installation. The hull is modified into a Deep-Vee with a sharp keel and a fully
reinforced bottom having the strength of a fiberglass hull without the weight.
The Full Kit includes a Hull, Hull Reinforcement, 3/16” hot-pressed mahogany plywood
Transom, Deck, forward Deck Reinforcement, teardrop Hatch Cover, Aluminum Motor Mount
with 3/16” hot-pressed mahogany Base with pre-installed 6-32 blind nuts, stainless motor
mount socket head screws, motor mount stainless washers, hex wrench, M3 motor socket head
screws, motor washers, motor hex wrench, molded Boat Stand with pre-cut foam mount pads,
an easy-to-apply combined windshield and roof hatch decal set, side decals, six deck
reinforcement clamps (clothes pins) two really cheap ratchet clamps, a wood scrap to clamp
the transom, an epoxy brush and a piece of 100 grit sandpaper.
The even-more economical Plastic Hull-Only kit includes the Hull, Hull Reinforcement,
3/16” hot-pressed mahogany plywood Transom, Deck, Deck Reinforcement, teardrop Hatch
Cover, Boat Stand and decal set. (No motor mount, no assembly bits.)
This hull will perform with a ROAR Stock brushed motor, or with the latest Brushless
setups. The reinforced motor mount slot allows for motor placement for flex drives or straight-
shaft drive systems. The transom will accommodate most struts and rudders made for smaller
boats. The sharp keel and makes turn fins unnecessary.
© 2012 Philip Pace dba Vac-U-Boat™
Length: 19-7/8 in. Beam: 7-3/8 in.

Now, for the Warnings!
Read all of the instructions! Review and understand each step, and the one after, as you build
your boat. Don’t rush. Good work takes time.
This is not a toy! I know. It LOOKS like a toy, but it isn’t. Toys are generally safe for small
children. This boat is not safe for small children. Assembling it requires the use of sharp tools
that can cut skin, strong adhesives than can bond flesh and injure eyes, spray paints that can be
flammable and toxic, as well as batteries that can short causing severe burns or fires. Read all
of the instructions and warnings on all of the tools and chemicals you plan to use. Use
protective eyewear when recommended. USE SAFETY GLASSES! If you think you don’t
have the skills, or are uncomfortable with tools and chemicals, or just changed your
mind, then pack up this kit and return it immediately for a full refund. If you bought this
direct from Vac-U-Boat, I’ll reimburse you for standard return shipping. If you need some
help, find a local boat club to join, check with the hobby shop where you purchased your
motor and radio gear, or contact internet clubs and organizations for assistance. Keep
your work area away from children. Even if you have no children, when not working on the
kit, keep all sharp objects and all chemicals locked away in a safe area. You never know who
will come to visit and how well they will supervise the young ones with them.
This is STILL not a toy! Once you complete the boat and are running it in a lake, know that
the boat can injure life, limb, and property. Never touch the propeller, spinning or not, while
there is a battery inside or connected to the boat. Even if it is turned OFF, assume it can glitch
and run on its own. Never run the boat if swimmers are in the water. Don’t chase wildlife. Be
careful with rechargeable batteries. They have the ability to dump large amounts of current in a
very brief period of time if shorted, causing burns or fires. Never store the boat with the battery
inside it, connected or not. Keep your batteries in a safe place, out of the reach of children.
Read the warnings on the other parts you purchase, the motor, battery, electronic speed control,
radio transmitter and receiver, and the battery charger. Use “frequency boards” at your lake to
control radio channel usage. If you don’t control channels, then you increase the risk of loosing
control of the boat. An out of control boat can harm someone. You are responsible for the safe
use of this product. You are responsible for choosing wisely, those who you entrust the use of
the boat and radio, even for a few minutes at a lake. Never swim after a disabled model boat!
This is an adult toy! That is what you say to those nice stranger-type kids that come up to you at the
lake. It isn’t easy, but it is the responsible thing to do. Clubs should keep slower scale boats for
visitors to run. I happen to know a guy who makes a nice easy-to-build plastic tugboat kit that is just
fine for such an occasion. Lets see, what was the name of that boat?....
CHOKING HAZARD - Small parts. Not for children under 3 years.
WARNING - To avoid danger of suffocation, keep plastic bags away from babies and children. Do not use
in cribs, beds, carriages or play pens. THESE PLASTIC BAGS ARE NOT TOYS.
WARNING: Brass parts in this kit contain lead, a chemical known to the State of California to cause
cancer and birth defects and other reproductive harm. Bronze and brass alloys can contain lead.
WARNING:

INSTRUCTIONS
We are ready to get started building this Vac-U-Vee Jr. Follow the photos and captions to
assemble your boat. Read through the instructions before building. Assemble the necessary
tools and adhesives on a clean workbench or table. Keep paper towels handy to catch spills.
Don’t forget the safety glasses!
With holding the hull upside down on the
work surface, press a razor or hobby
knife into the corners at the marked trim
line.
Rock the razor left and right until it
cuts into the hull about this much. Repeat for the two corners at the
stern.
Removing these corners will give you
a starting point for trimming with
scissors.
Cut with the boat on the right and the
scrap on the left. Don’t cut near the
tip of the scissors. If the tip of the
scissors closes on the plastic it could
cause a tiny crack.
While holding the liner firmly in place,
mark the edge to be trimmed with a
pencil. Trim the liner with scissors.
Set the Hull Liner into the trimmed
hull.
123
456
Trim the deck starting with the bow
and stern corners and your paint
scraper.
789
3
Pull down on the corners breaking
them off as shown. Trying to cut the
corners with scissors may split the
plastic.

4
Save the scrap to use to test paints or
glues.
Cut the hatch on the marked trim line. Sand the underside of the hull liner
with the 100 grit sandpaper.
When gluing the hull liner, you want to
clamp it firmly to the deck, but you don’t
want to clamp over the strakes or chines.
(raised areas)
Sand the underside of the deck for the
bond with the deck liner.
Sand the deck liner. All plastics are best
sanded in several directions.
Score the hatch opening at the marked
line 2 to 3 times until the opening
separates from the hull.
These 3/16” thick scraps of Masonite
panel will let you press the hull while
avoiding the raised areas.
Close up of the edge of the scrap how
it avoids the raised chine. Any smooth
flat material will work here.
Taped in place, they will not move.
Without the scraps, you could not use a
larger flat surface for clamping.
Cut slowly. The plastic is thicker on
the deck than the hull.
10 11 12
13 14 15
16
Sand the inside of the hull. Sand both in
at least two directions for a better bond.
17 18
19 20 21

Take two books or pieces of wood,
the same thickness. Tape them
together at the center.
Mix a large puddle of 30 minute
epoxy. Add filler to make it less
brittle. (I’m using talcum powder.)
Using the included epoxy brush, brush
the filled epoxy on the raised areas of
the hull liner and transom end surface
that contacts the hull.
With the liner set into the hull firmly,
clamp the transom end using the
unglued wood reinforcement on the
inside and the wood scrap outside.
With everything aligned, set a bag of
sand inside the hull to clamp the liner
to the hull.
Hold the liner to the bow with tape. Mix a smaller amount of epoxy and add filler.
Or use some magnets to clamp them together.
Raise the outer edges of the books until
their angle matches the hull angle.
The liner is pre-trimmed. Brush the
filled epoxy on the raised areas of the
deck liner.
Attach the six deck clamps. Keep
the space between the liner & deck
even.
Set the glued liner into the deck. It
touches the front of the hatch opening
but is spaced to the deck edges. 5
22 23 24
25 26 27
28 29 30
31 32 33
There are lots of clever ways to clamp a liner to a hull leaving the hull surface flat and true. This is just one example.

The gap stays inside the hole of the
clothes pin.
Fold a piece of sandpaper to sand the
deck groove.
Sand the rest of the underside edges of
the deck. Sand where the transom
reinforcement will bond to the hull.
Use a tiny piece of sandpaper folded
to sand both sides of the edges of the
deck. Just a little on the outside.
Check the edge of the hull and sand-
level any uneven areas for a good
even contact with the deck.
Do the same on the sides of the hull. This
lets the sealant or glue grip the plastic.
Let the epoxy cure. When you
are sure it is set, remove the
clamps and tape.
Now we assemble the glued hull.
You can use RTV sealants, heavily
filled epoxies or other glues. Avoid
glues that would melt styrene.
I am using PL brand Polyurethane
Roof Sealant in a caulking tube.
Sand all surfaces you are bonding.
If you are using a caulking tube of
sealant, make a narrower nozzle by
wrapping the end with packing tape to a
point and trim the tip for a 1/8” bead.
First, place a bead of sealant in the
bottom groove at the transom for the
transom reinforcement.
Keep experimenting until you have a
good nozzle and can run a smooth bead
of sealant.
Don’t forget the bottom of the groove
6
34 35 36
37 38 39
40 41 42
43 44 45

Set the deck upside-down on a towel
and set a weight at the center to hold it Move steadily along the groove for
an even fill.
Start at the bow by filling the groove
about 2/3 full of sealant.
On the rest of the deck, fill the inside
of the corner of the flange with a
triangular cross-section. Put a thicker
bead at the rear to reach the transom.
Clean up after PL Polyurethane Roof
Sealant with a piece of paper towel
slightly dampened with mineral
spirits.
It doesn’t have to be pretty. Fill evenly
and wipe off any excess. Note how the
sealant is pressed into the corner.
Smooth the sealant onto the top of
the transom. It will help seal it to the
deck.
7
46 47 48
49
Put a piece of tape across the top of the
transom and stand up the boat. Press
the reinforcement into place. The tape
will catch the excess sealant.
50 51
The side to glue to the transom is the side
with beveled edges. Test fit before gluing.
52
Peel up the tape to lift the excess
sealant onto the top of the transom.
53 54
55 56 57
One side of the transom reinforcement
has sharp edges. This is the inside.
Apply sealant to the transom
reinforcement and set into the transom.

Continue taping every 3 inches or so
toward the bow. We can remove any excess sealant
after it cures. Doing so now would
just make a mess.
There are no strips of tape at the transom.
The slope of the deck would cause the
transom to roll in if pulled down.
Same here. Try to avoid touching any
sealant or it just spreads around. Where the groove stops, you can see
the bead of sealant along the side.
Inside the bow you can see the sealant
squeezed out a little. A good thing!
With pieces of tape ready, pull the
deck over the hull and secure the
bow as shown. Don’t worry about
sealant squeezing out.
7
58 59 60
61
Start the tape on the deck under the
boat. Pull gently up and onto the hull.
Do 2 pieces then one piece across the
rear to avoid smearing sealant.
62 63
Set the hull into the deck transom-first
with no gaps.
64
Work from the transom toward the
bow at 3 inch increments. Stand up the
boat after 4 pieces on each side.
65 66
67 68 69
Set the deck with sealant on a padded
surface. See that the sides fit inside the deck
flange.
Looking inside the deck from the
hatch holding the boat upside down.

7
70 71 72
73
Test fit your hatch.
74
Smoothed sealant. Wider seal joint.
76
In hot weather, if you are worried that
your painter’s tape will come loose
before the sealant cures, you can put
extra strips to secure the tape.
77
You can strengthen the seal by
smoothing it with a finger increasing the
contact area with the hull and deck.
Check under the deck flange along the
side making sure the tape wasn’t
If you see a piece of side tape is too tight with a gap between the hull and deck flange,
peel off the piece of tape, reposition the hull against the deck and re-tape.
The best solvent for the PL Brand Polyurethane Roof Sealant is Mineral Spirits, a type of
paint thinner. It will leave no residue on the plastic to affect the paint. Use only a tiny drop
on a paper towel to dissolve any sealant stains. Most RTV gasket material will peel off of
un-sanded styrene. If you are unsure, use the hatch scrap to test adhesives.
Now pull the sealant away from the
hull. Sealant will not stick as well to an
un-sanded surface.
Cut carefully. Don’t cut into the
plastic. Peel away the excess.
75
After the sealant has cured and the tape
removed, any excess sealant can be
removed by carefully cutting just the
sealant with a hobby knife or razor.
78
Trim the boat stand along the marked
line and your boat hull is complete
and ready for painting!
This manual suits for next models
3
Other Vac-U-Boat Toy manuals

Vac-U-Boat
Vac-U-Boat Vac-U-Soling Lower Hull Kit User manual

Vac-U-Boat
Vac-U-Boat Vac-U-Cracker User manual

Vac-U-Boat
Vac-U-Boat Vac-U-Tug User manual

Vac-U-Boat
Vac-U-Boat Combat Vac-U-Fletcher User manual

Vac-U-Boat
Vac-U-Boat Combat Vac-U-Gearing User manual

Vac-U-Boat
Vac-U-Boat Vac-U-Fletcher User manual
Popular Toy manuals by other brands

BABY born
BABY born Mommy Look I Can Swim manual

Mega Construx
Mega Construx HALO PRO BUILDERS SPARTAN JFO GLB66 manual

Faller
Faller 161549 manual

Canon
Canon CREATIVE PARK Bottlenose Dolphin Assembly instructions

DOCYKE
DOCYKE S-04 Construction manual

Eduard
Eduard P-38L Lightning Undercarriage set quick start guide