Cleaning the BrCleaning the Br
Cleaning the BrCleaning the Br
Cleaning the Brushush
ushush
ush AssembAssemb
AssembAssemb
Assembll
ll
lyy
yy
y
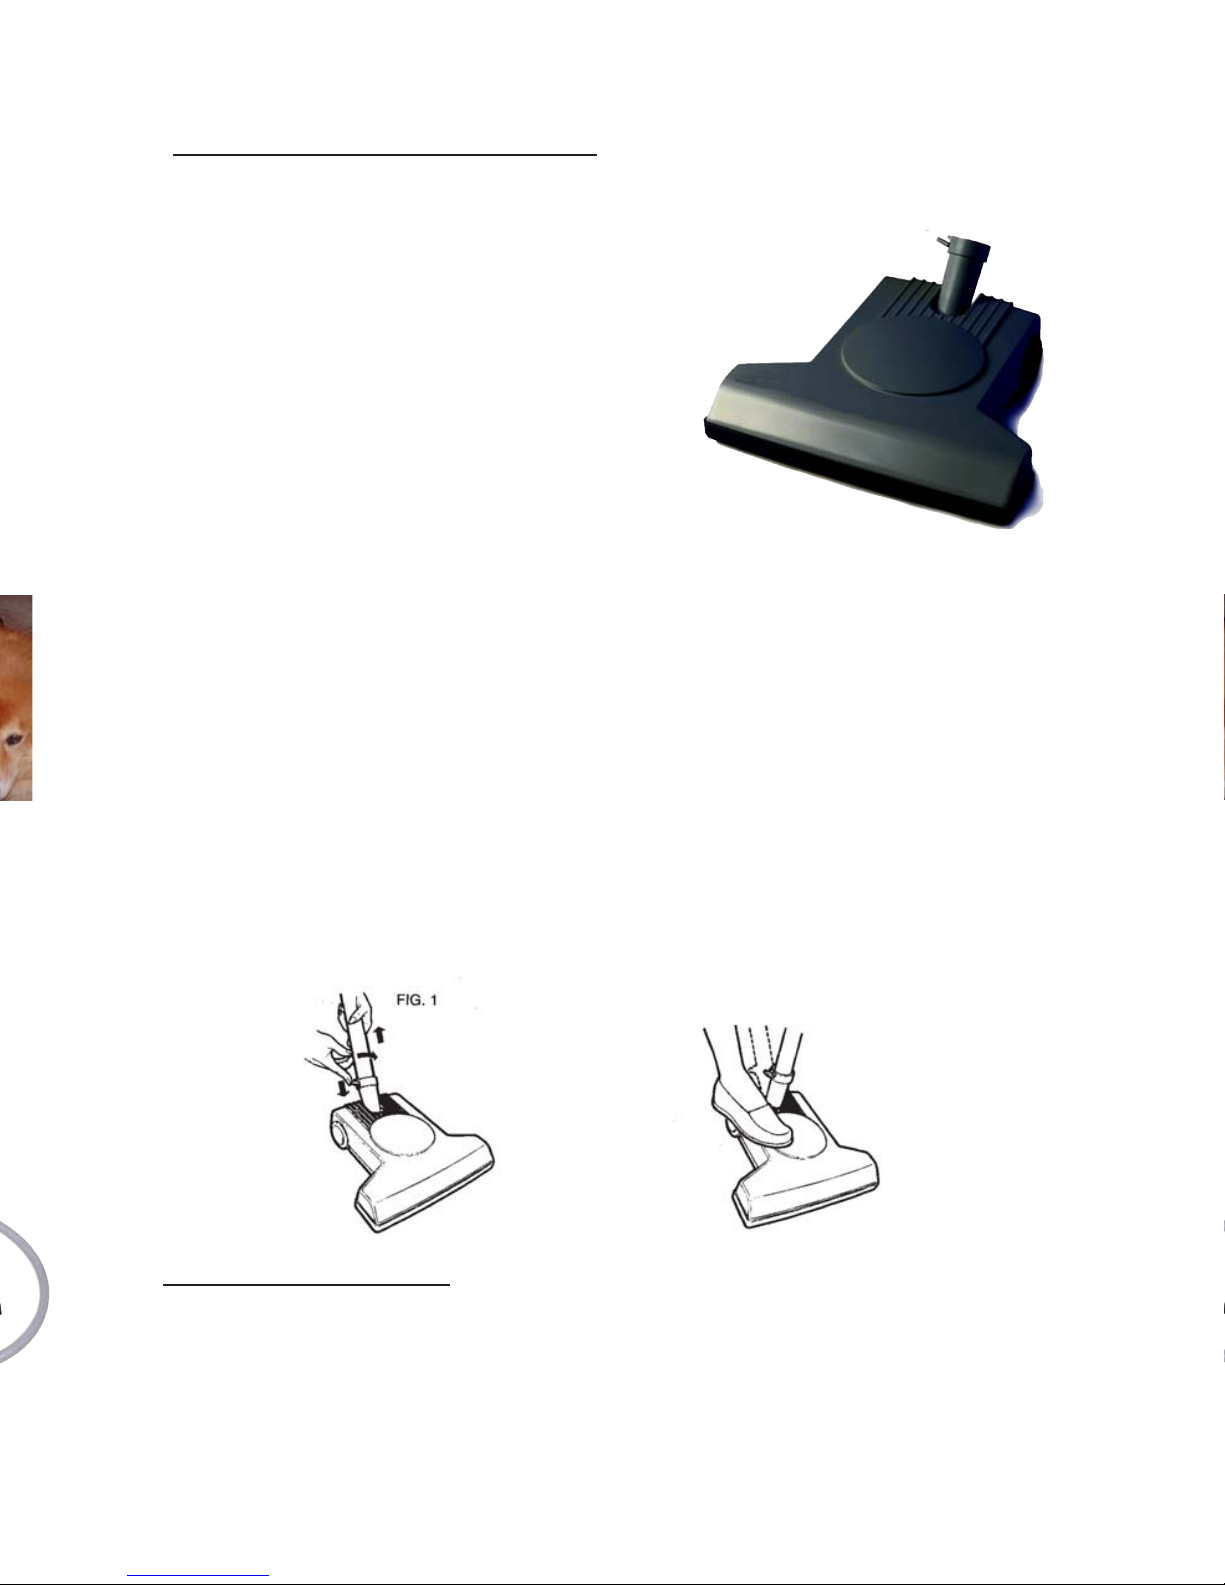
Thread, string, carpet fiber, fuzz, and
pet hair occasionally become wound
around the brush assembly. These items
should be routinely removed to keep the
brush assembly clean and to maintain
efficiency.
1. Disconnect the poDisconnect the po
Disconnect the poDisconnect the po
Disconnect the poww
ww
werhead frerhead fr
erhead frerhead fr
erhead fromom
omom
om
the hose and wthe hose and w
the hose and wthe hose and w
the hose and wandsands
andsands
ands..
..
.Be surBe sur
Be surBe sur
Be sure pare par
e pare par
e partsts
tsts
ts
haha
haha
havv
vv
ve stopped spinning befe stopped spinning bef
e stopped spinning befe stopped spinning bef
e stopped spinning beforor
oror
oree
ee
e
ww
ww
woror
oror
orking onking on
king onking on
king on the turbine pothe turbine po
the turbine pothe turbine po
the turbine poww
w
w
werhead.erhead.
erhead.erhead.
erhead.
2. Turn the powerhead over (Fig.3).
3. Strings and other entangled items
can be removed by unwinding them
by hand or carefully with scissors.
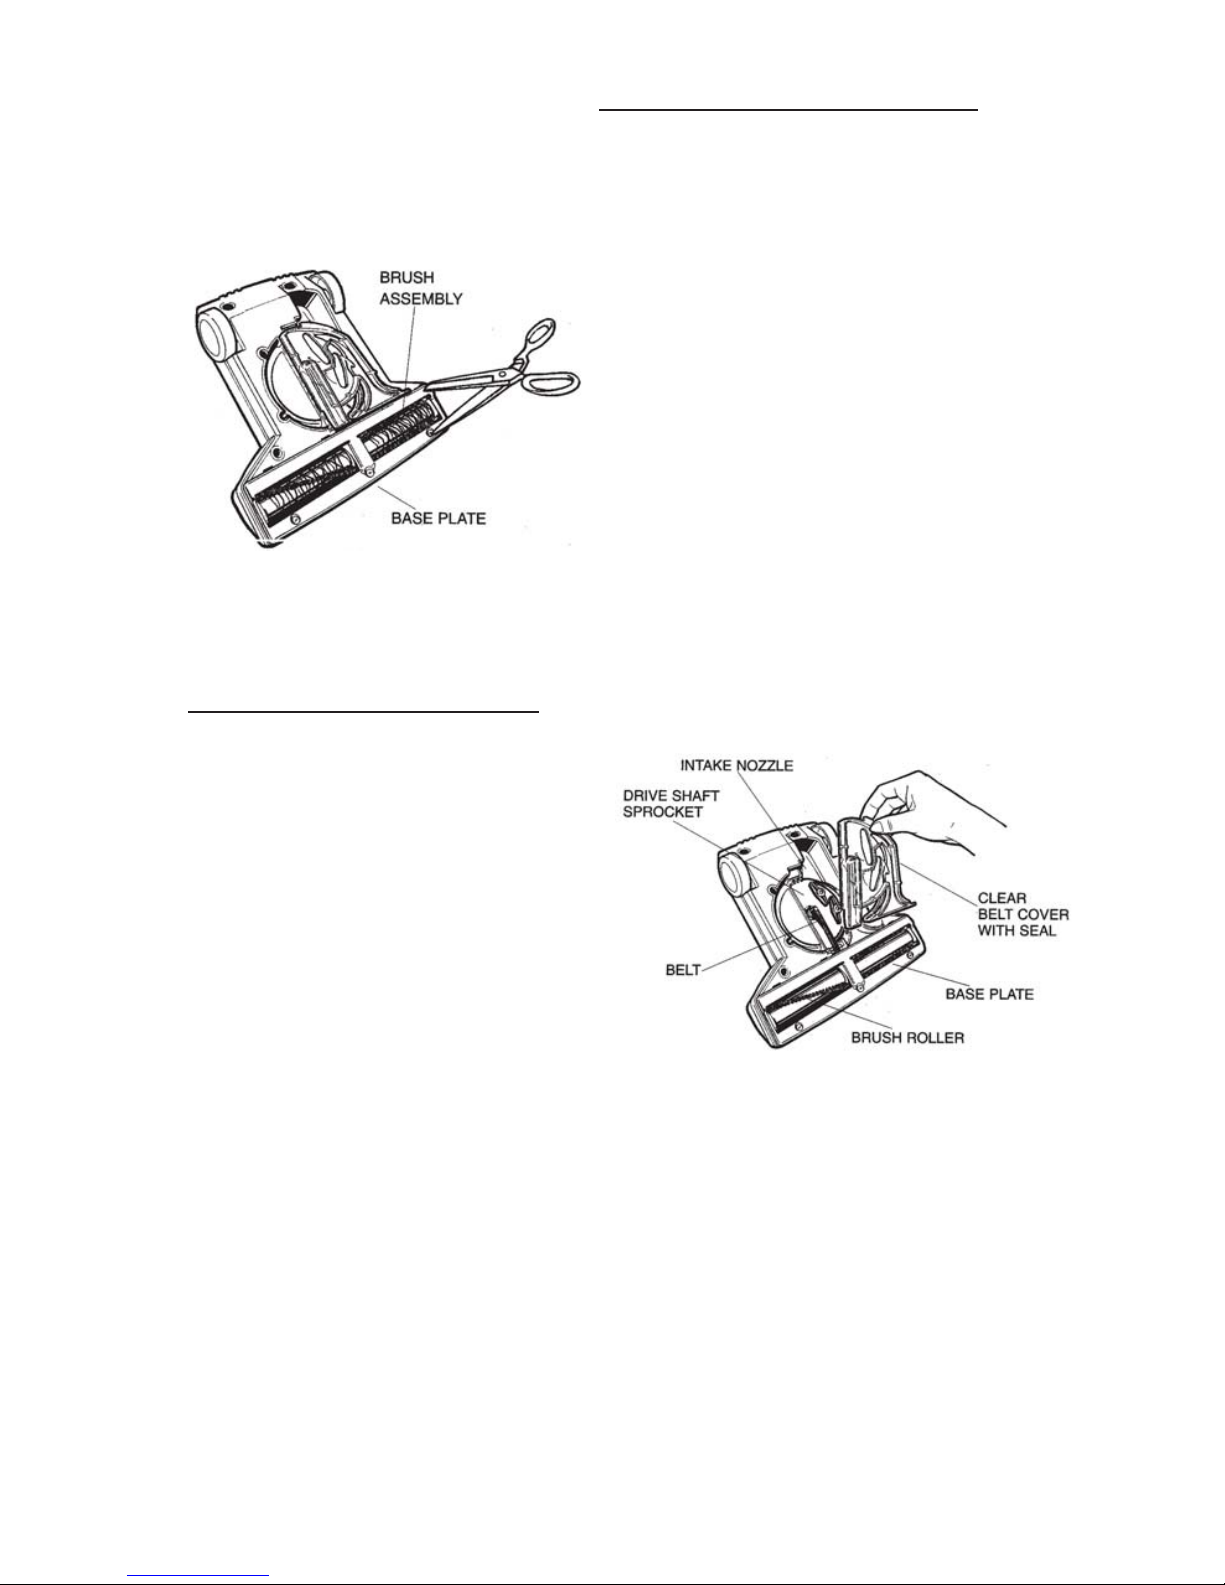
Cleaning the IntakCleaning the Intak
Cleaning the IntakCleaning the Intak
Cleaning the Intake Noe No
e Noe No
e Nozzlezzle
zzlezzle
zzle
If the turbine nozzle becomes
obstructed:
1. Turn off the vacuum system
and disconnect the powerhead
from the wand.
2. Turn the powerhead over and
remove the clear belt cover by
first rotating the two latches
counterclockwise until they
align with the openings in the
3. Remove debris from the intake and turbine. Rotate the brush roller
to ensure the system is clear. Make sure the red seal on the belt cover
and mating surfaces are free from dirt particles before reassembling.
Check that the belt teeth are engaged with the turbine drive shaft
sprocket. Check belt condition and position on sprocket and on
brush roller.
4. RR
RR
Reassembeassemb
eassembeassemb
eassemble the belt cole the belt co
le the belt cole the belt co
le the belt covv
vv
ver to the unit:er to the unit:
er to the unit:er to the unit:
er to the unit: Insert the front of the belt cover
under the base plate edge and press belt cover onto housing. Rotate
the two latches clockwise until they lock into place.
IMPORIMPOR
IMPORIMPOR
IMPORTT
TT
TANTANT
ANTANT
ANT::
::
:
ChecChec
ChecChec
Check thak tha
k thak tha
k that a prt a pr
t a prt a pr
t a proper seal is madeoper seal is made
oper seal is madeoper seal is made
oper seal is made..
..
.Unit perfUnit perf
Unit perfUnit perf
Unit perforor
oror
ormance is demance is de
mance is demance is de
mance is dependent onpendent on
pendent onpendent on
pendent on
a proper seal.a proper seal.
a proper seal.a proper seal.
a proper seal.
belt cover. Lift the belt cover out from under the base plate (Fig. 4).
FIG. 3
FIG. 4
3
H-431H-431
H-431H-431
H-431
Plastic Hose HangerPlastic Hose Hanger
Plastic Hose HangerPlastic Hose Hanger
Plastic Hose Hanger
CT-3BLCT-3BL
CT-3BLCT-3BL
CT-3BL
TT
TT
Tool Cadool Cad
ool Cadool Cad
ool Caddd
dd
dyy
yy
y
• Adds portable convenience by allowing multiple tools
to be carried on the wand for quicker and easier access.
•TT
TT
To ao a
o ao a
o attacttac
ttacttac
ttach:h:
h:h:
h: Snap caddy onto wand at an angle
(beveled side first), then slip attachments and tools onto
caddy pegs. When clipping it onto wand, attach it so that
the two peg side faces up, while the single peg side faces
down the wand. This will keep your tools on better.
CB-180CB-180
CB-180CB-180
CB-180
MeshMesh
MeshMesh
Mesh TT
TT
Tool Cadool Cad
ool Cadool Cad
ool Caddd
dd
dy Bay Ba
y Bay Ba
y Bagg
gg
g
8
• Holds accessories and tools making them more
manageable.
• For storing and transporting.
• Mount on a wall in a closet, garage, or any other convenient
location for hose storage.
• Coil your hose around this hanger to store when not in use.
• Use of hanger can increase the life of your hose and save
space while storing.
• Mounts using only one stud and two screws.
L6105
UT-630BBLKUT-630BBLK
UT-630BBLKUT-630BBLK
UT-630BBLK
PrPr
PrPr
Premium Upholsteremium Upholster
emium Upholsteremium Upholster
emium Upholsteryy
yy
y TT
TT
Tool with Brool with Br
ool with Brool with Br
ool with Brushush
ushush
ush
•Cleans upholstered furniture, drapes, mattresses,and
even works well on vehicle upholstery and carpets.
• Continuous airflow is critical to cleaning
results. This tool is designed to prevent
airflow from being cut off.
• The brush strip gently engages upholstery
to lift debris and groom surfaces being cleaned.