manuals.online logo
Brands
  1. Home
  2. •
  3. Brands
  4. •
  5. Vaillant
  6. •
  7. Thermostat
  8. •
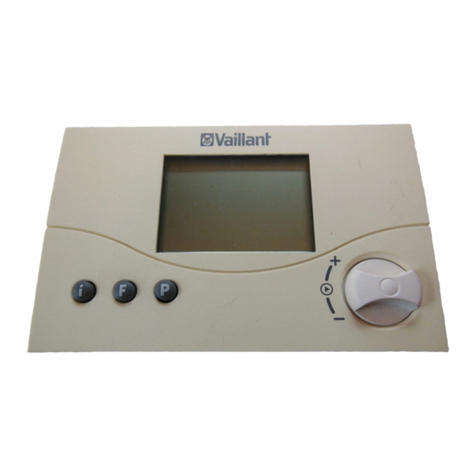
  9. Vaillant VRC 420 User manual

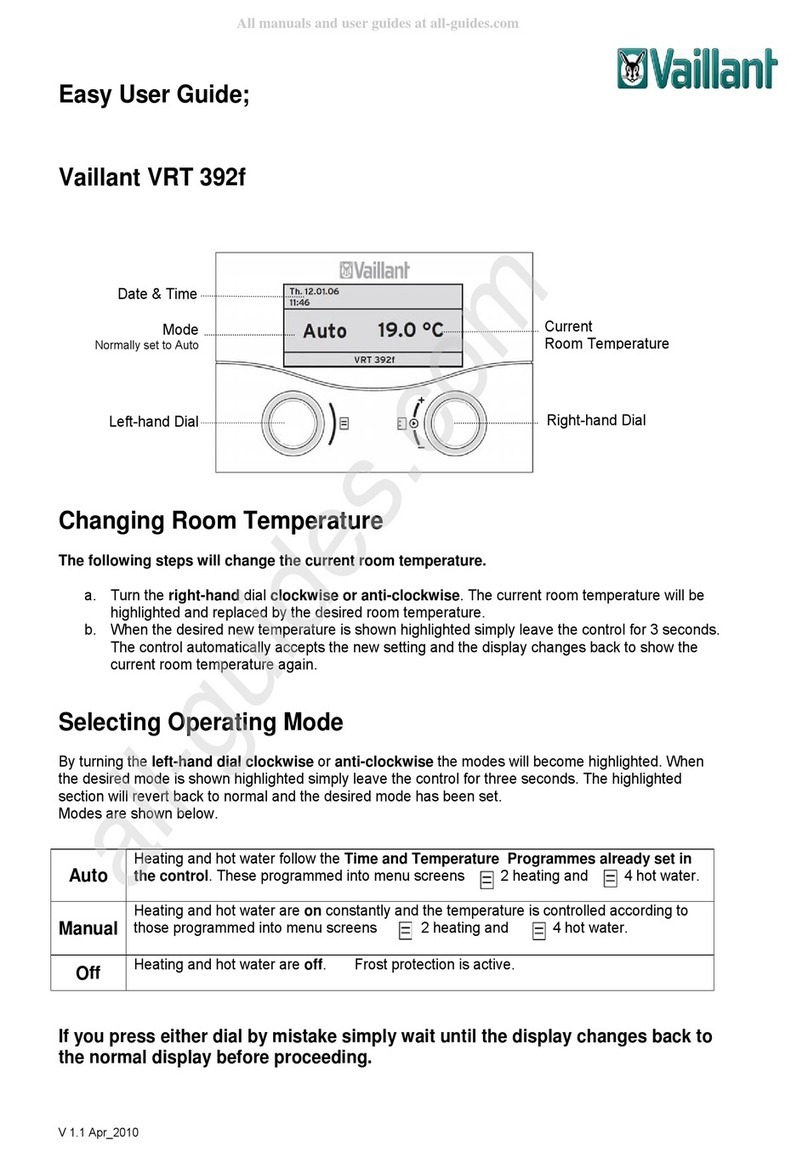
Vaillant VRC 420 User manual

Party
Sa - 15°C
°C
VRC-VCC
+1
0
+2
+3
-1
-2
-3
84+
420
BEDIENUNGS- UND MONTAGEANLEITUNG
OPERATING AND INSTALLATION INSTRUCTIONS
ÐÐÓÓÊÊÎÎÂÂÎÎÄÄÑÑÒÒÂÂÎÎ ÏÏÎÎ ÓÓÑÑÒÒÀÀÍÍÎÎÂÂÊÊÅÅ ÈÈ ÎÎÁÁÑÑËËÓÓÆÆÈÈÂÂÀÀÍÍÈÈÞÞ
DE GB RUS
2
Verehrte Kundin, geehrter Kunde!
Mit dem Vaillant Regelgerät VRC 420
haben Sie ein Spitzenprodukt aus dem
Hause Vaillant erworben. Um alle Vortei
le des Gerätes richtig nutzen zu können,
nehmen Sie sich ruhig ein paar Minuten
Zeit und lesen Sie diese Bedienungsanlei
tung. Sie ist nicht kompliziert und gibt
Ihnen nützliche Tips und Tricks.
Bitte bewahren Sie diese Anleitung sorg
fältig auf und geben Sie sie einem evt.
Nachbesitzer weiter.
Zu Ihrer Sicherheit!
Alle Arbeiten am Gerät selbst und am
Gesamtsystem dürfen nur autorisierte
Fachleute durchführen!
Bitte bedenken Sie, daß bei nicht fach
gerecht ausgeführten Arbeiten Gefahr für
Leib und Leben bestehen kann.
TIPPS!
●Beachten Sie die werkseitigen Ein
stellungen auf Seite 22. Sind Sie
damit zufrieden, brauchen Sie keine
weiteren Einstellungen vorzunehmen.
●Nehmen Sie bei allen Einstellvorgän
gen die Ausklappseiten am Anfang
und am Ende dieser Anleitung zu Hil
fe.
Dear cu tomer!
By choosing the VRC 420 thermostat you
have bought a high quality product from
Vaillant. In order to familiarise yourself
with all aspects of this thermostat it is
recommended that you take some time
and carefully read this instruction manu
al. It is easy to understand and will give
you many useful hints.
Please keep the manual in a safe place
and make sure that handed over to pos
sible next owners of the control.
For your afety!
All repairs on the thermostat itself and
your overall system should always be
carried out by authorised professionals
only!
Please take into consideration that non
professional interference with the appli
ance could threaten lives.
Hint !
●Please note the list of settings which
have been already programmed into
the thermostat on page 14. If you are
happy with these settings no further
programming is necessary.
●Refer to the folded pages at the be
ginning and the end of this manual
for re programming the thermostat.
УУвваажжааееммыыееппооккууппааттееллии!!
С покупкой регулятора VVRRCC420 Вы приоб
рели отличный прибор из линейки Vaillant.
Чтобы правильно использовать все преиму
щества данного прибора не откажите себе в
удовольствии уделить пару минут и всётаки
прочесть эту инструкцию по эксплуатации.
Она не слишком сложна и в то же время со
держит полезные указания и советы.
Пожалуйста, бережно сохраняйте эту инс
трукцию и, по возможности, передайте её
следующему владельцу.
ДДлляяВВаашшееййббееззооппаассннооссттии!!
Все работы с прибором и всей системой
должны проводиться только уполномочен
ными на то специалистами!
Пожалуйста, задумайтесь о том, что при
неграмотно выполненных работах может
возникнуть опасность для жизни и здоровья
людей.
ССооввеетт!!
●Обратите внимание на заводские уста
новки (стр. 22). Если Вы с ними согла
сны, то дальнейшие регулировки не
требуются.
●При проведении всех регулировок поль
зуйтесь раскладками в начале и на пос
ледних страницах этого руководства.
DE GB RUS
3
Party
Sa - 15°C
°C
VRC-VCC
+1
0
+2
+3
-1
-2
-3
Party
Sa - 15°C
°C
ABCDEF
HG
21
765
VRC VC2_001/0
Auf Seite 82 finden Sie eine Über icht
über die Bedienelemente unter dem
Gerätedeckel (5)
See page 82 for an overview of the
operating element located under the
cover panel (5)
ППееррееччееннььооббссллуужжииввааюющщииххээллееммееннттооввппоодд
ддееккооррааттииввннооййккррыышшккоойй((55))ррееггуулляяттооррааВВыы
ннааййддёёттееннаассттрр..8822
Bedienelemente
1Tag Temperaturwähler
zur Einstellung der gewünschten Raumtemperatur.
2Partytaste/einmaliges Laden des Speichers
zur vorübergehenden Abschaltung des Heizprogramms od
er zum einmaligen Aufheizen des Speicherwassers.
5Gerätedeckel
6Display
Das Display gibt Auskunft über Uhrzeit und Wochentag
sowie über Status und Betriebsart des Reglers.
7Betriebsartenschalter
Stellung Programm
In dieser Stellung wird die Raumtemperatur vom eingege
ben Programm geregelt.
Stellung Heizen
In dieser Stellung wird die Raumtemperatur ständig nach
der Temperatur geregelt, die am Tag Temperaturwähler (1)
eingestellt ist.
Stellung Absenken .
In dieser Stellung wird die Raumtemperatur ständig nach
der Absenk Temperatur (Nacht Temperatur) geregelt.
Di play, Über icht
AWochentag
BStatusanzeige:
Heizbetrieb Das Gerät befindet sich im Heizbetrieb.
Warmwa er Das Gerät befindet sich im Warmwasser
betrieb.
Party Das Gerät befindet sich im Party Betrieb
(siehe Seite 10).
Die Anzeige Heizbetrieb wird überdeckt,
weil in dieser Betriebart Heizung und
Warmwasser zur Verfügung stehen.
1x Ladung Das Gerät lädt den Warmwasserspeicher
einmalig auf (siehe Seite 11).
Urlaub Das Ferienprogramm ist aktiv.(s. Seite 36)
Fehlermeldungen (siehe Seite 48)
Störung Das Heizgerät hat eine Störung
Verbindung Die Datenübertragung vom Regler zum
Heizgerät ist gestört.
HK2 VT Sen or Die Verbindung zum Vorlauftemperatur
sensor ist gestört.
Wartung Das Heizgerät muß gewartet werden.
CAußentemperatur
DBetriebsart Absenken
EBetriebsart Heizen
FBetriebsart Programm
GAktuelle Uhrzeit
HAktuelle Temperatur (Anzeige nur bei Wandmontage)
DE
4
☞☞Heizkrei e:
Tragen Sie hier bitte ein welche Räume über die beiden
Heizkreise (HK) geregelt werden:
HK1:
HK2:
DE GB RUS
5
INHALT Seite
Bedienung anleitung . . . . . .3
1 Geräteüber icht . . . . . . . . . . . .3,82
1 Gerätebe chreibung . . . . . . . . . . .8
2 Bedienung . . . . . . . . . . . . . . . . . .9
2.1 Raumtemperatur einstellen . . . . . .9
2.2 Lüften . . . . . . . . . . . . . . . . . . . . .10
2.3 Partyfunktion einschalten . . . . . . .10
2.4 Speicher einmalig aufheizen . . . .11
3 Energie partipp . . . . . . . . . . . .12
4 Grundein tellungen . . . . . . . . . .13
4.1 Betriebsart wählen . . . . . . . . . . . .13
4.2 Landessprache wählen . . . . . . . .14
4.3 Uhrzeit/Wochentag einstellen . . . .16
4.4 Absenktemperatur einstellen . . . .18
4.5 Heizkurve einstellen . . . . . . . . . . .20
5 Zeitprogramme . . . . . . . . . . . . . .22
5.1 Werkseitige Einstellungen . . . . . .22
5.2 Übersicht . . . . . . . . . . . . . . . . . .24
5.3 Heizkreis wählen . . . . . . . . . . . . .26
5.4 Heizzeiten einstellen . . . . . . . . . .26
5.5 Warmwasserzeiten einstellen . . . .34
5.6 Zirkulationszeiten einstellen . . . . .35
5.7 Ferienprogramm aktivieren . . . . .36
6 Sonderfunktionen . . . . . . . . . . . .38
7 Info-Anzeige . . . . . . . . . . . . . . . .47
8 Fehlermeldungen . . . . . . . . . . . .48
9 Fro t chutz . . . . . . . . . . . . . . . . .49
10 Datenübertragung . . . . . . . . . .49
11 Telefonfern chaltung . . . . . . . .50
12 Werk ein tellung . . . . . . . . . . .50
13 Werk garantie . . . . . . . . . . . . .51
Montageanleitung . . . . . . .53
CONTENTS Page
Operating in truction . . . . .3
1Thermo tat overview . . . . . . . .3, 82
1 De cription of the appliance . . . .8
2 Operation . . . . . . . . . . . . . . . . . . .9
2.1 Adjusting day temperature . . . . . . .9
2.2 Ventilation . . . . . . . . . . . . . . . . . .10
2.3 Override mode . . . . . . . . . . . . . .10
2.4 One off heating up of tank . . . . .11
3 Energy aving hint . . . . . . . . . .12
4 Ba ic etting . . . . . . . . . . . . . . . .13
4.1 Choose operating mode . . . . . . .13
4.2 Choose a language . . . . . . . . . . .14
4.3 Date & time setting . . . . . . . . . . .16
4.4 Adjusting night temperature . . . . .18
4.5 Setting the heating curve . . . . . . .20
5 Heating period . . . . . . . . . . . . . .22
5.1 Pre set values . . . . . . . . . . . . . . .22
5.2 Overview . . . . . . . . . . . . . . . . . .24
5.3 Selection of heating circuit . . . . . .26
5.4 Programming heating periods . . .26
5.5 Set hot water supply periods . . . .34
5.6 Set circulating periods . . . . . . . . .35
5.7 Holiday program . . . . . . . . . . . . .36
6 Special function . . . . . . . . . . . .38
7 Di play of information . . . . . . . .47
8 Error me age . . . . . . . . . . . . . .48
9 Fro t Protection . . . . . . . . . . . . . .49
10 Data tran fer . . . . . . . . . . . . . .49
11 Remote control . . . . . . . . . . . . .50
12 Factory-adju ted element . . . .50
13 Manufacturer Warranty . . . . .51
In tallation in truction . . .53
ССООДДЕЕРРЖЖААННИИЕЕССттрр..
РРууккооввооддссттввооппооээккссппллууааттааццииии........33
ООббщщииййввииддппррииббоорраа..............................33,,8822
11ООппииссааннииееппррииббоорраа......................................88
22ООббссллуужжииввааннииее..............................................99
2.1 Установка комнатной температуры . . .9
2.2 Проветривание . . . . . . . . . . . . . . . . . . .10
2.3 Использование режима "Party" . . . . .10
2.4 Одноразовый нагрев бойлера . . . . . .11
33..РРееккооммееннддааццииииппооээккооннооммииииээннееррггииии....1122
44..ООссннооввнныыееннаассттррооййккии..............................1133
4.1 Выбор режима работы . . . . . . . . . . . . .13
4.2 Выбор языка дисплейных сообщений 14
4.3 Установка времени/дня недели . . . . .16
4.4 Установка пониженной температуры 18
4.5 Установка кривой отопления . . . . . . .20
55..ППррооггррааммммыыууппррааввллеенниияяппооввррееммееннии....2222
5.1 Заводские установки . . . . . . . . . . . . . .22
5.2 Обзор . . . . . . . . . . . . . . . . . . . . . . . . . . .24
5.3 Выбор контура отопления . . . . . . . . .26
5.4 Установка временных отрезков отопления .26
5.5 Установка времени нагрева горячей воды . .34
5.6 Установка времени циркуляции горячей воды35
5.7 Активирование программы "каникулы" . . . . . .36
66..ДДооппооллннииттееллььнныыееффууннккццииии......................3388
77..ИИннддииккаацциияяссооссттоояянниияя..............................4477
88..ССооооббщщеенниияяооббоошшииббккаахх..........................4488
99..ЗЗаащщииттааооттззааммееррззаанниияя..........................4499
1100..ППееррееддааччааддаанннныыхх..........................4499
1111..ДДииссттааннццииооннннооееууппррааввллееннииееппооттееллееффооннуу..5500
1122..ЗЗааввооддссккииееууссттааннооввккии............................5500
1133..ЗЗааввооддссккааяяггааррааннттиияя..............................5511
РРууккооввооддссттввооппооууссттааннооввккее............5533
GB
6
Operating element
1Day temperature selector
for adjusting to required room temperature.
2Override/one off filling of tank
for temporary deactivation of heating program or for one
off heating up of tank water (Domestic hot water for VUW
combination boilers only in GB).
5Device cover
6Display
The display shows the time and day, along with controller
mode and status information
7Operating mode switch
Program setting
In this setting, the room temperature is controlled by the
pre set program.
Heating setting
In this setting, the room temperature is permanently con
trolled according to the temperature pre selected on the
day temperature selector (1).
Reduce setting
In this setting, the room temperature is permanently con
trolled according to the reduced (night) temperature.
Di play, Overview
ADay of the week
BStatus indicator
Heating on The appliance is in heating mode.
Hot water The appliance is in hot water mode.
Party The appliance is in party (override) mode
(see page 10).
The Heating mode display message is
blocked out as heating and hot water are
both available in this operating mode.
DHW Boo t The appliance fills the hot water tank on a
single occasion (see page 11).The appli
ance activates the warmstart of the Aqua
Comfort system. (ecoMax 800 only)
Holiday The holiday program is active (see p. 36).
Error messages (see page 48)
Appl. Fault There is heating system fault.
Conn. Fault Data transfer from the controller to the
heating unit has been interrupted.
CH2 Fault The connection to the flow temperature is
malfunctioning.
Maintenance The heating appliance must be serviced.
(only available with compatible boiler and
electronics; not available in GB)
COutside temperature
DOperating mode "Night setting
EOperating mode "Heating
FOperating mode "Program
GActual time
HActual temperature
(only shown on wall mounted version)
☞☞Heating circuit :
Please indicate at this point which rooms are to be con
trolled via the two heating circuits (HC):
HC1:
HC2:
RUS
7
ЭЭллееммееннттыыууппррааввллеенниияя::
1. Переключатель дневной температуры — служит для установки
желаемой температуры в помещении.
2. Клавиша "Party" — одноразовый нагрев бойлера с включением
дневного режима отопления или, как вариант, просто
одноразовый нагрев бойлера.
5. Декоративная крышка регулятора.
6. Дисплей — показывает время и день недели, а также статус
и режим работы регулятора.
7. Переключатель режима работы:
ПОЛОЖЕНИЕ "Таймер"
В этом положении комнатная температура регулируется
по заданной программе.
ПОЛОЖЕНИЕ "День"
в этом положении комнатная температура поддерживается
постоянной, а её значение задаётся переключателем дневной
температуры.
ПОЛОЖЕНИЕ "Ночь"
в этом положении комнатная температура регулируется
по пониженной (ночной) температуре.
ДДииссппллеейй::
AДень недели
BСтатус:
HHeeiizzbbeettrriieebbПрибор находится в режиме отопления.
WWaarrmmwwaasssseerrПрибор находится в режиме приготовления
горячей воды.
PPaarrttyyПрибор находится в режиме "Party".
(см. стр. 10).
Индикация Heizbetrieb на дисплее
перекрывается, так как в этом режиме
приготовление горячей воды имеет
приоритет над режимом отопления.
11xxLLaadduunnggОднократный нагрев водонагревателя
(см. стр. 11).
UUrrllaauubbАктивирована программа "каникулы"
(см. стр. 36).
Сообщения об ошибках (см. стр. 48):
Störung Регулятор неисправен.
Verbindung Нарушена передача данных от регулятора
к отопительному котлу.
HK 2 VT Sensor
Wartung Отопительный котёл нуждается в
техническом обслуживании.
C Наружная температура.
D Режим работы "ночь".
E Режим работы "день".
F Режим работы "таймер" .
G Текущее время.
H Текущая температура
(индицируется только при монтаже на стену).
☞☞ООттооппииттееллььнныыееккооннттууррыы::
Внесите, пожалуйста, данные в таблицу, какие помещения
через какой отопительный контур (НК) регулируется:
ННКК11::
ННКК22::
DE GB RUS
8
1 Gerätebe chreibung
Das Regelgerät ermöglicht die witterungs
geführte Vorlauftemperatur Regelung
zweier Heizkreise, eines Brennerkreises
und eines Mischerkreises z. B. für die
Fußbodenheizung. Darüber hinaus kann
es die Warmwasserbereitung und eine
Zirkulationspumpe steuern.
Der Außentemperaturfühler mißt ständig
die aktuelle Außentemperatur. Das Regel
gerät sorgt dafür, dass die eingestellte
Raumtemperatur bei voll geöffneten
Thermostatventilen erreicht wird. Hierfür
muß das Heizgerät eine bestimmte Vor
lauftemperatur bereitstellen.
Sobald der Regler angeschlossen ist und
die Uhrzeit eingestellt ist, führt er ein
sinnvolles Heizprogramm durch. Hierfür
muß der Betriebsartenschalter (7, vordere
Klappseite) in der Stellung Programm
stehen.
Au führung mit DCF-Empfänger
Der im Lieferumfang enthaltene DCF
Empfänger empfängt ein Funkuhr Zeitsig
nal und stellt es Ihrem Regelgerät zur Ver
fügung. Die Uhrzeit Ihres Reglers stellt
sich automatisch ein, die Umstellung von
Sommer auf Winterzeit und umgekehrt
entfällt. Eine manuelle Einstellung der
Uhrzeit ist nur erforderlich, wenn der
Funkempfänger kein Zeitsignal erhält
(vgl. Uhrzeit und Wochentag einstellen).
1 Device de cription
The control device permits weather acti
vated adjustment of the flow temperature
control system, two heating circuits, one
burner circuit and one mixer circuit (e.g.
for under floor heating). It can also con
trol the hot water supply and a circulation
pump.
The outdoor temperature sensor constant
ly monitors the exterior temperature. The
control system ensures that the pre set
room temperature is achieved (with the
thermostat valves fully open). The heating
system must be adjusted to a specific flow
temperature setting in this case.
Once the controller is connected and the
timer set, it efficiently runs the heating
program. Note that the operating mode
switch (7, on front panel side) should be
set to the Program position.
Configuration with DCF receiver
(not currently available in the UK)
The DCF receiver supplied with the
system captures the timer transmitter sig
nal, making it available to your control
system. The clock time of your control
system is set automatically, without any
need to readjust from summer to winter
time or vice versa. Manual adjustment of
the clock is only required if the receiver
fails to capture a timer signal (cf. time
and day adjustment).
11..ООппииссааннииееппррииббоорраа
Регулятор обеспечивает регулирование
температуры подающей линии
отопительного контура в зависимости от
погодных условий. Кроме того, он может
управлять приготовлением горячей воды и
циркуляционным насосом.
Датчик наружной температуры постоянно
фиксирует текущую температуру наружного
воздуха. Регулятор заботится о том, чтобы
при полностью открытых термостатических
вентилях была достигнута заданная
комнатная температура.
Программа отопления идёт постоянно, пока
подключён регулятор и установлено время.
Для этого переключатель режима работы
регулятора (поз. 7 на раскладке в начале
руководства) должен быть установлен в
положение "таймер" .
ИИссппооллннееннииеессDDCCFFппррииёёммннииккоомм
Входящий в объём поставки DCFприёмник
распознаёт радиосигналы точного времени
и передаёт их на регулятор. Таким образом,
часы Вашего регулятора выставляются
автоматически, отпадает необходимость в
их переустановке с летнего на зимнее время
и наоборот. Ручная установка времени
требуется только в том случае, если
радиоприёмник не получает сигнал точного
времени (сравн. установка времени и дня
недели). В России сигналы DCF
принимаются некорректно. Данная функция
должна быть отключена специалистом.
DE GB RUS
9
2 Bedienung
Damit Ihr Heizgerät optimal arbeitet,
stellen Sie den Betriebsartenschalter (7,
vordere Klappseite) auf Programm .
2.1 Raumtemperatur ein tellen
Mit dem Tag Temperaturwähler (1, vor
dere Klappseite) können Sie die Raum
temperatur Ihren individuellen Bedürfnis
sen anpassen. Position  entspricht
einer gewünschten Raumtemperatur von
ca. 20 °C. Jeder Skalenpunkt bedeutet
eine Temperaturveränderung um etwa
2,5 °C.
●Raumtemperatur Erhöhen
Drehen Sie den Tag Temperaturwähler
nach rechts.
●Raumtemperatur Senken
Drehen Sie den Tag Temperaturwähler
nach links.
Diese Temperaturregelung ist nur aktiv,
wenn die Betriebsart oder eing
estellt ist.
2 Operation
In order to ensure optimum operation of
your heating appliance, set the mode
switch (7, on front panel side) to Pro
gram .
2.1 Adju ting day temperature
With the day temperature selector
(1,front folding page) you can adjust the
room temperature to individual needs.
Position  is set to approx. 20 °C.
Each point on the scale corresponds to a
temperature change of about 2.5 °C.
●To increa e temperature
Turn the day temperature selector
to the right.
●To decrea e temperature
Turn the day temperature selector
to the left.
The temperature can only be adjusted if
the operation mode of the appliance is
set to heating or program .
☞When the appliance is fitted within
the bolier facia, no additional room
thermostat is required. The overall
temperature of the radiators can be
finely adjusted to meet the heat re
quirements of the property using the
temperature selector control in con
juction with the systems thermostatic
radiator valves
22ООббссллуужжииввааннииее
Для того чтобы обеспечить оптимальную
работу Вашего регулятора, установите
переключатель режима работы (поз. 7
на раскладке в начале руководства)
в положение "таймер" .
22..11УУссттааннооввккааккооммннааттннооййттееммппееррааттууррыы
С помощью переключателя дневной
температуры (поз. 1 на раскладке в начале
руководства) Вы можете установить
соответствующую Вашим потребностям
комнатную температуру. Позиция ""
соответствует желаемой температуре
помещения, равной примерно 20°С.
Повышение ""EErrhhööhheenn""комнатной
температуры: поверните переключатель
дневной температуры по часовой
стрелке.
Понижение ""SSeennkkeenn""комнатной
температуры: поверните переключатель
дневной температуры против часовой
стрелки.
Такое регулирование температуры
возможно, если установлены режимы
работы "таймер" или "день" .
DE GB RUS
10
2.2 Lüften
Stellen Sie den Betriebsartenschalter (7,
vordere Klappseite) während des Lüftens
auf Absenken . Damit vermeiden Sie
eine unnötige Heizungseinschaltung.
Nach dem Lüften stellen Sie ihn wieder
zurück in Stellung Programm .
2.3 Partyfunktion ein chalten
Ihr Gerät ist mit einer Party Funktion aus
gestattet. Diese erlaubt es Ihnen, daß die
Heiz und Warmwasserzeiten über den
nächsten Abschaltpunkt hinaus fortge
setzt werden. Dies ist z. B. bei einer Feier
sinnvoll, denn der Regler stellt sich am
nächsten Morgen automatisch zurück auf
die Zeitfunktion.
Diese Funktion läßt sich nur aktivieren,
wenn der Betriebsartenschalter auf der
Position steht.
●Drücken Sie die Partytaste (2, vordere
Klappseite).
Im Display erscheint der Schriftzug
Party und neben dem Symbol
erscheint das Symbol .
●Mit dem Start der nächsten program
mierten Heizzeit endet der Party be
trieb automatisch. Der Regler arbeitet
dann wieder nach den programmier
ten Zeiten.
☞Sie können die Party Funktion aber
auch dadurch beenden, indem Sie
die Partytaste (2) zweimal drücken.
2.2 Ventilation
During airing switch the operating mode
(7, front folding page) of the appliance
to Night setting to avoid activating
the heating mode. After ventilating, re
turn it to the Program setting .
2.3 Override mode
Your thermostat is equipped with an
override mode, which enables you to
override the next stopping time for your
heating and hot water. It is therefore not
necessary to change your programmed
standard settings e.g. for a one off
override. This function can only be acti
vated if the operating switch is set to
symbol .
●Press the override button (2).
The display says override, and next to
symbol the symbol appears.
●With the start of the next pro
grammed heating period the override
mode switches off automatically. The
thermostat returns to the pro
grammed timings.
☞The override mode can also be
stopped by pressing the override
button (2) twice.
22..22ППррооввееттррииввааннииее
Установите переключатель режима работы (поз. 7
на раскладке в начале руководства) в положение
"ночь" на время проветривания помещения с
тем, чтобы исключить ненужные включения котла.
После проветривания помещения установите
переключатель назад в положение "таймер" .
22..33ИИссппооллььззооввааннииеерреежжииммаа""PPaarrttyy""
Ваш регулятор оснащён функцией "Party",
которая позволяет после некоторого
временного перерыва возобновить
прерванную программу отопления и
приготовления горячей воды. Это может быть
полезно, например, во время празднования
какоголибо события, так как на следующее
утро регулятор автоматически возвращается к
прерванной программе.
Эту функцию можно активировать, только
если переключатель режима работы (поз. 7
на раскладке в начале руководства)
находится в положении "таймер" .
●Нажмите клавишу "Party" (поз. 2 на
раскладке в начале руководства).
На дисплее появится надпись Party, а рядом
с символом возникнет значок .
●С наступлением следующего времени
обогрева режим "Party" закончится
автоматически. Теперь регулятор
работает по ранее заданной программе.
☞Вы также можете завершить работу в
режиме "Party", два раза нажав на
клавишу Party ((22)).
DE GB RUS
11
2.4 Einmalige Ladung für Warmwa -
er
Ihr Gerät ist mit einer Funktion zur ein
maligen Ladung des Speicherwassers
ausgestattet. Diese erlaubt es Ihnen, den
Warmwasserspeicher sofort aufzuladen
bzw. bei VCW Geräten den Warmstart
des Aqua Comfort Systems zu aktivieren.
Dies ist sinnvoll, wenn Sie z. B. eine Stun
de früher als gewöhnlich eine grössere
Menge Warmwasser benötigen.
Diese Funktion läßt sich nur aktivieren,
wenn der Betriebsartenschalter auf der
Position steht.
●Drücken Sie die Partytaste (2, vordere
Klappseite) zweimal.
Im Display erscheint der Schriftzug
1x Speicherl..
Der Regler fragt das Heizgerät ab, und
schaltet die einmalige Aufladung aus,
sobald das Heizgerät den Speicher auf
geladen hat.
☞Ist der Speicher bereits Aufgeladen
wird die einmalige Aufladung nach
45 Minuten abgeschaltet.
☞Sie können die einmalige Aufladung
auch manuell abschalten, indem Sie
die Partytaste einmal drücken. Der
Schriftzug 1x Speicherl. verschwindet.
2.4 One-off filling for hot water
Your appliance is fitted with a function
that provides for one off filling with tank
water. This allows you to fill the hot water
tank immediately or  in the case of com
bination boilers such as the ecoMAX 800 se
ries  to activate the warm start function
of the Aqua Comfort system. This func
tion is useful when  for example  a
large quantity of hot water is required an
hour earlier than normal. This function
can only be activated if the operating
mode switch is in the position .
●Press the party override button (2,
front side of panel) twice.
The display will show the message
1x tank fill.
The controller automatically shuts down
the one off filling function, as soon as
the boiler has satisfied this operation.
☞If the tank is already full, the one off
filling function is shut down after 45
minutes.
☞You can also shut down the one off
filling function manually by pressing
the override button once.
The 1x tank fill display message will
now disappear.
☞Tank or cylinder heating is currently
not availible in the UK. This function
is available for the warmstart of the
Aqua Comfort system on the ecoMAX
800 series only.
22..44ООддннооррааззооввыыййннааггррееввббооййллеерраа
Ваш регулятор оснащён функцией
одноразового нагрева бойлера. Это
позволяет быстро нагреть бойлер. Это
уместно, например, в случае, если Вам
требуется большое количество горячей
воды на час раньше, чем обычно. Данную
функцию можно активировать, только если
переключатель режима работы находится в
положении "таймер" .
●Нажмите два раза клавишу "Party" (поз.
2 на раскладке в начале руководства).
На дисплее появится надпись
"1x Ladung".
Регулятор запрашивает отопительный котёл
и отключает однократный нагрев, как
только бойлер нагреется.
☞Если бойлер уже нагрет, то функция
одноразового нагрева отключится через
45 минут.
☞Вы можете также выключить эту
функцию вручную, два раза нажав на
клавишу "Party". Надпись "1x Ladung"
исчезнет.
DE GB RUS
12
3 Energie partipp
☞Stellen Sie die Raumtemperatur nur
so hoch ein, daß diese für Ihr Beha
glich keitsempfinden gerade aus
reicht. Jedes Grad darüber hinaus
bedeutet einen unnötigen Energiever
brauch von etwa 6 %.
☞Senken Sie die Raumtemperatur für
die Zeiten Ihrer Nachtruhe und Ab
wesenheit ab.
☞Öffnen Sie während der Heizperiode
das Fenster nur zum Lüften und nicht
zur Temperaturregelung. Eine kurze
Stoßlüftung ist wirkungsvoller und en
ergiesparender als lange offenste
hende Kippfenster.
☞Stellen Sie während des Lüftens den
Betriebsartenschalter (s. Geräteüber
sicht) auf Absenken (Symbol ).
Damit vermeiden Sie eine unnötige
Heizungseinschaltung.
☞Lassen Sie in dem Zimmer, in dem
sich Ihr Regelgerät befindet, stets alle
Heizkörperventile voll geöffnet.
☞Verdecken Sie Ihr Regelgerät nicht
durch Möbel, Vorhänge oder andere
Gegenstände. Es muß die zirkulier
ende Raumluft ungehindert erfassen
können.
3 Energy aving hint
☞Set your room temperature in such a
way that it just reaches your comfort
level. Every degree over and above
that level represents an unnecessary
waste of energy of about 6%.
☞Reduce your room temperature dur
ing the night and when the dwelling
is not occupied.
☞When the heating is on open
windows for airing only not for
regulating the room temperature.
Short periods of airing are more ef
fective than having a small window
open for long periods.
☞During airing switch the operating
mode of the appliance to Night
setting (Symbol ) to avoid
activating the heating mode.
☞In the room where the thermostat is
fixed all radiator valves should be left
in the fully open position.
☞Do not cover your thermostat with
furniture, curtains or other objects. It
must have free access to the air
circulating in the room.
33РРееккооммееннддааццииииппооээккооннооммииии
ээннееррггииии
☞Устанавливайте такую температуру,
которая соответствует Вашему
комфортному состоянию. Каждый
градус сверх неё означает ненужный
перерасход энергии около 6%.
☞Уменьшайте комнатную температуру на
время Вашего отсутствия и сна.
☞Во время отопления открывайте окна
только для проветривания, а не для
регулирования температуры. Короткое
сквозное проветривание более
действенно и экономично, чем
длительное время открытое окно.
☞Установите переключатель режима
работы (поз. 7 на раскладке в начале
руководства) в положение "ночь"
(символ ) на время проветривания
помещения с тем, чтобы исключить
ненужные включения котла.
☞В комнате, где расположен регулятор,
термостатические вентили на
радиаторах оставляйте всегда
полностью открытыми.
☞Не закрывайте регулятор занавесками,
мебелью и другими предметами, так как
к нему должен быть обеспечен
беспрепятственный доступ
циркулирующего в помещении воздуха.
DE GB RUS
13
4 Grundein tellungen
4.1 Betrieb art wählen
Mit dem Betriebsartenschalter (7, vordere
Klappseite) können Sie die Betriebsweise
Ihrer Anlage einstellen.
●Stellung Programm
In dieser Stellung wird die Raumtem
peratur vom eingegeben Programm
geregelt. Während der Heizzeiten
wird die Temperatur nach der am
Tag Temperaturwähler (1) eingestell
ten Temperatur geregelt, während der
Absenkphase nach der Absenk Tem
peratur.
●Stellung Heizen
In dieser Stellung wird die Raumtem
peratur ständig nach der Temperatur
geregelt, die am Tag Temperaturwähl
er (1) eingestellt ist. Im Display ersch
eint . Die Programmierung der
Schaltuhr wird nicht berücksichtigt.
●Stellung Absenken .
In dieser Stellung wird die Raumtem
peratur ständig nach der Absenk Tem
peratur geregelt. Im Display erscheint
. Die Programmierung der Schal
tuhr wird nicht berücksichtigt. Werk
seitig ist die Absenkung auf 15 °C
eingestellt.
4 Ba ic etting
4.1 Choo e the operating mode
The operating mode switch (7, front
folding page) allows you to set the
control for your particular needs. After
a certain time the length of which de
pends on your property and outside
weather conditions the selected room
temperature will be reached.
●Position Program
The room temperature is controlled
by the programmed settings.
During warm up periods, the temper
ature is controlled by means of the
day temperature selector (1) setting,
and by the reduction temperature
during the reduction phase.
●Position Heating
The room tempera
ture is constantly adjusted to the set
day temperature. The display shows
.
Any programming is overridden.
●Position Night etting
With this setting the room tempera
ture is constantly set at the night
temperature. The display shows .
Any programming is overrid
den. The factory setting for this mode
is 15 °C.
44ООссннооввнныыееннаассттррооййккии
44..11ВВыыббоорррреежжииммааррааббооттыы
С помощью переключателя режима работы
(поз. 7 на раскладке в начале руководства)
Вы можете установить режим работы
Вашего регулятора.
Положение ""ттааййммеерр"".
В этом положении комнатная
температура регулируется по заданной
программе. Во время отопления
температура определяется
установленным по переключателю
дневной температуры (1) значением, а
во время фазы понижения — ночной
температурой.
Положение ""ддеенньь"".
В этом положении комнатная
температура поддерживается
постоянной, а её значение задаётся
переключателем дневной температуры
(1). На дисплее появляется символ .
Программа таймера для отопления не
учитывается.
Положение ""ннооччьь"".
В этом положении комнатная
температура регулируется по
пониженной (ночной) температуре. На
дисплее появляется символ .
Программа таймера для отопления не
учитывается. Заводская регулировка
ночной температуры соответствует
15°С.
2
1
4
3
VRC_VC2_009/0
Íåì. ÿçûê Àíãë. ÿçûê
2
1
4
3
VRC_VC2_009/0
Íåì. ÿçûê Àíãë. ÿçûê
2
1
4
3
VRC_VC2_009/0
Íåì. ÿçûê Ôðàíö. ÿçûê
14
DE GB RUS
15
4.2 Lande prache wählen
☞Der Regler wird werkseitig in der
Landessprache Deutsch bzw. Span
isch ausgeliefert. Die Einstellung Ih
rer Landessprache hat Ihr Installateur
bei der Erstinbetriebnahme vorgen
ommen. Im Normalfall ist keine Än
derung mehr erforderlich. Wollen Sie
die Einstellung doch einmal ändern
gehen Sie bitte wie folgt vor:
●Klappen Sie den Gerätedeckel (5)
auf.
●Drehen Sie den Schalter (4) auf das
Symbol .
Im Display erscheint die interna-
tionale Länderkennung und der
Schriftzug Sprache in der jeweili
gen Landessprache.
●Drehen Sie nun den Einsteller (3)
nach rechts oder links und wählen Sie
die gewünschte Sprache.
●Schließen Sie den Gerätedeckel (5).
☞Die Einstellung wird automatisch ges
peichert. Sie müssen diese also nicht
mehr bestätigen.
4.2 Choo e a language
☞The control is pre set by the factory
to "German. The re setting to the
language required (English, French,
) has already been done by your
installer when the control was
commissioned. Normally it is not nec
essary to re set anything again.
Should you wish to re set the
language yourself please proceed as
follows:
●Open the control cover (5).
●Turn the switch (4) to symbol .
The display shows the flashing writing
International Country Identification
and the text message Language in
the corresponding language.
●Now turn the setting switch (3) left or
right and choose die appropriate lan
guage.
●Close the control cover (5).
☞Your setting is automatically saved.
You do not need to confirm your
choice.
44..22ВВыыббоорряяззыыккааддииссппллееййнныыххссооооббщщеенниийй
☞Заводская установка языка дисплейных
сообщений регулятора — немецкий или
испанский. Установку Вашего родного
языка должен произвести Ваш наладчик
при первом включении. Дальнейшие
изменения обычно не требуются. Но
если Вы хотите ещё раз изменить
установки, пожалуйста,
придерживайтесь следующей
последовательности действий:
●откройте декоративную крышку (5);
●поверните переключатель (4) на символ ;
На дисплее появится ""ммеежжддууннааррооддннааяя
ииддееннттииффииккаацциияяссттрраанн""((iinntteerrnnaattiioonnaallee
LLaannddeerrkkeennnnuunngg))и надпись ""яяззыыкк""
((SSpprraacchhee))на соответствующем
национальном языке;
●теперь поворотом переключателя (3)
выберите желаемый язык дисплейных
сообщений;
●закройте декоративную крышку (5).
☞Ваша установка запомнится
автоматически, так что Вам не
требуется её дальнейшее
подтверждение.
3
3
2
1
43
VRC VC2_011/0
So
Uhrzeit
So
Uhrzeit
So
Wochentag
Mi
Wochentag
3
3
2
1
43
VRC_VC2_011/0
Su
Time
Su
Time
Su
Day
We
Day
3
3
2
1
43
VRC_VC2_011/0
Âñ
Âðåìÿ
Âñ
Âðåìÿ
Âñ
Äåíü íåäåëè
Ñð (Mi)
Äåíü íåäåëè
16
DE GB RUS
17
4.3 Uhrzeit und Wochentag ein tellen
Wenn Ihr Gerät ist mit einem DCF Emp
fänger ausgestattet ist, so synchronisiert
dieser die Uhrzeit mit dem offiziellen
deutschen Zeitsignal, wenn der Empfang
möglich ist. Die Uhrzeit Ihres Regelge
rätes stellt sich automatisch ein. Das gilt
auch für die Umstellung von Sommer
auf Winterzeit und umgekehrt. Müssen
Sie Uhrzeit oder Wochentag jedoch ein
mal ändern gehen Sie bitte wie folgt vor:
●Klappen Sie den Gerätedeckel (5)
auf.
●Drehen Sie den Schalter (4) auf das
Symbol .
Im Display erscheint eine blinkende
Uhrzeit und der Schriftzug Uhrzeit.
●Drehen Sie nun den Einsteller (3)
nach links, um die Uhrzeit zurück
zustellen
nach rechts, um die Uhrzeit vorzus
tellen.
●Drücken Sie den Einsteller (3).
Im Display erscheint ein blinkender
Wochentag mit dem Schriftzug Wo-
chentag.
●Nehmen Sie die Einstellung wie bei
der Uhrzeit beschrieben für den Wo
chentag vor.
☞Uhrzeit und Datum werden automa
tisch gespeichert. Sie müssen die neu
en Werte also nicht bestätigen.
4.2 Date and time etting
(The DCF receiver system is not currently
available in the UK)
If your control is fitted with a DCF receiv
er, the time for your thermostat will auto
matically adjusted and synchronised with
the German standard time if the sig
nals can be received. This is also the
case for changing from summer to win
ter time or vice versa.
Should you, however, need to adjust ei
ther time or date manually please pro
ceed as follows:
●Open the control cover (5)
●Turn switch (4) to symbol .
The display shows a flashing time
and the word Time next to it.
●Now turn the knob (3)
to the left to adjust time backwards
to the right to adjust time forward
●Press the knob (3)
The display shows a flashing day with
the wording Day.
●Follow the same steps as for time also
for day adjusting.
☞☞The new time and date are
automatically saved, there is no need
to confirm the new setting.
44..33УУссттааннооввккааввррееммееннии//дднняяннееддееллии
Если Ваш регулятор оснащён DCF
приёмником, то он синхронизирует
установку времени по официальным
сигналам точного немецкого времени (при
возможности приёма), то есть установка
времени Вашего регулятора производится
автоматически. Это касается также
переустановки с летнего на зимнее время и
наоборот.
В случае необходимости изменить время и
дату, пожалуйста, придерживайтесь
следующей последовательности действий:
●откройте декоративную крышку (55);
●поверните переключатель (44) на символ ;
Индикация времени замигает и на дисплее
появится надпись ""ввррееммяя""((UUhhrrzzeeiitt)).
●теперь поверните переключатель (33)
против часовой стрелки, чтобы
уменьшить значение времени;
по часовой стрелке, чтобы увеличить
значение времени;
●нажмите переключатель (33).
Индикация даты замигает и на дисплее появится
надпись ""ддееннььннееддееллии""((WWoocchheennttaagg)).
●произведите установку дня недели
аналогично установке времени;
●закройте декоративную крышку (55);
☞Время и дата запомнятся автоматически,
так что Вам не требуется их дальнейшее
подтверждение.
°C°C°C
2
1
433
VRC VC2_008/0
HC1
Min. Temp.
HC1
Min. Temp.
HC1
Min. Temp.
°C°C°C
2
1
433
VRC VC2_008/0
ÍÊ1
Ïîíèæåííàÿ òåìïåðàòóðà ÍÊ1
Ïîíèæåííàÿ òåìïåðàòóðà
ÍÊ1
Ïîíèæåííàÿ òåìïåðàòóðà
18
°C°C°C
2
1
433
VRC VC2_008/0
HK1
Absenktemp
HK1
Absenktemp
HK1
Absenktemp
DE GB RUS
19
4.4 Ab enktemperatur ein tellen
●Klappen Sie den Gerätedeckel (5) auf.
●Drehen Sie den Funktionsartenschal
ter (4) auf das Symbol .
Im Display erscheint eine blinkende 15
und die Anzeige HK 1 und Ab-
enktemp.
●Drehen Sie nun den Einsteller (3)
nach links, um die Absenktempera
tur zu verringern
nach rechts, um die Absenktempera
tur zu erhöhen.
☞Der Wert wird automatisch gespei
chert. Sie müssen den neuen Wert al
so nicht bestätigen.
☞Die Absenk Temperatur kann in einem
Bereich von 5 °C bis 20 °C verstellt
werden.
Die Einstellung der Absenktemperatur
auf 0°C empfiehlt sich nur bei länger
er Abwesenheit, da sie nur den Frost
schutz der Anlage sicherstellt.
●Zur Einstellung der Absenk Temperatur
für den Heizkreis 2 drücken Sie auf
den Einsteller (3), um den Heizkreis
2 auszuwählen.
Im Display erscheint eine blinkende 15
und die Anzeige HK 2 und Ab-
enktemp.
Stellen Sie die Absenk Temperatur ein
wie oben beschrieben.
4.4 Adju ting night temperature
●Open the control cover (5)
●Turn switch (4) to symbol
The display shows a flashing 15 and
the words HC1 and Min. Temp.
next to it.
●Now turn the knob (3)
to the left to decrease the tempera
ture
to the right to increase the tempera
ture.
☞The new temperature is automatically
saved, there is no need to confirm the
new setting.
☞The reduction temperature can
be adjusted within a range of
5 °C to 20 °C.
The reduction temperature should on
ly be set to 0 °C during long absen
ces, as it ensures only that the system
will be protected from frost.
●To set the reduction temperature for
heating circuit 2, press the Adjuster
(3) to select heating circuit 2.
The display shows a flashing 15 and
the words HC 2 and Min.
Temp. next to it.
Set the reduction temperature as de
scribed above.
44..44УУссттааннооввккааппоонниижжеенннноойй((ннооччнноойй))ттееммппееррааттууррыы
●откройте декоративную крышку ((55));
●поверните переключатель ((44))на символ ;
На дисплее появится мигающее число "15"
и надпись ""ННКК11""и ""ппоонниижжееннннааяя
ттееммппееррааттуурраа""((AAbbsseennkktteemmpp));
●теперь поверните переключатель ((33))
против часовой стрелки, чтобы
уменьшить значение ночной
температуры,
по часовой стрелке, чтобы увеличить
значение ночной температуры.
☞Установленное значение запомнится
автоматически, так что Вам не
требуется его дальнейшее
подтверждение.
☞Пониженная температура может быть
установлена в диапазоне от 5 до 20°С.
Регулировка пониженной температуры
на 0°С может быть рекомендована
только в случае длительного отсутствия,
так как она только обеспечивает защиту
установки от замерзания.
●для установки пониженной температуры
для отопительного контура 2 нажмите
на переключатель (3) и выберите
отопительный контур 2.
На дисплее появится мигающее число
"15" и надпись ""ННКК22""и ""ппоонниижжееннннааяя
ттееммппееррааттуурраа""((AAbbsseennkktteemmpp)).
Установите пониженную температуру,
как это описано выше.
3
2
1
43
3
VRC VC2_010/1
HC2
Heat. Curve
HC1
Heat. Curve
HC1
Heat. Curve
HC2
Heat. Curve
3
2
1
43
3
VRC VC2_010/1
ÍÊ2
Êðèâàÿ îòîïëåíèÿ
ÍÊ1
Êðèâàÿ îòîïëåíèÿ
ÍÊ1
Êðèâàÿ îòîïëåíèÿ
ÍÊ2
Êðèâàÿ îòîïëåíèÿ
20
3
2
1
43
3
20 15 10 5 0 – 5 – 10 – 15 – 20
20
30
40
50
60
70
80
90
0.2
0.6
1.0
1.2
1.5
2.02.53.03.54.0
VRC VC2_010/1
VRC VC2_019/0
HK2
HZ-Kurve
HK1
HZ-Kurve
HK1
HZ-Kurve
HK2
HZ-Kurve
Vorlauftemperatur
Advance flow temp.
Температура подающей линии контура отопления
Heizkurven
Heating curves
Кривая отопления
Außentemperatur
Outside temperature
Наружная температура

Other manuals for VRC 420

1

Other Vaillant Thermostat manuals

Vaillant VRC 420 User manual

Vaillant

Vaillant VRC 420 User manual

Vaillant VRT 90 User manual

Vaillant

Vaillant VRT 90 User manual

Vaillant VRC 470 User manual

Vaillant

Vaillant VRC 470 User manual

Vaillant VRT 350 User manual

Vaillant

Vaillant VRT 350 User manual

Vaillant VRT 40 User manual

Vaillant

Vaillant VRT 40 User manual

Vaillant VR 70 User manual

Vaillant

Vaillant VR 70 User manual

Vaillant VR 51 User manual

Vaillant

Vaillant VR 51 User manual

Vaillant VRT 390 User manual

Vaillant

Vaillant VRT 390 User manual

Vaillant multiMATIC VRC 700 User manual

Vaillant

Vaillant multiMATIC VRC 700 User manual

Vaillant VRC 430 Operating and Specification sheet

Vaillant

Vaillant VRC 430 Operating and Specification sheet

Vaillant multiMATIC VRC 700/5 User manual

Vaillant

Vaillant multiMATIC VRC 700/5 User manual

Vaillant VRT 220 User manual

Vaillant

Vaillant VRT 220 User manual

Vaillant VRT 30 User manual

Vaillant

Vaillant VRT 30 User manual

Vaillant ecoFIT User manual

Vaillant

Vaillant ecoFIT User manual

Vaillant geoTHERM SERIES User manual

Vaillant

Vaillant geoTHERM SERIES User manual

Vaillant VRT 320 Guide

Vaillant

Vaillant VRT 320 Guide

Vaillant VRT 340f Specification sheet

Vaillant

Vaillant VRT 340f Specification sheet

Vaillant VRT 392 Specification sheet

Vaillant

Vaillant VRT 392 Specification sheet

Vaillant VRT 360 Operating and Specification sheet

Vaillant

Vaillant VRT 360 Operating and Specification sheet

Vaillant MultiMatic 700/2 Installation guide

Vaillant

Vaillant MultiMatic 700/2 Installation guide

Vaillant VRT 230 Operating and Specification sheet

Vaillant

Vaillant VRT 230 Operating and Specification sheet

Vaillant VRT 392f Specification sheet

Vaillant

Vaillant VRT 392f Specification sheet

Vaillant VRT 50 Specification sheet

Vaillant

Vaillant VRT 50 Specification sheet

Vaillant VRT 50 Specification sheet

Vaillant

Vaillant VRT 50 Specification sheet

Popular Thermostat manuals by other brands

Pentair NRG-Temp manual

Pentair

Pentair NRG-Temp manual

Honeywell Prestige 2.0 THX9421 manual

Honeywell

Honeywell Prestige 2.0 THX9421 manual

Tekmar tekmarNet 2 Thermostat 529 Installation and operation manual

Tekmar

Tekmar tekmarNet 2 Thermostat 529 Installation and operation manual

Carrier A07048 installation instructions

Carrier

Carrier A07048 installation instructions

Robertshaw 9901i user manual

Robertshaw

Robertshaw 9901i user manual

GENERAL LIFE ARUNA 302S RF user manual

GENERAL LIFE

GENERAL LIFE ARUNA 302S RF user manual

AC International CT0-7TC-32 instruction manual

AC International

AC International CT0-7TC-32 instruction manual

Honeywell FocusPRO TH6110D installation guide

Honeywell

Honeywell FocusPRO TH6110D installation guide

Ecobee 3 smarter wi-fi thermostat user manual

Ecobee

Ecobee 3 smarter wi-fi thermostat user manual

Sinope TH1500ZB-C4 installation guide

Sinope

Sinope TH1500ZB-C4 installation guide

Adax Glamox heating WT2 Series user guide

Adax

Adax Glamox heating WT2 Series user guide

Honeywell RTH8500 Series owner's manual

Honeywell

Honeywell RTH8500 Series owner's manual

Maico THR 10-1 quick start guide

Maico

Maico THR 10-1 quick start guide

Honeywell RTH7460D1018/E 5-1-1 Quick installation guide

Honeywell

Honeywell RTH7460D1018/E 5-1-1 Quick installation guide

Honeywell DT90E user guide

Honeywell

Honeywell DT90E user guide

Watts BT DP-01 manual

Watts

Watts BT DP-01 manual

Enernet T9000 user guide

Enernet

Enernet T9000 user guide

Watts Tekmar 563 installation manual

Watts

Watts Tekmar 563 installation manual

manuals.online logo
manuals.online logoBrands
  • About & Mission
  • Contact us
  • Privacy Policy
  • Terms and Conditions

Copyright 2025 Manuals.Online. All Rights Reserved.