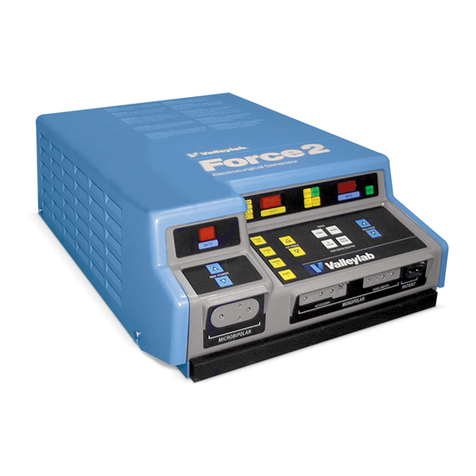
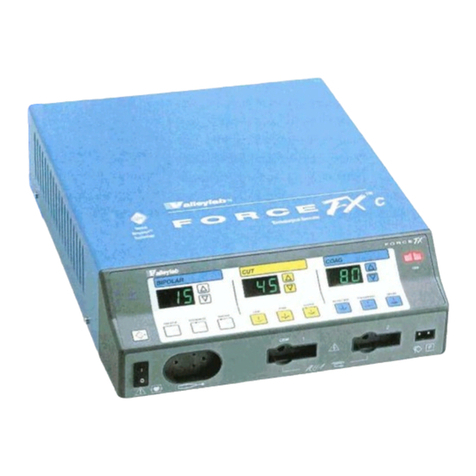
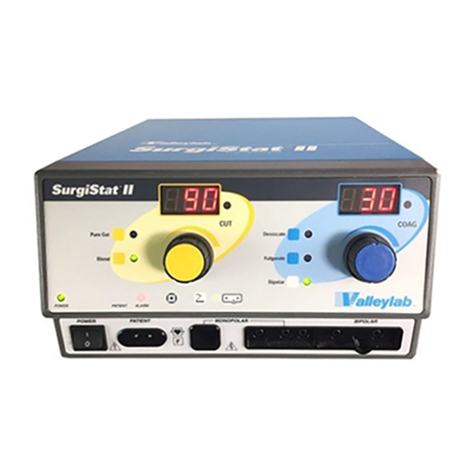
Valleylab Force 30 User manual

Force
Service
Manual
Force
30
Force
40
Valleylab
Inc
5920
Longbow
Drive,
P.O.
Box
9015
Boulder,
Colorado
80301
USA
For
service
information
call:
1-800-255-8522
/
1-303-530-2300
/
TWX
910-940-2514
Copyright
©
Valleylab
Inc,
1992
All
rights
reserved.
Contents
of
this
publication
may
not
be
reproduced
in
any
form
without
the
written
permission
of
Valleylab
Inc.

Foreword
The
following
service
instructions
are
for
use only
by
personnel
qualified
to
repair
and
service
the
equipment
described
in
this
manual.
Caution:
Federal
(USA)
law
restricts
this
device
to
sale
by
or
on
the
order
of
a
physician.
Effective
Date:
April
1992
Valleylab
Part
No.:
945
100
153
Equipment
covered
in
this
manual:
Force
30,
40
Electrosurgical
Generators
110
—
120
V-
nominal
220
—
240
V-
nominal
(user
selected)
REM"
is
a
trademark
of
Valleylab
Inc
PolyHesive®
is
a
registered
trademark
of
Valleylab
Inc
Purpose
And
Scope
This
Service
Manual
contains
information
required
to
calibrate,
troubleshoot,
maintain,
and
install
the
Force
30
and
Force
40
Electrosurgical
Generators.
Instructions
for
the
operation
of
the
Force
generator
and
cautions
and
warnings
concerning
electrosurgery
are
beyond
the
scope
of
this
manual.
The
reader
is
directed
to
the
Force 30,40
Instruction
Manual
supplied
with
the
generator.
Limited
Warranty
Valleylab
Inc
warrants
each
product
manufactured
by
it
to
be
free
from
defects
in
material
and
workmanship
under
normal
use
and
service
for
the
period(s)
set
forth
below.
Valleylab’s
obligation
under
this
warranty
is
limited
to
the
repair
or
replacement,
at
its
sole
option,
of
any
product,
or
part
thereof,
which
has
been
returned
to
it
or
its
Distributor
within
the
applicable
time
period
shown
below
after
delivery
of
the
product
to
the
original
purchaser,
and
which
examination
discloses,
to
Valleylab’s
satisfaction,
that
the
product
is
defective.
This
warranty
does
not
apply
to
any
product,
or
part
thereof,
which
has
been
repaired
or
altered
outside
Valleylab’s
factory
in
a
way
so
as,
in
Valleylab’s
judgment,
to
affect
its
stability
or
reliability,
or
which
has
been
subjected
to
misuse,
neglect
or
accident.
The
warranty
periods
for
Valleylab’s
products
are
as
follows:
Electrosurgical
Generators
One
Year
from
date
of
shipment.
Mounting
Fixtures
(All
Models)
One
Year
from
date
of
shipment.
Footswitches
(All
Models)
One Year
from
date
of
shipment.
Patient
Return
Electrodes
Shelf
life
only,
as
stated
on
packaging.
Sterile
Disposables
Sterility
only,
as
stated
on
packaging.
This
warranty
is
in
lieu
of
all
other
warranties,
expressed
or
implied,
including,
without
limitation,
the
warranties
of
merchantability
and
fitness
for
a
particular
purpose,
and
of
all
other
obligations
or
liabilities
on
the
part
of
Valleylab.
Valleylab
neither
assumes
nor
authorizes
any
other
person
to
assume
for
it
any
other
liability
in
connection
with
the
sale
or
use
of
any
of
Valleylab's
products.
Notwithstanding
any
other
provision
herein
or
in
any
other
document
or
communication,
Valleylab's
liability
with
respect
to
this
agreement
and
products
sold
hereunder
shall
be
limited
to
the
aggregate
purchase
price
for
the
goods
sold by
Valleylab
to
customer.
There
are
no
warranties
which
extend
beyond
the
terms
hereof.
Valleylab
disclaims
any
liability
hereunder
or
elsewhere
in
connection
with
the
sale
of
this
product,
for
indirect
or
consequential
damages.
This
warranty
and
the
rights
and
obligations
hereunder
shal]
be
construed
under
and
governed
by
the
laws
of
the
State
of
Colorado,
USA.
The
sole
forum
for
resolving
disputes
arising
under
or
relating
in
any
way
to
this
warranty
is
the
District
Court
for
the
County
of
Boulder,
State
of
Colorado.
Valleylab
Inc,
its
dealers
and
representatives,
reserve
the
right
to
make
changes
in
equipment
built
and/or
sold
by
them
at
any
time
without
incurring
any
obligation
to
make
the
same
or
similar
changes
on
equipment
previously
built
and/or
sold
by
them.

Table
of
Contents
Section
1
Installation
.................
Responsibility
of
the
Manufacturer
................
Environmental
Conditions
.......................
Transport
and
Storage
.................................
A
eeeeeeereerererere
Preparing
the
Generator
for
Use
..................
Power
Requirements
............................
Power
Plug
....................................
Proper
Grounding
..............................
Preoperational
Checkout
........................
Routine
Maintenance
and
Inspections
..............
Cleaning
Instructions
...........................
Recommended
Electrosurgical
Accessories
..........
Reusable
Pencil
Cleaning
and
Reprocessing
Directions
......................
Cleaning
に
に
に
に
に に
ーー
トト
に
ドー
ドド
トド
ドド
トド
ドド
トー
ドド ドド
ドー
ババ
Ethylene
Oxide
(EtO)
Processing
........................
Steam
Autoclave
Processing
............................
Section
2
Performance
Specifications
.
Output
Configuration
...........................
Low
Frequency
Leakage
(50-60
Hz)
...............
High
Frequency
Risk
Parameters
.................
REM
Contact
Quality
Monitor
....................
Audio
Volume
.................................
Input
Power
Source
.............................
Weight
...................................4...
Overall
Dimensions
.............................
Classification
..................................
Class
I
Equipment
per
IEC
601-1
.......................
Type
CF
Equipment
per
IEC
601-1
......................
Defibrillator-Proof
...................................
Drip
Proof
per
IEC
601-1
.............................
Intermittent
Operation
.................................
Force
30
Output
Waveform
......................
Force
30
Output
Characteristics
..................
Force
40
Output
Waveform
......................
Force
40
Output
Characteristics
.......-..........
ыыы
ο
ND
DNA
DBA
nA
RB
LO
LO
00
00
00
00
00 00
00
00
00
JIA

Section
3
Functional
Description
.....
Overview
.......
기
이기기
기
이기기
이
기
기이
이기
이이
이아
Microcontroller
Board
...........................
Microcontroller
/
Memory
/1/O
.........................
Serial
Communication
on
the
IIC
Bus
....................
Footswitch
Decoding
.................................
Watchdog
Timer
.....................................
Voltage
Regulators
...................................
Display
Board
................,................
7-Segment
LEDS
....................................
LED
Lamps
.........................................
REMLamp
......
κ
εν
οκ
καν
κνν
¡11
LO
0000
0
Front
Panel
Buttons
..................................
REMSwitch
.................
.
eee
Power
Control
Pencil
Detector
..........................
Voltage
Regulators
...................................
Interface
Board
................................
¡AS
Handswitch
Key
Sense
................................
RF
Sense
........,.........,........................
Dosage
Error
........................................
RF
Sense
/
Dosage
Error
Gain
Test
......................
REM
Circuitry
νεο
κκ
<
スー
ドド
トド
ドド
・
ト
トレ
レト
トト
トー
レイ
ーー
Voltage
Regulators
...................................
REM
Filter
Board
..............................
Power
Supply/RF
Board
.........................
AC
Line
Hardware
...................................
LVDC
Power
Supply
.................................
HVDC
Power
Supply
................,................
ЕСОМ
ersnsee
Dosage
Error
........................................
Ton
Generation
.....................,................
Clamp
Signals
.......................................
Load
Enable
........................................
RFOUutputStage
.......................
000.010
e
Voltage
Regulators
...................................
23
23
23
23
24
25
25
26
26
26
26
27
27
27
28
28
28
29
29
29
30
31
32
33
34
34
Section
4
Descriptions
Of
Controls,
Indicators,
and
Receptacles
........
43
Introduction
.......................,...........
43
Status.............
rr
시
이
게
에
사
47
Power
Controls
.........................,.......
47
Bipolar
.......................................
48
Monopolar
Cut
.................................
48
Monopolar
Coag................................
48
Alarms
...........
0s
49
Front
Panel
Receptacles
.........................
50
Rear
Panel
Functions
...........................
51
Section
5
Testing
And
Calibration
.....
53
Recommended
Test
Equipment
...................
53
General
Test
And
Calibration
Information
..........
54
Pretest
Inspection
..............................
54
Front
Panel
ω
νοκ
ρο
νεο
εοσ
οσον
κ
κοκ
εκ
εκν
54
Rear
Panel
................................ss..sse
て
55
Chassis
Inspection
....................................
55
Power
Up
Self-Test
.............................
55
Calibration
....................................
56
General
Instructions
.....................,............
56
Setting
Up
for
Calibration
.......................
57
Multiplier
Offset
Calibration
.....................
57
REM
Filter
Board
Calibration
....................
57
Calibration
Steps
...............................
58
Summary
Table
of
the
Calibration
Steps
...........
62
Error
Codes
...................................
63
Section
6
Component
Replacement
....
67
Section
7
Factory
Service
............
69
Returning
the
Generator
for
Service
...............
69
Returning
the
Force
30,
40
Generator
....................
69
Returning
Circuit
Boards
and
Other
Subassemblies
.........
69
Ordering
Replacement
Parts
............................
69
Section
8
Service
Parts
List
..........
71
Display
PCBA
.................................
71
Interface
PCBA
................................
72
Microprocessor
PCBA
...........................
75
Power
Supply
PCBA
............................
76
REM
filter
PCBA
..............................
80
Section
9
Assemblies
and
Schematics
..
81
Electronic
Interface
Between
Boards
...............
81
Cable
#
1:
Low
Voltage
Interconnect
Cable
...............
81
Connector
#1:
Microcontroller
Board
to
PSRF
Board
.......
82

List
of
Figures
Figure
2.1
Force
40
Output
Power
vs
Load
.........
Figure
2.2
Force
30
Output
Power
vs
Load
.........
Figure
2.3
Output
Power
vs
Generator
Setting
......
Figure
3.1
Functional
Block
Diagram
..
Figure
4.1
Force
40
Front
Panel
......
Figure
4.2
Force
30
Front
Panel
......
Figure
4.3
Rear
Panel
..............
e...
..........
ecos
cs
0
0.
Figure
9.1
System
Interconnect
Diagram
...........
Figure
9.2
Interface
Schematic
.......
Figure
9.3
Power
Supply/RF
Schematic
Figure
9.4
Display
Board
Schematic
..
.
e.
............
Figure
9.5
Microcontroller
Board
Schematic
........
Figure
9.6
REM
Filter
Board
Schematic
ss...
11
15
18
41
45
46
83
84
88
92
95
97

ATTENTION:
REFER
TO
THE
Service
Centers
Valleylab
inc
Boulder,
Colorado,
USA
800-255-8522
Valleylab
Inc
Stamford,
Connecticut,
USA
800-843-2872
Valleylab
Australia
Prospect,
AUSTRALIA
61-2-688-4888
Valleylab
Benelux
Nieuwegein,
HOLLAND
31-3402-32456
Valleylab
Canada
Ontario,
CANADA
800-668-1832
Valleylab
Europe,
Middle
East
and
Africa
London,
UNITED
KINGDOM
44-081-961-9956
Valleylab
France
c/o
CLIMO
Lyon,
FRANCE
33—78—096262
Valleylab
Germany
Wichmannstrasse
4
Postfach
520452
D-2000
Hamburg
52
GERMANY
0049-4089-
6884
Valleylab
UK
London,
UNITED
KINGDOM
44-081-961-9956
IO
à
TYPE
CF
EQUIPMENT
DRIP-PROOF
LOW
LEAKAGE
ACCOMPANYING
SUITABLE
FOR
CARDIAC
USE
DOCUMENTS
DEFIBRILLATOR-PROOF
F
THE
GENERATOR
IS
HIGH-FREQUENCY
ISOLATED
PER
IEC
601-2-2

Introduction
The
Force
30
and
Force
40
Electrosurgical
Generators
are
designed
for
ceiling
or
cart
mounting.
The
models
available
in
this
Force
series
are:
Force
30,
Force
40,
and
the
Force 40S
(Simutaneous
Coag
feature).
All
generators
are
configured
to
operate
at
220-240
V~
nominal.
A
kit
is
available
from
Valleylab
to
convert
the
generator
to
110-120
V-
operation.
The
differences
between
the
two
major
models
are
the
maximum
power
settings
and
the
number
of
available
functions.
These
differences
are
summarized
in
the
following
tables.
Note:
“-”
indicates
the
mode
is
not
available
on
that
particular
model.
Maximum
Power
Setting
(watts)
Mode
Force
40
Force
30
Pure
Cut
300 300
Blend
1
250
250
Blend
2
200
一
Desiccate
200
200
Fulgurate
150
150
Spray
Coag
150
一
Standard
Bipolar
50 50
Precise
Bipolar
50 50
Features
Feature
Force
40
Force
30
Handswitching
Outputs
2
2
Footswitching
Output
yes
yes
Simultaneous
Coag
option
一
Isolated
Outputs
yes yes
Power
Control
yes
yes
Autoranging
REM
yes yes
Blend
2
yes
一
Spray
Coag
yes
一
The
Force
30,
40
generators
are
enclosed
in
the
same
metal
and
molded
plastic
enclosure.
The
front
panel
contains
touch
membrane
switches,
lighted
indicators,
digital
displays,
high
voltage
output
receptacles,
and
a
monopolar
footswitch
receptacle.
The
rear
panel
contains
the
power
entry
module,
a
line
voltage
selector
switch,
a
volume
control
potentiometer,
a
handle,
and
monopolar
and
bipolar
footswitch
receptacles.
vi

Section
1
Installation
Notify
Valleylab
to
arrange
for
repair
or
replacement
of
any
parts
damaged
from
shipping.
All
returns
must
have
the
approval
from
the
Valleylab
Customer
Service
Department.
The
return
authorization
number
must
be
displayed
on
the
package
label.
Carefully
remove
the
Force
generator
and
all
accessories
from
the
shipping
package.
Save
all
cartons
and
packing
materials
to
use
when
transporting
the
generator
or
when
returning
it
for
service.
If
you
have
any
questions
concerning
the
contents,
contact
Valleylab
Customer
Service
at
1-800-255-8522
or
your
Valleylab
representative.
Responsibility
of
the
Manufacturer
Valleylab
Inc
is
responsible
for
the
effects
on
safety,
reliability
and
performance
of
the
equipment
only
if:
—
©
assembly
operations,
extensions,
readjustments,
modifications
or
repairs
are
carried
out
by
persons
authorized
by
Valleylab
Inc.
—
the
electrical
installation
of
the
relevant
room
complies
with
local
codes
and
requirements
such
as
IEC
and
BSI.
—
the
equipment
is
used
in
accordance
with
the
instructions
for
use.
Environmental
Conditions
Transport
and
Storage
Ambient
Temperature:
Between
—40
and
+70
degrees
C.
Relative
Humidity:
Between
10%
and
100%,
noncondensing.
Atmospheric
Pressure:
Between
500
and
1060
millibar.
Operation
Ambient
Temperature:
Between
+10
and
+40
degrees
C.
Relative
Humidity:
Between
30%
and
75%,
noncondensing.
Atmospheric
Pressure:
Between
700
and
1060
millibar.
Preparing
the
Generator
for
Use
The
electrosurgical
generator
may
be
placed
on
a
mounting
cart
(available
from
Valleylab)
or
be
installed
in
a
ceiling
mount
system.
It is
recommended
that
carts
have
conductive
wheels.
Refer
to
hospital
procedures
or
local
codes
for
detailed
information.
Provide
at
least
four
to
six
inches
of
space
around
the
sides
and
top
of
the
generator
for
convection
cooling.
Under
continuous
use
for
extended
periods
of
time,
it
is
normal
for
the
top
and
rear
panel
to
be
warm.
DANGER
Explosion
Hazard.
Do
not
install
the
electrosurgical
generator
in
areas
using
flammable
anesthetics,
gases,
liquids,
or
objects.
Force
30,
40
Service
Manual
1

Power
Requirements
The
Force
30,
40
Electrosurgical
Generator
is
designed
to
operate
between
85
—
140
V~
or
170
-
280
V~,
50-60
Hz.
The
output
will
remain
constant
over
the
ranges
of
90-135
V~
or
180-270
V
~,
50-60
Hz.
Power
Plug
The
Force
generator
is
shipped
with
a
hospital
grade
power
plug.
The
Valleylab
representative
in
your
country
will
equip
your
Valleylab
generator
with
the
proper
connector
for
your
operating
room,
if
different
from
that
supplied.
The
connector
meets
all
requirements
for
safe
grounding.
Its
purpose
should
not
be
defeated
by
using
extension
cords
or
three-prong
to
two-prong
adapters.
The
power
cord
assembly
should
be
periodically
inspected
by
qualified
personnel.
Cords
should
always
be
grasped
by
the
plug.
Do
not
pull
on
the
cord
itself.
Proper
Grounding
An
important
consideration
in
assuring
patient
safety
while
using
electrical
equipment
is
proper
grounding.
The
ground
wire
in
the
power
cable
is
connected
to
the
chassis
and
insures
that
no
dangerous
currents
will
flow
from
the
cabinet
of
the
generator
in
the
event
of
an
internal
electrical
failure.
Undesirable
50-60
Hz
leakage
currents
are
also
affected
by
the
polarization
of
the
input
50-60
Hz
power
to
the
generator.
It
is
the
responsibility
of
the
user
to
assure
proper
grounding
and
polarity
in
the
power
outlets
furnishing
power
to
the
Force
generator.
Preoperational
Checkout
Refer
to
Section
5,
Power
Up
Self-Test.
Routine
Maintenance
and
Inspections
Valleylab
recommends
that
the
Force
generator
be
inspected
by
gualified
service
personnel
twice
a
year.
This
Service
Manual
describes
the
recommended
inspection,
testing,
and
calibration
procedures.
For
major
repairs,
the
generator
can
be
returned
to
Valleylab.
If
desired,
Valleylab
will
supply
any
parts
or
information
needed
to
repair
the
Force
generator.
Cleaning
Instructions
Clean
the
generator
using
standard
hospital
procedures.
Use
a
mild
detergent
and
damp
cloth
to
clean
the
generator
cover,
keyboard
and
cord.
Do
not
allow
fluids
to
enter
the
chassis.
Do
not
use
alcohol,
caustic,
corrosive,
or
abrasive cleaning
materials.
The
generator
cannot
be
sterilized.
2
Force
30,
40
Service
Manual

|
Recommended
Electrosurgical
Accessories
Valleylab
E7507/E7509
REM
PolyHesive
II
Patient
Return
Electrode
Valleylab
E2515/E2516
Disposable
Handswitching
Pencil
Valleylab
E2525
Reusable
Handswitching
Pencil
Valleylab
E2517
Disposable
Power
Control
Pencil
Valleylab
Bipolar
Forceps
Valleylab
E2400
Disposable
Insulating
Holster
Valleylab
E6008B
Monopolar
Footswitch
Valleylab
E6009
Bipolar
Footswitch
Force
30,
40
Service
Manual

Reusable
Pencil
Cleaning
And
Reprocessing
Directions
(For
Valleylab
Reusable
Handswitching
Pencils)
NOTE
These
directions
are
not
intended
for
electrosurgical
accessories
not
manufactured
by
Valleylab.
Refer
to
the
instructions
provided
by
the
manufacturer.
Cleaning
1.
The
pencil
should
be
processed
with
other
delicate surgical
instruments
in
order
to
protect
the
electronic
components.
2.
If
a
disposable
electrode
has
been
used
in
the
pencil,
remove
and
discard.
Remove
all
gross
matter
(blood,
mucus,
tissue)
by
wiping
the
entire pencil
with
a
cloth
or
gauze
pad
and
a
mild
cleaning
solution
or
blood
dissolving
detergent.
Remove
any
cleansing
agents
by
wiping
the
pencil
with
a
water-dampened
cloth.
Do
not
immerse
the
pencil
in
reprocessing
solutions.
3.
Dry
thoroughly.
4.
Sterilize
the
pencil
using
standard
hospital
procedures
for
Ethylene
Oxide
sterilization
or
steam
autoclave
sterilization,
following
the
handling
recommendations
below.
Ethylene
Oxide
(EtO)
Processing
1.
Coil
the
cord
loosely
prior
to
inserting
the
pencil
into
an
EtO
pouch.
Tight
“bunching”
or
wrapping
of
the
cord
will
decrease
the
useful
life
of
the
pencil.
2.
Estimated
number
of
uses
when
reprocessed
by
this
method:
20
Steam
Autoclave
Processing
1.
Do
not
autoclave
the
pencil
unwrapped.
2.
Lay
the
pencil
body
in
the
center
of
the
wrapping
material
as
shown.
(Fig.
1)
3.
Fold
the
material
over
the
pencil
body
and
proceed
to
coil
the
cord
around
the
material
lengthwise
.
(Fig.
2)
NOTE
Keep
the
pencil
body,
dord
and
plug
connector
from
contacting
each
other
to
prolong
the
life
of
the
pencil.
Do
not
use
rubber
bands,
string,
or
tape
to
secure
the
cord.
4.
Apply
a
second
wrapping
material
to
the
packet
produced
in
Step
2
above
(Fig.
3).
Tape
and
autoclave.
5.
Do
not
exceed
a
processing
temperature
of
135°C
(275°F
)
for
20
minutes.
The
number
of
uses
will
be
reduced
when
this
product
is
steam
autoclaved.
Recommended
wrapping
procedure
for
normal
autoclaving:
11
r:
KR
[|
|
2
T
7
k
Fig.
1
Fig.
2
Fig.
3
4
Force
30,
40
Service
Manual

Testing
During
surgical
procedure
set
up,
inspect
product
and
confirm
product
function.
1.
Insert
the
pencil
connector
into
the
appropriate
active
handswitch
receptacle
on
the
generator.
The
patient
return
electrode
must
be
in
place
on
the
patient.
2.
Using
the
generator
front
panel
On/Off
switch,
turn
the
generator
On.
3.
The
generator
will
conduct
a
self-test
and
power
settings
will
display
1
watt.
Do
not
press
the
Reset
button.
CAUTION
Set
Cut
and
Coag
power
settings
to
the
lowest
setting
before
testing
the
pencil.
INES
NOTE
Observe
the
generator.
If
an
error
code
(119-122) appears
in
the
power
setting
displays
and
a
tone
sounds,
this
indicates
a
malfunctioning
accessory.
Discard
the pencil.
4.
Press
the
yellow
Cut
button
on
the
pencil
and
verify
that
the
yellow
lamp
in
the
Cut
mode
illuminates.
If
the
blue
Coag
lamp
illuminates,
discard
the
pencil.
5.
Press
the
blue
Coag
button
on
the
pencil
and
verify
that
the
blue
lamp
in
the
Coag
mode
illuminates.
If
the
yellow
Cut
lamp
illuminates,
discard
the
pencil.
NOTE
If
either
the
Cut
or
Coag
lamp
does
not
illuminate,
discard
the
pencil.
CAUTION
Inspect
the
pencil
and
cord
for
breaks,
cracks,
nicks,
or
other
damage
before
use.
If
damaged,
do
not
use.
Failure
to
observe
this
precaution
with
every
use
may
result
in
injury
or
electrical
shock
to
the
patient
or
operating
room
personnel.
6.
Place
the
generator
in
the
Off
mode
until
ready
for
surgery.
Force
30,
40
Service
Manual
5

Force
30,
40
Service
Manual

Section
2
Performance
Specifications
Specifications
are
subject
to
change
without
notice.
In
this
Section,
"typical"
refers
to
a
specification
that
is
within
+
20%
of
a
stated
value
at
room
temperature
(25°
C)
and
nominal
input
power
voltage.
Output
Configuration
Isolated
output.
Low
Frequency
Leakage
(50-60
Hz)
All
patient-connected
terminals
tied
together:
Source
Current
Polarity
Ground
Leakage
(110-120V~)
Leakage
(220-240V-)
Normal
intact
«
10µΑ
<2.0
нА
Normal
open
<
100
pA
<
50
pA
Reverse
open
<
100
pA
<50
pA
High
Frequency
Risk
Parameters
Leakage
Monopolar
RF
leakage
current
<
150
mA
RMS
Bipolar
RF
leakage
current
<
50
mA
RMS
REM
Contact
Quality
Monitor
Measurement
Measurement
Acceptable
Resistance
Range
Frequency
Current
Single
area
pad
Dual
area
pad
70
+
5
kHz
<
10
mA
<
20
ohms
5
—
135
ohms
If
the
impedance
measured
is
outside
the
acceptance
range,
a
REM
fault
condition
will
occur.
In
the
REM
mode,
if
resistance
increases
by
more
than
40%
above
the
nominal
value
or
135
ohms
resistance,
an
alarm
will
be
generated.
Audio
Volume
The
audio
keying
tones
are
adjustable.
The
alarm
tones
are
not
adjustable.
Audio
Level
@
1
meter
Keying
Tone
45
to>
65
dBA
Alarm
Tone
(Fixed)
>
65
dBA
Force
30,
40
Service
Manual
7

Input
Power
Source
Nominal
Voltage:
110-120
V
RMS
or
220-240
V
RMS
Regulation
Voltage
90-135
V
RMS
or
180-270
V
RMS
Operating
Range:
85-140
V
RMS
or
170-280
V
RMS
Current:
Idle
0.4
A,
max
.or
0.2
A,
max
Cut
7.0
A,
max
or
3.5
A,
max
Coag
4.0
A,
max
or
2.0
A,
max
Bipolar
2.0
A,
max
or
1.0
A,
max
Weight
20
Ib
(9.1
kg)
Overall
Dimensions
7.8
in.
H
x
16.lin.
W
x
11.9
in.
D
(199
mm
x
409
mm
x
303
mm)
Classification
Class
I
Equipment
per
IEC
601-1
Protection
against
electric
shock
is
provided
by
connection
of
accessible
conductive
parts
to
the
protective
earth
conductor
in
such
a
way
that
they
cannot
become
live
in
the
event
of
a
failure
of
basic
insulation.
Type
CF
Equipment
per
IEC
601-1
The
Force
30,40
provides
a
high
degree
of
protection
against
electric
shock,
particularly
regarding
allowable
leakage
currents
and
has
a
CF
type
isolated
(floating)
applied
part.
The
applied
part
may
be
used
on
the
heart.
Defibrillator-Proof
The
neutral
electrode
terminals
of
the
Force
30,40
can
withstand
the
effects
of
defibrillator
discharge.
Drip
Proof
per
IEC
601-1
The
Force
30,40
enclosure
will
prevent
reasonable
amounts
of
falling
liquid
from
interfering
with
the
generator’s
safe
and
satisfactory
operation.
Intermittent
Operation
The
generator
is
cooled
by
natural
convection.
Under
maximum
power
setting
and
rated
load
conditions
(Pure
Cut,
300
watt
setting,
300
ohm
load)
the
Force
30,40
is
suitable
for
10
seconds
on,
30
seconds
off
operation
for
one
hour.
With
lesser
settings
and
other
load
impedances,
the
Force
30,40
can
be
used
for
greater
activation
durations
without
generating
excessive
internal
temperatures.
8
Force
30,
40
Service
Manual

Note:
Power
readouts
agree
with
actual
power
into
rated
load
to
within
+
15%
or
+
5
watts,
whichever
is
greater.
Dosage
error
occurs
when
the
measured
output
power
exceeds
the
displayed
units
by
35
watts
or
35%,
whichever
is
greater.
Force
30
Output
Waveform
Cut
500
kHz
sinusoid.
Blend
500
kHz
bursts
of
sinusoid
@
50%
duty
cycle,
recurring
@
31.25
kHz.
Desiccate
500
kHz
damped
sinusoidal
bursts
with
a
repetition
frequency
of
250
kHz.
Fulgurate
500
kHz
damped
sinusoidal
bursts
with
a
repetition
frequency
of
62.5 kHz.
Standard
Bipolar
500
kHz
sinusoid.
Precise
Bipolar
500
kHz
sinusoid.
Output
Characteristics
Maximum
Rated
Nominal
Crest
(open
circuit)
Load
Power
Factor
Mode
P-P
voltage
(ohms)
+
(watts)
(typical
Cut
3300
300
300
2.1 @
100W
Blend
3800
300
250
3.5
@
100W
Desiccate
3500
300 200
3.5
@
100W
Fulgurate
6500
300
150
6.0
@
100W
Standard
Bipolar
550
100
99
1.9
@
20W
Precise
Bipolar
550
100
70
1.9
@
20W
Force
30,
40
Service
Manual

Note:
Power
readouts
agree
with
actual
power
into
rated
load
to
within
+
15%
or
+
5
watts,
whichever
is
greater.
Dosage
error
occurs
when
the
measured
output
power
exceeds
the
displayed
units
by
35
watts
or
35%,
whichever
is
greater.
Force
40
Output
Waveform
Cut
500
kHz
sinusoid.
Blend
1
500
kHz
bursts
of
sinusoid
@
50%
duty
cycle,
recurring
@
31.25
kHz.
Blend
2
500
kHz
bursts
of
sinusoid
@
37.5%
duty
cycle,
recurring
@
31.25
kHz.
Desiccate
500
kHz
damped
sinusoidal
bursts
with
a
repetition
frequency
of
250
kHz.
Fulgurate
500
kHz
damped
sinusoidal
bursts
with
a
repetition
frequency
of
62.5
kHz.
Spray
Coag
500
kHz
damped
sinusoidal
bursts
with
a
repetition
frequency
of
31.25
kHz.
Standard
500
kHz
sinusoid.
Precise
500 kHz
sinusoid.
Output
Characteristics
Maximum
Rated
Nominal
Crest
(open
circuit)
Load
Power
Factor
Mode
P-P
voltage
(ohms)
(watts)
(typical)
Cut
3300
300
300
2.1
@
100W
Blend
1
3800
300
250
3.5
@
100W
Blend
2
4000
300
200
4.0
@
100W
Desiccate
3500
300
200
3.5
@
100W
Fulgurate
6500
300
150
6.0
@
100W
Spray
Coag
9000
300
150
8.5
@
100W
Standard
550
100
99
1.9
@
20W
Precise
550
100
70
1.9
@
20W
10
Force
30,
40
Service
Manual

All
Monopolar
output
measurements
are
made
using
the
procedures
described
in
IEC
601-2-2.
PURE
CUT
GENERATOR
SETTING
OUTPUT
POWER
(WATTS)
300
|
150
0
200
400
600
800
1000
1200
1400
1600 1800
2000
|
IMPEDANCE
(OHMS)
|
BLEND1
GENERATOR
SETTING
OUTPUT
POWER
(WATTS)
250
130
O
200
400
600
800
1000
1200
1400
1600 1800
2000
IMPEDANCE
(OHMS)
Figure
2.1
Force
40
Output
Power
vs
Load
Force
30,
40
Service
Manual
11

BLEND
2
300
GENERATOR
270
SETTING
240
210
18
DS
OUTPUT
/
00068.
150
/
nm]
1204H
==
200
gol
Al
|
/
一
60
100
30
0 0
200
400
600
800
1000
1200
1400
1600
1800
2000
IMPEDANCE
(OHMS)
DESICCATE
GENERATOR
SETTING
OUTPUT
POWER
200
(WATTS)
100
30
0
0
200
400
600
800
1000
1200
1400
1600
1800
2000
IMPEDANCE
(OHMS)
2.1
Force
40
Output
Power
vs
Load
(cont'd)
12
Force
30,
40
Service
Manual
This manual suits for next models
1
Table of contents
Other Valleylab Medical Equipment manuals

Valleylab
Valleylab LigaSure User manual

Valleylab
Valleylab SurgiStat II-20 User manual

Valleylab
Valleylab Force FX-8C User manual

Valleylab
Valleylab RapidVac User manual

Valleylab
Valleylab ForceTriad User manual

Valleylab
Valleylab RapidVac 1009803 User manual

Valleylab
Valleylab Force 2 User manual

Valleylab
Valleylab CUSA EXcel-8 User manual