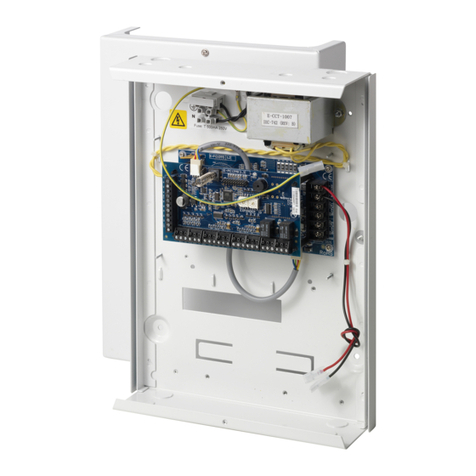
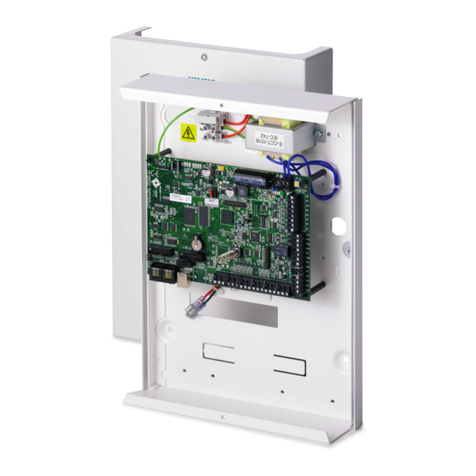
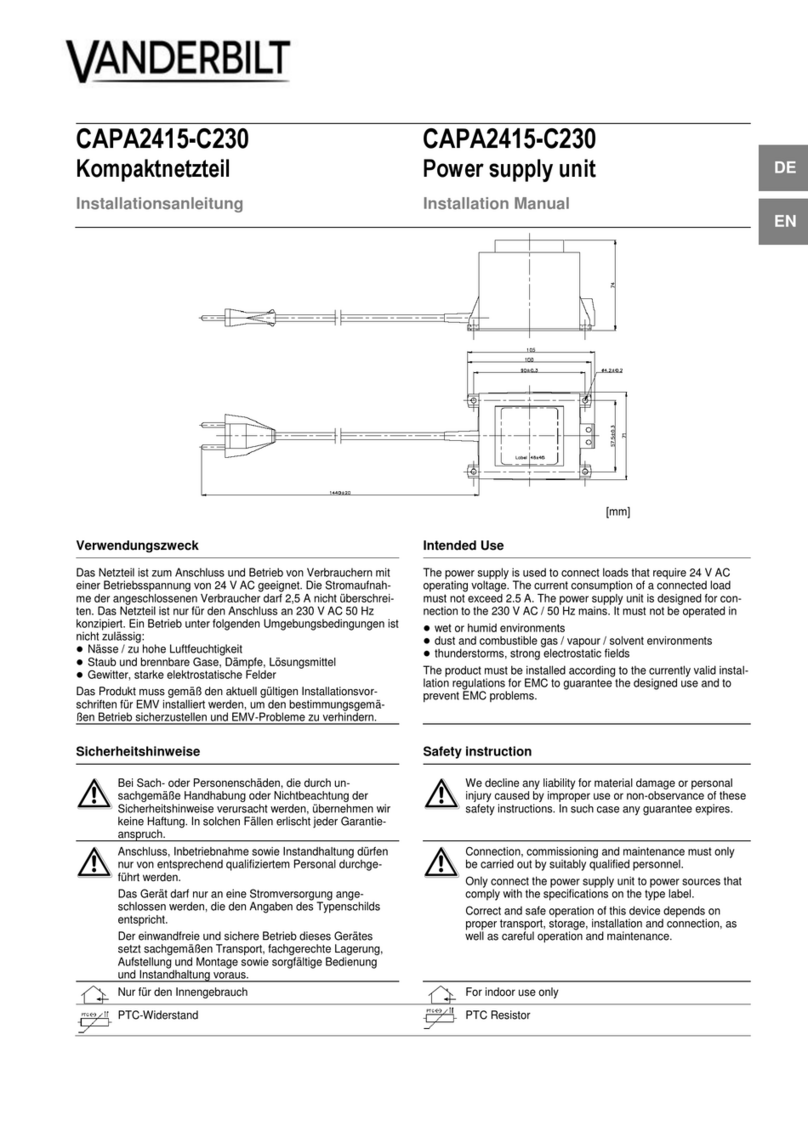
Vanderbilt SPC4 Series Instruction sheet

SPC4xxx/5xxx/6xxx
Installation & Configuration Manual
Document ID: A6V10276959-d
Edition date: 11.2018

Data and design subject to change without notice. / Supply subject to availability.
© 2018 Copyright by Vanderbilt International Ltd.
We reserve all rights in this document and in the subject thereof. By acceptance of the document the recipient acknowledges these rights and
undertakes not to publish the document nor the subject thereof in full or in part, nor to make them available to any third party without our prior
express written authorization, nor to use it for any purpose other than for which it was delivered to him.

Table of Contents
Table of Contents 3
1 Meaning of symbols 10
2 Security 11
2.1 Target group 11
2.2 General safety instructions 11
2.2.1 General information 11
2.2.2 Transport 11
2.2.3 Setup 12
2.2.4 Operation 12
2.2.5 Service and maintenance 12
2.3 Meaning of written warning notices and hazard symbols 12
2.3.1 Warning notices 12
2.3.2 Hazard symbols 13
3 Directives and standards 14
3.1 EU directives 14
3.2 Overview of Conformity to EN50131 Standard 14
3.2.1 Compliance with EN50131 Approvals 20
3.3 Compliance with EN 50136-1:2012 and EN 50136-2:2014 22
3.4 Compliance with INCERT Approvals 22
3.5 PD 6662:2010 Conformance Guidelines 23
3.5.1 Product scope 23
3.5.2 Standards overview 24
3.5.3 Methods for the completion of setting and unsetting 24
3.5.4 Configuration requirements for PD 6662:2010 conformance 26
3.5.5 Additional commissioning requirements for PD 6662:2010 conformance 27
3.5.6 Additional information 27
3.6 Compliance with VdS approvals 28
3.7 Compliance with NF and A2P approvals including CYBER requirements 29
3.7.1 Compliance with NF and A2P approvals including CYBER requirements 29
3.7.2 Compliance with NF and A2P approvals including CYBER requirements - SPC Products 30
4 Technical Data 31
4.1 SPC4000 31
4.2 SPC5000 33
4.3 SPC6000 37
4.4 SPCP355.300 40
5 Introduction 42
6 Mounting system equipment 43
© Vanderbilt 2018 3 A6V10276959-d
11.2018

6.1 Mounting a G2 housing 43
6.2 Mounting a G3 housing 44
6.2.1 Mounting a Back Tamper Kit 46
6.2.2 Battery installation for EN50131 compliance 50
6.3 Mounting a G5 housing 51
6.3.1 Tamper protection 52
6.3.2 Mounting the housing with tamper protection 53
6.3.3 Installing the batteries 55
6.4 Mounting a keypad 56
6.5 Mounting an expander 56
7 Smart PSU 57
7.1 SPCP355.300 Smart PSU 57
7.1.1 Supervised Outputs 59
7.1.2 Batteries 60
7.1.3 Wiring the X-BUS Interface 62
7.1.4 Compliance with NF and A2P approvals including CYBER requirements 65
7.1.5 PSU LED Status 66
7.1.6 System Recovery 66
8 Controller hardware 68
8.1 Controller Hardware 42xx/43xx/53xx/63xx 68
8.2 Controller Hardware SPC5350 and 6350 71
9 Door Expander 74
10 Wiring the system 75
10.1 Wiring the X-BUS interface 75
10.1.1 Loop configuration 76
10.1.2 Spur configuration 77
10.1.3 Star and multi-drop configuration 78
10.1.4 Shielding 83
10.1.5 Cable Map 83
10.2 Wiring of branch expander 83
10.3 Wiring the system ground 84
10.4 Wiring the relay output 84
10.5 Wiring the zone inputs 85
10.6 Wiring an external SAB bell 88
10.7 Wiring an internal sounder 89
10.8 Wiring Glassbreak 89
10.9 Installing plug-in modules 90
11 Powering up the SPC controller 92
11.1 Powering from battery only 92
SPC4xxx/5xxx/6xxx – Installation & Configuration Manual Table of Contents
© Vanderbilt 2018 4 A6V10276959-d
11.2018

12 Keypad user interface 93
12.1 SPCK420/421 93
12.1.1 About the LCDkeypad 93
12.1.2 Using the LCD keypad interface 95
12.1.3 Data entry on the LCD keypad 98
12.2 SPCK620/623 99
12.2.1 About the Comfort keypad 99
12.2.2 LED description 103
12.2.3 Viewing mode description 103
12.2.4 Function keys in idle state 104
13 Software support tools 105
14 Starting the system 106
14.1 Engineer modes 106
14.1.1 Engineer PINs 106
14.2 Programming with the keypad 106
14.3 Configuring start-up settings 107
14.4 Creating system users 108
14.5 Programming the portable ACE 109
14.6 Configuring wireless fob devices 110
14.6.1 Clearing alerts using the fob 110
15 Soft Engineer programming via the keypad 111
16 Engineer programming via the keypad 112
16.1 System Status 112
16.2 Options 113
16.3 Timers 117
16.4 Areas 121
16.5 Area Groups 123
16.6 X-BUS 123
16.6.1 X-BUS Addressing 123
16.6.2 XBUS Refresh 124
16.6.3 Reconfigure 124
16.6.4 Keypads/Expanders/Door Controllers 125
16.6.5 Addressing Mode 133
16.6.6 XBUS Type 134
16.6.7 Bus Retries 134
16.6.8 Comms Timer 135
16.7 Users 135
16.7.1 Add 135
16.7.2 Edit 135
SPC4xxx/5xxx/6xxx – Installation & Configuration Manual Table of Contents
© Vanderbilt 2018 5 A6V10276959-d
11.2018

16.7.3 Delete 138
16.8 User Profiles 138
16.8.1 Add 138
16.8.2 Edit 138
16.8.3 Delete 139
16.9 Wireless 139
16.9.1 Select a wireless programming option 140
16.9.2 One-way wireless 141
16.9.3 Two-way wireless 145
16.10 Zones 148
16.11 Doors 148
16.12 Outputs 152
16.12.1 Outputs types and output ports 153
16.13 Communication 157
16.13.1 Serial Ports 157
16.13.2 Ethernet Ports 158
16.13.3 Modems 158
16.13.4 Central Station 160
16.13.5 SPCConnect PRO 162
16.14 Test 162
16.14.1 Bell Test 162
16.14.2 Walk Test 162
16.14.3 Zone Monitor 163
16.14.4 Output Test 164
16.14.5 Soak Test 164
16.14.6 Audible Options 164
16.14.7 Visual Indicators 165
16.14.8 Seismic Test 165
16.15 Utilities 165
16.16 Isolate 166
16.17 Event Log 166
16.18 Access Log 166
16.19 Alarm Log 166
16.20 Change Engineer Pin 167
16.21 SMS 167
16.21.1 Add 168
16.21.2 Edit 168
16.21.3 Delete 169
16.22 X-10 169
SPC4xxx/5xxx/6xxx – Installation & Configuration Manual Table of Contents
© Vanderbilt 2018 6 A6V10276959-d
11.2018

16.23 Set Date/Time 169
16.24 Installer Text 170
16.25 Door Control 170
16.26 SPC Connect 171
17 Engineer programming via the browser 172
17.1 System Information 172
17.2 Ethernet interface 172
17.3 Connecting to the panel via USB 174
17.4 Logging into the browser 176
17.5 SPC Home 177
17.5.1 System Summary 177
17.5.2 Alarms Overview 178
17.5.3 Viewing Video 178
17.6 Panel status 179
17.6.1 Status 179
17.6.2 X-Bus Status 180
17.6.3 Wireless 187
17.6.4 Zones 189
17.6.5 Doors 191
17.6.6 FlexC Status 192
17.6.7 System alerts 194
17.7 Logs 194
17.7.1 System Log 194
17.7.2 Access Log 195
17.7.3 ALARM LOG 195
17.8 Users 196
17.8.1 Adding/Editing a User 196
17.8.2 Adding/Editing User Profiles 199
17.8.3 Configuring SMS 203
17.8.4 SMS Commands 204
17.8.5 Deleting Web Passwords 207
17.8.6 Configuring Engineer Settings 207
17.9 Wireless 209
17.9.1 One-way wireless 210
17.9.2 Two-way wireless 220
17.10 Configuration 228
17.10.1 Configuring controller inputs and outputs 229
17.10.2 X-BUS 238
17.10.3 Changing system settings 252
SPC4xxx/5xxx/6xxx – Installation & Configuration Manual Table of Contents
© Vanderbilt 2018 7 A6V10276959-d
11.2018

17.10.4 Configuring zones, doors and areas 269
17.10.5 Calendars 284
17.10.6 Change own PIN 287
17.10.7 Configuring advanced settings 287
17.11 Configuring Communications 295
17.11.1 Communications Settings 295
17.11.2 FlexC® 304
17.11.3 Reporting 323
17.11.4 PC Tools 335
17.12 File Operations 337
17.12.1 File Upgrade Operations 337
17.12.2 File Manager Operations 341
18 Accessing web server remotely 343
18.1 PSTN connection 343
18.2 GSM connection 345
19 Intruder alarm functionality 348
19.1 Financial mode operation 348
19.2 Commercial mode operation 348
19.3 Domestic mode operation 349
19.4 Full and local alarms 349
20 System examples and scenarios 351
20.1 When to use a common area 351
21 Seismic Sensors 353
21.1 Seismic Sensor Testing 354
21.1.1 Manual and Automatic Test Process 354
21.1.2 Automatically Testing Sensors 354
21.1.3 Manually Testing Sensors 355
22 Blocking Lock Operation 357
22.1 Blocking Lock 357
22.2 Authorized Setting of the Blocking Lock 358
22.3 Locking Element 359
23 Appendix 361
23.1 Network cable connections 361
23.2 Controller status LEDs 362
23.3 Powering expanders from the auxiliary power terminals 363
23.4 Calculating the battery power requirements 364
23.5 Domestic, Commercial and Financial mode default settings 366
23.6 Wiring of the X10 interface 367
23.7 SIA Codes 368
SPC4xxx/5xxx/6xxx – Installation & Configuration Manual Table of Contents
© Vanderbilt 2018 8 A6V10276959-d
11.2018

23.8 CID Codes 373
23.9 Overview of keypad types 375
23.10 User PIN combinations 376
23.11 Duress PINs 376
23.12 Automatic inhibits 376
23.12.1 Zones 376
23.12.2 Access PINs 377
23.12.3 Engineer Access 377
23.12.4 Keypad User Logoff 377
23.13 Wiring of mains cable to the controller 377
23.14 Maintenance controller 377
23.15 Maintenance Smart PSU 378
23.16 Zone types 379
23.17 Zone attributes 384
23.18 Applicable attributes to zone types 387
23.19 ATS levels and attenuation specifications 388
23.20 Supported card readers and card formats 388
23.21 SPC Support for E-Bus Devices 390
23.21.1 Configuring and Addressing E-Bus Devices 391
23.22 FlexC Glossary 393
23.23 FlexC Commands 394
23.24 ATS Category Timings 397
23.25 ATP Category Timings 398
24 Notes 400
SPC4xxx/5xxx/6xxx – Installation & Configuration Manual Table of Contents
© Vanderbilt 2018 9 A6V10276959-d
11.2018

1 Meaning of symbols
There are several symbols in the document:
Symbol Description
Not available for SPC42xx, SPC43xx.
Only available for SPC controller with IP interface
(SPC43xx/SPC53xx/SPC63xx).
Not available for installation type Domestic.
Only available in unrestricted mode.
Find further information about Security Grade, Region or Mode in text.
See Appendix for further information.
© Vanderbilt 2018 10 A6V10276959-d
11.2018

2 Security
This chapter covers:
2.1 Target group 11
2.2 General safety instructions 11
2.3 Meaning of written warning notices and hazard symbols 12
2.1 Target group
The instructions in this documentation are directed at the following target group:
Target
readers Qualification Activity Condition of the
equipment
Installation
personnel
Technical training for building or electrical
installations.
Assembles and installs the
hardware components on site.
Individual components
that need to be
assembled and
installed.
Operational
startup
personnel
Has appropriate technical training with
regard to the tasks and the products,
devices or systems to be put in service.
Puts the device or system
which is readily assembled and
installed on site into service.
New, readily
assembled and
installed device or
modified device.
2.2 General safety instructions
WARNING: Before starting to install and work with this device, read the Safety Instructions. This
device shall only be connected to power supplies compliant to EN60950-1, chapter 2.5 ("limited power
source").
2.2.1 General information
lKeep this document for later reference.
lAlways pass this document on together with the product.
lAlso take into account any additional country-specific, local safety standards or regulations
concerning project planning, operation and disposal of the product.
Liability claim
lDo not connect the device to the 230V supply network if it is damaged or any parts are missing.
lDo not make any changes or modifications to the device unless they are expressly mentioned in this
manual and have been approved by the manufacturer.
lUse only spare parts and accessories that have been approved by the manufacturer.
2.2.2 Transport
Unit damage during transport
lKeep the packaging material for future transportation.
lDo not expose the device to mechanical vibrations or shocks.
© Vanderbilt 2018 11 A6V10276959-d
11.2018

2.2.3 Setup
Radio interference with other devices in the environment/EMS
lWhen handling modules that are susceptible to electrostatic discharge, observe the ESD
guidelines.
Damage due to unsuitable mounting location
lThe environmental conditions recommended by the manufacturer must be observed.
See Technical Data on page31.
lDo not operate the device close to sources of powerful electromagnetic radiation.
Danger of electrical shock due to incorrect connection
lConnect the device only to power sources with the specified voltage. Voltage supply requirements
can be found on the rating label of the device.
lEnsure that the device is permanently connected to the electricity supply; a readily accessible
disconnect device must be provided.
lEnsure that the circuit that the device is connected to is protected with a 16A (max.) fuse. Do not
connect any devices from other systems to this fuse.
lThis device is designed to work with TN power systems. Do not connect the device to any other
power systems.
lElectrical grounding must meet the customary local safety standards and regulations.
lPrimary supply cables and secondary cables should be routed such that they do not run in parallel or
cross over or touch one anther inside the housing.
lTelephone cables should be fed into the unit separately from other cables.
Risk of cable damage due to stress
lEnsure that all outgoing cables and wires are sufficiently strain-relieved.
2.2.4 Operation
Dangerous situation due to false alarm
lMake sure to notify all relevant parties and authorities providing assistance before testing the
system.
lTo avoid panic, always inform all those present before testing any alarm devices.
2.2.5 Service and maintenance
Danger of electrical shock during maintenance
lMaintenance work must only be carried out by trained specialists.
lAlways disconnect the power cable and other cables from the main power supply before performing
maintenance.
Danger of electrical shock while cleaning the device
lDo not use liquid cleaners or sprays that contain alcohol, spirit or ammonia.
2.3 Meaning of written warning notices and hazard symbols
2.3.1 Warning notices
Signal Word Type of Risk
DANGER Danger of death or severe bodily harm.
SPC4xxx/5xxx/6xxx – Installation & Configuration Manual Security
© Vanderbilt 2018 12 A6V10276959-d
11.2018

Signal Word Type of Risk
WARNING Possible danger of death or severe bodily harm.
CAUTION Danger of minor bodily injury or property damage
IMPORTANT Danger of malfunctions
2.3.2 Hazard symbols
WARNING: Warning of hazard area
WARNING: Warning of dangerous electrical voltage
SPC4xxx/5xxx/6xxx – Installation & Configuration Manual Security
© Vanderbilt 2018 13 A6V10276959-d
11.2018

3 Directives and standards
This chapter covers:
3.1 EU directives 14
3.2 Overview of Conformity to EN50131 Standard 14
3.3 Compliance with EN 50136-1:2012 and EN 50136-2:2014 22
3.4 Compliance with INCERT Approvals 22
3.5 PD 6662:2010 Conformance Guidelines 23
3.6 Compliance with VdS approvals 28
3.7 Compliance with NF and A2P approvals including CYBER requirements 29
3.1 EU directives
This product complies with the requirements of the European Directives 2004/108/EC “Directive of
Electromagnetic Compatibility”, 2006/95/EC “Low Voltage Directive”, and1999/5/EC on Radio and
Telecommunications Terminal Equipment (R&TTE). The EU declaration of conformity is available to the
responsible agencies at http://pcd.vanderbiltindustries.com/doc/SPC
European Directive 2004/108/EC “Electromagnetic Compatibility”
Compliance with the European Directive 2004/108/EC has been proven by testing according to the
following standards:
emc emission EN 55022 Class B
emc immunity EN 50130-4
European Directive 2006/95/EC “Low-Voltage Directive”
Compliance with the European Directive 2006/95/EC has been proven by testing according to the
following standard:
Safety EN 60950-1
3.2 Overview of Conformity to EN50131 Standard
This section gives an overview of the SPC compliance to the EN50131 standard.
Address of Certifying Body
VdS (VdS A/C/EN/SES Approval)
AG Köln HRB 28788
Sitz der Gesellschaft:
Amsterdamer Str. 174, 50735 Köln
Geschäftsführer:
Robert Reinermann
JörgWilms-Vahrenhorst (Stv.)
© Vanderbilt 2018 14 A6V10276959-d
11.2018

SPC products listed have been tested according to EN50131-3:2009 and all relevant RTC specifications.
Product Type Standard
lSPC6350.320
lSPC6330.320
lSPC5350.320
lSPC5330.320
lSPCP355.300
lSPCP333.300
lSPCE652.100
lSPCK420.100
lSPCK421.100
lSPCE452.100
lSPCE110.100
lSPCE120.100
lSPCA210.100
lSPCK620.100
lSPCK623.100
lSPCN110.000
lSPCN320.000
EN50131 Grade 3
lSPC5320.320
lSPC4320.320
lSPCP332.300
lSPCW110.000
lSPCW112.000
lSPCW114.000
lSPCW130.100
EN50131 Grade 2
Specific information in relation to EN50131 requirements can be found in the following sections in this
document.
EN50131 Requirement (and relevant section) Relevant Vanderbilt documentation
Operating temperature and humidity range Technical data:
lSPC4000 on page31
lSPC5000 on page33
lSPC6000 on page37
Weights and dimensions Technical data:
lSPC4000 on page31
lSPC5000 on page33
lSPC6000 on page37
Fixing details Mounting system equipment on page43
SPC4xxx/5xxx/6xxx – Installation & Configuration Manual Directives and standards
© Vanderbilt 2018 15 A6V10276959-d
11.2018

EN50131 Requirement (and relevant section) Relevant Vanderbilt documentation
Installation, commissioning and maintenance instructions,
including terminal identifications
Mounting system equipment on page43
Controller hardware on page68
Type of interconnections (see 8.8) Technical data:
lSPC4000 on page31
lSPC5000 on page33
lSPC6000 on page37
Wiring the X-BUS interface on page75
Details of methods of setting and unsetting possible (see 11.7.1
to 11.7.3 and Tables 23 to 26)
User programming via the keypad:
lSetting/Unsetting on page275
lConfiguring a Keyswitch Expander on
page242
lConfiguring wireless fob devices on
page110
lTriggers on page288
Serviceable parts Technical data:
lSPC4000 on page31
lSPC5000 on page33
lSPC6000 on page37
Power supply requirement if no integrated PS See installation instructions for SPCP33x and
SPCP43x Expander PSUs.
Where PS is integrated, the information required by EN 50131-
6:2008, Clause 6
Technical data:
lSPC4000 on page31
lSPC5000 on page33
lSPC6000 on page37
Maximum number of each type of ACE and expansion device. Wiring the X-BUS interface on page75
Technical data:
lSPC4000 on page31
lSPC5000 on page33
lSPC6000 on page37
Current consumption of the CIE and each type of ACE and
expansion device, with and without an alarm condition.
See relevant installation instructions.
Maximum current rating of each electrical output Technical data:
lSPC4000 on page31
lSPC5000 on page33
lSPC6000 on page37
SPC4xxx/5xxx/6xxx – Installation & Configuration Manual Directives and standards
© Vanderbilt 2018 16 A6V10276959-d
11.2018

EN50131 Requirement (and relevant section) Relevant Vanderbilt documentation
Programmable functions provided Engineer programming via the keypad on
page112
Engineer programming via the browser on
page172
How indications are made inaccessible to level 1 users when
level 2, 3 or 4 user is no longer accessing the information (see
8.5.1)
Keypad user interface on page93
LCD Keypad Settings on page126
Comfort Keypad Settings on page127
Configuring an Indicator Expander on page240
Masking/reduction of range signals/messages processed as
“fault” or “masking” events (see 8.4.1, 8.5.1 and Table 11)
System Options on page252
Wiring the zone inputs on page85
SIA Codes on page368
PIR masking is always reported as a zone
masked event (SIA - ZM). Additionally, anti-
mask can cause an alarm, tamper, trouble or no
additional action depending on configuration
Current defaults of PIR addition effect:
Ireland
Unset - None
Set - Alarm
UK, Europe, Sweden, Swiss, Belgium
Unset - Tamper
Set - Alarm
Prioritization of signal and message processing and indications
(see 8.4.1.2, 8.5.3)
Using the LCD keypad interface on page95
Using the Comfort keypad interface - see About
the Comfort keypad on page99
Minimum number of variations of PIN codes, logical keys,
biometric keys and/or mechanical keys for each user (see 8.3)
User PIN combinations on page376
Method of time-limiting internal WD for level 3 access without
level 2 authorization (see 8.3.1)
Not supported - Engineer cannot access system
without permission.
Number and details of disallowed PIN codes (see 8.3.2.2.1) Automatic inhibits on page376
Details of any biometric authorization methods used (see
8.3.2.2.3)
Not applicable
Method used to determine the number of combinations of PIN
codes, logical keys, biometric keys and/or mechanical keys
(see 11.6)
User PIN combinations on page376
Number of invalid code entries before user interface is disabled
(see 8.3.2.4)
Access PINs on page377
Details of means for temporary authorization for user access
(see 8.3.2)
User Menus – Grant Access
SPC4xxx/5xxx/6xxx – Installation & Configuration Manual Directives and standards
© Vanderbilt 2018 17 A6V10276959-d
11.2018

EN50131 Requirement (and relevant section) Relevant Vanderbilt documentation
If automatic setting at pre-determined times provided, details of
pre-setting indication and any automatic over-ride of prevention
of set (see 8.3.3, 8.3.3.1)
Setting/Unsetting on page275
Details of conditions provided for the set state (see 8.3.3.4) Setting/Unsetting on page275
LCD Keypad Settings on page126
Comfort Keypad Settings on page127
Editing an output on page231
Zone types on page379
Notification of output signals or messages provided (see 8.6) Editing an output on page231
Setting/Unsetting on page275
User rights on page200
Other output configurations to interface with I&HAS
components (see 8.2)
Editing an output on page231
Zone types on page379
Test on page162
Keypad user interface on page93
Criteria for automatic removal of “soak test” attribute (see 8.3.9) Timers on page261
Number of events resulting in automatic inhibit Automatic inhibits on page376
If ACE is Type A or Type B (see 8.7) and whether portable or
moveable (see 11.14)
All devices are hardwired and powered by
system PSUs. See the relevant technical data
on PSUs (separate documents).
Component data for non-volatile memory components (see
Table 30, step 6)
See user documentation for SPCK420/421 and
SPCK620/623 keypads.
Life of memory support battery (see 8.10.1) N/A. Stored in non-volatile memory.
Optional functions provided (see 4.1) Engineer programming via the keypad on
page112
Engineer programming via the browser on
page172
Additional functions provided (see 4.2, 8.1.8) Unrestricted Grade on page268
Options on page252
Access levels required to access such additional functions
provided
Edit on page135
User configuration (browser) - see
Adding/Editing a User on page196
Details of any programmable facility that would render an
I&HAS non-compliant with EN 50131-1:2006, 8.3.13 or
compliant at a lower security grade, with instruction on
consequent removal of compliance labeling (see 4.2 and
8.3.10).
Unrestricted Grade on page268
Options on page252
Compliance with EN50131 Approvals on
page20
SPC4xxx/5xxx/6xxx – Installation & Configuration Manual Directives and standards
© Vanderbilt 2018 18 A6V10276959-d
11.2018

SPC products listed have been tested according to EN50131-6, and all relevant RTC specifications.
Product Type Standard
lSPC6350.320
lSPC6330.320
lSPC5350.320
lSPC5330.320
lSPCP355.300
lSPCP333.300
lSPCP355.300
lSPCE652.100
lSPCK420.100
lSPCK421.100
lSPCE452.100
lSPCE110.100
lSPCE120.100
lSPCA210.100
lSPCK620.100
lSPCK623.100
lSPCN110.000
lSPCN310.000
EN50131-6
lSPC5320.320
lSPC4320.320
lSPCP332.300
EN50131-6
SPC4xxx/5xxx/6xxx – Installation & Configuration Manual Directives and standards
© Vanderbilt 2018 19 A6V10276959-d
11.2018

3.2.1 Compliance with EN50131 Approvals
Software Requirements
lIn the Standards settings page, select Europe under Region to implement EN50131
requirements.
lSelect Grade 2 or Grade 3 to implement the grade of EN50131 compliance.
lThe Wireless setting Prevent Setting Time must be set to a value greater than 0 and less than
20.
lThe Wireless setting Device Lost Time must be set to a value less than 120.
lThe X-BUS Settings, Retries, must be set to a value of 10.
lThe X-BUS Settings, Comms timer, must be set to a value of 5.
lSelect Synchronization Time with Mains under Clock settings to use mains as clock master.
SPC4xxx/5xxx/6xxx – Installation & Configuration Manual Directives and standards
© Vanderbilt 2018 20 A6V10276959-d
11.2018
This manual suits for next models
31
Table of contents
Other Vanderbilt Power Supply manuals
Popular Power Supply manuals by other brands

Federal Signal Corporation
Federal Signal Corporation SelecTone PS250 Installation and maintenance instructions

Puls
Puls PIANO Series installation manual

Altronix
Altronix ALTV615DC48CBM220 Installation guides

Manson Engineering Industrial
Manson Engineering Industrial NEP-8323 quick start guide

Altronix
Altronix Tango1B installation guide

Valcom
Valcom VP-6124 Technical specifications