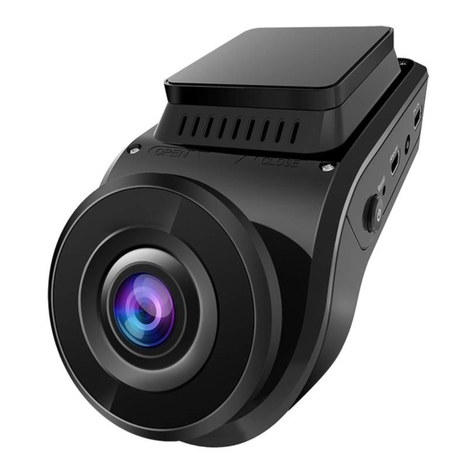
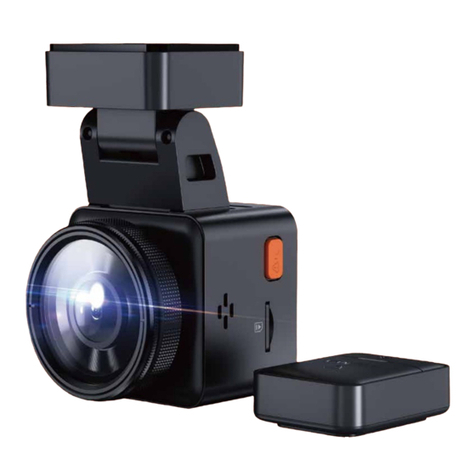
Vantrue OnDash X4S User manual

4k Wi-Fi Dash Cam
OnDash X4S
User Manual
122mmX130mm
80g

www.vantrue.net/contact facebook.com/vantrue.live
Connect with us:

CONTENTS
VERZEICHNIS
日本語作業マニュアル
CONTENU
SPIS TREŚCI
1
28
53
76
104
What's in the box?
Lieferumfang
梱包内容
Qu'y a-t-il dans la boîte?
Co znajduje się w pudełku?
1. 11
38
63
86
114
Basic Operation
Funktionseinführung
X4Sの機能紹介
Opération de base
Podstawowe funkcje
5.
26
51
74
102
130
Specifications
Spezifikationen
仕様
Spécifications
Dane techniczne
6.2
29
54
77
Camera Overview
Bildschirmübersicht
各部の名称とはたらき及び
画面表示について
Vue d'ensemble de la caméra
Budowa kamery
2.
105
4
31
56
79
107
Getting Started
Installation
基本的な使い方
Pierwsze uruchomienie
3. 27
52
75
103
132
Warranty & Support
Kundendienst
保証とアフターサービス
Garantie & Support
Gwarancja I wsparcie
7.
Préparation avant la mise en
marche
8
35
60
83
111
How to use APP
Tutorial zur APP-Nutzung
APPの使用方法について
Jak używać aplikacji na smartfon?
4.
Comment utiliser l'application

- 1 -
1.What'sinthebox?
C. Rear camera
(optional)
F. Type-C Rear
Camera Cable(20ft)
I. Adhesive Sticker
(optional)
D. Car Charger with
Built-in Type-C
Cable (11.4 ft)
A. VANTRUE®X4S
Dash Cam
G. User Manual
B. Suction Cup Mount
E. Type-C USB Data
Cable (3ft)
H. Quick Start Guide
4k Wifi Dash Cam
OnDash X4S
User Manual
QUICK START GUIDE
→ PLEASE READ →
→ BITTE LESEN SIE →
→ ご覧下さい →
→ VEUILLEZ LIRE →
→ WARTO PRZECZYTAĆ →
Optional accessories

- 2 -
2. Camera Overview
NO.
3Move selector down; Switch the front and rear
camera window display.
DescriptionName
Button
7
10
11
8
USB
6 7
5
9
4
3
2
1
M
OK
4Confirms the action; Stop/Start the video
Recording
Button
Long Press to Power ON/OFF; Short Press to
manually lock the currently recording video clip
following an emergency or to preserve important
videos; Press once while the emergency video is
being recorded to take a quick snapshot.
Button
5
2Move selector up; Microphone on/off;
Long press to enter Parking Mode.
1 Button
Button
OK
MEnter/exit setup menu; Long Press to turn on WIFI.
NO. Name Description

11-12-2021
Recording Time
(Current Clip)
Current Date(MM/DD/YY)
and Time (24H)
GPS Signal Connecting
GPS Signal Locked
G-Sensor ON G-Sensor OFF
Loop Recording Time
MIC is ON MIC is OFF
Memory card inserted
NO Memory card inserted
Recorded Driving Speed
(KMH or MPH)
Time lapse On
Collision Detection ON
Motion Detection ON
1080P Low Bitrates Recording ON
720P Low Bitrates Recording ON
1080P
Emergency File Lock
Parking Mode
- 3 -
LED Indicator
Power Indicator.
Camera is plugged into supply.
Blue light visible on
the Indicatorlight [11]
Camera is recording.Blue light blinks on
the Indicatorlight [11]
9Reset Button Press to force reset the device.
6Type-C USB /
Rear Cam Port
7 Mount Connector Connects to the Suction Cup Mount.
8 MicroSD Card Slot Provides expandable storage (up to 256GB in
FAT32, U3 or higher).
Visible Red light [10]
Screen Overview
Video Resolution
Type-C USB port for charging or transferring data;
Video stream port for streaming rear camera's
recording.

- 4 -
3. Getting Started
3.1 Installing a Memory Card (Recommend Vantrue U3 high-speed microSD
card).
Please use a genuine Micro SD memory card from 16GB to 256GB with a
speed rating of U3 higher. We recommend using Vantrue Micro SD Card
(not including). Please insert the SD card when dash cam is off. Carefully
insert the memory card into the camera's card slot until it clicks. To remove
the card, power off the camera first, then push the card into the slot until it
clicks again.
Before using the card, please format it correctly using these steps:
Press button to stop the recording then press button to enter
setup; if the camera is recording video, press button to stop the
recording; if it says 'SD card error, please format SD card' here, please
press the button and press button to access into the menu.
Press the button to highlight the System Setup option, press button
to confirm.
Press the button to highlight the format option, press followed by
the button to select Format.
OK
OK
OK
OK
OK
M
M
M
M

- 5 -
The microSD card should be formatted once a month to maximize the
lifetime of the memory card.
Pleasedonottakethecardoutwhenthecameraisrecordingincase
theimportantvideofilesmissing.
Please don't use Sandisk or Transcend SD card on this dash cam.
REMINDER:
1.
Attach the Suction Mount to the camera's Mount Connector, pushing it
in until it clicks.
1.
2.
3.
2.
3.
3.2 Installing the camera onto your windshield
Thoroughly clean the windshield using water or alcohol, and wipe
clean with a dry cloth.
Wipe the Suction Mounting Pad clean on the Suction Mount.

- 6 -
4.
5. Carefully route the power cable around the windscreen and tuck it
under the trim.
Securely attach the Suction Mount to the windshield, and rotate the
locking clamp on the mount 90° upward until it clicks.

- 7 -
Connect the External Camera(optional) to the Rear Cam Port on the
device through the rear camera cable, carefully route the cable and
tuck it under the trim.
6.
With the Type-C USB Cable, connect the supplied Car Charger to the
Front Camera Mount Base.
7.
8. Insert the Car Charger into your vehicle's cigarette lighter port.
Vehicle’s Cigarette
Lighter Port
9. Start the car.
10. The camera will auto power on and start recording.

- 8 -
4. How to use the APP
The X4S dash cam can be paired with the smartphone with the "Vantrue
Cam" APP through the built-in Wi-Fi. You can watch and download the
images and video captured during driving easily through the APP and
adjust the relevant configuration of the dash cam.
4.1 APP Download and Wi-Fi Connection
a. Please scan the relevant version QR code below to download the APP
and install it.
b. Search for "Vantrue Cam" APP in App Store or Google Play Store to find
the App and then download and install it on your phone.
After the mobile phone is connected to the X4S dashcam Wi-Fi, open the
"Vantrue Cam" App and click "+" on the main page to add the recorder.
For iPhone: In the setting interface, enter "Wireless LAN", select "X4S_VAN-
TRUE_XXXX" in the Wi-Fi list, enter the default password "12345678" to
connect to the recorder Wi-Fi, and then return to the APP.
For Android: Select "X4S_VANTRUE_XXXX" in the Wi-Fi list, and enter the
default password "12345678" for the first time to connect to the recorder
Wi-Fi.

- 9 -
4.2 APP Operation
Video preview: After the APP is successfully connected to the recorder, it
will enter the real-time preview page, click the full-screen button, or the
phone is placed horizontally, the real-time picture will automatically
switch to the full-screen preview mode. Click the window switch button to
switch the front and rear video windows.
Setting
Full-Screen
Button
Stop Recording
Button
Front and Rear
Window Switch
Album
Snapshot
9:41
Real Time Preview
2021-11-02
09:44:43
00:00:56
2021/11/02 15:28:29 X4S 88488 256.702966 41.644481 96KM/H

- 10 -
4.3 APP Upgrade
Video playback: The video and photo files recorded on the SD card can
be viewed in the APP, and the video can be played back after clicking
the file.
Video download: You can choose to download videos or pictures in the
SD card browse file interface or in the video playback. After downloading
the video, it can be played in the App local file, and the GPS track of the
video can be viewed.
Video capture: App real-time preview interface can capture the current
picture. Please click the snapshot button to take it.
Open the "Vantrue Cam" App, connect to the Wi-Fi, and enter "Settings>
About> Detect New Version", the App will automatically detect whether
the App version is the latest version. If there is a new version of the App,
follow the App prompts and upgrade the version.
4.4 What should we do if we forget the Wi-Fi password?
The Wi-Fi default password is 12345678. You can reset its password in the
APP. If you forget the password, you can default the dash cam setting
and restore the password.

a. Record Setup
Press the button to enter the settings, and use the / buttons to
navigate the different options.
►Resolution: Press the / button to toggle the recording mode and
resolution.
Single Recording Mode: 3840x2160P 30FPS;2560X1440P 30FPS;
2560X1440P 60FPS; 1920X1080P 30FPS;1920X1080P 60FPS; 1920X1080P
120FPS; 1280X720P 30FPS.
Dual Recording Mode(Requires optional rear camera):4K+1080P 30FPS;
4K+720P 30FPS; 1440P+1080P 30FPS; 1080P+1080P 30FPS; 1080P+1080P
60FPS; 1440P+1080P(HDR) 30FPS; 1440P+720P(HDR) 30FPS; 1080P+1080P(H-
DR) 30FPS; 1080P+720P(HDR) 30FPS;720P+720P(HDR) 30FPS.
►Loop Recording: Press button to change the duration: 1/2/3/4/5 min,
and OFF.
►G-Sensor Set: You can set the g-sensor values of Forward & Backward,
After power ON the camera, press the button to enter the setup process.
(If the camera is recording video, press the button to stop recording
before pressing the button.)
- 11 -
5. Basic Operation
5.1 Menu Settings
Record Setup System Setup Files

Leftward & Rightward, Upward & Downward of the car. The G-sensor
value in each direction can be selected 1/2/3/4/5/Off. The highest
sensitivity of G-Sensor is 5. If turned off, the collision sensitivity of the current
area is 0.
►Audio Recording: Press button and button to toggle it OFF/ON.
►Recording Light: Default is on. Press and button to toggle it
OFF/ON. The blue indicator light will dismiss on recording if turns off.
►Parking Mode: Press and button to change the options: Collision
Detection, Motion Detection, Low Bitrates Recording, OFF.
Collision Detection: Press the and button to select the section: Low,
Medium, and High.
Motion Detection: Press the and button to select the section: Low,
Medium, and High.
Low Bitrates Recording: Press the and button to select the section:
1920X1080P 15FPS and 1280X720P 15FPS.
►Exposure: Press and / button to select between Front and Rear
exposure.
Front: +2.0,+1.6,+1.3,+1.0,+0.6,+0.3,+0.0,-0.3,-0.6,-1.0,-1.3,
-1.6,-2.0
Rear: +2.0,+1.6,+1.3,+1.0,+0.6,+0.3,+0.0,-0.3,-0.6,-1.0,-1.3,
-1.6,-2.0
►Color: Press and / button to select between Front and Rear
Color.
Front: Press the and button to select the section: Normal, black and
white, sepia.
Rear: Press the and button to select the section: Normal, black and
- 12 -

white, sepia.
►Number Plate: Press / and to set your car license number.
►Stamp: Press to toggle it OFF/ON. Stamp shows the date/time, logo,
car number, Speed and GPS Location information.
►Rotate Display: The default is off, press the and button to choose
to rotate the front or rear display, If turned on, the front or rear video
screen will be reversed 180°.
►Time Lapse: Press followed by to set time interval: 1 Sec, 5 Sec, 10
Sec, 15Sec, Off.
b. System Setup
►Language: Press and / button to select between English/
Simplified Chinese/Japanese/ Deutsch/Italian/Spanish/French/Русский
язык/Polski.
►WiFi: Press and / button to select between 5G and 2.4G.
►Format memory Card: Press , navigate button and select format to
format the micro SD card.
►Format Reminder Setup: Press the and / button to select the
reminder options: 15 Days, 1 Month, and Off.
Note: If changing the format reminder option, formatting the sd card in
advance, or resetting manually, the dash cam will recalculate the time.
►Time & Date: Press / and button to set the current date and time.
Press the button to exit.
►Auto LCD Off: If the setup is 3 min, the dash cam screen will auto turn off
after 3 min it start recording. If the setup is off, the screen will not turn off.
Press the button to select the duration in minutes: 30sec, 1Min, 3Min
5Min or OFF to disable it.
- 13 -

►Device Sound: Press the / button to adjust the device sound.
►Frequency: Press to toggle between 50Hz/60Hz.
►System Info: Press to check the current model and firmware version
and Website.
►Default Setting: Press and Button to select OK to reset the device
back to stock factory settings.
►GPS: Press the button to toggle it ON/OFF.
►Speed Unit: Press / and button to select either KM/H or MPH.
Press the button to exit and complete the setup.
C. Files
Review and delete videos stored in file folders.
►Event: Critical event videos detected by G-Sensor activity or manually
locked by user.
►Normal: Standard videos recorded.
►Photo: Snapshot file.
►All: All the standard videos and critical event videos were recorded.
- 14 -

5.2.1 Switch the front and rear camera window display
In Dual recording mode, you can switch the front and rear camera
window display by pressing the button when recording.
- 15 -
5.2 Featured Function
Front Camer Recording Rear Camera Recording
Front Camera Bigger Rear Camer Bigger
11-12-2021
11-12-2021
11-12-2021
11-12-2021

- 16 -
5.2.2 Loop Recording
With a memory card inserted, the camera will (by default) immediately
start loop recording video when connected to a power source and
powered ON. If the device is not connected to a power source, it will not
immediately start on and record.
While recording, the record indicator will blink and a blue dot will flash on
the lower corner left of the screen. You can stop/start the recording at
any time by pressing the button.
By default, the Loop Recording Time is 3 minutes. Please go to "Record
Setup" ► "Loop Recording" to change it to 1 min, 2 mins, 3 mins, 4mins or 5
mins for your need.
The loop recording video file name format is "Year_Date_Time_E.MP4”. For
example “20211228_140633_0001_E_A.MP4”. The suffix A indicates front
cam recorded files, while the suffix B refers to rear cam recorded files.
Standard files are stored in the "Video/Normal" folder. When normal video
folder memory reaches 70% of the current memory card's total capacity,
the new loop video file automatically overwrites the first loop video file.
When Loop Recording is turned off, the camera will record video in 15
minute clips, but will not overwrite old videos when the storage card is full.
11-12-2021

- 17 -
11-12-2021
5.2.3 Event Recording
Critical event detection is triggered by the G-Sensor (Gravity Sensor) and
will auto-detect vehicle impacts and collisions. This will cause the camera
to protect the current video clip from being overwritten by locking it and
saving the footage in the "Video/Event" folder.
The user can also manually lock the current video recording session by
pressing the Emergency Button. A key icon will appear at the center
of the screen.
You can set the G-sensor Sensitivity values of Forward & Backward,
Leftward & Rightward, Upward & Downward of the car. The G-sensor value
in each direction can be selected 1/2/3/4/5/OFF. The default sensitivity for
the three dimensions is 3. The highest sensitivity of the G-Sensor is 5. Event
videos are stored in the "Video/Event" folder, and cannot be automatically
overwritten.
The camera will auto overwrite old Event videos once the Event folder
has accumulated 30% of the card capacity. Please regularly transfer
important videos to your PC or another storage location (e.g. external
hard drive). To maintain good read/write performance, the microSD
card should be formatted at least once a month.
If turn off the loop recording or turn on time-lapse recording, the emer-
gency recording will not be triggered.
Note:
1.
2.
Table of contents
Other Vantrue Dashcam manuals

Vantrue
Vantrue Element 2 User manual

Vantrue
Vantrue Mirror 3 User manual

Vantrue
Vantrue S1 Pro User manual

Vantrue
Vantrue Element 1 User manual

Vantrue
Vantrue Element 3 User manual

Vantrue
Vantrue Falcon 1 User manual

Vantrue
Vantrue Nexus 5 User manual

Vantrue
Vantrue S2 User manual

Vantrue
Vantrue OnDash X3 User manual

Vantrue
Vantrue VP03 User manual

Vantrue
Vantrue OnDash N2 Pro User manual

Vantrue
Vantrue Element 1 User manual

Vantrue
Vantrue OnDash R3 User manual

Vantrue
Vantrue Mirror 3 User manual

Vantrue
Vantrue OnDash N2 Pro User manual

Vantrue
Vantrue Sonnet 1 PRO User manual

Vantrue
Vantrue N1 PRO User manual

Vantrue
Vantrue OnDash N2S User manual

Vantrue
Vantrue OnDash N3 User manual

Vantrue
Vantrue S1 User manual