Vaxcel T0171 Instruction manual

Page 1 / 5
Important to Know:
1. If you are not familiar with state and local electrical
codes, it is recommended that you consult with a
qualified electrician.
2. This fixture requires a 120 VAC, 60 Hz power
source.
3. For general safety and to avoid any possible
damage to the sensor, be sure the power is
switched "off" before adjustment.
Maximum Wattage: 36 W
Working Temperature Range: - 4°F ~ 113°F
ASSEMBLY AND INSTALLATION
INSTRUCTIONS
NOTES: 1. Before installing, consult local electrical codes for wiring and grounding requirements.
2. READ AND SAVE THESE INSTRUCTIONS.
T0170 / T0171
Features:
WARNING:
TO AVOID RISK OF ELECTRICAL SHOCK, BE SURE TO SHUT OFF
POWER BEFORE INSTALLING OR SERVICING THIS FIXTURE.
Note: Fixture can be wall mounted or eave mounted.
Wall Mounted Eave Mounted
Read notes section on page 4 for additional information about mounting location of fixture.
Light fixture and sensor should be mounted as shown above when installed (depending upon type of installation)
Before installing the light fixture under an eave, the sensor head must be rotated as shown in the next two steps for
proper operation and to avoid the risk of electrical shock.
For eave mounted only:
Swing the sensor head towards the back plate. Rotate the sensor head clockwise 180˚ so the controls face down.
Controls
Back Plate Controls
Controls
1. Energy saving LED fixture.
2. Motion sensor: turns light ON automatically when
motion is detected and turns light OFF automatically
when motion stops.
3. Photocell keeps the light OFF during daylight hours.
4. When in manual override mode, use wall switch
to keep the light ON during the night.
Hardware Package (included):
Mounting Strap Wire Nut X3
Decorative cover
Fixture Mounting Screw
Mounting Screw X2
#8/32X1/2 in
Mounting Screw X2
#6/32 X1/2 in
Mounting Screw X2
#10/24 X1/4 in
150623

Page 2 / 5
Installation Steps
Turn off the power at fuse or circuit box.
Turn on the power at fuse or circuit box.
Sensor
Mounting Strap
Outlet Box
Wire Nut
Back Plate
Mounting Screw
Light Head
Fixture Mounting Screw
FRONT
Decorative cover
1. Install the mounting strap to the outlet box with the stamped word “FRONT” facing away from the outlet box, using
two mounting screws that best fit the outlet box. Back plate should sit flush against wall surface when secured.
(Choose one matching pair of suitable mounting screws from the 3 pairs provided)
2. Pull out the source wires from the outlet box. Make wire connections using wire nuts as follows:
---Connect the black wire from the fixture to the “hot” wire from the power source. (usually black)
---Connect the white wire from the fixture to the neutral wire from the power source. (usually white)
---Connect the grounding wire from the fixture to the grounding wire from the power source. (usually green / yellow
insulation)
Carefully tuck the wires back into the outlet box.
3. Attach the back plate of the light to the mounting strap, secure it with the fixture mounting screw.
4. Push the decorative cover firmly into the fixture mounting screw hole on the light.
5. With silicone caulking compound, caulk completely around where the back plate meets the wall surface.
CAUTION: Be sure to caulk completely where the back plate meets the wall surface to prevent water from
seeping into the outlet box.
sensor
Fig. 1
Adjusting the Sensor Head:
1. Aim sensor head toward desired detection area, maintaining a 5° - 40°
downward angle to allow moisture to drain.
Note: Make sure sensor head is positioned with controls facing toward
the ground.
2. You can move the sensor head up and down to change the coverage area.
(See Fig. 1)
Note: Range set too high may increase false triggering.
(See Fig. 2 and Fig. 3 )
Sensor Adjustment Lower For Short Coverage
Sensor Adjustment Higher For Long Coverage
Fig. 2 Fig. 3
150623

Page 3 / 5
Function and Operation
Choose a mode by sliding the switch on the bottom of the sensor. (See Fig.4)
Note: When power is first applied, the light will turn on . The sensor will take 30 seconds to warm up.
1. Test mode(daytime or nighttime operation)
●Rotate knob on the bottom of the sensor to the “TEST” position. (See Fig.4)
● When slide the mode selector to “OFF”, the light turns off automatically. It turns to high-level brightness when
motion is detected, and stays on as long as the motion continues. It turns off about 5 seconds after motion
is no longer detected.
● When slide the mode selector to “AUTO”, the light turns to low-level brightness automatically. It turns to
high-level brightness when motion is detected, and stays on as long as the motion continues. Then reverts
back to low-level brightness about 5 seconds after motion is no longer detected.
● When slide the mode selector to “PC”, the light will turn off when it is daytime, if it is nighttime, the light will turn
to high-level brightness.
2. OFF MODE (nighttime operation only)
● To shift to “OFF” mode, rotate Time knob arrow to point to the desired time setting (between 5 seconds and 3
minutes). At dusk, the light turns to high-level brightness automatically when motion is detected, and stays on as
long as the motion continues. When the motion is no longer detected, the light at full brightness remains on for
the predetermined time you set (5s ~ 3min), after then the light turns off automatically.
● The light turns off automatically at dawn.
3. AUTO MODE (nighttime operation only)
● To shift to “AUTO” mode, rotate Time knob arrow to point to the desired time setting (between 5 seconds
and 3 minutes). At dusk, the light turns on to low level brightness. When motion is detected, the light turns to
full brightness and stays on as long as motion continues. When the motion is no longer detected, the light at
full brightness remains on for the predetermined time you set (5s ~ 3min), and then switches back to low level
automatically.
● The light turns off automatically at dawn.
4. PC MODE (nighttime operation only)
● The light turns on to full brightness at dusk and remains on until dawn.
Fig. 4 Fig. 5
Sensitivity of Motion Sensor
● You can adjust the sensitivity of the motion sensor by using the “SENSITIVITY” selector located on the right side
of the bottom surface of the sensor. (See Fig. 4)
● Adjust motion sensor sensitivity to achieve desired performance.
● Approximate range for each setting from 10ft to 70ft.
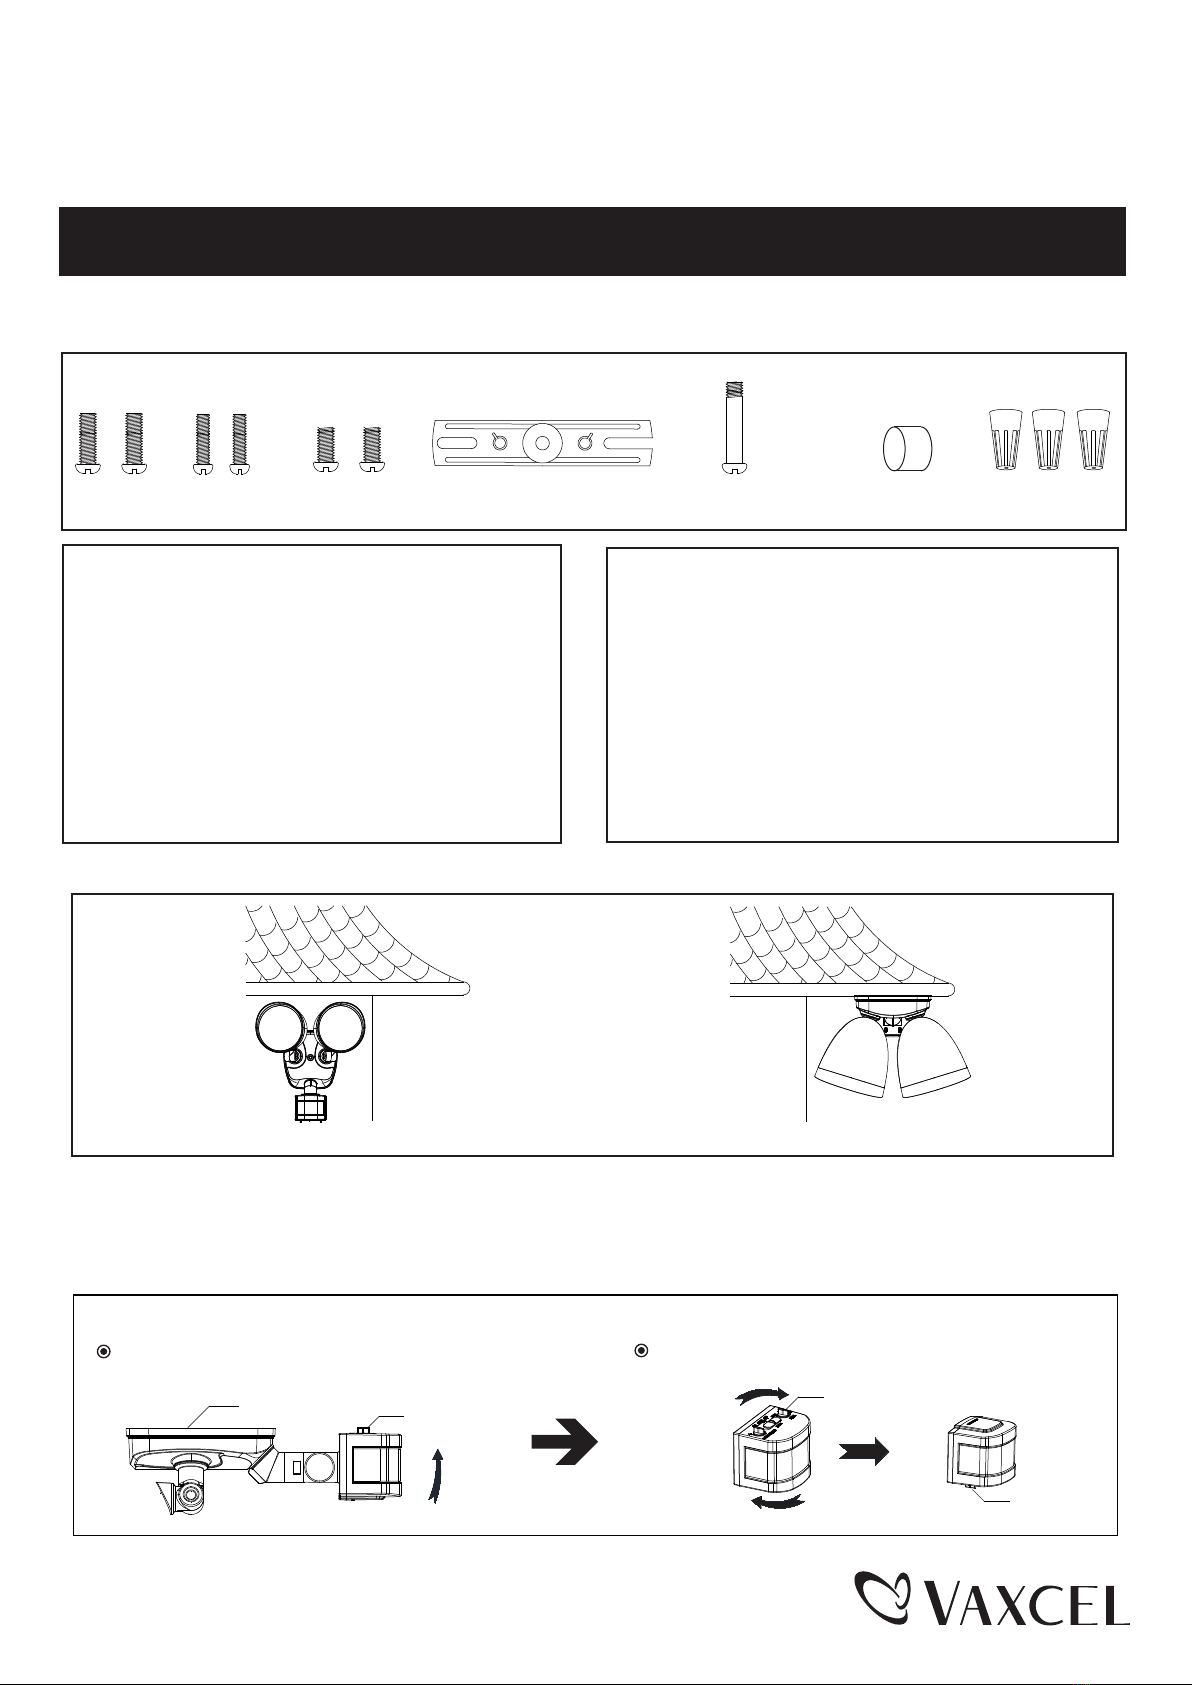
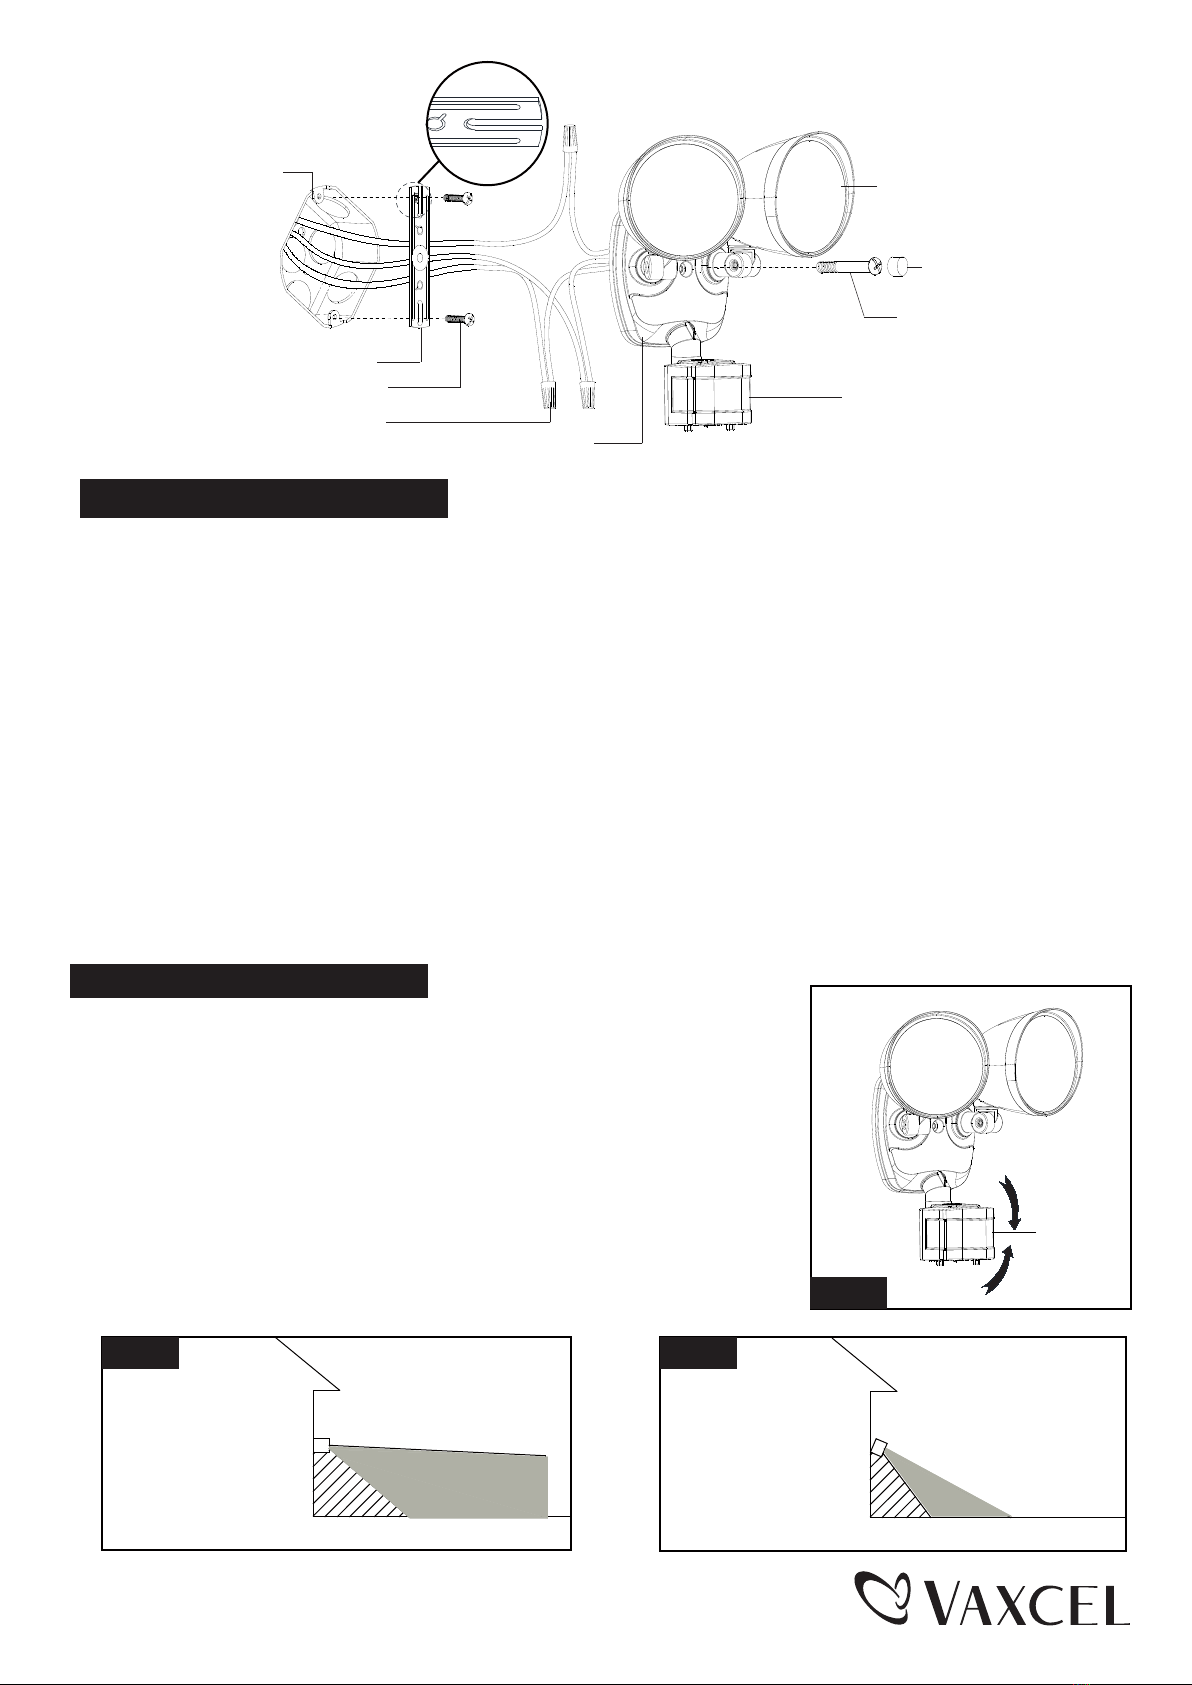
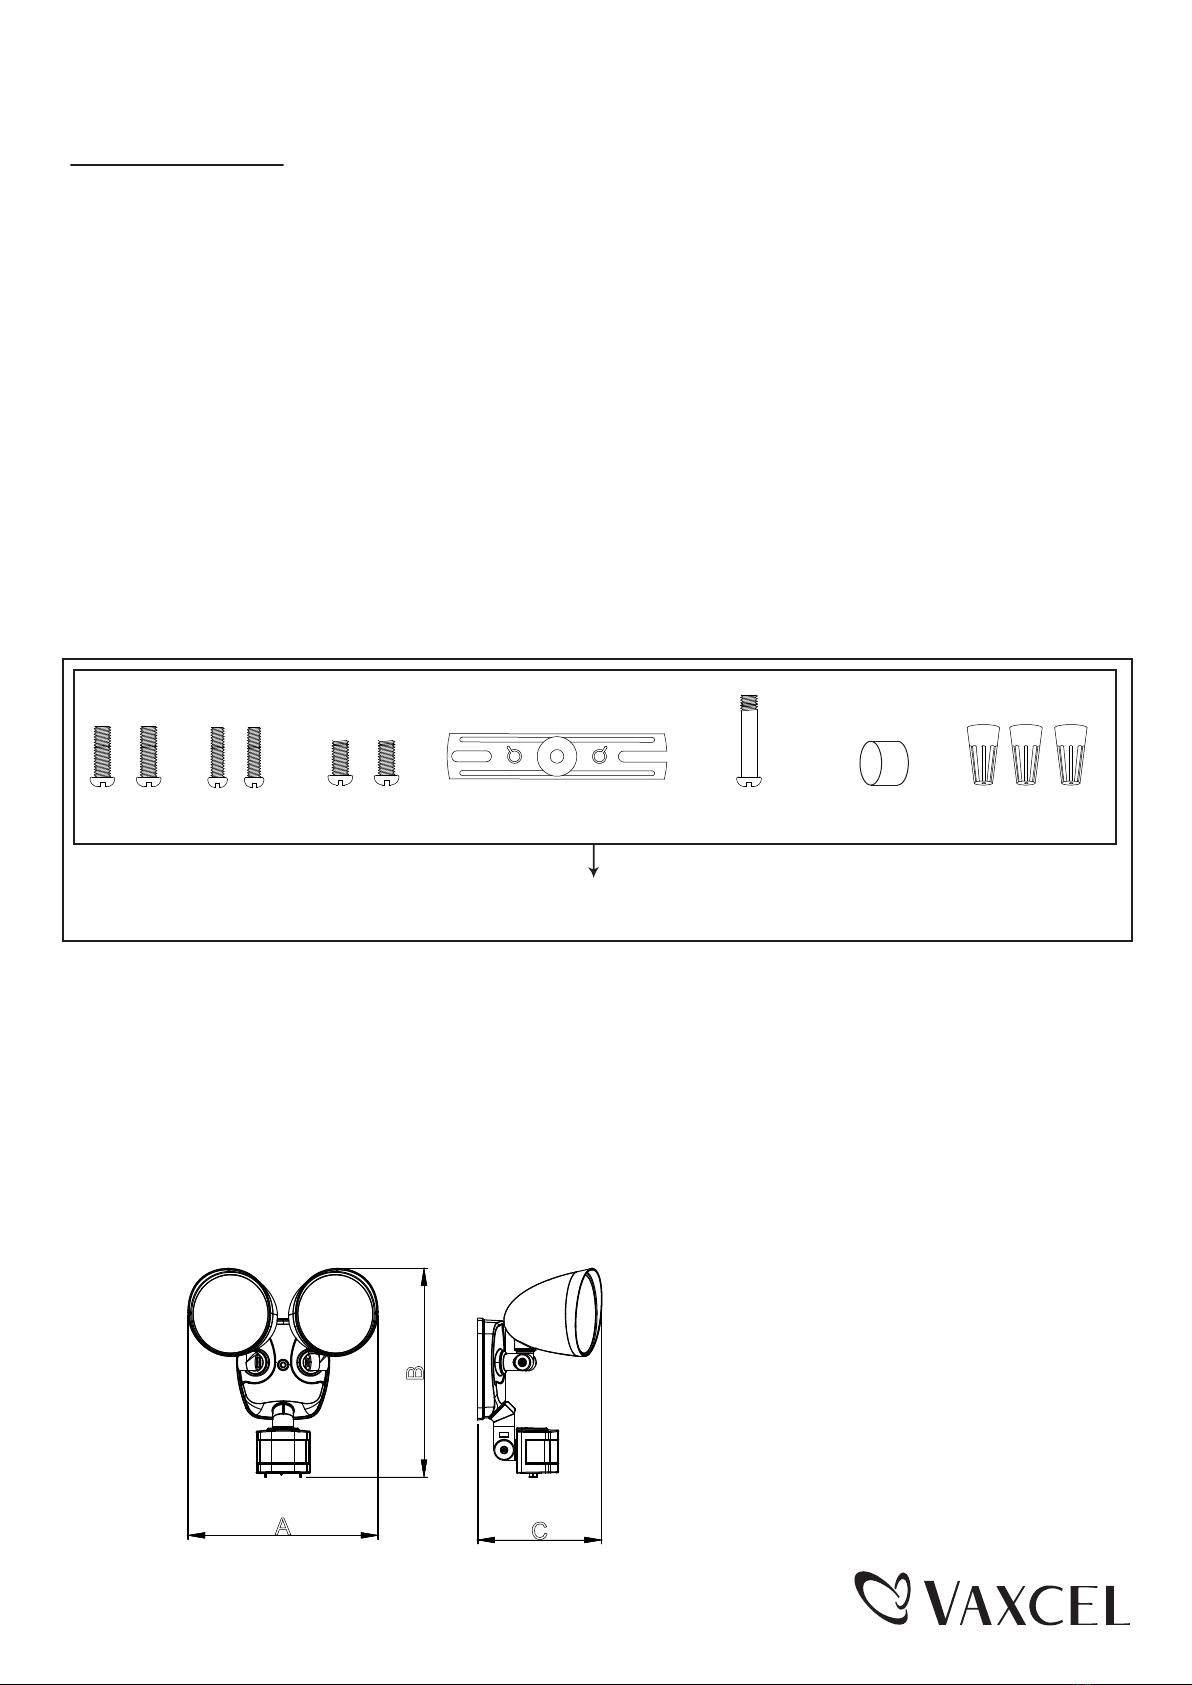
Adjusting the Light Head:
1. Gently grasp the light heads and move them up or down, left or right to adjust the light coverage area. Keep the light
heads at least 1” (25mm) away from the sensor.(See Fig. 5)
2. Keep the light heads 30˚ below horizontal to avoid water damage and electrical shock.
Light Head
150623

Page 4 / 5 150623
10'
8.0'
12.0'
70'
Notes:
1. The sensitivity of the motion sensor will increase as the
environmental temperature gets cooler. For best
performance, gently clean the lens with a soft cloth every
1 or 2 months to ensure maximum sensitivity.
2. For best performance, install fixture at least 8 feet above
the ground. At such a height, the fixture will provide a
detection distance of up to 70 feet at 77 degrees
Fahrenheit. (See Fig.7)
3. The sensor detects movement across a detection range
of 180 degrees. (See Fig.8)
4. The sensor will be more sensitive to motion across its
detection path than motion directly towards it. (See Fig.9)
5. To reduce possible nuisances, do not mount the fixture
near a heat source like an air conditioner, vent or furnace
exhaust, or in a direction facing any reflective object or
other nearby light source.
Where you install your fixture is important:
Be sure the light is mounted straight on the wall
or eave; otherwise, the detection distance may
be limited.
Shut-off Delay
●The shut-off delay is the length of time the light will stay at full brightness after motion is detected.
●You can set the shut-off delay by rotating the Time knob arrow so it points to the desired time setting (from 5
seconds to 3 minutes). To increase the shut-off delay, turn the knob clockwise. To decrease the shut-off delay,
turn the knob counterclockwise.
Customization Options:
Fig. 7 Fig. 8
Motion
Least sensitive
Motion
Most sensitive
Sensor
Fig. 9
180˚
“OFF” or
“AUTO” Mode
Manual
Override
Manual Override Operation Diagram
Turn wall switch OFF-ON
in 0.5~3 Seconds
Turn wall switch OFF-ON
in 0.5~3 Seconds
Fig. 6
5. Manual Override mode (nighttime operation only)
● To temporarily override the settings in “OFF” or “AUTO”
modes for continuous full-brightness at night, turn the wall
switch “OFF” then turn it “ON” within 3 seconds. The light
remains on all night long. To shift back to “OFF” or “AUTO”
mode, turn the wall switch “OFF” then turn it “ON” within 3
seconds again.
● The light turns off automatically at dawn.
Note: To make sure the above functions operate properly,
always keep the wall switch in the “ON” position (including
the daytime).

5-YEAR LIMITED WARRANTY:
All products are warranted to be free of defects in material and workmanship for five (5) years from date of
purchase. This warranty is limited to the correction of any such defect, or the replacement of any such defective
item(s), provided that: (a) we are properly notified and consent to return of the item(s) in question:(b) the item (s)
is / are returned with proof of purchase date; and (c) it is found upon inspection by us that the item (s) is / are defective
as noted above. This warranty dose not cover labor costs, consequential damages, nor dose it apply to any item(s) that
have been improperly installed, overloaded, altered, or otherwise abused by the customer, its agent(s) or emplyee(s).
Finishes are specially excluded from the terms of this warranty since they are subject to environmental maintenance
deemed beyond our control. Other than the described obligation, we assume no further liability with respect to the sale
or use of our products.We make no warranty, express or implied, and disclaim any warranty of merchantability or fitness
for a particular purpose.
A
B
C
Page 5 / 5 150623
The following parts are available for re-order if damaged or missing.
Mounting Strap Wire Nut X3
Decorative cover
Fixture Mounting Screw
Assembly Kit
5349MM (1 SET) FOR T0170
5350MM (1 SET) FOR T0171
A: 9-1/4"
B: 9"
C: 5-3/4"
Troubleshooting
---The light does not come on at all:
1. Make sure the wall switch and circuit breaker are on.
2. Make sure the wiring is correct.
3. Cover the sensor with dark color cloth to verify that the ambient light level is not too high.
---The light comes on for no apparent reason:
1. Re-aim the motion sensor.
2. Decrease the sensitivity setting.
3. Do not use a dimmer or timer to control the light fixture. Replace the dimmer or timer with a standard on/off wall
switch.
---The light flashes on and off:
1. Reposition the light head away from the motion sensor.
2. Reposition the motion sensor.
3. The motion sensor is in “TEST” mode and warm up.
---In Manual override, the light stays on after dawn:
1. The ambient light level may be too low due to overcast skies.
Mounting Screw X2
#8/32X1/2 in
Mounting Screw X2
#6/32 X1/2 in
Mounting Screw X2
#10/24 X1/4 in
This manual suits for next models
1
Table of contents
Other Vaxcel Accessories manuals
Popular Accessories manuals by other brands

Deif
Deif WSS 500 Series User’s Manual/Installation Note

LORD
LORD MicroStrain 3DM-GX5-25 user manual

THORLABS
THORLABS WFS Series Operation manual

SC
SC iStick TC100W user manual

DARCHE
DARCHE ECLIPSE 270 SET-UP AND CARE INSTRUCTIONS

CMA Dishmachines
CMA Dishmachines DIFFERENTIALVOLTAGE SENSOR 0210I user guide