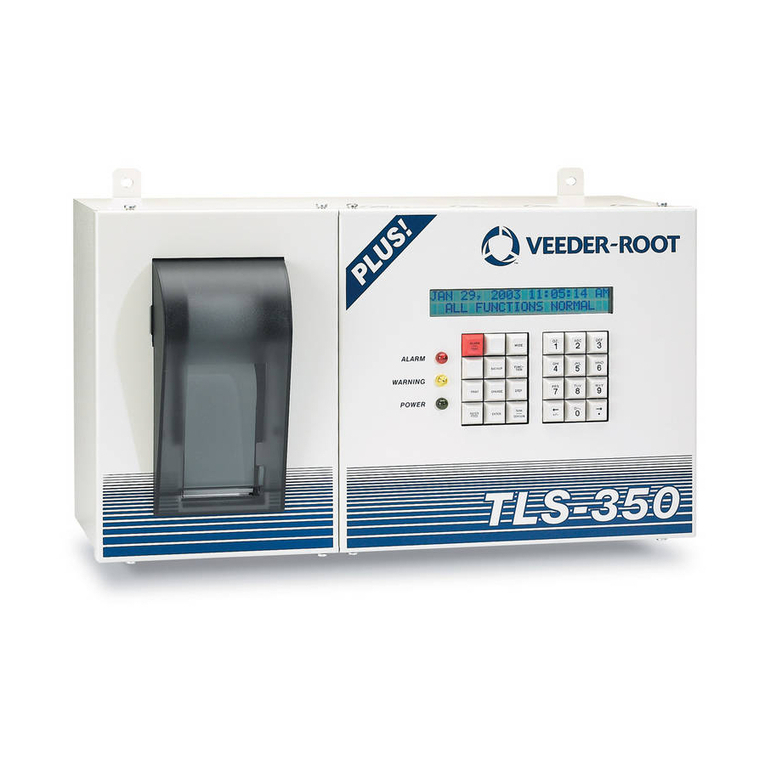
Veeder-Root TLS-450PLUS Manual instruction

Manual No: 577014-460 • Revision: A
Install, Setup, & Operation Manual
Pressure Management Control
TLS-450PLUS Consoles for VR Polisher

ii
Notice
Veeder-Root makes no warranty of any kind with regard to this publication, including, but not limited to, the implied warranties of
merchantability and fitness for a particular purpose.
Veeder-Root shall not be liable for errors contained herein or for incidental or consequential damages in connection with the furnishing,
performance, or use of this publication.
Veeder-Root reserves the right to change system options or features, or the information contained in this publication.
This publication contains proprietary information which is protected by copyright. All rights reserved. No part of this publication may be
photocopied, modified or translated to another language without the prior written consent of Veeder-Root. Contact TLS Systems
Technical Support for additional troubleshooting information at 800-323-1799.
DAMAGE CLAIMS / LOST EQUIPMENT
Thoroughly examine all components and units as soon as they are received. If any cartons are damaged or missing, write a complete
and detailed description of the damage or shortage on the face of the freight bill. The carrier's agent must verify the inspection and sign
the description. Refuse only the damaged product, not the entire shipment.
Veeder-Root must be notified of any damages and/or shortages within 30 days of receipt of the shipment, as stated in our Terms and
Conditions.
VEEDER-ROOT’S PREFERRED CARRIER
1. Contact Veeder-Root Customer Service at 800-873-3313 with the specific part numbers and quantities that were missing or
received damaged.
2. Fax signed Bill of Lading (BOL) to Veeder-Root Customer Service at 800-234-5350.
3. Veeder-Root will file the claim with the carrier and replace the damaged/missing product at no charge to the customer. Customer
Service will work with production facility to have the replacement product shipped as soon as possible.
CUSTOMER’S PREFERRED CARRIER
1. It is the customer’s responsibility to file a claim with their carrier.
2. Customer may submit a replacement purchase order. Customer is responsible for all charges and freight associated with
replacement order. Customer Service will work with production facility to have the replacement product shipped as soon as
possible.
3. If “lost” equipment is delivered at a later date and is not needed, Veeder-Root will allow a Return to Stock without a restocking fee.
4. Veeder-Root will NOT be responsible for any compensation when a customer chooses their own carrier.
RETURN SHIPPING
For the parts return procedure, please follow the appropriate instructions in the "General Returned Goods Policy” pages in the
"Policies and Literature" section of the Veeder-Root North American Environmental Products price list. Veeder-Root will not
accept any return product without a Return Goods Authorization (RGA) number clearly printed on the outside of the package.
FCC INFORMATION
This equipment complies with the requirements in Part 15 of the FCC rules for a Class A computing device. Operation of this
equipment in a residential area may cause unacceptable interference to radio and TV reception requiring the operator to take whatever
steps are necessary to correct the interference.
INSTALLATION IN THE STATE OF CALIFORNIA
Please refer to the Vapor Recovery Certification Phase II EVR Executive Orders at the California Air Resources Board website
(www.arb.ca.gov) for the latest manual revisions pertaining to Executive Orders VR-202 (Assist Phase II EVR System Including ISD
System), VR-203 (Balance Phase II EVR System) or VR-204 (Balance Phase II EVR System Including ISD System).
©Veeder-Root 2023 All rights reserved.

iii
Warranty
This warranty applies only when the product is installed in accordance with Veeder-Root’s specifications by Veeder-Root
certified installers. This warranty will not apply to any product which has been subjected to misuse, negligence, accidents,
systems that are misapplied or are not installed per Veeder-Root specifications, modified or repaired by unauthorized
persons, or damage related to acts of God. Veeder-Root is not liable for incidental, consequential, or indirect damages
or loss, including, without limitation, personal injury, death, property damage, environmental damages, cost of labor, clean-
up, downtime, installation and removal, product damages, loss of product, or loss of revenue or profits. This warranty
applies to the initial purchaser and any subsequent purchaser for the duration of the warranty period. THE WARRANTY
CONTAINED HEREIN IS EXCLUSIVE AND THERE ARE NO OTHER EXPRESS, IMPLIED, OR STATUTORY
WARRANTIES. WARRANTIES OF MERCHANTABILITY OR FITNESS FOR A PARTICULAR PURPOSE ARE
EXPRESSLY EXCLUDED.
TLS-450PLUS MONITORING SYSTEM
We warrant that this product shall be free from defects in material and workmanship and is compliant with all applicable
performance standards and specifications for which it has been certified, for a period of one (1) year from the date of
installation when proof of date of installation is provided or twenty-four (24 months) from the date of manufacture when
proof of date of installation is not provided. During the warranty period, we or our representative will repair or replace the
product, if determined by us to be defective, at the location where the product is in use and at no charge to the purchaser.
LAMPS, FUSES, AND LITHIUM BATTERIES ARE NOT COVERED UNDER THIS WARRANTY.
If "Warranty" is purchased as part of the Fuel Management Service, Veeder-Root will maintain the equipment for the life
of the contract in accordance with the written warranty provided with the equipment. A Veeder-Root Fuel Management
Services Contractor shall have free site access during Customer’s regular working hours to work on the equipment.
Veeder-Root has no obligation to monitor federal, state or local laws, or modify the equipment based on developments or
changes in such laws.
MODULES, KITS, OTHER COMPONENTS (PARTS PURCHASED SEPARATE OF A
COMPLETE CONSOLE)
We warrant that this product shall be free from defects in material and workmanship and is compliant with all applicable
performance standards and specifications for which it has been certified, for a period of one (1) year from the date of
installation when proof of the date of installation is provided or fifteen (15) months from the date of manufacture when
proof of date of installation is not provided. We warrant that the lithium batteries (excluding EVR BATTERY PACK) shall
be free from defects in material and workmanship for a period of three (3) months from date of invoice. We will repair or
replace the product if the product is returned to us; transportation prepaid by user, within the warranty period, and is
determined by us to be defective. LAMPS AND FUSES ARE NOT COVERED UNDER THIS WARRANTY.
PRESSURE MANAGEMENT CONTROL (PMC)
For components used in PMC systems (Vapor Pressure Sensor, Software, TLS RF, Wireless Repeater, Wireless
Transmitter & Wireless Receiver), excluding LAMPS, FUSES, AND LITHIUM BATTERIES, the following warranty
applies:
We warrant that this product shall be free from defects in material and workmanship and is compliant with all applicable
performance standards and specifications for which it has been certified, for a period of one (1) year from the date of
PMC start-up when proof of the date of install is provided or twenty-four (24) months from the date of manufacture when
proof of date of installation is not provided. During the warranty period, we and or our representative will repair or replace
the product, if determined by us to be defective, at the location where the product is in use, at no charge to the purchaser.
For PMC components installed after the initial PMC start-up, we warrant that these products shall be free from defects
in material and workmanship and is compliant with all applicable performance standards and specifications for which it

has been certified, for a period of one (1) year from the date of installation when proof of the date of install is provided or
fifteen (15) months from date of manufacture when proof of date of installation is not provided. We will repair or replace
the product if the product is returned to us; transportation prepaid by user, within the warranty period, and is determined
by us to be defective.
EVR BATTERY PACK
We warrant that this product shall be free from defects in material and workmanship and is compliant with all applicable
performance standards and specifications for which it has been certified, for a period of one (1) year from the date of
installation when proof of the date of install is provided or fifteen (15) months from the date of manufacture when proof
of date of installation is not provided. The replacement EVR Battery Pack warranty period will be the
REMAINING warranty period of the original EVR Battery Pack. LAMPS, FUSES, AND LITHIUM BATTERIES
OTHER THAN THE EVR BATTERY PACK, ARE NOT COVERED UNDER THIS WARRANTY.

Table of Contents
v
Introduction
Site Requirements ............................................................................................................1
Related Manuals ...............................................................................................................1
Contractor Certification Requirements ..............................................................................2
Safety Precautions ............................................................................................................3
Example Site Diagrams ....................................................................................................4
Setup
Introduction .......................................................................................................................5
Date/Time Setup ...............................................................................................................5
Device Setups ...................................................................................................................6
Atmospheric Pressure (ATM) Sensor Setup ............................................................6
Vapor Pressure Sensor Setup..................................................................................7
Vapor Valve Setup....................................................................................................8
Vapor Recovery Setup ......................................................................................................9
Vapor General Setup..............................................................................................10
Vapor Management................................................................................................11
Diagnostics
PMC Device Diagnostic Screens ....................................................................................13
Atmospheric Sensor Overview ...............................................................................13
Vapor Pressure Sensor Overview ..........................................................................14
Vapor Valve Overview ............................................................................................16
PMC Status .....................................................................................................................17
Automatic Mode......................................................................................................18
Manual Mode..........................................................................................................18
Switching Between Vapor Processor Modes..........................................................18
Vapor Monitor - Clear Test After Repair .........................................................................19
Example Procedure................................................................................................19
Operations
Alarms .............................................................................................................................22
PMC Alarm Summary .....................................................................................................22
Reports - PMC Status .....................................................................................................23
Viewing PMC Reports via RS-232 Connection ...............................................................25
Connecting Laptop to TLS-450PLUS .....................................................................25
Setting up The TLS-450PLUS Serial Port For PMC Regulator Access..................27
Setting Up Communication Between Laptop and TLS-450PLUS...........................29
Sending Console Commands.................................................................................30
Troubleshooting
PMC Setup Fail ...............................................................................................................35
PMC Sensor Faults .........................................................................................................35
Wireless Related Sensor Alarms ....................................................................................36
VP Emission Alarm .........................................................................................................36
Example PMC reports .....................................................................................................37

Table of Contents
vi
Figures
Figure 1. Example Site Diagram - TLS Console Controlled
V-R Vapor Processor (PMC only) ............................................................................4
Figure 2. Date and Time Setup Screen .............................................................................5
Figure 3. Accessing ATM Pressure Sensor Setup Screen ................................................6
Figure 4. ATM Sensor Setup Screen .................................................................................7
Figure 5. Accessing Vapor Pressure Sensor Setup Screen ..............................................7
Figure 6. Vapor Pressure Sensor Setup Screen ...............................................................8
Figure 7. Accessing Vapor Valve Setup Screen ................................................................8
Figure 8. Example Vapor Valve Setup Screen ..................................................................9
Figure 9. Example Vapor Valve Completed Setup Screen ................................................9
Figure 10. Accessing Vapor General: General Screen ...................................................10
Figure 11. Vapor General: General Setup Screen ..........................................................10
Figure 12. Vapor Management Setup Screen .................................................................11
Figure 13. Vapor Management Processor Setup Screen - Page 1 .................................11
Figure 14. Vapor Management Processor Screen - Page 2 ............................................12
Figure 15. Accessing the Atmospheric Sensor Overview Screen ...................................13
Figure 16. Atmospheric Sensor Overview Screen - Page 1 ............................................13
Figure 17. Atmospheric Sensor Overview Screen - Page 2 ............................................14
Figure 18. Accessing the Vapor Pressure Sensor Overview Screen ..............................14
Figure 19. Vapor Pressure Sensor Overview Screen - Page 1 .......................................15
Figure 20. Vapor Pressure Sensor Overview Screen - Page 2 .......................................15
Figure 21. Accessing the Vapor Valve Overview Screen ................................................16
Figure 22. Vapor Valve Overview Screen - Page 1 .........................................................16
Figure 23. Vapor Valve Overview Screen - Page 2 .........................................................17
Figure 24. Accessing PMC Status Diagnostic Screen .....................................................17
Figure 25. PMC Status Diagnostic Screen (Scroll Down to View Additional Fields)...........18
Figure 26. Manually Switching Between PMC Modes .....................................................19
Figure 27. Vapor Monitor Clear Test After Repair Screen ...............................................19
Figure 28. Select Test Type ............................................................................................20
Figure 29. Clear Test .......................................................................................................20
Figure 30. Confirmation Message Dialog Box .................................................................20
Figure 31. Last Clear Field Updates ................................................................................21
Figure 32. Clear After Test Repair History Printout .........................................................21
Figure 33. Accessing PMC Report ..................................................................................23
Figure 34. PMC Status Report Example .........................................................................23
Figure 35. PMC Status Report Printout ...........................................................................24
Figure 36. Connecting Laptop to TLS-450PLUS for Serial Communication ....................25
Figure 37. Connect Laptop to an Available RS-232 Comm Port .....................................26
Figure 38. TLS-450PLUS RS-232 Connector Pin Outs ...................................................26
Figure 39. Example Serial Port Setup Screen .................................................................27
Figure 40. Example Serial Port 3 Setup Screen ..............................................................28
Figure 41. Laptop Device Manager .................................................................................29
Figure 42. PuTTY Terminal Window ...............................................................................30
Figure 43. Vapor Polisher Runtime Diagnostics Report - Serial to PC Format ...............31
Figure 44. Vapor Processor Status Report - Serial to PC Format ...................................32
Figure 45. Vapor Valve Diagnostic Report - Serial to PC Format ....................................33
Figure 46. Daily Vapor Polisher Diagnostic Report - Serial to PC Format .......................33
Figure 47. Non-Priority Alarm History Report - Serial to PC Format ...............................34
Figure 48. Priority Alarm History Report - Serial to PC Format .......................................34
Figure 49. PMC Report Examples ...................................................................................37

Table of Contents
vii
Tables
Table 1: Related Manuals/Drawings ......................................................................................1
Table 2. PMC Alarm Summary ............................................................................................22
Table 3. Wireless Related Sensor Alarms ...........................................................................22
Table 4. Selectable Comm Module Permissible Slots And Port Availability ........................27
Table 5: Serial Commands for PMC Reports .......................................................................31
Table 6: Vapor Processor Runtime Diagnostic Report Event Codes ...................................32
Table 7: PMC Setup Fail Diagnostic Procedure ...................................................................35
Table 8. PMC Device Fault Summary ..................................................................................35

1
Introduction
This manual provides instructions to install, setup and operate the components of Veeder-Root Pressure Management
Control (PMC) equipment. The PMC feature is an option for the TLS console platform, and as such, many of the
installation/setup/operation instructions for non-PMC specific tasks are covered in the TLS-450PLUS supplied literature.
Do not us the manual when PMC is installed with ISD. Use the TLS-450PLUS ISD & Operations Manual 577013-484
(Balance) or 55714-461 (Assist).
Revision or reprogramming of the TLS may require notification of the local Certified
Unified Program Agency (CUPA).
Site Requirements
Below are the requirements for all vapor recovery systems except where noted.
1. TLS-450PLUS installed as per TLS-450PLUS Site Prep and Install manual 577014-073. Required TLS-450PLUS
modules are listed below.
a. A dedicated comm port to be available for use by contractor or government inspectors.
b. Universal Sensor Module (USM) is required to monitor Vapor Valve and Vapor Pressure Sensor (up to 16 devices
per module). USM/ATM Module Group for TLS-450PLUS (P/N 0332812-006) may be used and or required for
SVCM or PMC.
•One V-R Mag probe in each of the gasoline tanks being monitored - install as per installation manual shipped with
device, setup following instructions in TLS-450PLUS / TLS4 Operator’s Manual or using the TLS-450PLUS Online
Help.
•Vapor Pressure Sensor (one per site) - install as per Vapor Pressure Sensor installation manual shipped with sensor,
setup following instructions in this manual.
•Veeder-Root Vapor Polisher or Healy CAS - If installing the Vapor Polisher, follow the instructions in the Vapor Polisher
Installation and Maintenance Guide (P/N 577013-920), setup following instructions in this manual. The canister can
only be installed in systems with a vapor recovery vent stack fitted with a UL Listed pressure/vacuum (P/V) valve that
complies with California Air Resources Board (CARB) requirements.
•The total leak rates for P/V valves, shall be less than or equal to: 0.17 CFH at +2.0 inches H2O, 0.63 CFH at -4.0
inches H2O.
•If installing the Healy CAS, follow instructions in the accompanying manual(s). There is no TLS-450PLUS setup
required for the Healy CAS.
Related Manuals
The manuals in Table 1 below are included for reference.
Table 1: Related Manuals/Drawings
V-R Manual Part Number
TLS-450PLUS Console Site Prep & Installation Manual 577014-073
Vapor Pressure Sensor for Vent Stacks Installation Guide 577014-019
Pressure Sensor Installation Guide 577013-797
TLS-450PLUS / TLS4 Operator’s Manual 577014-110
ISD/PMC Troubleshooting Manual - TLS-450PLUS 577014-463
TLS RF Wireless 2 System (W2) Installation and Maintenance Guide 577013-964
TLS-450PLUS Console Board and Software Replacement/Upgrade 577014-076
TLS-450PLUS Console Module Replacement Instructions 577014-077
Descriptive System Document IECEx TLS-450PLUS Consoles 331940-106

2
Introduction Contractor Certification Requirements
Contractor Certification Requirements
Veeder-Root requires the following minimum training certifications for contractors who will install and set up the
equipment discussed in this manual:
All service personnel on site must comply with all recommended safety practices identified by OSHA and your employer.
Review and comply with all the safety warnings in this an any related documents, and any other Federal, State, or Local
requirements
Warranty Registrations may only be submitted by selected Distributors.
Veeder-Root Contractor
Certification Requirements
Installer
Certification6
ATG Technician
Certification7
VR Vapor Products
Certification8
TLS-450PLUS
EVR for CA
Certification
Install1 ISD X X X X
Install PMC X X X X
Install CCVP X X X X
Install Wireless ISD/PMC X X X X
Installation Checkout2X X X
ATG Startup3 / Training4 / Service5X X X
ISD Startup / Training / Service X X
PMC Startup / Training / Service X X
CCVP Startup / Training / Service X X
Wireless ISD/PMC Startup / Training / Service X X
Install Pressure Sensor (ATG) X X X X
Maintain Pressure Sensor (ATG) X X X
Calibrate Pressure Sensor (ATG) X X X
Clear ATG Pressure Sensor Alarm (ATG) X X X
Clear ISD/PMC Alarms (ISD/PMC) X X
1Perform wiring and conduit touting; equipment mounting
2Inspect wiring and conduit routing; equipment mounting
3Turn power on, program and test the systems
4Provide supervised field experience in service techniques and operations
5Troubleshoot and provide routing maintenance
6UST Monitoring Systems – Installer (Level 1)
7Certified UST Monitoring Technician
8VR Vapor Products

3
Introduction Safety Precautions
Safety Precautions
The following symbols may be used throughout this manual to alert you to important safety hazards.
ELECTRICITY
High voltage exists in, and is supplied
to, the device. A potential shock hazard
exists.
TURN POWER OFF
Live power to a device creates a
potential shock hazard. Turn Off power
to the device and associated accesso-
ries when servicing the unit.
WARNING indicates a hazard-
ous situation which, if not
avoided, could result in death or
serious injury.
APPROVED CONTAINER
Use nonbreakable, clearly marked con-
tainers, suitable for collecting and
transporting hazardous fuels during
service.
READ ALL RELATED MANUALS
Knowledge of all related procedures
before you begin work is important.
Read and understand all manuals thor-
oughly. If you do not understand a pro-
cedure, ask someone who does.
NOTICE is used to address practices
not related to physical injury.
WARNING
The console contains high voltages which can be lethal. It is also connected to low power
devices that must be kept intrinsically safe.
Turn power Off at the circuit breaker. Do not connect the console AC power supply until all
devices are installed.
FAILURE TO COMPLY WITH THE FOLLOWING WARNINGS AND SAFETY PRECAUTIONS
COULD CAUSE DAMAGE TO PROPERTY, ENVIRONMENT, RESULTING IN SERIOUS INJURY
OR DEATH.

4
Introduction Example Site Diagrams
Example Site Diagrams
Figure 1 shows an example site with a TLS-450PLUS controlled vapor processor.
Figure 1. Example Site Diagram - TLS Console Controlled V-R Vapor Processor (PMC only)
Dispenser Vapor
Return line
Vapor Processor
Feed line
Comm
Modules
USM
Module
TANK #1
MAG
Probe
MAG Probes
MAG
Probe
MAG
Probe
TANK #2 TANK #3
460-2.eps
Dispenser Fuel
Meter Events
Regulator Port
RS-232
Vapor Pressure Sensor
Vapor Valve
Vapor Valve
P/V Valve
V-R Vapor
Polisher
Vent
Stack
Carbon
Canister
Dispenser Vapor
Return line
Vapor Pressure
Sensor
(1 per site)
To USM Module
FP1 FP3 FP5
FP2 FP4 FP6
FP7
FP8
TLS-450PLUS
To USM Module
To USM Module To USM Module To USM Module

5
Setup
Introduction
This section describes how to program the TLS-450PLUS for PMC using the front panel graphical user interface
(GUI). The procedures in this manual follow standard TLS-450PLUS console setup programming methods. All
PMC-related equipment must be installed at the site and connected to the TLS console prior to beginning the
setups covered in this section. As with all TLS connections, you cannot change sensor wiring or module slots after
programming or the system will not recognize the correct data. Reference the section entitled “Probe and Sensor
Field Wiring” in the TLS-450PLUS Site Prep and Install manual (P/N 577014-073) for rewiring precautions.
Date/Time Setup
This screen lets you enter the current data and time for the console. It is especially important to update the time
when setting up the console.
It is very important when entering the date and time, you do not set it into the future. A future date and time will
affect the test results at assessment time, even after making any corrections. Should this situation occur, contact
Veeder-Root Tech Support.
Prior to setting Date and Time on initial startup, you must remove the protective tab
underneath the backup battery. This tab is yellow with an X printed on it. The battery can be
found on the PC board inside the left front door of the console. Date and Time will not be
entered correctly if this yellow tab is not removed.
1. Touch Menu>Setup>Date and Time (see Figure 2).
Figure 2. Date and Time Setup Screen
2. Ensure the Current Date and Current Time field entries are correct.
3. Ensure the Time Zone entry is (UTC-07) US/Pacific as shown in Figure 2.
4. Touch the check button to save your choices.

6
Setup Device Setups
Device Setups
Touch Menu>Setup>Devices to assign addresses and other information for the PMC devices that will be
monitored by the TLS-450PLUS, i.e. Atmospheric Pressure Sensor, Vapor Pressure Sensor and Vapor Valve.
ATMOSPHERIC PRESSURE (ATM) SENSOR SETUP
The ATM Pressure Sensor is factory installed on the USM/ATM Module (P/N 0332818-006). At least one USM/
ATM Module must be installed in the console. You must configure at least one USM/ATM Module for use by the
Vapor Polisher or a PMC Set-up Fail will occur. NOTE: if more than one ATM Pressure Sensor is installed, only one
ATM Pressure Sensor needs to be configured.
1. Touch ATM Pressure Sensor in the Devices list (Figure 3) to display the ATM Sensor setup screen (Figure 4).
Figure 3. Accessing ATM Pressure Sensor Setup Screen
2. Touch the Address drop down box to select the address of a USM module ATM sensor. (The ATM on an USM
module is located at address 17.). Touch the Label field to open the keypad and enter a name to identify the
sensor (e.g., ATM Sensor). Touch the Enabled radio button to configure the ATM Sensor. Touch the check
button to save your choice.

7
Setup Device Setups
Figure 4. ATM Sensor Setup Screen
VAPOR PRESSURE SENSOR SETUP
The Vapor Pressure Sensor (VPS) monitors the vapor pressure in the ullage space of the underground gasoline
storage tanks. Only one VPS sensor needs to installed and configured for the site.
1. Touch Vapor Pressure Sensor in the Menu>Setup>Devices list (Figure 5) to open the VPS sensor setup
screen (Figure 6).
Figure 5. Accessing Vapor Pressure Sensor Setup Screen

8
Setup Device Setups
Figure 6. Vapor Pressure Sensor Setup Screen
2. Touch the Address drop down box and select the address of the VPS sensor. Touch the Label field and enter
the label text for the sensor on the keypad then touch the green check button to accept the label. Touch the
Enabled radio button to configure the sensor. Touch the check button to save your choices.
3. Notice after saving, the Vapor Pressure sensor serial number is now visible (see Figure 6).
VAPOR VALVE SETUP
1. Touch Vapor Valve in the Menu>Setup>Devices list (Figure 7) to open the Vapor Valve setup screen (Figure 8)
Figure 7. Accessing Vapor Valve Setup Screen

9
Setup Vapor Recovery Setup
Figure 8. Example Vapor Valve Setup Screen
2. Touch the Address drop-down box and select the address of the Vapor Valve. Touch the Label field and enter
the label text for the Vapor Valve on the keypad (e.g., Vapor Valve) then touch the green check button to accept
the label. Touch the Enabled radio button to configure the Vapor Valve. Touch the check button to save your
choices.
3. Notice after saving the Vapor Valve serial number is now visible (see Figure 9).
Figure 9. Example Vapor Valve Completed Setup Screen
Vapor Recovery Setup
You must choose the appropriate data sheet from Appendix A for the vapor recovery system installed at your
facility (e.g., Single or Multi-Hose Dispensers) and record in those sheets, all the unique information from sensors/
hose positions, prior to beginning the TLS-450PLUS set up procedure below.

10
Setup Vapor Recovery Setup
VAPOR GENERAL SETUP
1. Go to Menu>Setup>Vapor General>General (Figure 10) to setup Assessment Time and Vapor Pressure
Sensor selection (Figure 11).
Figure 10. Accessing Vapor General: General Screen
Figure 11. Vapor General: General Setup Screen
2. Assessment Time defines when vapor assessment is scheduled to begin using the last 24 hours of data. Select
the Vapor Pressure Sensor configured in the Pressure Sensor drop-down box and touch the check button
to save your choice.

12
Setup Vapor Recovery Setup
3. Notice the Vapor Valve field self populates when there is a Vapor Valve configured (as in this example).
Figure 14. Vapor Management Processor Screen - Page 2
4. Touch the check button to save your processor choice.

13
Diagnostics
PMC Device Diagnostic Screens
ATMOSPHERIC SENSOR OVERVIEW
1. Touch Menu>Diagnostics>Atmospheric Sensor>Overview to display the Atmospheric Sensor overview screen
(see Figure 16).
Figure 15. Accessing the Atmospheric Sensor Overview Screen
Figure 16. Atmospheric Sensor Overview Screen - Page 1
Other manuals for TLS-450PLUS
6
Table of contents
Other Veeder-Root Control Unit manuals