manuals.online logo
Brands
  1. Home
  2. •
  3. Brands
  4. •
  5. Veeder-Root
  6. •
  7. Measuring Instrument
  8. •
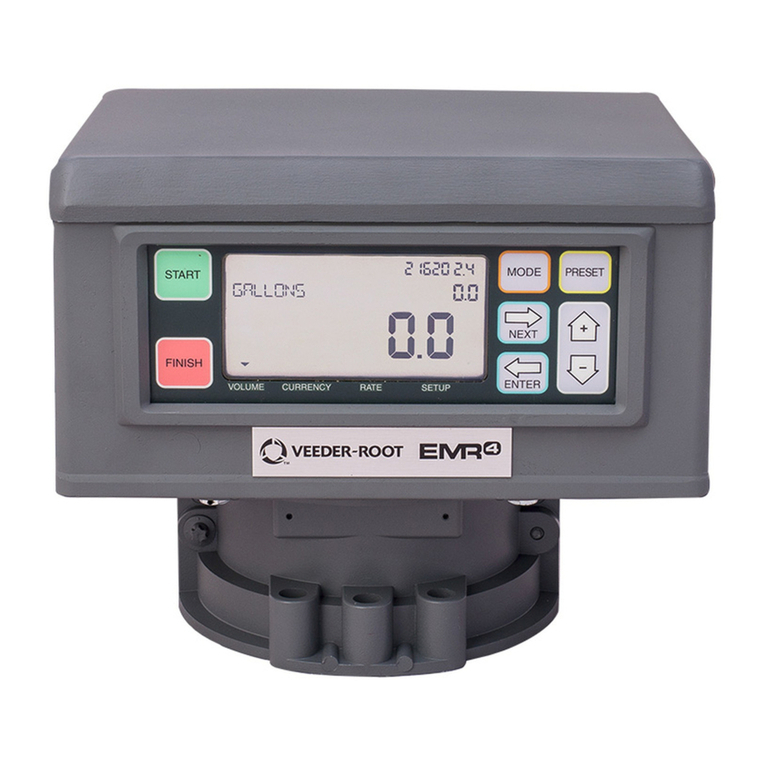
  9. Veeder-Root EMR4 Reference guide

Veeder-Root EMR4 Reference guide

PC Setup Quick Help Guide
Manual No. 577014-356 • Revision B
INTRODUCTION & BASIC SETUP
This guide will lead the user through the steps needed to setup a basic EMR4 for deliv-
ery of a single product with pricing capability and temperature compensation.
As you go through this guide, you will come to places where you will have options to
expand the capability of the EMR4. Where this occurs, you will be advised about the
option and where you may go for further guidance for adding the features relating to that
option, but you will NOT be advised to incorporate such features at the present time.
PROGRAM INSTALLATION
This guide assumes that you have successfully installed the EMR4 PC Setup Program.
After a brief display of the Title box for this program, your beginning window should be
a welcome message providing you with instructions for starting a new file or opening an
existing file. Please read these instructions carefully and then prepare to create a NEW
file.
START A NEW EMR FILE
1. Select NEW from the FILE menu.
2. Under EMR Unit File Name, type in a name such as EMR1Sample.
3. Leave the Location field unchanged. Option: You can locate this new file any
where you choose in future applications by clicking on the small box to the right of
the folder name and specifying a new folder.
4. Click OK.
5. View the current default values for this new EMR file for both Setup and C&C
parameters.
6. Click OK.
C & C – BASIC SETUP
1. Go to Basic Setup under the C&C menu and verify settings for language labels.
Default is English. Selecting French and then clicking OK would close window and
all labels would now be in French but leave in English for this exercise.
2. Select “C&C Configuration” tab and review default settings.
3. Check “Enable Security Code” under “Security Code”.
4. Click OK.
5. Enter default passcode 666666 and click OK. You have the option of changing
the passcode for both C&C and Setup Logins. The default passcode for the Setup
Login is 000000 (six zeros).
6. Go back to C&C, Basic Setup and click the Display Syntax Options tab. Review
but do not change the settings for this exercise.
7. Click OK.
4. Select Download All on the Download Screen.
5. Click on the Download button.
6. Say Yes to the Download dialog box.
7. Wait for the Download complete message in the status bar at the bottom of the
screen.
EMR OPERATION AFTER DOWNLOAD
Refer to the EMR4 Setup and Operation Manual 577014-350 or EMR4 Operator Quick
Help, 577014-352.
Transferring Setup Parameters From EMR3 To EMR4
UPLOAD FROM EMR3
1. Connect the PC to the serial port of the EMR3 IB box in accordance with the
Installation Instructions provided in the EMR3 Installation Manual.
2. Open the EMR3 PC Setup Program and select New from the File menu.
3. Type a name for the setup file you will be uploading from the EMR3, and click OK.
4. Click OK on the Unit File dialog box that is automatically displayed.
5. Select Device Specifics Sheet in the Setup menu, and ensure the EMR3 head
that you will be uploading the setup parameters from is selected. Click OK when
finished.
6. Select Communication/Connect in the File Menu and establish communication
with the EMR3. If prompted to select the port, please select the COM port that the
EMR3 IB is connected to on the PC.
7. Select Communication/Upload in the File Menu.
8. Wait for the “Do you want to overwrite the existing values?” message is displayed,
and click Yes.
9. Click Save in the File menu to save the file.
10. Close the EMR3 PC Setup Program.
DOWNLOAD TO EMR4
1. Connect the PC to the serial port of the EMR4 IB box in accordance with the
Installation Instructions provided in the EMR4 Application Guide.
2. Open the EMR4 PC Setup Program and select Open from the File menu.
3. Navigate to the location where the setup file uploaded from the EMR3 was
saved,and click Open.
4. Click OK on the Unit File dialog box that is automatically displayed.
5. Select Device Specifics Sheet in the Setup menu, and ensure the EMR4 head
that you will be downloading the setup parameters to is selected. Click OK when
finished.
6. Select Communication/Connect in the File Menu and establish communication
with the EMR4. If prompted to select the port, please select the COM port that the
EMR4 IB is connected to on the PC.
7. Select Communication/Download in the File Menu.
8. Select Download All on the Download Screen, and click Download.
9. Say Yes to the Download dialog box asking if you would like to proceed with
over-writing the EMR4 values.
10. Wait for the Download complete message in the status bar at the bottom of the
screen.
11. Close the EMR4 PC Setup Program.
14
©Veeder-Root 2018. All rights reserved.
TEMPERATURE SETUP
1. Select C&C/Calibration/Temperature Calibration and verify that the units are “Fahr-
enheit”, the TC method is “Coefficient ..” and the Reference Temperature is 60. Do
not change these setting for this exercise.
2. Note: The other fields on this screen are associated with the calibration process for
the EMR and meter at the site. This exercise will NOT use the Calibration proce-
dure that involves interaction between the PC Setup program and the EMR at the
Site. That procedure will be left to the advanced user relying on additional informa-
tion from the on-line Help screens.
3. Click OK.
PRODUCT SETUP
1. Select C&C/Product Setup.
2. Leave Meter ID and Input settings as is for this exercise.
3. Note: Within the Product Description frame, there is extensive capability to custom-
ize up to 8 different Product Descriptions with different temperature compensation
characteristics. Each Product Description can also be assigned to 1 of up to 4
different meter calibrations. Additionally, 1 of 2 Print Formats may also be selected
for each Product Description.
4. For this exercise use Gasoline for Prod Dscrpt 1 and in the Edit Product Name
field, enter HIGAS. Move to any other box and you will then see the Product Sum-
mary window update with the new setting for HIGAS.
5. Leave the other settings unchanged and click OK.
PRINT FORMAT SETUP
1. Select C&C/Report Formats/Printer Labels.
2. Scroll down to Label ID 71 (line 71 may differ on your system), VEEDER ROOT
CO, double click on this entry and change to HIGAS INC in the Edit Label box.
Click Enter and OK. This step serves to illustrate how you may change any of the
labels listed.
3. Select C&C/Report Formats/Delivery Report Format.
4. Note: Labels 5 and 9 have changed to HIGAS INC in the available fields list. To
illustrate the Remove Function, select label 28, TANK ID, in the list of fields in the
report and then click on Remove.
5. To illustrate the Add Function, select label 44 (TAX THIS DELIVERY) in the avail-
able fields list, then select label 43 (FINAL PRICE/GALLON) in the list of fields
in the report. With both selections entered, click the Add Button and observe the
placement of TAX THIS DELIVERY below FINAL PRICE/GALLON.
6. Click on Preview to see the composed printout and then OK to complete and close
the screen.
7. Note: Shift printout will not be covered in this QUICK HELP GUIDE but can be
reviewed by the user in conjunction with the on-line help screens.
FILE SAVE
1. Note: It is important to remember that the settings that have been entered so far
and at the closing of each screen are not yet saved permanently to the open file.
Save new settings by closing and reopening the file (or use Save or Save As).
2. Select File/Close.
3. Answer Yes to saving the current values. File closes.
4. Select File/Open.
5. Select EMRSample1 as the File and then Open.
6. Review the parameters listed for this EMR File and then click OK.
7. You’re settings so far are now saved and you are ready to continue with the “Setup”
portion of the program.
SETUP
8. Select Setup/Device Specifics Sheet.
9. General: This tab sheet establishes the location of the current EMR you will
download these settings to. The default location is the first EMR connected to the
first IB box on port 2. This will be the typical setting for a single EMR on a vehicle.
The advanced user can refer to the on-line help screens to determine settings for
multiple EMR/IB systems.
10. Printer Options: Check the Enable box and leave the Printer Type as Slip Printer
and change the Advance Distance to 1. Check the “ …print test page…” box.
11. Presets: Keep volume and currency presets enabled and change Volume Preset1 to
50 gallons and Currency Preset1 to $25.
12. Relay Control: Leave as is.
13. Defaults: Leave as is.
14. Time Delays: Leave as is.
15. Date Format: Leave as is.
16. Version Number: This is a read-only screen that gets updated when the Setup PC
is connected to the EMR and this data is received by an Upload command.
PRICING AND TAX/DISCOUNT
1. Select Setup/Pricing and Tax/Discount Sheet.
2. Select C&C/Basic Setup/ Display Syntax Options. Change “Preset Price” and
“Register Price” to 3 decimal digits, “888.888”.
3. Price Code Table: Select Price Code 1, enter a price of 1.899 and select Tax/
Discount Code 1. Select Price Code 2, enter a price of 1.629 and select Tax/Dis-
count Code 2.
4. Note: Selecting 2 price codes will give the operator/driver the option of selecting
between 2 set prices at the start of each delivery.
5. Tax/Discount Code Table: Customers with Price Code 1 in this example will be
charged a sales tax of 6%. Customers with Price Code 2 are considered volume
buyers and are given not only a lower price but a 5% discount as well which is
applied to the total sale.
6. Therefore: For Tax/Discount Code 1, select T/D Line 1, T/D Item Tax Percentage
and enter a value of 6.
7. For Tax/Discount Code 2, select T/D Line 1, T/D Item Discount Percentage and
enter a value of 5.
8. For Code 1 and Code 2, click on Line0 in the Assign to Line Checkbox.
9. Click OK.
COMPLETE SETUP
Complete the setup by either Saving or Closing this EMR File.
PREPARE TO DOWNLOAD
1. Connect the PC to port 2 of the IB box in accordance with the Installation Instruc-
tions provided for hooking up the RS-232 connector and the PC cable.
2. Select Communication/Connect in the File Menu and establish communication with
the subject EMR.
3. Select Communication/Download in the File Menu.
2 3
Other manuals for EMR4

3

Other Veeder-Root Measuring Instrument manuals

Veeder-Root Mag-FLEX User manual

Veeder-Root

Veeder-Root Mag-FLEX User manual

Veeder-Root EMR3 XStream-PKG User manual

Veeder-Root

Veeder-Root EMR3 XStream-PKG User manual

Veeder-Root EMR3 XStream-PKG User manual

Veeder-Root

Veeder-Root EMR3 XStream-PKG User manual

Veeder-Root EMR4 User guide

Veeder-Root

Veeder-Root EMR4 User guide

Veeder-Root TLS4/8601 Series Programming manual

Veeder-Root

Veeder-Root TLS4/8601 Series Programming manual

Veeder-Root RFMP Series Operating and maintenance instructions

Veeder-Root

Veeder-Root RFMP Series Operating and maintenance instructions

Veeder-Root EMR3 XStream-PKG Manual instruction

Veeder-Root

Veeder-Root EMR3 XStream-PKG Manual instruction

Veeder-Root Mag-FLEX User manual

Veeder-Root

Veeder-Root Mag-FLEX User manual

Veeder-Root Mag Plus User manual

Veeder-Root

Veeder-Root Mag Plus User manual

Veeder-Root TLS2 Installation and operation manual

Veeder-Root

Veeder-Root TLS2 Installation and operation manual

Veeder-Root SERIES 7886 Manual

Veeder-Root

Veeder-Root SERIES 7886 Manual

Veeder-Root TLS RF Wireless 2 Product manual

Veeder-Root

Veeder-Root TLS RF Wireless 2 Product manual

Veeder-Root EMR4 User manual

Veeder-Root

Veeder-Root EMR4 User manual

Veeder-Root Mag Plus User manual

Veeder-Root

Veeder-Root Mag Plus User manual

Veeder-Root TLS-3 Series User manual

Veeder-Root

Veeder-Root TLS-3 Series User manual

Veeder-Root TLS-50 Series User manual

Veeder-Root

Veeder-Root TLS-50 Series User manual

Veeder-Root DIS-51 Manual instruction

Veeder-Root

Veeder-Root DIS-51 Manual instruction

Veeder-Root EMR3 XStream-PKG Manual instruction

Veeder-Root

Veeder-Root EMR3 XStream-PKG Manual instruction

Veeder-Root Series C628 User manual

Veeder-Root

Veeder-Root Series C628 User manual

Veeder-Root TLS-350R PLUS User manual

Veeder-Root

Veeder-Root TLS-350R PLUS User manual

Veeder-Root Series C628 User manual

Veeder-Root

Veeder-Root Series C628 User manual

Veeder-Root EMR3 XStream-PKG User manual

Veeder-Root

Veeder-Root EMR3 XStream-PKG User manual

Veeder-Root TLS-450PLUS Manual instruction

Veeder-Root

Veeder-Root TLS-450PLUS Manual instruction

Veeder-Root TLS2 User manual

Veeder-Root

Veeder-Root TLS2 User manual

Popular Measuring Instrument manuals by other brands

Elesa MPI-R10 operating instructions

Elesa

Elesa MPI-R10 operating instructions

Fieldpiece SC54 Operator's manual

Fieldpiece

Fieldpiece SC54 Operator's manual

Perception PowerVu user manual

Perception

Perception PowerVu user manual

Geokon GK-406 quick start guide

Geokon

Geokon GK-406 quick start guide

Elcometer PG70 operating instructions

Elcometer

Elcometer PG70 operating instructions

Tesco KNOPP KATC-V operating instructions

Tesco

Tesco KNOPP KATC-V operating instructions

Goodwe HK3000 Quick Installation Instruction

Goodwe

Goodwe HK3000 Quick Installation Instruction

Fluke 279 FC Quick reference guide

Fluke

Fluke 279 FC Quick reference guide

SENSIRION SCD4 Series manual

SENSIRION

SENSIRION SCD4 Series manual

Fluke CableAnalyzer DSX-602 user manual

Fluke

Fluke CableAnalyzer DSX-602 user manual

Gill Instruments WindObserver II user manual

Gill Instruments

Gill Instruments WindObserver II user manual

QED BIOGAS 5000 operating manual

QED

QED BIOGAS 5000 operating manual

ORO W401A manual

ORO

ORO W401A manual

Hilti PRI 36 operating instructions

Hilti

Hilti PRI 36 operating instructions

Cardinal Gates Victoreen 948A-40 instruction manual

Cardinal Gates

Cardinal Gates Victoreen 948A-40 instruction manual

TELNET GPONDoctor 9500 user manual

TELNET

TELNET GPONDoctor 9500 user manual

Ruskin DPT-IQ Installation & maintenance manual

Ruskin

Ruskin DPT-IQ Installation & maintenance manual

KYOWA MRS-10A instruction manual

KYOWA

KYOWA MRS-10A instruction manual

manuals.online logo
manuals.online logoBrands
  • About & Mission
  • Contact us
  • Privacy Policy
  • Terms and Conditions

Copyright 2025 Manuals.Online. All Rights Reserved.