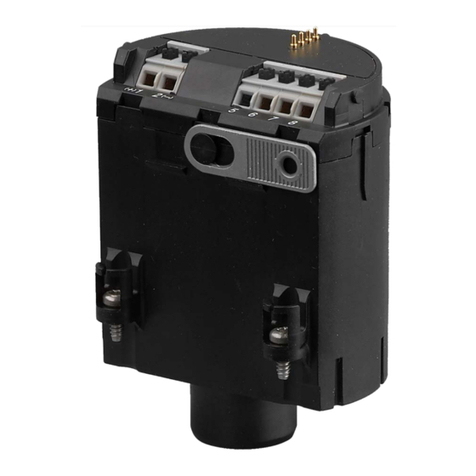
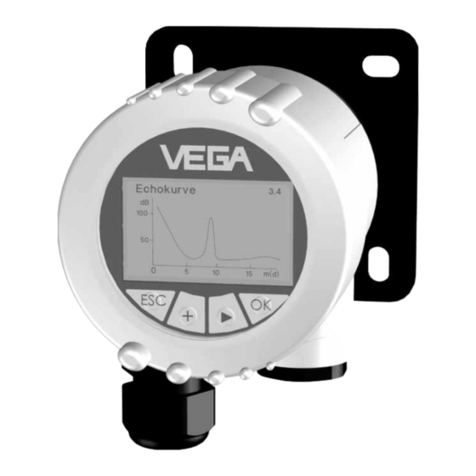
Vega plicscom User manual

Operating Instructions
Display and adjustment module
PLICSCOM
Document ID: 36433

2
Contents
PLICSCOM •
36433-EN-160216
Contents
1 About this document
1.1 Function ........................................................................................................................... 4
1.2 Target group ..................................................................................................................... 4
1.3 Symbols used................................................................................................................... 4
2 For your safety
2.1 Authorised personnel ....................................................................................................... 5
2.2 Appropriate use................................................................................................................ 5
2.3 Warning about incorrect use............................................................................................. 5
2.4 General safety instructions............................................................................................... 5
2.5 CE conformity................................................................................................................... 5
2.6 NAMUR recommendations .............................................................................................. 6
2.7 Encryption ........................................................................................................................ 6
2.8 US version........................................................................................................................ 6
2.9 Environmental instructions ............................................................................................... 6
3 Product description
3.1 Conguration.................................................................................................................... 7
3.2 Principle of operation........................................................................................................ 8
3.3 Packaging, transport and storage................................................................................... 10
4 Prepare setup
4.1 Insert display and adjustment module............................................................................ 12
4.2 Adjustment system......................................................................................................... 13
5 Parallel operation of display and adjustment modules
5.1 Sensors of older generation ........................................................................................... 16
5.2 Sensors of newer generation.......................................................................................... 16
6 Set up Bluetooth connection
6.1 Preparations................................................................................................................... 18
6.2 Connecting..................................................................................................................... 18
6.3 Sensor parameter adjustment ........................................................................................ 19
7 Maintenanceandfaultrectication
7.1 Maintenance .................................................................................................................. 20
7.2 Integrated battery (US version) ...................................................................................... 20
7.3 How to proceed if a repair is necessary.......................................................................... 20
8 Dismount
8.1 Dismounting steps.......................................................................................................... 22
8.2 Disposal ......................................................................................................................... 22
9 Supplement
9.1 Technical data ................................................................................................................ 23
9.2 Dimensions .................................................................................................................... 24
3
Contents
PLICSCOM •
36433-EN-160216
Safety instructions for Ex areas
TakenoteoftheExspecicsafetyinstructionsforExapplications.
These instructions are attached as documents to each instrument
with Ex approval and are part of the operating instructions manual.
Editing status: 2016-02-04

4
1 About this document
PLICSCOM •
36433-EN-160216
1 About this document
1.1 Function
This operating instructions manual provides all the information you
need for mounting, connection and setup as well as important instruc-
tionsformaintenanceandfaultrectication.Pleasereadthisinforma-
tion before putting the instrument into operation and keep this manual
accessible in the immediate vicinity of the device.
1.2 Target group
This operating instructions manual is directed to trained specialist
personnel. The contents of this manual should be made available to
these personnel and put into practice by them.
1.3 Symbols used
Information, tip, note
This symbol indicates helpful additional information.
Caution: If this warning is ignored, faults or malfunctions can result.
Warning: If this warning is ignored, injury to persons and/or serious
damage to the instrument can result.
Danger: If this warning is ignored, serious injury to persons and/or
destruction of the instrument can result.
Ex applications
This symbol indicates special instructions for Ex applications.
• List
The dot set in front indicates a list with no implied sequence.
→ Action
This arrow indicates a single action.
1 Sequence of actions
Numbers set in front indicate successive steps in a procedure.
Battery disposal
This symbol indicates special information about the disposal of bat-
teries and accumulators.

5
2 For your safety
PLICSCOM •
36433-EN-160216
2 For your safety
2.1 Authorised personnel
All operations described in this operating instructions manual must
be carried out only by trained specialist personnel authorised by the
plant operator.
During work on and with the device the required personal protective
equipment must always be worn.
2.2 Appropriate use
The pluggable display and adjustment module is used for measured
value indication, adjustment and diagnosis.
Youcannddetailedinformationabouttheareaofapplicationin
chapter "Product description".
Operational reliability is ensured only if the instrument is properly
usedaccordingtothespecicationsintheoperatinginstructions
manual as well as possible supplementary instructions.
2.3 Warning about incorrect use
Inappropriate or incorrect use of the instrument can give rise to
application-specichazards,e.g.vesseloverllordamagetosystem
components through incorrect mounting or adjustment. Also the pro-
tectivecharacteristicsoftheinstrumentcanbeinuenced.
2.4 General safety instructions
This is a state-of-the-art instrument complying with all prevailing
regulations and guidelines.The instrument must only be operated in a
technicallyawlessandreliablecondition.Theoperatorisresponsible
for the trouble-free operation of the instrument.
During the entire duration of use, the user is obliged to determine the
compliance of the necessary occupational safety measures with the
current valid rules and regulations and also take note of new regula-
tions.
The safety instructions in this operating instructions manual, the na-
tional installation standards as well as the valid safety regulations and
accident prevention rules must be observed by the user.
For safety and warranty reasons, any invasive work on the device
beyond that described in the operating instructions manual may be
carried out only by personnel authorised by the manufacturer. Arbi-
traryconversionsormodicationsareexplicitlyforbidden.
The safety approval markings and safety tips on the device must also
be observed.
2.5 CE conformity
ThedevicefulllsthelegalrequirementsoftheapplicableECguide-
lines.ByaxingtheCEmarking,weconrmsuccessfultestingofthe
product.

6
2 For your safety
PLICSCOM •
36433-EN-160216
YoucanndtheCECerticateofConformityinthedownloadsection
of our homepage.
2.6 NAMUR recommendations
NAMUR is the automation technology user association in the process
industry in Germany. The published NAMUR recommendations are
acceptedasthestandardineldinstrumentation.
ThedevicefulllstherequirementsofthefollowingNAMURrecom-
mendations:
• NE 21 – Electromagnetic compatibility of equipment
• NE53–Compatibilityofelddevicesanddisplay/adjustment
components
For further information see www.namur.de.
2.7 Encryption
Within the context of Bluetooth communication, an authentication
between sensor and adjustment unit is carried out.The sensor PIN
is encrypted acc. to "mbed TLS" (Transport Layer Security) for maxi-
mum security (see appendix of this operating instructions manual).
2.8 US version
To operate or import and export the display and adjustment module
with wireless Bluetooth communication in the USA, it is compulsory
that the US version be used.
For this purpose the following radio licenses have been issued:
• USA: FCC ID PI4BL600
• Canada: IC 1931B-BL600
2.9 Environmental instructions
Protection of the environment is one of our most important duties.
That is why we have introduced an environment management system
with the goal of continuously improving company environmental pro-
tection.Theenvironmentmanagementsystemiscertiedaccording
to DIN EN ISO 14001.
Pleasehelpusfulllthisobligationbyobservingtheenvironmental
instructions in this manual:
• Chapter "Packaging, transport and storage"
• Chapter "Disposal"

7
3 Product description
PLICSCOM •
36433-EN-160216
3 Product description
3.1 Conguration
The type label on the housing contains the most important data for
identicationanduseoftheinstrument:
6
5
1
2
3
4
Fig. 1: Layout of the type label (example)
1 Instrument type
2 Product code
3 Data-Matrix-Code for smartphone app
4 Serial number of the instrument
5 Hardware version
6 Switch position Bluetooth function
The indicating/adjustment module consists of a display with full dot
matrix as well as four keys for adjustment.
An LED background lighting is integrated in the display. It can be
switchedooronviatheadjustmentmenu.
The instrument is optionally equipped with Bluetooth functionality.
This version allows wireless adjustment of the sensor via smart-
phone/tablet/PC. Furthermore, the keys of this version can also be
operated with a magnetic pen right through the closed housing lid
with inspection window.
As an option, the display and adjustment module comes equipped
with heating. This makes it possible to read the display at low tem-
peratures down to -40 °C (-40 °F).
This operating instructions manual applies to the following hardware
and software versions of the display and adjustment module:
• Hardware from 1.10.0
• Software from 1.0.0
The scope of delivery encompasses:
• Display and adjustment module
• Magnetic pen (with Bluetooth version)
• Documentation
– This operating instructions manual
– Supplementary instructions manual 31708 "Heating for display
and adjustment module" (optional)
Type label
Instrument versions
Scope of this operating
instructions manual
Scope of delivery

8
3 Product description
PLICSCOM •
36433-EN-160216
Note:
Optional instrument features are also described in this operating
instructions manual. The respective scope of delivery results from the
orderspecication.
3.2 Principle of operation
The pluggable display and adjustment module PLICSCOM is used for
measured value indication, adjustment, and diagnostics for the follow-
ing instruments of the VEGA plics®family:
• VEGAPULS series 60
• VEGAFLEX series 60 and 80
• VEGASON series 60
• VEGACAL series 60
• VEGABAR series 50, 60 and 80
• VEGADIF 65
• PROTRAC
• VEGADIS 61, 81 and 82
The display and adjustment module PLICSCOM with integrated Blue-
tooth functionality allows wireless connection to smartphones/tablets
with iOS or Android operating system.
1
23
Fig. 2: Wireless connection to smartphones/tables
1 Display and adjustment module
2 Sensor
3 Smartphone/Tablet
The display and adjustment module is mounted in the respective sen-
sor housing. With instruments with double chamber housing, the dis-
Application area
Wireless connection
Installation in the sensor
housing

9
3 Product description
PLICSCOM •
36433-EN-160216
play and adjustment module can be mounted either in the electronics
or in the connection compartment.
1
Fig. 3: Mounting the display and adjustment module in the single chamber
housing
1 Mounting in the electronics compartment
1 2
Fig. 4: Mounting the display and adjustment module in the double chamber
housing
1 Mounting in the electronics compartment
2 Mounting in the connection compartment
The electrical connection is carried out via spring contacts in the
sensor and contact surfaces in the display and adjustment module.
After mounting, the sensor and display and adjustment module are
splash-water protected even without housing lid.
The external display and adjustment unit is another installation option.
1
Fig. 5: Mounting the display and adjustment module in the external display and
adjustment unit
1 Installation position
Mounting in the external
display and adjustment
unit

10
3 Product description
PLICSCOM •
36433-EN-160216
The range of functions of the display and adjustment module is deter-
mined by the sensor and depends on the respective software version
of the sensor.
Power is supplied directly via the respective sensor or the external
display and adjustment unit. An additional connection is not required.
Background lighting
The backlight is also powered by the sensor or the external display
and adjustment unit. Prerequisite for this is a supply voltage at a
certainlevel.Theexactvoltagespecicationscanbefoundinthe
operating instructions manual of the respective sensor.
Bluetooth function
The version with integrated Bluetooth function requires a sensor sup-
plywithhighervoltage.Youcanndtherequiredoperatingvoltagein
chapter "Technical data".
Heating
Theoptionalheatingrequiresitsownoperatingvoltage.Youcannd
details in the supplementary instructions manual "Heating for display
and adjustment module".
3.3 Packaging, transport and storage
Your instrument was protected by packaging during transport. Its
capacity to handle normal loads during transport is assured by a test
based on ISO 4180.
The packaging of standard instruments consists of environment-
friendly, recyclable cardboard. For special versions, PE foam or PE
foil is also used. Dispose of the packaging material via specialised
recycling companies.
Transport must be carried out in due consideration of the notes on the
transport packaging. Nonobservance of these instructions can cause
damage to the device.
The delivery must be checked for completeness and possible transit
damage immediately at receipt. Ascertained transit damage or con-
cealed defects must be appropriately dealt with.
Up to the time of installation, the packages must be left closed and
stored according to the orientation and storage markings on the
outside.
Unless otherwise indicated, the packages must be stored only under
the following conditions:
• Not in the open
• Dry and dust free
• Not exposed to corrosive media
• Protected against solar radiation
• Avoiding mechanical shock and vibration
Range of functions
Voltage supply
Packaging
Transport
Transport inspection
Storage

11
3 Product description
PLICSCOM •
36433-EN-160216
• Storage and transport temperature see chapter "Supplement -
Technical data - Ambient conditions"
• Relative humidity 20 … 85 %
Storage and transport
temperature

12
4 Prepare setup
PLICSCOM •
36433-EN-160216
4 Prepare setup
4.1 Insert display and adjustment module
The display and adjustment module can be inserted into the sensor
andremovedagainatanytime.Youcanchooseanyoneoffourdier-
ent positions - each displaced by 90°. It is not necessary to interrupt
the power supply.
Proceed as follows:
1. Unscrew the housing lid
2. Place the display and adjustment module on the electronics in the
desired position and turn it to the right until it snaps in.
3. Screw housing lid with inspection window tightly back on
Disassembly is carried out in reverse order.
The display and adjustment module is powered by the sensor, an ad-
ditional connection is not necessary.
Fig. 6: Installing the display and adjustment module in the electronics compart-
ment of the single chamber housing

13
4 Prepare setup
PLICSCOM •
36433-EN-160216
1 2
Fig. 7: Installing the display and adjustment module in the double chamber
housing
1 In the electronics compartment
2 In the terminal compartment
Note:
Ifyouintendtoretrottheinstrumentwithadisplayandadjustment
module for continuous measured value indication, a higher lid with an
inspection glass is required.
4.2 Adjustment system
1
2
Fig. 8: Display and adjustment elements
1 LC display
2 Adjustment keys
• [OK] key:Key functions

14
4 Prepare setup
PLICSCOM •
36433-EN-160216
– Move to the menu overview
– Conrmselectedmenu
– Edit parameter
– Save value
• [->] key:
– Presentation, change measured value
– Select list entry
– Select menu items in the quick setup menu
– Select editing position
• [+] key:
– Change value of the parameter
• [ESC] key:
– Interrupt input
– Jump to next higher menu
The instrument is operated via the four keys of the display and adjust-
ment module.The individual menu items are shown on the LC display.
Youcanndthefunctionsoftheindividualkeysintheprevious
illustration.
With the Bluetooth version of the display and adjustment module you
can adjust the instrument alternatively with the magnetic pen.This
pen operates the four keys of the display and adjustment module right
through the closed lid with inspection window of the sensor housing.
1
2
4
5
3
Fig. 9: Display and adjustment elements - With adjustment via magnetic pen
1 LC display
2 Magnetic pen
3 Adjustment keys
4 Bluetooth symbol
5 Lid with inspection window
Operating system - Keys
direct
Adjustment system - Keys
via magnetic pin

15
4 Prepare setup
PLICSCOM •
36433-EN-160216
When the [+] and [->] keys are pressed quickly, the edited value, i.e.
the cursor, moves by one position. When the keys are pressed longer
than 1 s, the cursor moves continuously.
When the [OK] and [ESC] keys are pressed simultaneously for more
than 5 s, the display returns to the main menu. The menu language is
then switched over to "English".
Approx. 60 minutes after the last pressing of a key, an automatic reset
tomeasuredvalueindicationistriggered.Anyvaluesnotconrmed
with [OK] will not be saved.
Time functions

16
5 Parallel operation of display and adjustment modules
PLICSCOM •
36433-EN-160216
5 Parallel operation of display and
adjustment modules
Depending on the generation as well as hardware version (HW) and
software version (SW) of the respective sensor, parallel operation of
the display and adjustment modules in the sensor and in the external
display and adjustment unit is possible.
Youcanrecognizethesensorgenerationbylookingattheterminals.
Thedierencesaredescribedbelow:
5.1 Sensors of older generation
With the following hardware and software versions of the sensor,
parallel operation of several display and adjustment modules is not
possible:
• HW < 2.0.0, SW < 3.99
With these instruments, the interfaces for the integrated display and
adjustment module and the external display and adjustment unit are
connected internally. The terminals are shown in the following graphic:
1
2
Display
12 5678
I²C
Fig. 10: Interfaces for display and adjustment
1 Spring contacts for display and adjustment module
2 Terminals for external display and adjustment unit
5.2 Sensors of newer generation
With the following hardware and software versions of the sensors,
parallel operation of several display and adjustment modules is pos-
sible:
• RadarsensorswithHW≥2.0.0,SW≥4.0.0
• SensorswithguidedradarwithHW≥1.0.0,SW≥1.1.0
• PressuretransmitterwithHW≥1.0.0,SW≥1.1.0
With these instruments, the interfaces for the display and adjustment
module and the external display and adjustment unit are separated:

17
5 Parallel operation of display and adjustment modules
PLICSCOM •
36433-EN-160216
5
12
+
( ) (-)
678
1
2
Fig. 11: Interfaces for display and adjustment
1 Spring contacts for display and adjustment module
2 Terminals for external display and adjustment unit
If the sensor is operated via the one display and adjustment modules,
the message "Adjustment blocked" appears. Simultaneous adjust-
ment is thus impossible.
Connection of more than one display and adjustment module on one
interface, or a total of more than two display and adjustment modules,
however, is not supported.

18
6 Set up Bluetooth connection
PLICSCOM •
36433-EN-160216
6 Set up Bluetooth connection
6.1 Preparations
Make sure that your smartphone/table meets the following system
requirements:
• Operating system: iOS 8 or newer
• Operating system: Android 4.3 or newer
• Bluetooth Smart ab 4.0
Download the app "VEGA Tools" from the Apple App Store or Google
Play Store to your smartphone or tablet.
Make sure that the Bluetooth function of the display and adjustment
module is activated. For this, the switch on the bottom side must be
set to "On".
Factory setting is "On".
1
On
Off
Fig. 12: Activate Bluetooth
1 Switch
On Bluetooth active
OBluetoothnotactive
6.2 Connecting
Start the "VEGA-Tools" app and select the function "Setup". The
smartphone/tablet searches automatically for Bluetooth-capable
instruments in the area.
The found instruments will be listed on the left side of the adjustment
window. The search is continued automatically.
Select the requested instrument in the device list.
The message "Searching …" is displayed.
Fortherstconnection,theadjustmentdeviceandthesensormust
authenticate each other.
System requirements
Activate Bluetooth
Connecting …
Coupling

19
6 Set up Bluetooth connection
PLICSCOM •
36433-EN-160216
iOS
During pairing, the message "Pairing request (Bluetooth), e.g.
12345678 wants to pair with your iPad" appears. Push the "Pair" but-
ton. For authentication, enter in the next menu window the 4-digit PIN
which is used to Lock/Unlock the sensor.
Android
The pairing runs automatically. Enter the 4-digit PIN which is used to
Lock/Unlock the sensor.
The factory setting of the PIN is "0000".
The message "Connecting …" is displayed on the smartphone/tablet.
After connection, the sensor adjustment menu is displayed.
6.3 Sensor parameter adjustment
The sensor adjustment menu is divided into two halves:
Ontheleftyoucanndthenavigationsectionwiththemenus
"Setup", "Display", "Diagnosis" and others.
Theselectedmenuitemcanbeidentiedbythecolourchangeandis
displayed in the right half.
Fig. 13: Example of an app view - Setup sensor adjustment
Entertherequestedparametersandconrmviathekeyboardorthe
editingeld.Themessage"Dataarebeingwritten"isdisplayed.The
parameter values are henceforth active in the sensor.
Connected
Enter paramters

20
7Maintenanceandfaultrectication
PLICSCOM •
36433-EN-160216
7 Maintenanceandfaultrectication
7.1 Maintenance
If the instrument is used correctly, no maintenance is required in
normal operation.
7.2 Integrated battery (US version)
Youcanrecognizeinsucientchargingoftheintegratedbatteryby
the symbol for weak battery.
In this case, the integrated battery must be replaced by a new one.
To exchange the battery, proceed as follows:
1. Open the battery compartment with a screwdriver
2. Remove battery
3. Insert new battery, plus pole upward
4. Close the battery compartment
1
Fig. 14: Exchanging the integrated battery
1 Battery compartment
Youcanndtherequiredbatterytypeonthetypelabelorinchapter
"Technical data".
7.3 How to proceed if a repair is necessary
Youcanndaninstrumentreturnformaswellasdetailedinfor-
mation of the procedure in the download area on our homepage:
www.vega.com.
By doing this you help us carry out the repair quickly and without hav-
ing to call back for needed information.
If a repair is necessary, please proceed as follows:
• Printandlloutoneformperinstrument
• Clean the instrument and pack it damage-proof
Battery exchange
Other manuals for plicscom
3
Table of contents
Other Vega Measuring Instrument manuals

Vega
Vega VEGACAL 65 User manual

Vega
Vega VEGATOR 112 User manual

Vega
Vega VEGAFLEX 81 User manual

Vega
Vega VEGACAP 67 User manual

Vega
Vega VEGASON 63 User manual

Vega
Vega VEGABAR 14 User manual

Vega
Vega VEGABAR 17 User manual

Vega
Vega VEGAFLEX 81 User manual

Vega
Vega vegacap 62 User manual

Vega
Vega VEGACAP 63 User manual

Vega
Vega VEGASON 62 User manual

Vega
Vega VEGACAL 63 User manual

Vega
Vega VEGAPULS 66 User manual

Vega
Vega VEGABAR 82 User manual

Vega
Vega VEGAPULS WL 61 User manual

Vega
Vega VEGAPULS 66 User manual

Vega
Vega VEGACAP 35 User manual

Vega
Vega VEGASON 62 User manual

Vega
Vega VEGASWING 63 User manual

Vega
Vega VEGACAP 66 User manual