Veho Pebble PZ10 PRO User manual

VPP-013-PZ10-B

Multi-lingual manual download
veho-world.com/downloads
EC Declaration of Conformity
Hereby, Veho UK LTD declares that the radio equipment type (VPP-770-20K) is in compliance with EC directives.
The full text of the EU Declaration of Conformity is available at https://veho-world.com/compliance/

UK 1. LED indicator button
2. USB charging port
3. LED indicators
4. PD universal USB-C port
5. USB-C charging cable
6. Apple Lightning cable
FR 1. Bouton indicateur LED
2. Port de chargement USB
3. Indicateurs LED
4. Port USB-C universel PD
5. Câble de chargement USB-C
6. Câble Apple Lightning
ES 1. Botón indicador LED
2. Puerto de carga USB
3. Indicadores LED
4. Puerto USB-C universal PD
5. Cable de carga USB-C
6. Cable de iluminación de Apple
IT 1. Pulsante indicatore LED
2. Porta di ricarica USB
3. Indicatori LED
4. Porta USB-C universale PD
5. Cavo di ricarica USB-C
6. Cavo Apple Lightning
NL 1. LED-indicatorknop
2. USB-oplaadpoort
3. LED-indicatoren
4. PD universele USB-C-poort
5. USB-C-oplaadkabel
6. Apple Lightning-kabel
DE 1. LED-Anzeigetaste
2. USB-Ladeanschluss
3. LED-Anzeigen
4. PD-Universal-USB-C-Anschluss
5. USB-C-Ladekabel
6. Apple Lightning-Kabel
DK 1. LED indikator knap
2. USB -opladningsport
3. LED indikatorer
4. PD universal USB-C port
5. USB-C ladekabel
6. Apple Lightning-kabel
PT 1. Botão indicador LED
2. Porta de carregamento USB
3. LEDs indicadores
4. Porta USB-C universal PD
5. Cabo de carregamento USB-C
6. Cabo Apple Lightning
CH 1.LED指示灯按钮
2.USB充电口
3.LED指示灯
4.PD通用USB-C口
5.USB-C充电线
6.苹果闪电数据线
J 1.LEDインジケータボタン
2.USB充電ポート
3.LEDインジケーター
4.PDユニバーサルUSB-Cポート
5.USB-C充電ケーブル
6.Appleライトニングケーブル
3
5 6
1
2
1
4

UK Guide to the LED indicator lights The LEDs indicate the remaining battery charge that the power
bank contains. Press the power button to check battery status. When using fast charging, the
rst LED will turn green.
FR Guide des voyants LED Les LED indiquent la charge restante de la batterie que contient la banque
d'alimentation. Appuyez sur le bouton d'alimentation pour vérier l'état de la batterie. Lors de
l'utilisation de la charge rapide, la première LED devient verte.
ES Guía de las luces indicadoras LED Los LED indican la carga restante de la batería que contiene
el banco de energía. Pulse el botón de encendido para comprobar el estado de la batería. Al usar
carga rápida, el primer LED se volverá verde.
IT Guida alle spie LED I LED indicano la carica residua della batteria contenuta nel power bank.
Premere il pulsante di accensione per controllare lo stato della batteria. Quando si utilizza la
ricarica rapida, il primo LED diventa verde.
NL Gids voor de LED-indicatielampjes De LED's geven de resterende batterijlading aan die de
powerbank bevat. Druk op de aan/uit-knop om de batterijstatus te controleren. Bij snelladen
wordt de eerste LED groen.
DE Anleitung zu den LED-Kontrollleuchten Die LEDs zeigen die verbleibende Akkuladung an, die die
Powerbank enthält. Drücken Sie die Ein/Aus-Taste, um den Batteriestatus zu überprüfen. Beim
Schnellladen leuchtet die erste LED grün.
DK Vejledning til LED -indikatorlamperne LED'erne angiver den resterende batteriopladning, som
powerbanken indeholder. Tryk på tænd/sluk-knappen for at kontrollere batteristatus. Ved brug af
hurtig opladning vil den første LED blive grøn.
PT Guia para as luzes indicadoras de LED Os LEDs indicam a carga restante da bateria que o banco
de potência contém. Pressione o botão liga/desliga para vericar o status da bateria. Ao usar o
carregamento rápido, o primeiro LED cará verde.
CH LED指示灯指南LED指示移动电源包含的剩余电池电量。按电源按钮检查电池状态。
使用快速充电时,第一个LED将变为绿色。
J LEDインジケータライトのガイドLEDは、パワーバンクに含まれるバッテリーの残量
を示します。電源ボタンを押して、バッテリーの状態を確認します。急速充電を使
用すると、最初のLEDが緑色に変わります。
<25%
25% – 50%
51% – 75%
76% – 100%
2

3
UK Charging the power bank Using the supplied USB-C charging cable connect the USB-C tip into
the power bank and the other end to a compatible power supply.
FR Charger la banque d'alimentation À l'aide du câble de chargement USB-C fourni, connectez
l'embout USB-C à la banque d'alimentation et l'autre extrémité à une alimentation compatible.
ES Cargando el banco de energía Con el cable de carga USB-C suministrado, conecte la punta
USB-C al banco de energía y el otro extremo a una fuente de alimentación compatible.
IT Ricarica del power bank Utilizzando il cavo di ricarica USB-C in dotazione, collega la punta
USB-C al power bank e l'altra estremità a un alimentatore compatibile.
NL De powerbank opladen Gebruik de meegeleverde USB-C-oplaadkabel om de USB-C-tip aan te
sluiten op de powerbank en het andere uiteinde op een compatibele voeding.
DE Aufladen der Powerbank Verbinden Sie mit dem mitgelieferten USB-C-Ladekabel die USB-C-
Spitze mit der Powerbank und das andere Ende mit einem kompatiblen Netzteil.
DK Opladning af powerbanken Brug det medfølgende USB-C-ladekabel til at slutte USB-C-spidsen til
strømbanken og den anden ende til en kompatibel strømforsyning.
PT Carregando o banco de energia Usando o cabo de carregamento USB-C fornecido, conecte a
ponta USB-C ao banco de energia e a outra extremidade a uma fonte de alimentação compatível.
CH 给移动电源充电使用随附的USB-C充电线将USB-C尖端连接到移动电源,将另一端
连接到兼容的电源。
J パワーバンクの充電付属のUSB-C充電ケーブルを使用して、USB-Cチップをパワーバ
ンクに接続し、もう一方の端を互換性のある電源に接続します。

4
UK Charging a device Connect your device to the output port on the Pebble PZ, once connected
charging will automatically begin until your device is fully charged.
FR Charger un appareil Connectez votre appareil au port de sortie du Pebble PZ, une fois connecté, la
charge commencera automatiquement jusqu'à ce que votre appareil soit complètement chargé.
ES Cargando un dispositivo Conecte su dispositivo al puerto de salida en el Pebble PZ, una vez
conectado, la carga comenzará automáticamente hasta que su dispositivo esté completamente
cargado.
IT Ricarica di un dispositivo Collega il tuo dispositivo alla porta di uscita sul Pebble PZ, una
volta connesso la ricarica inizierà automaticamente no a quando il tuo dispositivo non sarà
completamente carico.
NL Een apparaat opladen Sluit uw apparaat aan op de uitgangspoort van de Pebble PZ. Zodra
het apparaat is aangesloten, begint het opladen automatisch totdat uw apparaat volledig is
opgeladen.
DE Aufladen eines Geräts Verbinden Sie Ihr Gerät mit dem Ausgangsanschluss des Pebble PZ.
Sobald das Gerät angeschlossen ist, beginnt der Ladevorgang automatisch, bis Ihr Gerät
vollständig aufgeladen ist.
DK Opladning af en enhed Tilslut din enhed outputporten på Pebble PZ, når tilsluttet opladning
starter automatisk, indtil din enhed er fuldt opladet.
PT Carregando um dispositivo Conecte seu dispositivo à porta de saída do Pebble PZ, uma vez
conectado, o carregamento começará automaticamente até que o dispositivo esteja totalmente
carregado.
CH 为设备充电将您的设备连接到PebblePZ上的输出端口,连接后将自动开始充电,
直到您的设备充满电。
J デバイスの充電デバイスをPebblePZの出力ポートに接続します。接続すると、デバ
イスが完全に充電されるまで自動的に充電が開始されます。

Specications
Battery capacity 10,000mAh @ 3.7V
USB-C Input DC 5V 3A, 9V 2A, 12V 1.5A
USB-C Output DC 5V 3A, 9V 2.22A, 12V 1.5A
USB Output DC 5V 3A, 9V 2A, 12V 1.5A
Charging time Up to 6 hours
Maintenance & safety
UK IMPORTANT! Please ensure that the voltage of power supply is compatible with the ‘Power In’ of
the power bank. Failure to do so could damage the product and invalidate the warranty. Only use
the supplied charging cable or your device’s charging cable to charge your device. To prolong
battery performance, charge/discharge the Pebble at least once every three months.
FR IMPORTANT! Veuillez vous assurer que la tension d'alimentation est compatible avec le «Power
In» de la banque d'alimentation. Ne pas le faire pourrait endommager le produit et annuler la
garantie. Utilisez uniquement le câble de charge fourni ou le câble de charge de votre appareil
pour charger votre appareil. Pour prolonger les performances de la batterie, chargez/déchargez le
Pebble au moins une fois tous les trois mois.
ES ¡IMPORTANTE! Asegúrese de que el voltaje de la fuente de alimentación sea compatible con el
"Power In" del banco de energía. No hacerlo podría dañar el producto e invalidar la garantía.
Utilice únicamente el cable de carga suministrado o el cable de carga de su dispositivo para
cargar su dispositivo. Para prolongar el rendimiento de la batería, cargue/descargue el Pebble al
menos una vez cada tres meses.
IT IMPORTANTE! Assicurati che la tensione dell'alimentatore sia compatibile con il "Power In"
del power bank. In caso contrario, si potrebbe danneggiare il prodotto e invalidare la garanzia.
Utilizzare solo il cavo di ricarica in dotazione o il cavo di ricarica del dispositivo per caricare il
dispositivo. Per prolungare le prestazioni della batteria, caricare/scaricare il Pebble almeno una
volta ogni tre mesi.
NL BELANGRIJK! Zorg ervoor dat het voltage van de voeding compatibel is met de 'Power In' van de
powerbank. Als u dit niet doet, kan het product beschadigd raken en vervalt de garantie. Gebruik
alleen de meegeleverde oplaadkabel of de oplaadkabel van uw apparaat om uw apparaat op te
laden. Om de prestaties van de batterij te verlengen, laadt/ontlaadt u de Pebble minstens eens in
de drie maanden.

DE WICHTIG! Bitte stellen Sie sicher, dass die Spannung des Netzteils mit dem „Power In“ der
Powerbank kompatibel ist. Andernfalls kann das Produkt beschädigt werden und die Garantie
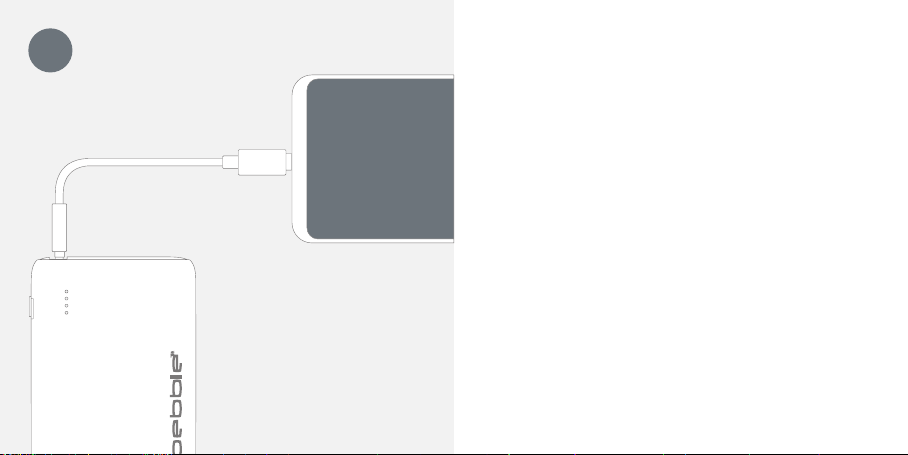
erlöschen. Verwenden Sie zum Aufladen Ihres Geräts ausschließlich das mitgelieferte Ladekabel
oder das Ladekabel Ihres Geräts. Um die Akkuleistung zu verlängern, laden/entladen Sie die
Pebble mindestens einmal alle drei Monate.
DK VIGTIG! Sørg for, at strømforsyningens spænding er kompatibel med strømforsyningens ‘Power
In’. Hvis dette ikke gøres, kan det beskadige produktet og gøre garantien ugyldig. Brug kun det
medfølgende ladekabel eller din enheds opladningskabel til at oplade din enhed. For at forlænge
batteriets ydeevne skal du oplade/aflade Pebble mindst en gang hver tredje måned.
PT IMPORTANTE! Certique-se de que a tensão da fonte de alimentação é compatível com o 'Power
In' do banco de energia. Não fazer isso pode danicar o produto e invalidar a garantia. Use
apenas o cabo de carregamento fornecido ou o cabo de carregamento do seu dispositivo para
carregá-lo. For at udvide batteriets ydeevne skal du oplade/aflade Pebble mindst en gang hver
tredje måned. Para prolongar o desempenho da bateria, carregue/descarregue o Pebble pelo
menos uma vez a cada três meses.
CH 重要的!请确保电源电压与移动电源的“PowerIn”兼容。否则可能会损坏产品并使
保修失效。只能使用随附的充电线或设备的充电线为设备充电。为了延长电池性能,
请至少每三个月对Pebble进行一次充电/放电.
J 重要!電源の電圧がパワーバンクの「パワーイン」と互換性があることを確認して
ください。そうしないと、製品が損傷し、保証が無効になる可能性があります。付
属の充電ケーブルまたはデバイスの充電ケーブルのみを使用してデバイスを充電し
てください。バッテリー性能を延ばすには、少なくとも3ヶ月に1回はPebbleを充電/
放電してください。
For product support, please visit our Tech Support page at:
Pour l’assistance produit, veuillez visiter notre page d’assistance technique à l’adresse:
Para soporte del producto, visite nuestra página de soporte técnico en:
Per il supporto del prodotto, visitare la nostra pagina di supporto tecnico all’indirizzo:
Bezoek voor productondersteuning onze technische ondersteuningspagina op:
Für Produktsupport besuchen Sie bitte unsere Tech-Support-Seite unter:
For produktsupport besøg venligst vores tekniske supportside på:
Para obter suporte ao produto, visite nossa página de suporte técnico em:
如需产品支持,请访问我们的技术支持页面:
製品サポートについては、次のテクニカルサポートページをご覧ください。
veho-world.com/product-support
Support

This symbol, axed to the product or its packaging, indicates that the product must not be processed as household waste. This product should
be correctly disposed of according to your local guidelines for electrical and baery operated products. Correct disposal of the baery will avoid
potenal harm to the environment and human health. For further informaon regarding the recycling of this product, please contact your local
waste recycling centre.
PROP 65: For more information on PROP 65 & disclaimer visit veho-world.com/prop65
Veho Global Group, PO Box 436, Southampton, SO30 9DH, UK
Veho Europe, 25 Place de la Madeleine, 75008 Paris
Table of contents
Other Veho Accessories manuals
Popular Accessories manuals by other brands

Tripp Lite
Tripp Lite UPB-10K4-S2U owner's manual

Multitech
Multitech RBS306-TEMP-TC-US user guide

Rocket Fish
Rocket Fish RF-HTS205 Garantie de l’équipement connecté

Hamilton/Buhl
Hamilton/Buhl 3x 3D Magic Pen instruction manual

In-situ
In-situ Aqua TROLL 500 instruction sheet

Heath Zenith
Heath Zenith 7307 manual