manuals.online logo
Brands
  1. Home
  2. •
  3. Brands
  4. •
  5. Velleman
  6. •
  7. Timer
  8. •
  9. Velleman TIMER8S User manual

Velleman TIMER8S User manual

TIMER8S
WEEKLY TIMER 3600W
1. Introduction
To all residents of the European Union
Important environmental information about
this product
This symbol on the device or the package
indicates that disposal of the device after its
lifecycle could harm the environment.
Do not dispose of the unit (or batteries) as unsorted
municipal waste; it should be taken to a specialized
company for recycling.
This device should be returned to your distributor or to a
local recycling service.
Respect the local environmental rules.
If in doubt, contact your local waste disposal authorities.
Thank you for choosing Perel! Please read the manual
thoroughly before bringing this device into service. If the
device was damaged in transit, don’t install or use it and
contact your dealer.
2. Safety Instructions
Damage caused by disregard of certain guidelines in this
manual is not covered by the warranty and the dealer
will not accept responsibility for any ensuing defects or
problems.
Do not connect to an appliance with a load exceeding
16A.
Always make sure the plug of the connected appliance is
fully inserted into the timer.
Wipe the device regularly with a dry cloth. Do not use
alcohol or solvents. Do not immerse the timer into water
or any other liquid.
It is recommended not to connect heaters or similar
appliances to the timer.
Note that damage caused by user modifications to the
device is not covered by the warranty.
Keep the device away from children and unauthorised
users.
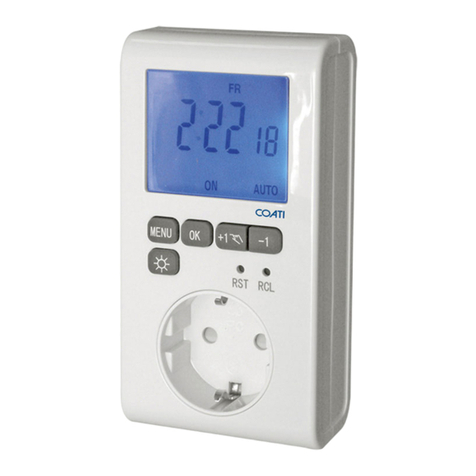
3. Description
WEEK, HOUR, MINUTE: Day, hour or minute setting (with
CLOCK or TIMER).
RST/RCL: Override programs.
CLOCK: Day, hour or minute setting (with WEEK, HOUR
or MINUTE), 12/24h mode (with TIMER), daylight saving
time function (with ON/AUTO/OFF).
TIMER: Timer day, hour or minute setting (with WEEK,
HOUR or MINUTE), 12/24h mode (with CLOCK).
ON/AUTO/OFF: Operating modes.
RANDOM: Set or cancel random function.
MASTERCLEAR: Clear all data.
4. Initial Battery Charge
Connect the timer to the mains and let the internal
battery charge for approximately 14 hours. Press
MASTERCLEAR using a pointed object after the charging
period. The timer is now ready to be set.
5. Use
Setting the Time
Hold CLOCK pressed and set the day, the hour and the
minutes with WEEK, HOUR and MINUTE respectively.
Programming
Press TIMER once to enter the first program.
First, enter the regularity with WEEK. You can choose
between: single day, every day, every weekday, weekend,
every weekday + Saturday, etc.
Next, set the time with HOUR and MINUTE. Press TIMER
again to finish the programming.
Set remaining programs accordingly making sure not to
overlap programs.
ON/AUTO/OFF Setting
Choose one of the modes using the ON/AUTO/OFF
button.
AUTO: Programs will only be activated in this mode.
ON: Power output is always on and programs will not
be executed.
OFF: Power output is always off and programs will not
be executed.
When switching from ON mode to AUTO mode, the timer
will stay in ON mode until the next timer setting.
Random Function
Press RANDOM to activate this function (note that it will
only work in AUTO mode). The programs set between
6pm and 6am will be advanced by 10 to 31 minutes.
12/24h Mode
Hold CLOCK pressed and press TIMER to switch from
12h mode to 24h mode and back.
Daylight Saving Mode
Hold CLOCK pressed and press ON/AUTO/OFF to switch
from normal mode to daylight saving mode and back.
6. Technical Specifications
Power Supply max. 230VAC / 50Hz
Max. Load max. 3600W
Dimensions 125 x 60 x75 mm
Total Weight 169kg
Velleman nv cannot be held responsible in the event of
damage or injury resulted from (incorrect) use of this
device.
For more info concerning this product, please visit our
website www.perel.eu.
The information in this manual is subject to change
without prior notice.
TIMER8S
MINUTEUR HEBDOMADAIRE
3600W
1. Introduction
Aux résidents de l’Union européenne
Des informations environnementales
importantes concernant ce produit
Ce symbole sur l’appareil ou l’emballage
indique que l’élimination d’un appareil en fin
de vie peut polluer l’environnement.
Ne pas jeter un appareil électrique ou électronique (et
des piles éventuelles) parmi les déchets municipaux non
sujets au tri sélectif ; une déchèterie traitera l’appareil
en question.
Renvoyer les équipements usagés à votre fournisseur ou
à un service de recyclage local.
Il convient de respecter la réglementation locale relative
à la protection de l’environnement.
En cas de questions, contacter les autorités locales pour
élimination.
Nous vous remercions de votre achat ! Lire la présente
notice attentivement avant la mise en service de
l’appareil. Si l’appareil a été endommagé pendant le
transport, ne pas l’installer et consulter votre revendeur.
2. Prescriptions de sécurité
La garantie ne s’applique pas aux dommages survenus
en négligeant certaines directives de cette notice et
votre revendeur déclinera toute responsabilité pour les
problèmes et les défauts qui en résultent.
Ne pas raccorder un appareil avec une charge supérieure
à 16A.
Veiller à insérer complètement la fiche dans la prise du
minuteur.
Essuyer l’appareil régulièrement avec un chiffon sec.
Éviter l’usage d’alcool et de solvants. Ne pas tremper le
minuteur dans un liquide quelconque.
Le raccordement d‘un calorifère est déconseillé.
Les dommages occasionnés par des modifications à
l’appareil par le client, ne tombent pas sous la garantie.
Garder votre E305W hors de la portée de personnes non
qualifiées et de jeunes enfants.
3. Description
WEEK, HOUR, MINUTE : Paramétrage du jour, de l’heure
et des minutes (avec CLOCK ou TIMER).
RST/RCL : Écrasement des programmations.
CLOCK : Paramétrage du jour, de l’heure et des minutes
(avec WEEK, HOUR ou MINUTE), mode 12/24h (avec
TIMER), fonction horaire d’été (avec ON/AUTO/OFF).
TIMER : Paramétrage du jour, de l’heure et des minutes
de la minuterie (avec WEEK, HOUR ou MINUTE), mode
12/24h (avec CLOCK).
ON/AUTO/OFF : Modes d’opération.
RANDOM : Paramétrage ou effacement de la fonction
« Random ».
MASTERCLEAR : Effacement de toutes les données.
4. Première charge d’accu
Raccorder le minuteur au secteur (± 14h) afin de charger
l’accu interne. Enfoncer MASTERCLEAR à l’aide d’un
objet pointu après la charge complète. Le minuteur est
prêt à l’emploi.
5. Emploi
Paramétrage de l’heure
Maintenir enfoncé CLOCK et paramétrer le jour, l’heure
et les minutes avec respectivement WEEK, HOUR et
MINUTE.
Programmation
Enfoncer TIMER pour accéder au premier programme.
Entrer d’abord la combinaison de jours organisés avec
WEEK. Vous avez le choix entre : jour individuel, chaque
jour, chaque jour de la semaine, week-end, chaque jour
de la semaine + samedi, etc.
Ensuite, paramétrer l’heure avec HOUR et MINUTE.
Renfoncer TIMER pour terminer la programmation.
Programmer les intervalles restants comme ci-dessus
en veillant à ne pas recouvrir les intervalles.
ON/AUTO/OFF
Choisir un des modes avec ON/AUTO/OFF.
AUTO : Les intervalles ne seront activés que dans ce
mode.
ON : Alimentation continue. Les intervalles ne seront pas
exécutés.
OFF : Alimentation coupée. Les intervalles ne seront pas
exécutés.
En commutant manuellement du mode ON vers le mode
AUTO, le minuteur ne commutera qu’à partir du premier
intervalle.
Fonction « Random »
Enfoncer RANDOM pour activer la fonction (la fonction
ne sera valable qu’en mode AUTO). Les intervalles
programmés entre 18h00 et 06h00 seront avancés de
10 à 31 minutes.
12/24h Mode
Maintenir enfoncé CLOCK et enfoncer TIMER pour passer
du mode 12h au mode 24h.
Horaire d’été
Maintenir enfoncé CLOCK et enfoncer ON/AUTO/OFF
pour passer au mode d’horaire d’été.
6. Spécifications techniques
Alimentation max. 230VCA / 50Hz
Puissance de commutation max. max. 3600W
Dimensions 125 x 60 x75 mm
Poids 169kg
SA Velleman ne sera aucunement responsable de
dommages ou lésions survenus à un usage (incorrect)
de cet appareil.
Pour plus d’information concernant cet article, visitez
notre site web www.perel.eu.
Toutes les informations présentées dans cette notice
peuvent être modifiées sans notification préalable.
TIMER8S
WEEKTIMER 3600W
1. Inleiding
Aan alle ingezetenen van de Europese Unie
Belangrijke milieu-informatie betreffende dit
product
Dit symbool op het toestel of de verpakking
geeft aan dat, als het na zijn levenscyclus
wordt weggeworpen, dit toestel schade kan toebrengen
aan het milieu.
Gooi dit toestel (en eventuele batterijen) niet bij
het gewone huishoudelijke afval; het moet bij een
gespecialiseerd bedrijf terechtkomen voor recyclage.
U moet dit toestel naar uw verdeler of naar een lokaal
recyclagepunt brengen.
Respecteer de plaatselijke milieuwetgeving.
Hebt u vragen, contacteer dan de plaatselijke autoriteiten
inzake verwijdering.
Dank u voor uw aankoop! Lees deze handleiding grondig
voor u het toestel in gebruik neemt. Werd het toestel
beschadigd tijdens het transport, installeer het dan niet
en raadpleeg uw dealer.
2. Veiligheidsinstructies
De garantie geldt niet voor schade door het negeren van
bepaalde richtlijnen in deze handleiding en uw dealer
zal de verantwoordelijkheid afwijzen voor defecten of
problemen die hier rechtstreeks verband mee houden.
Gebruik deze timer niet met toestel met een belasting
hoger dan 16A.
Zorg ervoor dat de stekker van het aangesloten toestel
goed in de timer steekt.
Maak het toestel geregeld schoon met een droge doek.
Gebruik geen alcohol of solvent. Dompel de timer nooit
in vloeistoffen.
Het aansluiten van verwarmingstoestellen is af te raden.
Schade door wijzigingen die de gebruiker heeft
aangebracht aan het toestel vallen niet onder de
garantie.
Houd dit toestel uit de buurt van kinderen en
onbevoegden.
3. Omschrijving
WEEK, HOUR, MINUTE: Instellen van de dag, het uur en
de minuten (met CLOCK of TIMER).
RST/RCL: Overschrijven van de programma’s.
CLOCK: Instellen van de dag, het uur en de minuten (met
WEEK, HOUR of MINUTE), 12/24h-modus (met TIMER),
zomeruur (met ON/AUTO/OFF).
TIMER: Instellen van de dag, het uur en de minuten
van de timer (met WEEK, HOUR of MINUTE), 1212/24h-
modus (met CLOCK).
ON/AUTO/OFF: Gebruiksmodi.
RANDOM: In- of uitschakelen van de random-functie.
MASTERCLEAR: Alle gegevens wissen.
4. Eerste laadbeurt van de accu
Koppel de timer aan het lichtnet en laad de interne accu
gedurende ± 14 uur. Druk op MASTERCLEAR met een
puntig voorwerp na de complete laadbeurt. De timer is
nu klaar voor gebruik.
5. Gebruik
Instellen van het uur
Houd CLOCK ingedrukt en stel de dag, het uur en de
minuten in met WEEK, HOUR respectievelijk MINUTE.
Programmering
Druk op TIMER om het eerste programma weer te
geven.
Geef eerst de regelmaat in met WEEK. U hebt de keuze
tussen: enkele elke, elke dag, elke weekdag, weekend,
elke weekdag + zaterdag, enz.
Stel vervolgens het uur in met HOUR en MINUTE. Druk
opnieuw op TIMER om te beëindigen.
Programmeer de resterende programma’s en zorg dat de
programma’s elkaar niet overlappen.
ON/AUTO/OFF
Selecteer een gebruiksmodus met ON/AUTO/OFF.
AUTO: De programma’s worden enkel in deze modus
geactiveerd.
ON: Continue stroomvoorziening. Programma’s worden
niet ingeschakeld.
OFF: Geen stroomvoorziening. Programma’s worden niet
ingeschakeld.
Wanneer u manueel van ON-modus naar AUTO-modus
overschakelt, blijft de timer in ON-modus tot het
volgende programma.
Random-functie
Druk op RANDOM om deze functie in te schakelen
(de functie is enkel geldig in de AUTO-modus). De
programma’s tussen 18h00 en 06h00 zullen worden
vervroegd met 10 tot 31 minuten.
12/24h-modus
Houd CLOCK ingedrukt en druk op TIMER om te
schakelen van de 12h-modus naar de 24h-modus.
Zomeruur
Houd CLOCK ingedrukt en druk op ON/AUTO/OFF om
te schakelen van de normale gebruiksmodus naar de
zomeruurmodus.
6. Technische specificaties
Voeding max. 230VAC / 50Hz
Max. schakelvermogen max. 3600W
Afmetingen 125 x 60 x75 mm
Gewicht 169kg
Velleman nv is niet aansprakelijk voor schade of
kwetsuren bij (verkeerd) gebruik van dit toestel.
Voor meer informatie omtrent dit product, zie www.
perel.eu.
De informatie in deze handleiding kan te allen tijde
worden gewijzigd zonder voorafgaande kennisgeving.
TIMER8S
TEMPORIZADOR SEMANAL
3600W
1. Introducción
A los ciudadanos de la Unión Europea
Importantes informaciones sobre el medio
ambiente concerniente este producto
Este símbolo en este aparato o el embalaje
indica que, si tira las muestras inservibles,
podrían dañar el medio ambiente.
No tire este aparato (ni las pilas eventuales) en la basura
doméstica; debe ir a una empresa especializada en
reciclaje. Devuelva este aparato a su distribuidor o a la
unidad de reciclaje local.
Respete las leyes locales en relación con el medio
ambiente.
Si tiene dudas, contacte con las autoridades locales para
residuos.
¡Gracias por haber comprado el E305W! Lea atentamente
las instrucciones del manual antes de usar el aparato. Si
el aparato ha sufrido algún daño en el transporte no lo
instale y póngase en contacto con su distribuidor.
2. Instrucciones de seguridad
Daños causados por descuido de las instrucciones de
seguridad de este manual invalidarán su garantía y su
distribuidor no será responsable de ningún daño u otros
problemas resultantes.
No conecte el aparato a una carga superior a 16A.
Asegúrese de que el enchufe del aparato conectado esté
correctamente introducido en el temporizador.
Limpie el aparato regularmente con un paño seco.
Evite el uso de alcohol y de disolventes. No sumerja el
temporizador en cualquier líquido.
No conecte aparatos de calefacción.
Los daños causados por modificaciones no autorizadas,
no están cubiertos por la garantía.
Mantenga el E305W lejos del alcance de personas no
capacitadas y niños.
3. Descripción
WEEK, HOUR, MINUTE: Ajustar el día, la hora y los
minutos (con CLOCK o TIMER).
RST/RCL: sobre-escribir programas.
CLOCK: Ajustar el día, la hora y los minutos (con WEEK,
HOUR o MINUTE), modo 12/24h (con TIMER), función
‘tiempo de verano’ (con ON/AUTO/OFF).
TIMER: Ajustar el día, la hora y los minutos del
temporizador (con WEEK, HOUR o MINUTE), modo 12/24h
(con CLOCK).
ON/AUTO/OFF: Modos de funcionamiento.
RANDOM: Activar o desactivar la función « Random ».
MASTERCLEAR: Borrar todos los datos.
4. Primera carga de la batería
Conecte el temporizador a la red (± 14h) para cargar
la batería interna. Pulse MASTERCLEAR con un
objeto puntiagudo después de la carga competa. El
temporizador está listo para utilizar.
5. Uso
Ajustar la hora
Mantenga pulsado CLOCK y ajuste el día, la hora y los
minutos con respectivamente WEEK, HOUR y MINUTE.
Programación
Pulse TIMER para entrar en el primer programa.
Primero, introduzca la combinación de días con WEEK.
Puede elegir entre: día individual, cada día, cada día
de la semana, fin de semana, cada día de la semana
+ sábado, etc.
Luego, ajuste la hora con HOUR y MINUTE. Vuelva a
pulsar TIMER para terminar la programación.
Programe los programas restantes y asegúrese de que
no coincidan.
ON/AUTO/OFF
Seleccione uno de los modos con ON/AUTO/OFF.
AUTO: Los programas sólo se activarán en este modo.
ON: Alimentación continua. Los programas no se
activarán.
OFF: Alimentación desactivada. Los programas no se
activarán.
Al conmutar manualmente del modo ON al modo AUTO,
el temporizador queda en el modo ON hasta el siguiente
programa.
Función « Random »
Pulse RANDOM para activar la función (la función sólo es
válida en el modo AUTO). Los programas entre 18h00 y
06h00 se adelantarán de 10 a 31 minutos.
Modo 12/24h
Mantenga pulsado CLOCK y pulse TIMER para conmutar
del modo 12h al modo 24h.
Tiempo de verano
Mantenga pulsado CLOCK y pulse ON/AUTO/OFF para
entrar en el modo ‘horario de verano’.
6. Especificaciones
Alimentación máx. 230VCA / 50Hz
Potencia de conmutación máx. máx. 3600W
Dimensiones 125 x 60 x75 mm
Peso 169kg
Velleman SA no será responsable de daños ni lesiones
causados por un uso (indebido) de este aparato.
Para más información sobre este producto, visite nuestra
página web www.perel.eu.
Se pueden modificar las especificaciones y el contenido
de este manual sin previo aviso.
TIMER8S
WOCHENZEITSCHALTUHR
3600W
1. Einführung
An alle Einwohner der Europäischen Union
Wichtige Umweltinformationen über dieses Produkt
Dieses Symbol auf dem Produkt oder der
Verpackung zeigt an, dass die Entsorgung
dieses Produktes nach seinem Lebenszyklus
der Umwelt Schaden zufügen kann.
Entsorgen Sie die Einheit (oder verwendeten
Batterien) nicht als unsortiertes Hausmüll; die Einheit oder
verwendeten Batterien müssen von einer spezialisierten
Firma zwecks Recycling entsorgt werden.
Diese Einheit muss an den Händler oder ein örtliches
Recycling-Unternehmen retourniert werden.
Respektieren Sie die örtlichen Umweltvorschriften.
Falls Zweifel bestehen, wenden Sie sich für
Entsorgungsrichtlinien an Ihre örtliche Behörde.
Wir bedanken uns für den Kauf des E305W! Lesen Sie
diese Bedienungsanleitung vor Inbetriebnahme sorgfältig
durch. Überprüfen Sie, ob Transportschäden vorliegen.
Sollte dies der Fall sein, verwenden Sie das Gerät nicht
und wenden Sie sich an Ihren Händler.
2. Sicherheitshinweise
Bei Schäden, die durch Nichtbeachtung der
Bedienungsanleitung verursacht werden, erlischt
der Garantieanspruch. Für daraus resultierende
Folgeschäden übernimmt der Hersteller keine Haftung.
Verbinden Sie diesen Timer nicht mit einem Gerät mit
einer Last über 16A.
Beachten Sie, dass Sie den Stecker vom angeschlossenen
Gerät richtig in den Timer gesteckt haben.
Verwenden Sie zur Reinigung ein sauberes, trockenes
Tuch. Verwenden Sie auf keinen Fall Alkohol oder
irgendwelche Lösungsmittel. Tauchen Sie den Timer nie
in Flüssigkeiten ein.
Schließen Sie keine Heizgeräte an.
Beachten Sie, dass Schäden, die durch manuelle
Veränderungen an diesem Gerät verursacht werden,
nicht unter den Garantieanspruch fallen.
Halten Sie Kinder und Unbefugte vom Gerät fern.
3. Umschreibung
WEEK, HOUR, MINUTE: Den Tag, die Uhrzeit und die
Minuten (mit CLOCK oder TIMER) einstellen.
RST/RCL: Die Programme überschreiben.
CLOCK: : Den Tag, die Uhrzeit und die Minuten (mit WEEK,
HOUR oder MINUTE), den 12/24Std.-Modus (mit TIMER),
die Sommerzeit-Funktion (mit ON/AUTO/OFF) einstellen.
TIMER: Den Tag, die Uhrzeit und die Minuten der
Zeitschaltuhr (mit WEEK, HOUR oder MINUTE), den
12/24Std.-Modus (mit CLOCK) einstellen.
ON/AUTO/OFF: Betriebsarten.
RANDOM: Die Random-Funktion ein- oder ausschalten.
MASTERCLEAR: Alle Daten löschen.
4. Die Batterie zum ersten Mal laden
Verbinden Sie die Zeitschaltuhr mit dem Netz und
laden Sie die interne Batterie während ± 14 Stunden.
Drücken Sie MASTERCLEAR nach einem vollständigen
Ladevorgang mit einem spitzen Gegenstand. Die
Zeitschaltuhr ist nun gebrauchsfertig.
5. Anwendung
Die Uhrzeit einstellen
Halten Sie CLOCK gedrückt und stellen Sie den Tag, die
Uhrzeit und die Minuten mit WEEK, HOUR und MINUTE
ein.
Programmierung
Drücken Sie TIMER, um das erste Programm
anzuzeigen.
Geben Sie zuerst die Regelmäßigkeit mit WEEK ein. Wahl:
einzelner Tag, jeder Tag, jeder Wochentag, Wochenende,
jeder Wochentag + Samstag, usw.
Stellen Sie danach die Uhrzeit mit HOUR und MINUTE ein.
Drücken Sie TIMER erneut zum Beenden.
Programmieren Sie die übrigen Programme und
sorgen Sie dafür, dass die Programme einander nicht
überschneiden.
ON/AUTO/OFF
Wählen Sie mit ON/AUTO/OFF eine Betriebsart aus.
AUTO: Die Programme werden nur in diesem Modus
aktiviert.
ON: dauernde Stromversorgung. Die Programme werden
nicht eingeschaltet.
OFF: keine Stromversorgung. Die Programme werden
nicht eingeschaltet.
Wenn Sie manuell vom ON-Modus auf AUTO-Modus
umschalten, bleibt der Timer bis das nächste Programm
im ON-Modus.
Random-Funktion
Drücken Sie RANDOM, um diese Funktion einzuschalten
(die Funktion ist nur im AUTO-Modus gültig). Die
Programme zwischen 18h00 und 06h00 werden mit 10
bis 31 Minuten vorgezogen.
12/24h-Modus
Halten Sie CLOCK gedrückt und drücken Sie TIMER, um
vom 12Std.-Modus auf 24Std.-Modus umzuschalten.
Sommerzeit
Halten Sie CLOCK gedrückt und drücken Sie ON/AUTO/
OFF, um von der normalen Betriebsart auf Sommerzeit-
Modus zu schalten.
6. Technische Daten
Stromversorgung max. 230VAC / 50Hz
Max. Schaltleistung max. 3600W
Abmessungen 125 x 60 x75 mm
Gewicht 169kg
Velleman NV übernimmt keine Haftung für Schaden oder
Verletzungen bei (falscher) Anwendung dieses Gerätes.
Für mehr Informationen zu diesem Produkt, siehe www.
perel.eu.
Alle Änderungen ohne vorherige Ankündigung
vorbehalten.
TIMER8S
TIMER DIGITALE SETTIMANALE
3500 W
1. Introduzione
A tutti i residenti dell’Unione Europea
Importanti informazioni ambientali relative a questo
prodotto
Questo simbolo riportato sul prodotto o
sull’imballaggio, indica che è vietato smalt-
ire il prodotto nell’ambiente al termine del
suo ciclo vitale in quanto può essere nocivo
per l’ambiente stesso. Non smaltire il prodotto (o le
pile, se utilizzate) come rifiuto urbano indifferenziato;
dovrebbe essere smaltito da un’impresa specializzata
nel riciclaggio.
Per informazioni più dettagliate circa il riciclaggio di
questo prodotto, contattare l’ufficio comunale, il servizio
locale di smaltimento rifiuti oppure il negozio presso il
quale è stato effettuato l’acquisto.
La ringraziamo per aver acquistato il TIMER8S! Si prega
di leggere attentamente le informazioni contenute nel
presente manuale prima di mettere in servizio il dis-
positivo. Assicurarsi che l’unità non sia stata danneg-
giata durante il trasporto; in tale evenienza, contattare
il proprio fornitore.
2. Informazioni relative alla sicurezza
• I danni derivanti dall’inosservanza delle indicazioni
fornite nel presente manuale non sono coperti da ga-
ranzia; il venditore non sarà ritenuto responsabile di
eventuali danni cagionati a cose o persone.
• Non collegare al dispositivo carichi con assorbimento
superiore a 16 A.
• Assicurarsi sempre che la spina del carico sia ben
inserita nella presa del dispositivo.
• Pulire il dispositivo regolarmente con un panno as-
ciutto. Non usare alcool o solventi. Non immergere il
dispositivo in acqua o altri liquidi.
• Si raccomanda di non collegare al timer apparecchi
di riscaldamento o similari.
• Eventuali danni causati da modifiche apportate al
dispositivo, da parte dell’utente, non sono coperti da
garanzia.
• Tenere il dispositivo lontano dalla portata di bambini
e persone non qualificate.
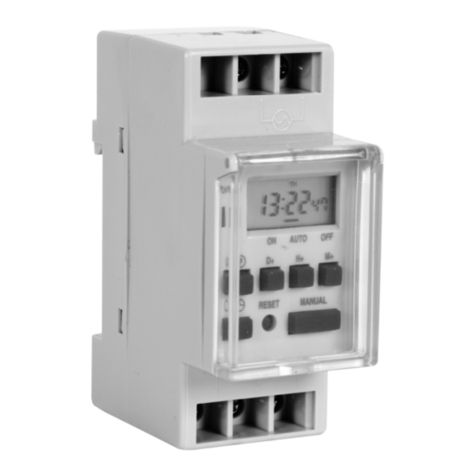
3. Descrizione tasti
1. WEEK, HOUR, MINUTE: tasti d’impostazione giorno
della settimana, ore e minuti (in combinazione con i
tasti CLOCK o TIMER).
2. RST/RCL: cancellazione dato inserito/programmazi-
one.
3. CLOCK: tasto d’impostazione giorno della settimana,
ora e minuti (in combinazione con i tasti WEEK, HOUR
e MINUTE), modalità 12/24h (in combinazione con il
tasto TIMER), funzione ora legale (in combinazione con
il tasto ON/AUTO/OFF).
4. TIMER: tasto d’impostazione giorno, ore e minuti
del timer (in combinazione con i tasti WEEK, HOUR o
MINUTE), modalità 12/24h (in combinazione con il tasto
CLOCK).
5. ON/AUTO/OFF: tasto modalità di funzionamento.
6. RANDOM: tasto per impostazione o cancellazione
funzione Random.
7. MASTERCLEAR: pulsante di reset (cancellazione di
tutte le impostazioni).
4. Ricarica iniziale della batteria
Prima dell’uso, connettere il timer alla presa di rete per
alcune ore (almeno 14) per consentire alla batteria in-
terna di ricaricarsi. Terminata la ricarica, premere con
un oggetto appuntito il pulsante MASTERCLEAR; il dis-
positivo ora è pronto per essere impostato.
5. Utilizzo
Impostazione dell’orologio.
Prima di usare il timer, occorre impostare l’orologio.
Premere e tenere premuto il tasto CLOCK ed impostare
il giorno della settimana, le ore e i minuti utilizzando
rispettivamente il tasto WEEK, HOUR e MINUTE.
Programmazione del timer
Il dispositivo offre la possibilità di impostare fino a 10
programmi di accensione/spegnimento.
1. Premere una volta il tasto TIMER per entrare nel pro-
gramma numero 1 (il display mostra 1 ON).
2. Premere quindi il tasto WEEK tante volte quante
necessarie per impostare il periodo di accensione de-
siderato (legenda giorni della settimana: Mo=Lunedì
- Tu=Martedì - We=Mercoledì - Th=Giovedì Fr=Venerdì
- Sa=Sabato - Su=Domenica).
3. È possibile scegliere tra: singolo giorno, tutti i giorni,
giorni feriali (da lunedì a venerdì), solo weekend (sa-
bato
e domenica), giorni feriali (da lunedì a venerdì) + il sa-
bato, ecc....
4. Impostare quindi l’ora d’intervento utilizzando i tasti
HOUR e MINUTE.
5. Premere nuovamente TIMER per passare alla pro-
grammazione dello spegnimento (il display mostra 1
OFF).
6. Ripetere le operazioni dal punto 2 per impostare i dati
relativi allo spegnimento.
7. Se lo si desidera, impostare gli altri programmi dis-
ponibili premendo sempre il tasto TIMER (facendo at-
tenzione che non si sovrappongano) o premere il tasto
CLOCK per terminare la programmazione e tornare alla
visualizzazione dell’orologio.
Nota: Se si desidera cancellare l’ultimo dato inserito o
l’impostazione di un programma, premere il tasto RST/
RCL. Ripremendo tale tasto il dato viene ripristinato.
Impostazione ON/AUTO/OFF
Scegliere la funzione desiderata premendo il tasto ON/
AUTO/OFF (detta funzione viene indicata sul display).
AUTO: il timer si accenderà e spegnerà secondo il pro-
gramma impostato dall’utente.
ON: il timer è permanentemente acceso e nessun pro-
gramma viene eseguito.
OFF: il timer è permanentemente spento e nessun pro-
gramma viene eseguito.
Quando si passa dalla modalità ON alla modalità AUTO,
il timer rimane nella modalità ON fino al successivo co-
mando di spegnimento programmato.
Funzione random (casuale)
Premere il tasto RANDOM per attivare questa funzione
(si tenga presente che il dispositivo funzionerà solo
nella modalità AUTO); sul display compare la lettera
“R”. Tale funzione non può essere attivata durante la
programmazione del timer. I programmi stabiliti tra le
ore 6 PM e 6 AM saranno eseguiti per un tempo che
varia da 10 a 31 minuti.
Modalità 12/24h
Tenere premuto il tasto CLOCK quindi premere il tasto
TIMER per passare dalla modalità 12h a quella 24h e
viceversa.
Funzione ora solare / ora legale
E’ possibile spostare avanti di 1 ora l’orologio del timer
(ora legale) semplicemente premendo contemporanea-
mente i tasti CLOCK e ON/AUTO/OFF. Sul fianco destro
del display apparirà una “S” ad indicare l’attivazione
dell’ora legale (Summertime). Per ripristinare l’ora so-
lare ripetere la medesima operazione: la “S” scomparirà
dal display.
6. Specifiche tecniche
Alimentazione 230 VAC / 50 Hz
Carico massimo 3500 W (16 A)
Dimensioni 125 x 60 x75 mm
Peso totale 169 kg
In nessun caso Velleman nv ed i suoi rivenditori possono
essere ritenuti responsabili di danni o lesioni derivanti
da un uso improprio od errato di questo dispositivo.
Per ulteriori informazioni relative a questo prodotto, vi
preghiamo di visitare il nostro sito www.velleman.eu.
Le informazioni contenute in questo manuale possono
essere soggette a modifiche senza alcun preavviso.

Other Velleman Timer manuals

Velleman TIMER10N User manual

Velleman

Velleman TIMER10N User manual

Velleman ED8A000 User manual

Velleman

Velleman ED8A000 User manual

Velleman K8041 User manual

Velleman

Velleman K8041 User manual

Velleman TIMER6 User manual

Velleman

Velleman TIMER6 User manual

Velleman MK188 User manual

Velleman

Velleman MK188 User manual

Velleman Timer10 User manual

Velleman

Velleman Timer10 User manual

Velleman TIMER11 User manual

Velleman

Velleman TIMER11 User manual

Velleman VM102 User manual

Velleman

Velleman VM102 User manual

Velleman EDIN305N User manual

Velleman

Velleman EDIN305N User manual

Velleman WT3116 User manual

Velleman

Velleman WT3116 User manual

Velleman Perel E305W2 User manual

Velleman

Velleman Perel E305W2 User manual

Velleman K2579 User manual

Velleman

Velleman K2579 User manual

Velleman TIMER8 User manual

Velleman

Velleman TIMER8 User manual

Velleman PEREL E305DD User manual

Velleman

Velleman PEREL E305DD User manual

Velleman TIMER7 User manual

Velleman

Velleman TIMER7 User manual

Velleman TIMER5 User manual

Velleman

Velleman TIMER5 User manual

Velleman Timer10 User manual

Velleman

Velleman Timer10 User manual

Velleman TIMER9 User manual

Velleman

Velleman TIMER9 User manual

Velleman TIMER9 User manual

Velleman

Velleman TIMER9 User manual

Velleman TIMER2 User manual

Velleman

Velleman TIMER2 User manual

Velleman TIMER12 User manual

Velleman

Velleman TIMER12 User manual

Velleman PEREL E305WON User manual

Velleman

Velleman PEREL E305WON User manual

Popular Timer manuals by other brands

Maestro MA-T51MN user manual

Maestro

Maestro MA-T51MN user manual

LW Scientific MKT-7.5.3-L-131 instruction manual

LW Scientific

LW Scientific MKT-7.5.3-L-131 instruction manual

Intermatic ST01 Series Easy setting guide

Intermatic

Intermatic ST01 Series Easy setting guide

ETI 806-150 operating instructions

ETI

ETI 806-150 operating instructions

Acroprint 200 Service and parts manual

Acroprint

Acroprint 200 Service and parts manual

tams elektronik MT-1 manual

tams elektronik

tams elektronik MT-1 manual

Orbit 27954 Installation and user manual

Orbit

Orbit 27954 Installation and user manual

Oregon Scientific TR118 user manual

Oregon Scientific

Oregon Scientific TR118 user manual

SOMFY inteo CHRONIS IB installation guide

SOMFY

SOMFY inteo CHRONIS IB installation guide

Timeguard TS840 quick start guide

Timeguard

Timeguard TS840 quick start guide

Theben SELEKTA 171 Top3 RC manual

Theben

Theben SELEKTA 171 Top3 RC manual

Orbis ASTRO SAT Instructions for use

Orbis

Orbis ASTRO SAT Instructions for use

Orbit 94874 user manual

Orbit

Orbit 94874 user manual

STIL 4852 user manual

STIL

STIL 4852 user manual

Conrad 618495 operating instructions

Conrad

Conrad 618495 operating instructions

Solight DT33 instruction manual

Solight

Solight DT33 instruction manual

Grasslin topica smart operating instructions

Grasslin

Grasslin topica smart operating instructions

gefran 550 Installation

gefran

gefran 550 Installation

manuals.online logo
manuals.online logoBrands
  • About & Mission
  • Contact us
  • Privacy Policy
  • Terms and Conditions

Copyright 2025 Manuals.Online. All Rights Reserved.