Precautions
1. The BG-C2 should only be used with compatible
devices specified in this manual.
2. Only use with batteries and battery holders
recommended in this manual.
3. Cover the power terminals with the contact cap
when the BG-C2 is not in use. This prevents
electrical shorts caused by metal objects touching
the power terminals.
4. When the battery holder is removed from the
grip, remove the batteries or place the holder in
a container to prevent electrical shorts caused by
contact with other metal objects.
5. If you notice smoke, an unusual smell or noise from
the battery pack, discontinue use immediately.
Remove the batteries and take the device to a
Vello authorized reseller.
6. Turn the grip power off when not shooting
vertically.
7. The battery level may not display properly if
batteries are inserted before mounting the grip.
8. Remove batteries from the grip when not in use.
9. Do not attempt to disassemble.
10. Avoid water or extreme humidity and keep in a
dry and cool place.
11. Keep out of reach of children.
3
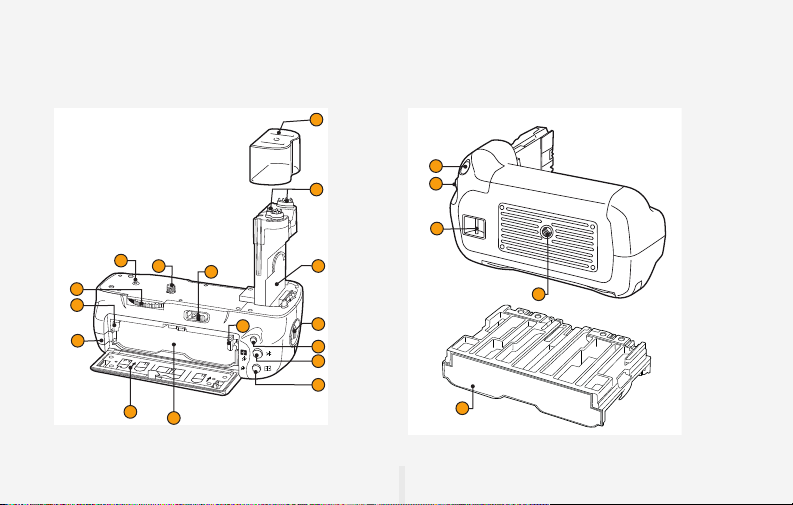
OVERVIEW INTRODUCTION
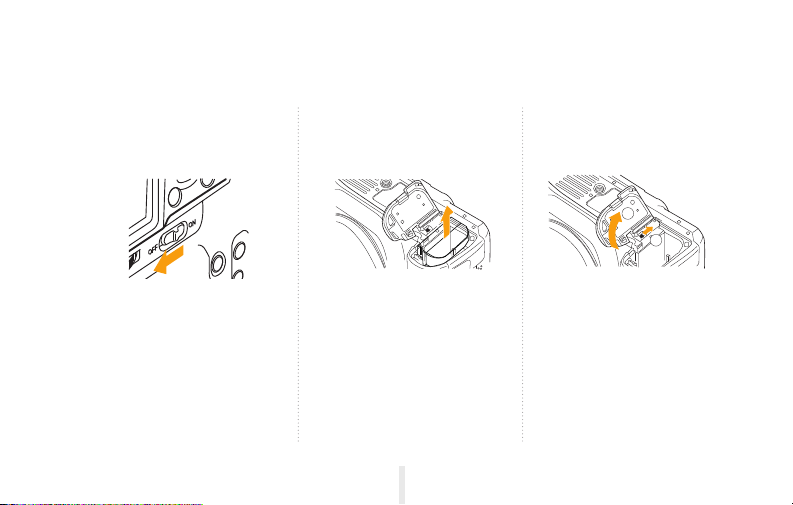
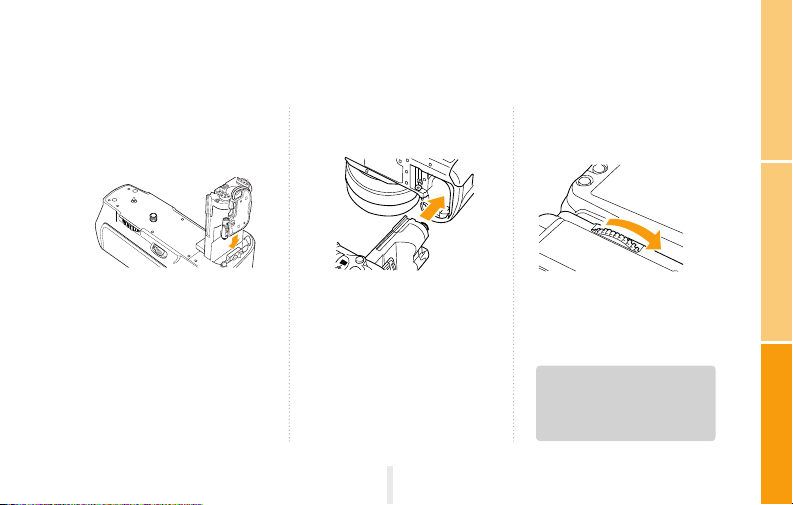
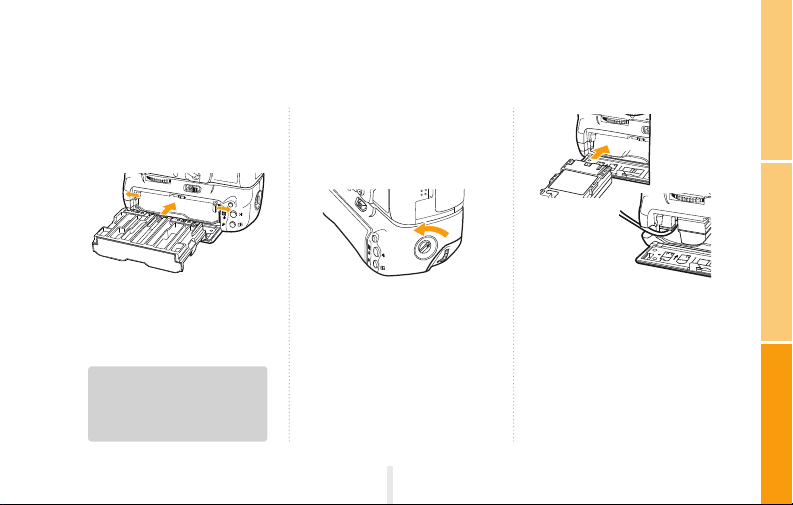
ASSEMBLY