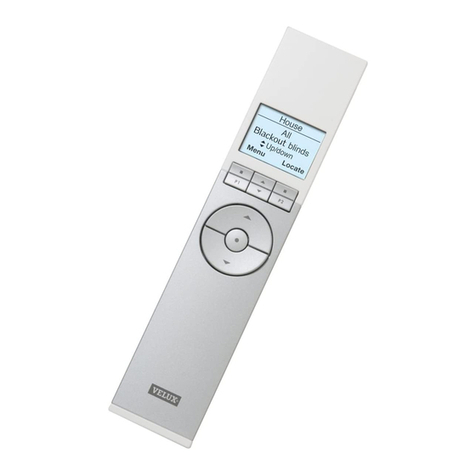
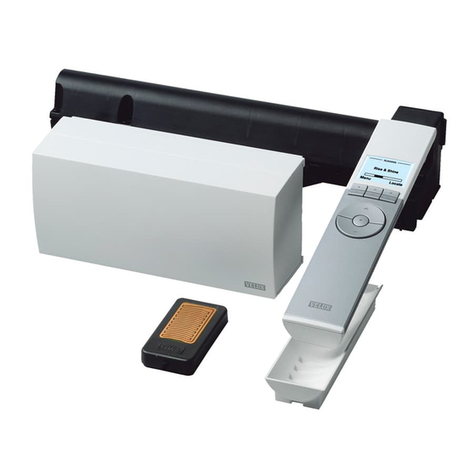
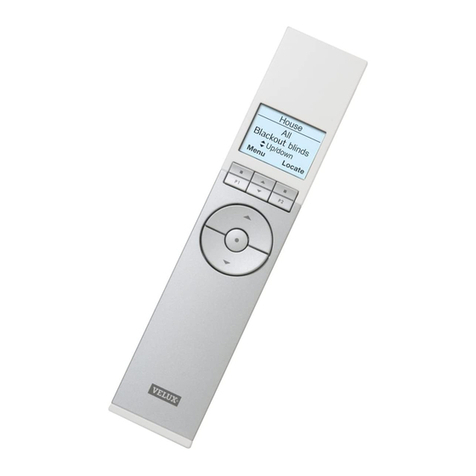
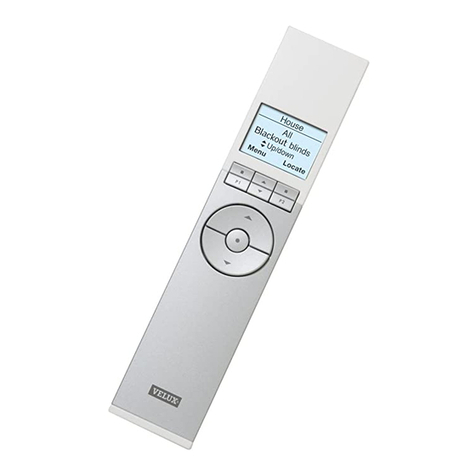
Velux INTEGRA KLR 200 User manual

Quick guide
VELUX INTEGRA®
KLR 200
ENGLISH
DEUTSCH
FRANÇAIS
DANSK
NEDERLANDS
ITALIANO
ESPAÑOL
BOSANSKI
БЪЛГАРСКИ
ČESKY
EESTI
HRVATSKI
LATVISKI

English
Getting started 5-23
Deutsch
Erste Schritte 25-43
Français
Mise en service 45-63
Dansk
Kom godt i gang 65-83
Nederlands
Verkorte gebruiksinstructie 85-103
Italiano
Rapida guida introduttiva 105-123
Español
Guía rápida 125-143
Bosanski
Kako početi 145-163
Български
Начално запознаване 165-183
Česky
Začínáme 185-203
Eesti
Alustamine 205-223
Hrvatski
Kako početi 225-243
Latviski
Produkta iedarbināšana 245-263

English VELUX®5
Important information 6-7
Getting started
Initial set-up 8-9
Basic operation 10-12
If the initial set-up fails 13
Adding products
Adding more products to the control pad 14-15
Adding control pad 16-18
All the rest
Resetting control pad 19
Operation in case of power failure, discharged battery
or if the control pad has been mislaid 20
Getting more information 21
Contents
Congratulations on your new VELUX INTEGRA®product!
Thank you for buying this VELUX INTEGRA®product.
The control pad has been produced and tested in accordance with the
newest methods and strictest requirements and will help you to get the
most out of your VELUX INTEGRA®products.
This short guide will help you get started with your new control pad.
When you see a ?in the control pad display, you can, by tapping on it,
find short instructions about the current screen. If you want more
information, you can get the full instructions from your VELUX sales
company, see telephone list or www.velux.com (see the section Getting
more information to determine the version number of your control pad).

English English
6 VELUX®VELUX®7
Product
• The control pad has been designed for use with genuine VELUX INTEGRA®
products. Connection to other products may cause damage or malfunction.
• The control pad is compatible with products with the io-homecontrol®logo.
• Electrical products must be disposed of in conformity with national regulations for
electronic waste and not with household waste.
• Used batteries must not be disposed of together with household waste but have to
be disposed of in conformity with the relevant national environmental regulations.
Batteries contain substances that can be harmful if not handled and recycled
correctly.
• Use local authority battery disposal point where available.
• The packaging can be disposed of with usual household waste.
• Sound pressure level: LpA ≤ 70 dB(A).
• Radio frequency band: 868 MHz.
• Radio frequency range: 200 m free field. Depending on building construction, the
indoor range is approx 20 m. However, constructions with reinforced concrete,
metal ceilings and plaster walls with steel members may reduce
the range.
• Expected battery lifetime of control pad: Up to 1 year.
• Expected battery lifetime of solar-powered window operator: Approx 10 years.
Maintenance and service
• Disconnect mains or battery supply before carrying out any maintenance or service
work to the window and products connected to it and ensure that it cannot be
reconnected unintentionally.
• Maintenance and installation must be carried out in consideration to Health and
Safety at Work requirements.
• If mains cable is damaged, it must be replaced by qualified personnel in accordance
with national regulations.
• Spare parts are available through your VELUX sales company. Please provide
information from the data label.
• If you have any technical questions, please contact your VELUX sales company,
see telephone list or www.velux.com.
Important information Important information
io-homecontrol®provides advanced and secure radio technology that is easy to install.
io-homecontrol®labelled products communicate with each other, improving comfort,
security and energy savings.
www.io-homecontrol.com
Read instructions carefully before installation. Please keep instructions for future
reference and hand them over to any new user.
Safety
• Control pad KLR 200 can be used by persons (aged 8 years and above) with suf-
ficient experience and knowledge if they have been given instruction
concerning its safe use and understand the hazards involved. Cleaning and user
maintenance must not be made by unsupervised children.
• Children must not play with the window and its electrical products, and the
control pad should be kept out of their reach.
• If repair or adjustment work is needed, disconnect mains or battery supply and
ensure that it cannot be reconnected unintentionally.
• Before operating, ensure that the window and its electrical products can be oper-
ated without risk of damage to property or injury to people or animals.
• For personal safety, never have your hand or body out of the window without first
having switched o the mains or battery supply.
Function
• If the rain sensor gets wet, the window operator automatically closes the window;
however, the ventilation flap remains open.
• Disabling the rain sensor while the window is open implies a risk of rain water
entering the building.
• To prevent the window from closing because of very fine/weak rain, fog or dew,
the rain sensor is equipped with a heating element to keep the surface dry.
• If the window has been opened manually, the window operator will not be acti-
vated via the rain sensor or other automatic functions.
• From fully open, it will take up to one minute from the time of activation before
the window is completely closed. Therefore, in case of sudden rain, water may
enter the room before the window is closed.
• The symbol on the data label of the window operator indicates that the win-
dow operator has an automatic closing function, closing the window at low force
so as not to cause injury to people or objects. However, be aware of the risk of
people or objects getting stuck. Under certain circumstances, the window will not
be able to close immediately because of the low closing force. In these instances,
the window will make up to 4 attempts to close, using an increased closing force.
Always ensure that the window has been closed completely.
• In case of snow and/or ice, the operation of the window may be blocked.
• It is recommended to place a control pad in the room where the window and its
electrical products have been installed.

English English
8 VELUX®VELUX®9
Before you can operate your
VELUX INTEGRA®products, they
must be registered in the control
pad.
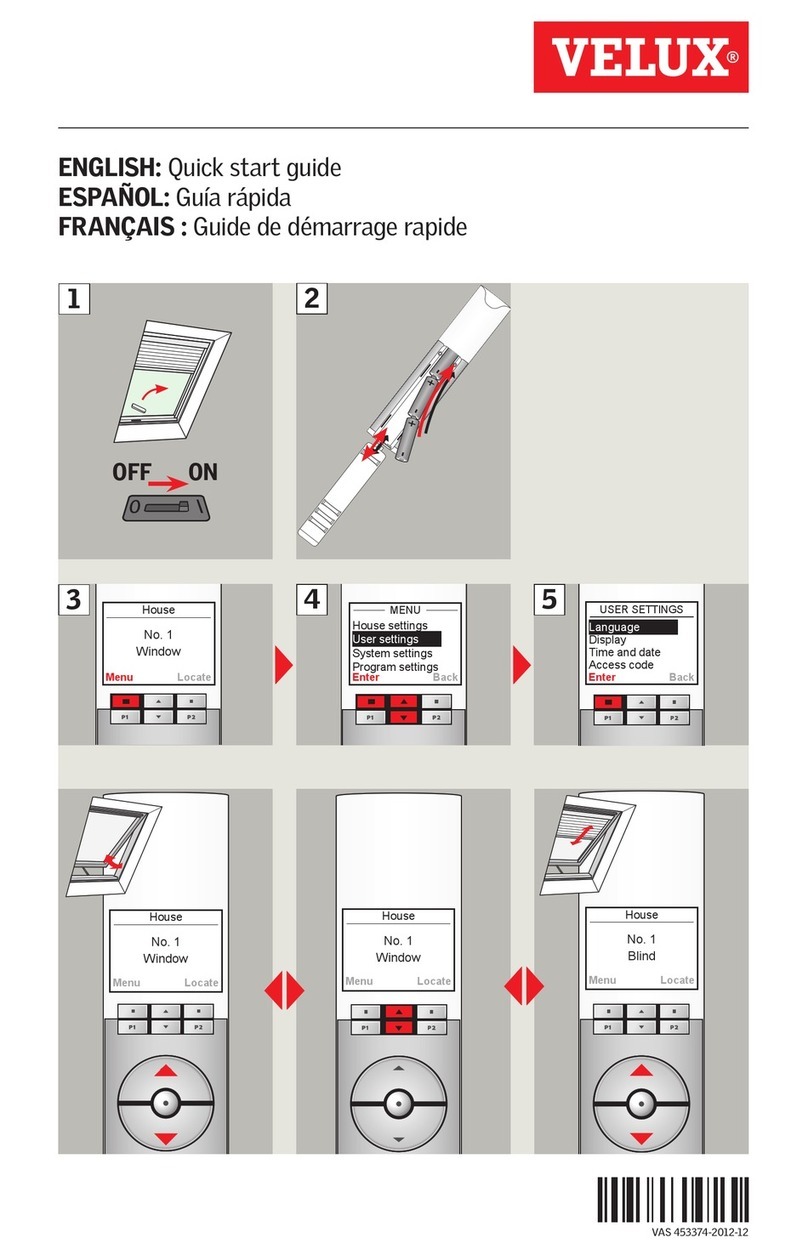
Remove the battery compartment
lid by pressing the release button
with a screwdriver as illustrated
1, 2).
Insert batteries (type AA/LR6) 3.
Replace lid.
In the display screen, roll the wheel
in the directions of the arrows to
choose language 1.
Tap 2.
Follow the directions in the display
and tap when you are ready.
Tap when the control pad has
found all products.
Note: Tap "Search again" if the
control pad does not find all the
products, and follow the instruc-
tions in the display. Go to the
section If the initial set-up fails, if
the control pad still has not found
all the products even if they are
connected to power.
Tap "OK".
Getting started
Initial set-up
Getting started
Initial set-up
12
3
1
2 5
4
3
1
2

English English
10 VELUX®VELUX®11
You operate all products by tapping
icons/buttons or by dragging the
slider and tapping the bar in the
display.
The product you can operate is
shown in the middle of the display.
If more products are registered in
the control pad, the products are
shown as shadows in the display
sides. Select the product you want
to operate by swiping a finger over
the display in the directions of the
arrows.
Operation of windows:
1Close
2Stop
3Open
4Open ventilation flap only. The
window is still closed.
5Drag the slider or tap the bar
to open the window to desired
position. The position of the
window from 0-100 is shown in
the bottom right corner.
6Tap the clock to close the win-
dow automatically after a given
period of time. Choose for how
many minutes the window is to
be open and tap "OK".
Operation of sunscreening products,
in this case a Venetian blind:
1Run up
2Stop
3Run down
4Drag the slider or tap the bar to
set the position of the Venetian
blind. The position of the Vene-
tian blind from 0-100 is shown in
the bottom right corner.
5Tap to set the tilting of the
slats. This only applies to prod-
ucts with two functions, such as
Venetian blinds.
Tap or to set the tilting of
the slats.
Drag the slider or tap the bar to
set the tilting of the slats. The
tilting of the slats from 0-100 is
shown in the bottom right corner.
Getting started
Basic operation
Getting started
Basic operation
1 2 3
5
4
6
3
21
5
4
5 5

English English
12 VELUX®VELUX®13
Turn on/Home/Stop all products
To prolong the lifetime of the con-
trol pad batteries, the display goes
into sleep mode shortly after the
last touch. You turn on the display
again by tapping .
When the display is on, a tap on
takes you back to the first product
in the product navigator.
Touching and holding for at least
3 seconds stops all products.
Functions
The button gives access to a
number of standard programs
which help you to get even more
out of your VELUX products. You
can also adjust the programs to
your needs or even make your own
programs.
Also tap to change the settings
in your control pad or to add,
change products etc.
Centre-pivot roof windows
Open window manually (if the
window is already open, close it by
pressing the test button on the win-
dow operator). Press test button on
the window operator for at least
10 seconds. The window operator
and other electrical products on the
window will run briefly back and
forth. Frame lights, if installed, will
flash briefly.
If the control pad cannot find certain products, you can make the
products ready for registration by manually resetting them to the initial
factory settings.
Note: Reset products cannot be operated until they have been registered
in the control pad again. See section Initial set-up.
Reset window according to window type:
Flat roof windows
Carefully remove the cover cap on
the kerb. Press the test button on
the window operator behind the
cover cap for at least 10 seconds.
The window operator and other
electrical products on the window
will run briefly back and forth. Refit
cover cap.
Getting started
Basic operation
Getting started
If the initial set-up fails

English English
14 VELUX®VELUX®15
You can operate up to 200 products by registering them in your control
pad.
Tap on the display as shown in the illustrations below to add more prod-
ucts to the control pad.
Tap .
Tap "New product".
Tap "Add new products".
Tap .
Tap when the control pad has
found the products. You can now
operate the new products.
Adding products
Adding more products to the control pad
Adding products
Adding more products to the control pad
1
3
5
2
4

English English
16 VELUX®VELUX®17
If you want to operate your VELUX INTEGRA®products with more than
one control pad, the contents in the control pad in use can be copied to
other control pads.
Note: If you have adjusted the standard programs or made your own
programs, these are not copied to the other control pads.
The instructions below show how to copy between two control pads of
the same type. If you have other controls, you must follow the instruc-
tions for these.
Start with control pad Bwhich is
to receive a copy.
Go to the section Initial set-up and
carry out steps 1-3.
Tap "Receive copy".
Note: Do not tap until step 5.
Carry out steps 2-4 with control
pad Awhich is to send a copy.
Tap .
Tap "New product".
Tap "Copy control pad".
The control pad to send a
copy is called A.
The new control pad to
receive a copy is called B.
Adding products
Adding control pad
Adding products
Adding control pad
1
2
A
A
B
B
3
4
A
A

English English
18 VELUX®VELUX®19
Tap in control pad Afollowed
by in control pad B.
If the display shows "No products
found", tap "Search again" to try
again.
Tap "OK" in control pad B.
Adding products
Adding control pad
All the rest
Resetting control pad
If you want to delete all registered products and personal settings and
start afresh, you can reset the control pad to the initial factory settings.
Note: If you have one control pad only, all the products must be reset
before they can be registered in the control pad again (see the section
If initial set-up fails). If you have a second control pad, you can copy this
to the control pad you are resetting instead (see the section Adding
control pad).
Remove the battery compartment
lid by pressing the release button
with a screwdriver as illustrated
1, 2.
Press the RESET button on the
back of the control pad with
a pointed object for at least
5 seconds 3.
Replace lid.
In the display screen, tap "Yes" to
confirm that you want to reset the
control pad.
The control pad has now been
reset. To use the control pad again,
see the section Initial set-up.
5
6
A
B
B1
2
1
2
3

GGL/GGU
CVP
GGL/GGU
English English
20 VELUX®VELUX®21
In case of power failure or dis-
charged battery, your centre-pivot
window can be closed manually
by disengaging the chain on the
ventilation flap of the window.
See how to close your window man-
ually, depending on window type, in
the full instructions for the control
pad. Please contact your VELUX
sales company, see telephone list or
www.velux.com.
If your control pad has been mislaid,
you can close your window by
pressing a button on the window.
See how to close your window
without control pad, depending on
window type, in the full instructions
for the control pad. Please contact
your VELUX sales company, see
telephone list or www.velux.com.
All the rest
Operation in case of power failure or discharged battery or if the control
pad has been mislaid
All the rest
Getting more information
Tap .
The full instructions for the control pad are available at your VELUX sales
company, see telephone list or www.velux.com. To be able to choose the
instructions belonging to your control pad, you must know the version
number of your control pad.
Below you can see how to find the version number in your control pad.
Tap "About this control pad".
Tap "Help".
See version number under
"Software version".
1
3
2
4Software version:
002.xxx.xxx.xxx

English English
22 VELUX®VELUX®23
In accordance with the European Parliament and Council Directive
2014/35/EU
We herewith declare that VELUX INTEGRA®control pad KLR 200
(3LR A12) has been manufactured in accordance with the harmonised
standard EN 60950-1(2006)+A11(2009)+A1(2010)+A12(2011).
In accordance with the European Parliament and Council Directive
2006/42/EC
We herewith declare that VELUX INTEGRA®products:
• roof windows GGL (-K-- ----21) and GGU (-K-- ----21),
• solar roof windows GGL (-K-- ----30) and GGU (-K-- ----30),
• flat roof window CVP (3MX A02 and 3LR A12),
• conversion kit KMX 200 (3MX A01, 3LA A01 and 3LR A12) for VELUX
roof windows GHL, GHU, GPL, GPU, GTL, GTU and VKU and
• solar conversion kits KSX 100 (3SM B01, 3SD B01 and 3LR A12) and
KSX 100K (3SM BK01 and 3LR A12) for VELUX roof windows GGL and
GGU
have been manufactured in accordance with relevant harmonised stand-
ards EN 60335-1(2002), EN 60335-2-103(2003)+A11(2009),
EN 61558-1(2005)+A1(2009), EN 61558-2-16(2009) and
EN 62233(2008).
All above-mentioned products have been manufactured in accordance
with relevant harmonised standards EN 300220-2(2010),
EN 300440-2(2010), EN 301489-3(2003), EN 55014-1(2006),
EN 55014-2(1997), EN 55022(2010), EN 55024(2010),
EN 61000-3-2(2006) and EN 61000-3-3(1995).
When the above-mentioned VELUX INTEGRA®products are installed
in a system with other VELUX INTEGRA® products in accordance with
the instructions and requirements, the total system complies with the
essential requirements of the Directives 2006/42/EC, 2014/30/EU,
2014/35/EU and 2014/53/EU of the European Parliament and Council.
The roof windows also comply with the Construction Products
Regulation (EU) No. 305/2011. For Declaration of Performance,
please go to www.velux.com.
Declaration of Conformity
VELUX A/S: . . . . . . . . . . . . . . . . . . . . . . . . . . . . . . . . . . . . . . . . . . . . . . . . . . . .
(Jens Aksel Thomsen, Market Approval)
Ådalsvej 99, DK-2970 Hørsholm. . . . . . . . . . . . . . . . . . . . . . . . . . . . . . . . . . .
CE DoC 942000-02
29-10-2015

Deutsch
Wichtige Informationen 26-27
Erste Schritte
Erstinstallation 28-29
Grundfunktionen 30-32
Wenn die Erstinstallation fehlschlägt 33
Hinzufügen von Produkten
Hinzufügen weiterer Produkte in das Control Pad 34-35
Hinzufügen eines Control Pads 36-38
Übriger Teil
Zurücksetzen des Control Pads 39
Betrieb bei Stromausfall, entladenem Akku oder abhanden
gekommenen Control Pad 40
Mehr Information 41
Inhalt
Herzlichen Glückwunsch zu Ihrem neuen VELUX INTEGRA®Produkt!
Vielen Dank für den Kauf dieses VELUX INTEGRA®Produkts.
Das Control Pad wurde nach den neuesten Methoden und Anforderungen
gefertigt und geprüft, um Ihnen noch mehr Freude mit Ihren
VELUX INTEGRA®Produkten zu bereiten.
Diese kurze Einführung wird Ihnen den Einstieg in Ihr neues Control Pad
erleichtern. Wenn Sie auf dem Display des Control Pads ein ?sehen,
können Sie durch das Tippen auf den aktuellen Bildschirm eine Kurzanlei-
tung sehen. Wenn Sie mehr Information benötigen, können Sie die volle
Anleitung über Ihre zuständigen VELUX Vertriebsgesellschaft erhalten,
siehe Telefonverzeichnis oder www.velux.com (siehe den Abschnitt Mehr
Information, um die Versionsnummer Ihres Control Pads zu finden).
VELUX®25

Deutsch Deutsch
Vor Montagebeginn bitte sorgfältig die gesamte Anleitung lesen. Bitte bewahren Sie
die Anleitung für den späteren Gebrauch auf und geben Sie diese an den jeweiligen
neuen Benutzer weiter.
Sicherheit
• Das Control Pad KLR 200 kann von Personen (ab 8 Jahren und älter) mit ausrei-
chenden Erfahrungen und Kenntnissen benutzt werden, wenn sie eine Einweisung in
dessen sichere Nutzung erhalten haben und die damit verbundenen Gefahren verste-
hen. Reinigung und Wartung dürfen nicht von unbeaufsichtigten Kindern ausgeführt
werden.
• Kinder dürfen nicht mit dem Fenster und dessen Elektroprodukten spielen, und das
Control Pad sollte nicht in die Hände von Kindern gelangen.
• Falls Reparaturarbeiten oder Anpassungen erforderlich sind, zuerst die Strom- oder
Akkuversorgung ausschalten und sicherstellen, dass diese nicht unabsichtlich wieder
eingeschaltet werden kann.
• Das Bedienen des Fensters und dessen Elektroprodukte sollte nur dann erfolgen,
wenn dies ohne Risiko für Personen, Tiere oder Gegenstände erfolgen kann.
• Nicht aus dem Fenster lehnen oder eine Hand ins Fenster halten, während die Strom-
oder Akkuversorgung eingeschaltet ist.
Funktion
• Wenn der Regensensor feucht wird, schließt der Fenstermotor automatisch das
Fenster. Die Lüftungsklappe bleibt oen.
• Die Deaktivierung des Regensensors, während das Fenster geönet ist, erhöht die
Gefahr des Wassereintritts.
• Um ein Schließen des Fensters aufgrund von Nebel oder Tau zu verhindern, ist der
Regensensor mit einem Heizelement ausgestattet, so dass die Oberfläche des Sen-
sors trocken bleibt.
• Wenn das Fenster manuell geönet wurde, kann der Fenstermotor vom Regensensor
oder anderen automatischen Funktionen nicht angesprochen werden.
• Bei völlig geönetem Fenster dauert es ca. eine Minute vom Aktivierungszeitpunkt,
bevor das Fenster völlig geschlossen ist. Daher kann bei plötzlichem Platzregen
Wasser in den Raum eindringen, bevor das Fenster vollständig geschlossen ist.
• Das Symbol auf dem Typenaufkleber des Fenstermotors bedeutet, dass der Fens-
termotor eine automatische Schließfunktion hat, die beim Schließen des Fensters
eine reduzierte Schließkraft ausübt, um Verletzungen von Personen und Beschädig-
ungen von Gegenständen zu verhindern. Es ist dennoch zu beachten, dass Personen
oder Gegenstände eingeklemmt werden können. Unter bestimmten Umständen
kann es vorkommen, dass das Fenster wegen der reduzierten Schließkraft nicht
sofort schließt. In diesen Fällen schließt der Fenstermotor das Fenster bis zu 4 Mal,
während die Schließkraft schrittweise erhöht wird. Da der komplette Schließvorgang
durch z. B. Gegenstände in der Fensteröffnung nicht möglich ist, wird empfohlen sich
zu vergewissern, ob das Fenster komplett geschlossen ist.
• Das Bedienen des Fensters kann von Eis oder Schnee blockiert werden.
• Es empfiehlt sich das Control Pad in dem Raum zu platzieren, in dem das Fenster
und dessen Elektroprodukte montiert sind.
Produkt
• Das Control Pad ist für den Betrieb mit originalen VELUX INTEGRA®Produkten
konstruiert worden. Der Anschluss an Produkte anderer Hersteller kann Schäden
oder Funktionsstörungen verursachen.
• Das Control Pad ist mit Produkten mit dem io-homecontrol®Logo kompatibel.
• Elektrische Produkte sind nach nationalen Bestimmungen als elektronischer Müll
zu entsorgen und dürfen nicht in den Hausmüll gelangen.
• Batterien dürfen nicht im Hausmüll gelangen, sondern sind nach den geltenden
Umweltrichtlinien zu entsorgen. Batterien enthalten Stoe, die schädlich sein
können, wenn sie nicht korrekt behandelt und wiederverwertet werden.
• Batterien an Hersteller, Vertreiber oder kommunale Erfassungsstellen zurückge-
ben.
• Die Verpackung kann mit dem Hausmüll entsorgt werden.
• Schalldruckpegel: LpA ≤ 70 dB(A).
• Radiofrequenzband: 868 MHz.
• Reichweite der Radiofrequenz: 200 m im freien Feld. Je nach Baukonstruktion liegt
die Reichweite im Haus bei ca. 20 m. Jedoch können Aufbauten mit verstärktem
Beton, Metalldecken und Gipswänden mit Stahlbewehrungen
die Reichweite verringern.
• Erwartete Lebensdauer der Batterien im Control Pad: Ca. 1 Jahr.
• Erwartete Akkulebensdauer des Solarzellen-Fenstermotors: Ca. 10 Jahre.
Wartung und Service
• Bei Wartung und Service des Fensters oder der Elektroprodukte zuerst die Strom-
bzw. die Akkuversorgung ausschalten bzw. trennen und sicherstellen, dass diese
nicht unabsichtlich wieder eingeschaltet werden kann.
• Wartung und Installation müssen unter Berücksichtigung der Gesundheits- und
Sicherheitsanforderungen am Arbeitsplatz durchgeführt werden.
• Falls die Netzleitung beschädigt wird, muss der Austausch gemäß nationalen
Bestimmungen durch eine qualifizierte Elektro-Fachkraft erfolgen.
• Ersatzteile sind bei Ihrer zuständigen VELUX Vertriebsgesellschaft erhältlich.
Hierzu bitte die Informationen auf dem Typenaufkleber angeben.
• Bei technischen Fragen wenden Sie sich bitte an Ihre zuständige VELUX
Vertriebsgesellschaft, siehe Telefonverzeichnis oder www.velux.com.
Wichtige Informationen Wichtige Informationen
io-homecontrol
®
bietet eine fortschrittliche und sichere Radio-Funktechnologie, die einfach
zu installieren ist. io-homecontrol
®
gekennzeichnete Produkte kommunizieren miteinander
und verbessern somit Komfort, Sicherheit und Energieeinsparung.
www.io-homecontrol.com
26 VELUX®VELUX®27

Deutsch Deutsch
Bevor Sie Ihre VELUX INTEGRA®
Produkte bedienen können, müssen
sie im Control Pad registriert
werden.
Lösen Sie den Batteriedeckel durch
Drücken der Entriegelungstaste
mit einem Schraubendreher wie
abgebildet 1
,
2.
Legen Sie die Batterien ein
(Typ AA/LR6) 3.
Schlieβen Sie mit dem Deckel das
Batteriefach.
Drehen Sie das Rad in die
Pfeilrichtungen, um eine Sprache
zu wählen. 1.
Tippen Sie auf 2.
Folgen Sie den Anweisungen auf
dem Display und tippen Sie auf ,
wenn Sie bereit sind.
Tippen Sie auf , sofern alle Pro-
dukte gefunden sind.
Tippen Sie auf "Erneut suchen",
wenn das Control Pad alle
Produkte nicht finden kann, und
folgen Sie den Anweisungen auf
dem Display. Sofern alle Produkte
weiterhin nicht gefunden sind,
und sie an eine Stromversorgung
angeschlossen sind, gehen Sie zum
Abschnitt Wenn die Erstinstallation
fehlschlägt.
Tippen Sie auf "OK".
Erste Schritte
Erstinstallation
Erste Schritte
Erstinstallation
28 VELUX®VELUX®29
2
1
2 5
4
3
12
3
1

Deutsch Deutsch
Sie bedienen alle Produkte durch
Tippen der Symbole/Tasten oder durch
Ziehen des Schiebereglers oder Tippen
des Balkens auf dem Display.
Das Produkt, das Sie bedienen kön-
nen, wird in der Mitte des Displays
angezeigt. Wenn mehrere Produkte im
Control Pad registriert sind, werden sie
als Schatten an den Seiten des Displays
angezeigt. Wählen Sie das gewünschte
Produkt, indem Sie mit einem Finger
über das Display in die Richtung des
Pfeils streichen.
Bedienung von Fenstern:
1Schließen
2Stopp
3Öffnen
4Öffnen Sie nur die Lüftungsklappe.
Das Fenster ist weiterhin geschlos-
sen.
5Ziehen Sie den Schieberegler oder
tippen Sie auf den Balken, um das
Fenster zur gewünschten Position
zu öffnen. Die Position des Fensters
von 0-100 wird in der unteren
rechten Ecke angezeigt.
6Schließen Sie das Fenster auto-
matisch nach einem gewünschten
Zeitraum. Tippen Sie auf die Uhr
und wählen Sie, wie viele Minuten
das Fenster offen stehen soll, und
tippen Sie auf “OK”.
Bedienung von Sonnenschutz-
produkten. In diesem Fall eine Jalousie:
1Hochfahren
2Stopp
3Herunterfahren
4Ziehen Sie den Schieberegler oder
tippen Sie auf den Balken, um die
Position der Jalousie einzustellen.
Die Position der Jalousie von 0-100
wird in der unteren rechten Ecke
angezeigt.
5Tippen Sie auf , um die Neigung
der Lamellen einzustellen. Dies gilt
nur für Produkte mit zwei Funktio-
nen, wie z. B. Jalousien.
Tippen Sie auf oder , um die
Neigung der Lamellen einstellen zu
können.
Ziehen Sie den Schieberegler oder
tippen Sie auf den Balken, um die
Neigung der Lamellen einzustellen.
Die Neigung der Lamellen von
0-100 wird in der unteren rechten
Ecke angezeigt.
Erste Schritte
Grundfunktionen
Erste Schritte
Grundfunktionen
30 VELUX®VELUX®31
1 2 3
5
4
6
3
21
5
4
5 5

Deutsch Deutsch
Einschalten/Haus/Alle Produkte
stoppen
Um die Lebensdauer der Batterien
im Control Pad zu verlängern, geht
das Display kurz nach der letzten
Berührung in den Ruhemodus. Sie
können das Display wieder einschal-
ten, indem Sie auf tippen.
Wenn das Display eingeschaltet
ist, gelangen Sie durch das Tippen
auf zum ersten Produkt auf der
Startseite zurück.
Eine Berührung von mindestens
3 Sekunden auf stoppt alle
Produkte.
Funktionen
Die Taste ermöglicht den Zugriff
auf eine Reihe von Standard-
Programmen, die Ihnen noch mehr
Freude mit Ihren VELUX Produkten
bereiten können. Sie können auch
die Programme auf Ihre Bedürf-
nisse anpassen oder sogar eigene
Programme erstellen.
Ebenfalls können Sie durch das
Tippen auf die Einstellungen Ih-
res Control Pads ändern, Produkte
hinzufügen oder ändern usw.
Schwingfenster
Öffnen Sie das Fenster manuell
(wenn das Fenster bereits offen
steht, muss es zuerst durch das
Drücken des Test-Knopfes am
Fenstermotor geschlossen werden).
Drücken Sie den Test-Knopf am
Fenstermotor mindestens 10 Se-
kunden. Der Fenstermotor und
die übrigen Elektroprodukte des
Fensters bewegen sich kurz auf und
ab. Eine evtl. installierte Fensterbe-
leuchtung blinkt kurz auf.
Wenn das Control Pad einige Produkte nicht finden kann, können Sie diese
Produkte für die Registrierung manuell vorbereiten durch eine Zurückstel-
lung auf die Werkseinstellungen.
Hinweis: Zurückgesetzte Produkte können nicht bedient werden, bevor sie
in einem Control Pad erneut registriert worden sind. Siehe den Abschnitt
Erstinstallation.
Zurücksetzen eines Fensters nach Fenstertyp:
Flachdachfenster
Entfernen Sie vorsichtig den
Abdeckpfropfen am Aufsatzkranz.
Drücken Sie den Test-Knopf am
Fenstermotor hinter dem Abdeck-
pfropfen mindestens 10 Sekunden.
Der Fenstermotor und die übrigen
Elektroprodukte des Fensters be-
wegen sich kurz auf und ab. Setzen
Sie den Abdeckpfropfen wieder ein.
Erste Schritte
Grundfunktionen
Erste Schritte
Wenn die Erstinstallation fehlschlägt
32 VELUX®VELUX®33

Deutsch Deutsch
Sie können bis zu 200 Produkte in das Control Pad registrieren.
Tippen Sie auf das Display wie in den Abbildungen gezeigt, um weitere
Produkte hinzuzufügen.
Hinzufügen von Produkten
Hinzufügen weiterer Produkte in das Control Pad
Hinzufügen von Produkten
Hinzufügen weiterer Produkte in das Control Pad
Tippen Sie auf .
Tippen Sie auf "Neues Produkt".
Tippen Sie auf "Neue Produkte
hinzufügen".
Tippen Sie auf .
Tippen Sie auf , wenn die
Produkte gefunden wurden.
Sie können die Produkte jetzt
bedienen.
34 VELUX®VELUX®35
1
3
5
2
4

Deutsch Deutsch
Um Ihre VELUX INTEGRA®Produkte mit mehr als einem Control Pad
anzusteuern, können Sie den Inhalt des Control Pads, das bereits ver-
wendet wird, auf andere Control Pads kopieren.
Hinweis: Wenn Sie Standard-Programme angepasst oder eigene
Programme erstellt haben, werden diese nicht auf die anderen
Control Pads kopiert.
Die folgenden Anweisungen zeigen, wie Sie zwischen zwei Control Pads
des gleichen Typs kopieren. Wenn Sie andere Bedieneinheiten haben,
müssen Sie deren Anleitungen folgen.
Beginnen Sie mit Control Pad B,
die eine Kopie erhalten soll.
Gehen Sie zum Abschnitt Erst-
installation und führen Sie die
Schritte 1-3 durch.
Tippen Sie auf "Kopie erhalten".
Hinweis: Tippen Sie nicht auf
bis zum Schritt 5.
Führen Sie die Schritte 2-4 mit
Control Pad Adurch, um eine
Kopie zu senden.
Tippen Sie auf .
Tippen Sie auf "Neues Produkt".
Tippen Sie auf "Control Pad
kopieren".
Hinzufügen von Produkten
Hinzufügen eines Control Pad
Hinzufügen von Produkten
Hinzufügen einer Bedienung
Das Control Pad, das eine
Kopie senden soll, heißt A.
Das Control Pad, das eine
Kopie erhalten soll, heißt B.
36 VELUX®VELUX®37
1
2
A
B
A B 3
4
A
A

1
1
2
3
Deutsch Deutsch
Tippen Sie auf in Control Pad A,
gefolgt von in Control Pad B.
Wenn das Display "Keine Produkte
gefunden" anzeigt, tippen Sie auf
"Erneut suchen", um von vorne
anzufangen.
Tippen Sie auf "OK" in Control
Pad B.
Hinzufügen von Produkten
Hinzufügen eines Control Pads
Übriger Teil
Zurücksetzen des Control Pads
Wenn Sie alle registrierten Produkte und persönliche Einstellungen
löschen und neu starten möchten, können Sie das Control Pad auf die
Werkseinstellungen zurücksetzen.
Hinweis: Wenn Sie nur ein Control Pad haben, müssen alle Produkte
zurückgesetzt werden, bevor sie wieder in das Control Pad registriert
werden können, siehe den Abschnitt Wenn die Erstinstallation fehlschlägt.
Wenn Sie ein zweites Control Pad haben, können Sie stattdessen dieses
auf Ihr zurückgesetztes Control Pad kopieren (siehe den Abschnitt Hinzu-
fügen eines Control Pads).
Lösen Sie den Batteriedeckel
durch Drücken der Entriegelungs-
taste mit einem Schraubendreher
wie in der Abbildung wird 1, 2.
Drücken Sie die RESET-Taste auf
der Rückseite des Control Pads
mindestens 5 Sekunden mit einem
spitzen Gegenstand 3.
Schlieβen Sie mit dem Deckel das
Batteriefach.
Tippen Sie auf "Ja", um zu bestä-
tigen, dass Sie das Control Pad
zurücksetzen möchten.
Das Control Pad ist jetzt zurück-
gesetzt. Um es wieder bedienen
zu können, müssen die Produkte
wieder registriert werden. Siehe
den Abschnitt Erstinstallation.
38 VELUX®VELUX®39
5
6
A
B
B
2
Other manuals for INTEGRA KLR 200
6
Table of contents
Languages:
Other Velux Remote Control manuals

Velux
Velux VSE KLR 100 User manual

Velux
Velux KLR 100 User manual

Velux
Velux VSE KLR 100 Manual

Velux
Velux INTEGRA KLR 200 User manual

Velux
Velux KLR 100 User manual

Velux
Velux VSE KLR 100 User manual

Velux
Velux Integra FMG-R User manual

Velux
Velux VSE KLR 100 User manual

Velux
Velux VSE KLR 100 User manual

Velux
Velux KMX 200 Manual