manuals.online logo
Brands
  1. Home
  2. •
  3. Brands
  4. •
  5. Vents-us
  6. •
  7. Fan
  8. •
  9. Vents-us BUCKET FAN 420 User manual

Vents-us BUCKET FAN 420 User manual

www.ventsus.com MIU_23,24_BF_BFW(USA_120)-01
Bodor Vents, LLC DBA: VENTS-US
11013 Kenwood Road Cincinnati, Ohio 45242
Phone: (513)348-3853
e-mail: [email protected]
BUCKET FAN SERIES
BUCKET FAN WHISPER SERIES
BUCKET FAN 420
BUCKET FAN 1055
BUCKET FAN 1460
BUCKET FAN WHISPER 420
BUCKET FAN WHISPER 1055
BUCKET FAN WHISPER 1460
INSTALLATION GUIDE
The destraticator consists of an axial fan attached to the casing via the vibration mounts. The destraticator has a polymer coated steel casing.
The destraticator is equipped with a single-phase asynchronous motor with an external rotor and an axial impeller. The motor is equipped with built-in thermal protection
enabling its automatic restarting and utilizes rolling-element bearings.The motor protection class is IP 44.
The Bucket Fan Whisper casing has special perforation and a sound-insulating layer of mineral wool to reduce the noise generated by the axial fan. The Bucket Fan Whisper
destraticator has a ow straightener at the discharge which ensures direct air ow and maximum air throw distance.
The destraticator is mounted by means of the bow bracket (Bucket FanWhisper can be xed with 15° steps) as well as the mounting and the safety cables with threaded joints.
8
7
6
9
1
2
3
4
5
Bucket Fan WhisperBucket Fan Bucket Fan Parts
1 Electrical junction box on protective grille
2 Vibration absorbing mount
3 Metal case
4 Handle
5 Handle bolts
6 Casing
7 Sound-Insulation Layer
8 Airow Straightener
9 Wing Head bolt
Prior to Installation:
Read and understand this entire manual. Should you have any questions before, during, or after installation please call your seller or contact VENTS at 888-640-0925 or
service@VentsUS.com.
Check the product for any damage that may have occurred during shipping.
Rotate the impeller by hand to ensure it turns smoothly.
MOUNTING
The Bucket Fan comes with a set of Hanging/Safety Cables with Gripples. The set consists of two Gripples and two cables with a toggle on one end.
NOTE: The Hanging and Safety Cables are the exact same, so there is no need to worry about which one is which.
NOTE: The toggle ends are the ones that are inserted into the handle.
WARNING: Both the Hanging and Safety cables MUST be installed as directed.
INSTALLATION GUIDE
www.ventsus.com MIU_23,24_BF_BFW(USA_120)-01
Bodor Vents, LLC DBA: VENTS-US
11013 Kenwood Road Cincinnati, Ohio 45242
Phone: (513)348-3853
e-mail: [email protected]
Attaching the Bucket Fan with the Hanging Cable and Gripple
Hanging
Cable
Safety
Cable
Tip: It is easier to attach the Hanging Cable and Gripple to the structure rst and then attach the fan with the toggle.
1. Insert the cable into one of the openings in the Gripple
2. Place the cable over the I-beam, truss, or other structure from which it is being hung.
3. Insert the end of the cable into the other opening in the Gripple.
4. Adjust to desired height
5. Insert toggle into the top hole on the handle.
Attaching the Safety Cable
1. Insert the cable into one of the openings in the Gripple
2. Place the cable over the I-beam, truss, or other attaching structure at a 40˚to 50˚angle
3. Insert the end of the cable into the other opening in the Gripple.
4. Insert toggle into the top hole on the handle.
5. Take the slack out of the safety cable by pulling the cable through the Gripple.
NOTE: The cable should not be so tight as to be pulling the fan to one side. The cable should not be so loose that the cable could get caught or tangled in the motor.
The Bucket Fan can be angled if needed. All it takes is a ½” socket wrench. Loosen the bolts on either side of the fan,
place at the angle you want, then re-tighten the bolts.
www.ventsus.com MIU_23,24_BF_BFW(USA_120)-01
Bodor Vents, LLC DBA: VENTS-US
11013 Kenwood Road Cincinnati, Ohio 45242
Phone: (513)348-3853
e-mail: [email protected]
WIRING THE FAN
Bucket Fan 420 Bucket Fan Whisper 420 1.0 A
Bucket Fan 1055 Bucket Fan Whisper 1055 1.0 A
Bucket Fan 1460 Bucket Fan Whisper 1460 2.0 A
Electrical wiring should only be done by a qualied electrician.
Warranty will not cover equipment damage or failure that is
caused by improper installation.
If the fan did not come pre-wired or if a new wire is to be used,
wire the fan as shown in the Figure 6 below.
Use 14 AWG or greater wire.
All set screws must be checked, and retightened where necessary, before installation.
C1
X1
BLACK (LINE) GREEN (PROTECTIVE EARTH)
WHITE (NEUTRAL)
Motor run capacitor
Motor terminal box
~120 VAC 60 Hz
CONTROLLER WIRING AND INSTALLATION
• The following is for the installation of one controller for one fan. Contact VENTS US if you need to operate two or more fans with one controller.
• Refer to Figure 7 for electrical connections.
• Use 18 AWG or greater wire.
• It is important that the controller be properly grounded for effective fan operation and personnel safety.
• Always install the controller in sight of the fan it controls.
• CAUTION: Incorrectly installed fan(s) and/or controller(s) may damage the equipment and void the warranty.
RED
SPEED CONTROLLER
BOX FOR SPEED CONTROLLER
(pre-installed by user)
TO POWER SOURCE
WHITE
WHITE
From Fan GREEN
GREEN
BLACK
BLACK
RED
~120 VAC 60 Hz
~120 VAC 60 Hz
www.ventsus.com MIU_23,24_BF_BFW(USA_120)-01
Bodor Vents, LLC DBA: VENTS-US
11013 Kenwood Road Cincinnati, Ohio 45242
Phone: (513)348-3853
e-mail: [email protected]
1. Application
a) Motor Type – Shaded Pole, P.S.C. and Universal.
b) Required Load – Fans, Blowers and Speed Dependent Loads.
2. Wiring
Warning! Power must be turned o before wiring. Connect control in series with motor and line voltage; never connect control across line. Ground (Earth)** – Be sure to ground
the control using the green wire.
**Some models do not require grounding, therefore, a ground wire is not provided.
3. Mounting
a) Use 2”deep standard electrical box.
b) Secure control with outer bracket tabs.
4. Minimum Speed Adjustment
Important: If this option is not supplied, disregard Step 4 and continue to Step 5. This control was designed to operate on motors used in diverse applications. A minimum speed
adjustment is provided to allow independent control of the minimum speed setting. Minimum speed adjustment ensures motor runs with sucient torque to prevent stalling.
a) Motor must be in actual operating condition to achieve proper speed adjustment. Motor will not slow down unless proper load is applied.
b) Turn main control knob to lowest speed position.
c) Locate and adjust minimum speed setting on front plate with screw driver (rotate clockwise to decrease minimum speed; counter-clockwise to increase minimum speed).
Special Note: For 2.5 and 3.0 Amp models, adjustment of minimum speed is reversed. Rotate clockwise to increase minimum speed; counter-clockwise to decrease minimum
speed.
On some models minimum speed adjustment hole is located on side of control.
d) Motor will now operate from this preset minimum speed to full speed.
Black
Full Voltage
Motor
Red
Red
L2
L1
Black
Variable
Voltage
240 Volt
Connection Diagram for 4-Wire* Controls
Ground (Earth)**
Green
Connection Diagram for 2-Wire* Controls (Switch Models)
Triac
Switch
AC Line
L1
L2
Ground (Earth)**
Green
Motor
Connection Diagram 2-Wire* Controls for No Switch Model (NS)
AC Line
L1
L2
Green
Triac
Motor
Ground (Earth)**
Connection Diagram for 3-Wire* Controls (Switch Models)
Triac
Switch
Black Blue***
AC Line
Auxiliary
Load
L1
L2
Ground (Earth)**
*** Wire may be white in some applications
Green
Red
Motor
* Ground wire is not counted when designating 2,3 or 4 wire controls.
** Be sure to ground control using the green wire. Some models do not require grounding, therefore, a ground wire is
not provided.
*** Wire may be white in some applications.

Other manuals for BUCKET FAN 420

1

This manual suits for next models

7

Other Vents-us Fan manuals

Vents-us TT 100 User manual

Vents-us

Vents-us TT 100 User manual

Vents-us VKP 100 Operating and maintenance instructions

Vents-us

Vents-us VKP 100 Operating and maintenance instructions

Vents-us TwinFresh Expert RW1-50 V.2 User manual

Vents-us

Vents-us TwinFresh Expert RW1-50 V.2 User manual

Vents-us VKM EC 100 User manual

Vents-us

Vents-us VKM EC 100 User manual

Vents-us VK User manual

Vents-us

Vents-us VK User manual

Vents-us CBF 110 User manual

Vents-us

Vents-us CBF 110 User manual

Vents-us TwinFresh Comfo RA1-50 User manual

Vents-us

Vents-us TwinFresh Comfo RA1-50 User manual

Vents-us VKP PS 125 User manual

Vents-us

Vents-us VKP PS 125 User manual

Vents-us BUCKET FAN 420 User manual

Vents-us

Vents-us BUCKET FAN 420 User manual

Vents-us VKOM 150 User manual

Vents-us

Vents-us VKOM 150 User manual

Vents-us QUIETLINE 100 User manual

Vents-us

Vents-us QUIETLINE 100 User manual

Vents-us HRV 80 User manual

Vents-us

Vents-us HRV 80 User manual

Vents-us TT SILENT M 100 User manual

Vents-us

Vents-us TT SILENT M 100 User manual

Vents-us TT PRO 100 User manual

Vents-us

Vents-us TT PRO 100 User manual

Vents-us QUIETLINE 100 User manual

Vents-us

Vents-us QUIETLINE 100 User manual

Vents-us OV1 200 User manual

Vents-us

Vents-us OV1 200 User manual

Vents-us VK EC User manual

Vents-us

Vents-us VK EC User manual
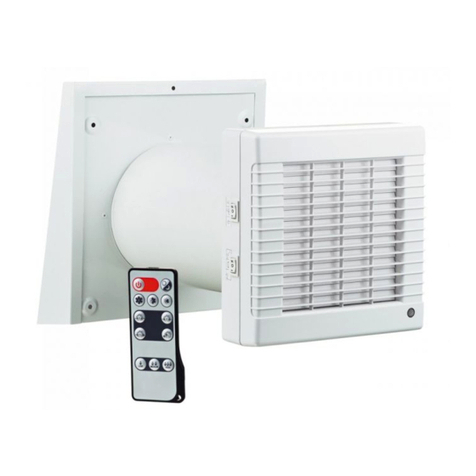
Vents-us RA1-50-2 User manual

Vents-us

Vents-us RA1-50-2 User manual

Vents-us TwinFresh Expert Duo RW1-30 User manual

Vents-us

Vents-us TwinFresh Expert Duo RW1-30 User manual

Vents-us TT SILENT M 100 User manual

Vents-us

Vents-us TT SILENT M 100 User manual

Vents-us TwinFresh Expert RW1-50 User manual

Vents-us

Vents-us TwinFresh Expert RW1-50 User manual

Vents-us Quietline User manual

Vents-us

Vents-us Quietline User manual

Vents-us PS Series User manual

Vents-us

Vents-us PS Series User manual

Vents-us PSS 102 User manual

Vents-us

Vents-us PSS 102 User manual
Popular Fan manuals by other brands

Kendal Lighting AC-19752 installation instructions

Kendal Lighting

Kendal Lighting AC-19752 installation instructions

Ellington E-WOD52ABZ5C installation guide

Ellington

Ellington E-WOD52ABZ5C installation guide

Bionaire BAFE1407 instruction manual

Bionaire

Bionaire BAFE1407 instruction manual

Daikin VAM350J VEB Series User reference guide

Daikin

Daikin VAM350J VEB Series User reference guide

Goldair GCMF100 operating instructions

Goldair

Goldair GCMF100 operating instructions

KRUEGER TADHF installation instructions

KRUEGER

KRUEGER TADHF installation instructions

Clas Ohlson WF001 instruction manual

Clas Ohlson

Clas Ohlson WF001 instruction manual

Broan HE Series installation guide

Broan

Broan HE Series installation guide

Hunter Type 3 Models installation instructions

Hunter

Hunter Type 3 Models installation instructions

anko BFT1803R user manual

anko

anko BFT1803R user manual

AirScape SAF10R installation manual

AirScape

AirScape SAF10R installation manual

ARDES AR5BR40P Instructions for use

ARDES

ARDES AR5BR40P Instructions for use

Prem-I-Air EH1520 manual

Prem-I-Air

Prem-I-Air EH1520 manual

Scarlett Comfort SC-SF111RC04 instruction manual

Scarlett

Scarlett Comfort SC-SF111RC04 instruction manual

Salda RIRS 400HW EKO 3.0 Technical manual

Salda

Salda RIRS 400HW EKO 3.0 Technical manual

Dimplex CABM1 Installation and operating instructions

Dimplex

Dimplex CABM1 Installation and operating instructions

ElectrIQ HVF18C user manual

ElectrIQ

ElectrIQ HVF18C user manual

Faro Barcelona Kauai manual

Faro Barcelona

Faro Barcelona Kauai manual

manuals.online logo
manuals.online logoBrands
  • About & Mission
  • Contact us
  • Privacy Policy
  • Terms and Conditions

Copyright 2025 Manuals.Online. All Rights Reserved.