7 8
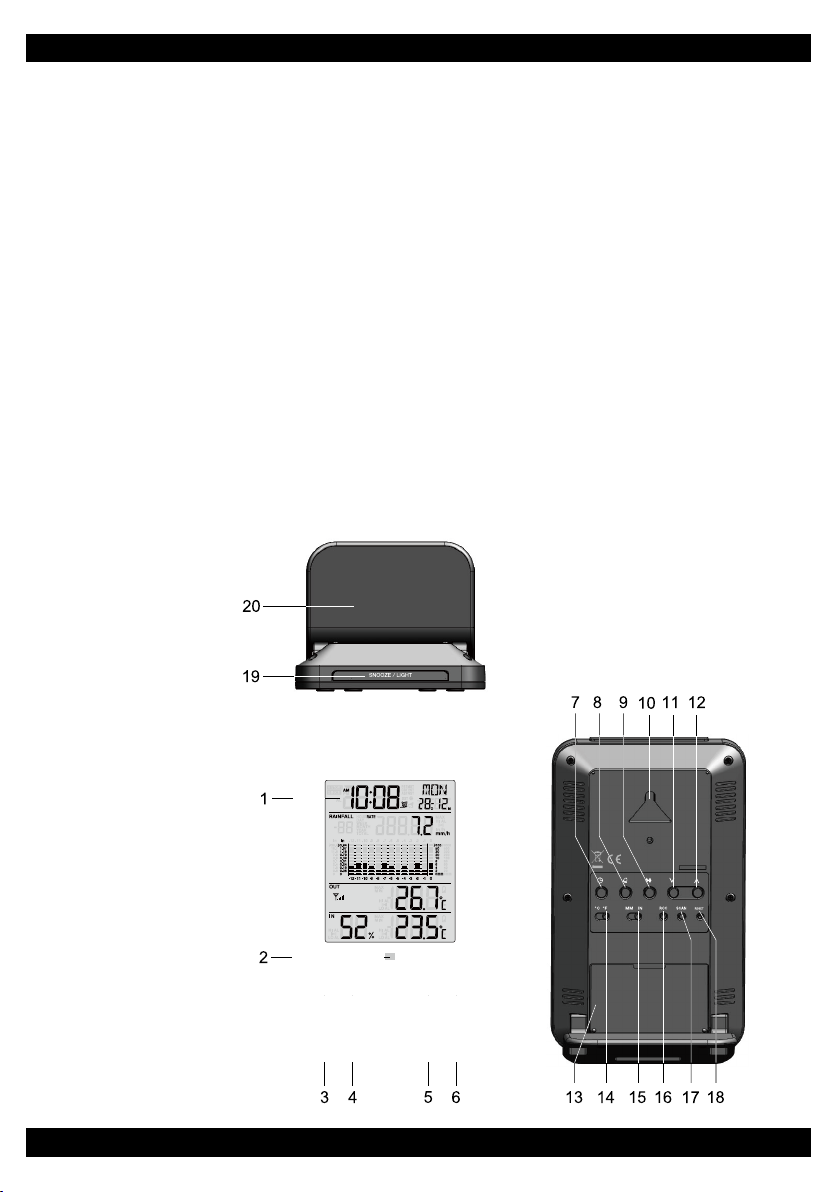
DISPLAY MAIN UNIT
Stand and Batteries Installation
The unit is designed for desktop or wall mount for easy viewing.
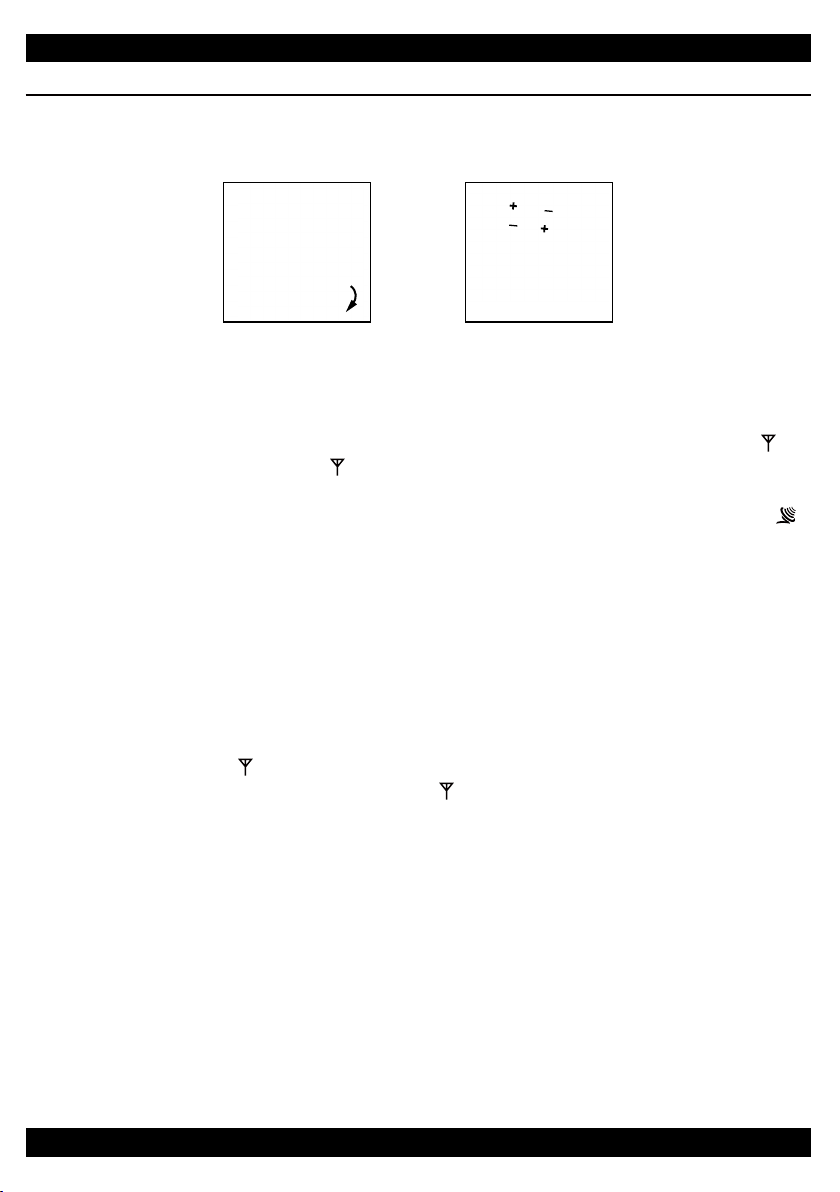
1. Remove the battery door of the main unit.
2. Insert 2 new AA size batteries according to the “ +/- ” polarity mark on the battery compartment.
3. Replace the battery door.
2QFHWKHEDWWHULHVDUHLQVHUWHGDOOWKHVHJPHQWVRIWKH/&'ZLOOEHEULHÀ\OLJKWHGXSEHIRUH
HQWHULQJDXWRPDWLFOLQNLQJSURFHVVZLWKWKHUHPRWHVHQVRUDVLQGLFDWHGE\WKHÀDVKLQJ
5. Press the [ SCAN ]EXWWRQLIWKH LVQRWÀDVKLQJWRPDQXDOO\DFWLYDWHWKHOLQNLQJSURFHVV
6 . Press the [ RESET ] button at the bottom of the sensor. After successful linking with the sensor,
WKHFORFNZLOODXWRPDWLFDOO\VHWLWVWLPHE\WKH5DGLRFRQWUROOHG5&VLJQDODVLQGLFDWHGE\WKH
NOTE:
1. If no display appears on the LCD after inserting the batteries, press the [ RESET ] button by
using a pointed object.
2. In some cases, you may not receive the RC signal immediately due to the atmospheric
disturbance.
Pairing of Wireless Sensor with Display Main Unit
After insertion of batteries, the Display Main Unit will automatically search and connect the wireless
VHQVRUDQWHQQDEOLQNLQJ
2QFHWKHFRQQHFWLRQLVVXFFHVVIXODQWHQQDPDUN DQGUHDGLQJVIRURXWGRRUWHPSHUDWXUHDQG
rainfall will appear on the display.
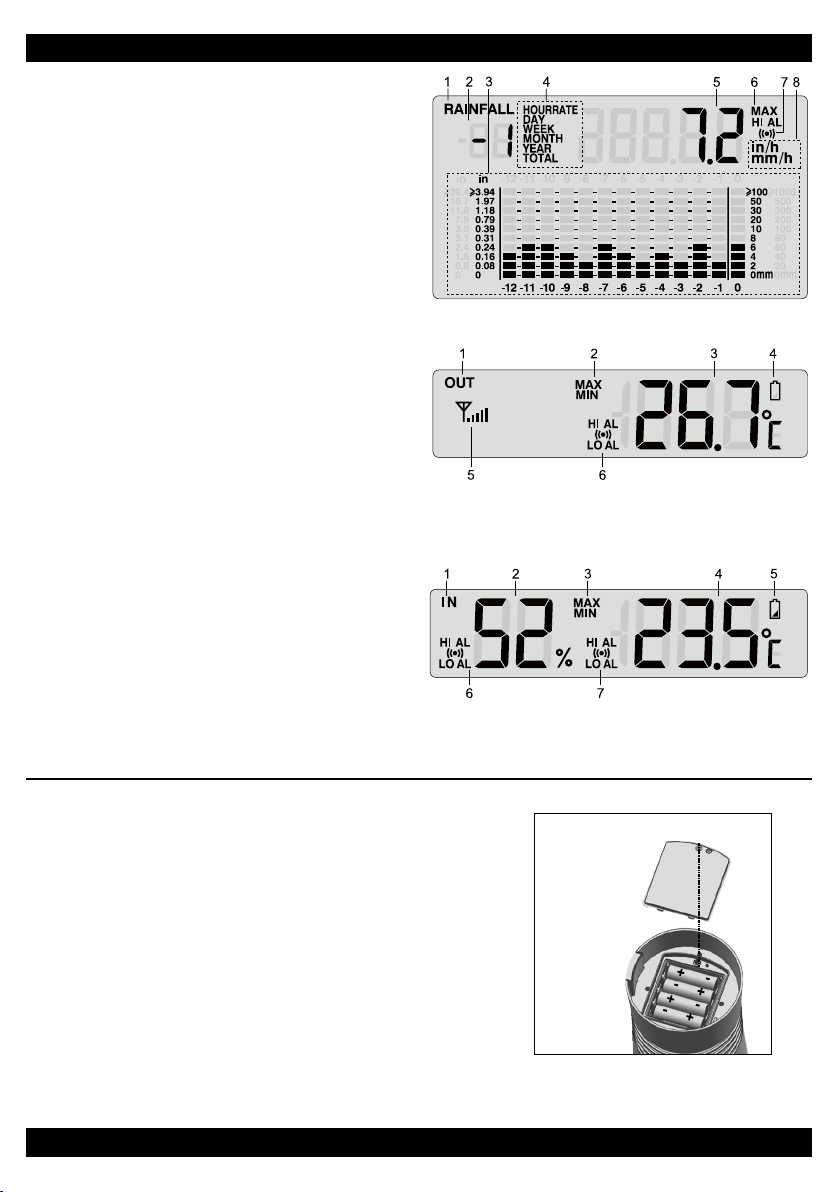
Changing Batteries of Thermo-Rain Gauge Sensor
Whenever you changed the batteries of the wireless sensor, pairing must be done manually.
1. Change the batteries to new ones.
2. Press the [ RESET ] button on the sensor.
3. Press the [ SCAN ] button on the Display Main Unit.
NOTE:
1. Pressing [ RESET ] button at bottom of the wireless sensor will generate a new code for
pairing purpose.
2. Always dispose old batteries in an environmental safe manner.
Radio-controlled / Atomic Clock Function
This main unit is programmed to synchronize with Radio-controlled time signal.
Version Time signal Signal broadcast
European version DCF77(German) Within 1500 km (932 miles) of Frankfurt, Germany
MSF(UK) Within 1500 km (932 miles) of Anthorn, England
North American WWVB(US) Within 3200 km (2000 miles) of Fort, Collins, Colorado
The unit synchronizes itself automatically to the RC signal daily. The “ ” icon will appear on the LCD
upon successful synchronisation each time.
NOTE:
1. The strength of radio-controlled time signal from the transmitter tower may be affected by
geographical location or building around.
2. Always place the unit away from interfering sources such as TV set, computer, etc.
3. Avoid placing the unit next to metal plates.
4. Closed areas such as airport, basement, tower block or factory are not recommended.
Time Setting
The unit automatically set itself according to the Radio Controlled Clock signal it received. To set
WKHFORFNFDOHQGDUPDQXDOO\LQDUHDVZKHUHUHFHSWLRQRIVLJQDOLVQRWSHUPLWWHGXVHUVPD\¿UVW
disable the reception by holding the [ RCC ] EXWWRQIRUVHFRQGVXQWLOWKH2))LFRQGLVSOD\RQ
the clock.
To Manually Set the Clock / Time Zone Selection
1. Press and hold [ CLOCK ]EXWWRQIRUVHFRQGVXQWLO³RU+U´ÀDVKHV
2. Use [ UP ] / [ DOWN ] button to adjust, and press [ CLOCK ] button to proceed to the next
setting.
3. Repeat 2 above for setting of TIME ZONE, HOUR, MINUTE, YEAR, MONTH&DATE or
DATE&MONTH, MONTH, DATE, HOUR OFFSET, LANGUAGE and DST.
NOTE:
1. The unit will automatically exit setting if no key was pressed in 60 seconds.
2. Time zone setting is only for North American version where the unit receives WWVB signal.
User can select PST, MST, CST, EST, AST or NST.
3. The hour offset is for DCF(German), MSF(UK) version and Australian version. Its range is
between -23 and +23 hours.
4. The language options are English (EN), French (FR), German (DE), Spanish (ES), Italian (IT),
Dutch (NL) and Russian (RU).
5. DST (Daylight Saving Time) feature is set to Auto (factory set). The clock has been
programmed to automatically adjust its time forward by one hour when the daylight saving
time (DST) is in effect. User can set the DST to OFF to disable the feature.
8
DISPLAY MAIN UNIT
Stand and Batteries Installation
The unit is designed for desktop or wall mount for easy viewing.
1. Remove the battery door of the main unit.
2. Insert 2 new AA size batteries according to the “ +/- ” polarity mark on the battery compartment.
3. Replace the battery door.
2QFHWKHEDWWHULHVDUHLQVHUWHGDOOWKHVHJPHQWVRIWKH/&'ZLOOEHEULHÀ\OLJKWHGXSEHIRUH
HQWHULQJDXWRPDWLFOLQNLQJSURFHVVZLWKWKHUHPRWHVHQVRUDVLQGLFDWHGE\WKHÀDVKLQJ
5. Press the [ SCAN ]EXWWRQLIWKH LVQRWÀDVKLQJWRPDQXDOO\DFWLYDWHWKHOLQNLQJSURFHVV
6 . Press the [ RESET ] button at the bottom of the sensor. After successful linking with the sensor,
WKHFORFNZLOODXWRPDWLFDOO\VHWLWVWLPHE\WKH5DGLRFRQWUROOHG5&VLJQDODVLQGLFDWHGE\WKH
NOTE:
1. If no display appears on the LCD after inserting the batteries, press the [ RESET ] button by
using a pointed object.
2. In some cases, you may not receive the RC signal immediately due to the atmospheric
disturbance.
Pairing of Wireless Sensor with Display Main Unit
After insertion of batteries, the Display Main Unit will automatically search and connect the wireless
VHQVRUDQWHQQDEOLQNLQJ
2QFHWKHFRQQHFWLRQLVVXFFHVVIXODQWHQQDPDUN DQGUHDGLQJVIRURXWGRRUWHPSHUDWXUHDQG
rainfall will appear on the display.
Changing Batteries of Thermo-Rain Gauge Sensor
Whenever you changed the batteries of the wireless sensor, pairing must be done manually.
1. Change the batteries to new ones.
2. Press the [ RESET ] button on the sensor.
3. Press the [ SCAN ] button on the Display Main Unit.
NOTE:
1. Pressing [ RESET ] button at bottom of the wireless sensor will generate a new code for
pairing purpose.
2. Always dispose old batteries in an environmental safe manner.
Radio-controlled / Atomic Clock Function
This main unit is programmed to synchronize with Radio-controlled time signal.
Version Time signal Signal broadcast
European version DCF77(German) Within 1500 km (932 miles) of Frankfurt, Germany
MSF(UK) Within 1500 km (932 miles) of Anthorn, England
North American WWVB(US) Within 3200 km (2000 miles) of Fort, Collins, Colorado
The unit synchronizes itself automatically to the RC signal daily. The “ ” icon will appear on the LCD
upon successful synchronisation each time.
NOTE:
1. The strength of radio-controlled time signal from the transmitter tower may be affected by
geographical location or building around.
2. Always place the unit away from interfering sources such as TV set, computer, etc.
3. Avoid placing the unit next to metal plates.
4. Closed areas such as airport, basement, tower block or factory are not recommended.
Time Setting
The unit automatically set itself according to the Radio Controlled Clock signal it received. To set
WKHFORFNFDOHQGDUPDQXDOO\LQDUHDVZKHUHUHFHSWLRQRIVLJQDOLVQRWSHUPLWWHGXVHUVPD\¿UVW
disable the reception by holding the [ RCC ] EXWWRQIRUVHFRQGVXQWLOWKH2))LFRQGLVSOD\RQ
the clock.
To Manually Set the Clock / Time Zone Selection
1. Press and hold [ CLOCK ]EXWWRQIRUVHFRQGVXQWLO³RU+U´ÀDVKHV
2. Use [ UP ] / [ DOWN ] button to adjust, and press [ CLOCK ] button to proceed to the next
setting.
3. Repeat 2 above for setting of TIME ZONE, HOUR, MINUTE, YEAR, MONTH&DATE or
DATE&MONTH, MONTH, DATE, HOUR OFFSET, LANGUAGE and DST.
NOTE:
1. The unit will automatically exit setting if no key was pressed in 60 seconds.
2. Time zone setting is only for North American version where the unit receives WWVB signal.
User can select PST, MST, CST, EST, AST or NST.
3. The hour offset is for DCF(German), MSF(UK) version and Australian version. Its range is
between -23 and +23 hours.
4. The language options are English (EN), French (FR), German (DE), Spanish (ES), Italian (IT),
Dutch (NL) and Russian (RU).
5. DST (Daylight Saving Time) feature is set to Auto (factory set). The clock has been
programmed to automatically adjust its time forward by one hour when the daylight saving
time (DST) is in effect. User can set the DST to OFF to disable the feature.