13. Never carry portable tools by the cord.
14. Use the right tool. Do not force a
small tool or attachment to do the job
of a heavy-duty tool.
15. Do not force tool. It will do the job
better and safer at the rate for which
it was designed.
16. Do not use damaged tools. A damaged
tool that does not operate correctly is
a safety hazard and should be fixed
before any further use.
17. Repairs and service should be
performed by a certified technician.
Use only identical replacement parts.
18. Do not alter or misuse the tool. Stop
any operation immediately if you
notice anything abnormal.
19. Practice proper maintenance. Keep all
tools sharp, clean and well lubricated
for the best and safest results. Sharp
blades minimize stalling, kickback,
and burning. They perform faster,
better and safer than dull blades.
20. Keep hands away from moving
parts until they have come to a
complete stop and the power has been
disconnected.
21. Always disconnect the tool from the
power source when changing cutters
or blades, or when performing any
general maintenance activities (such
as adjusting or cleaning).
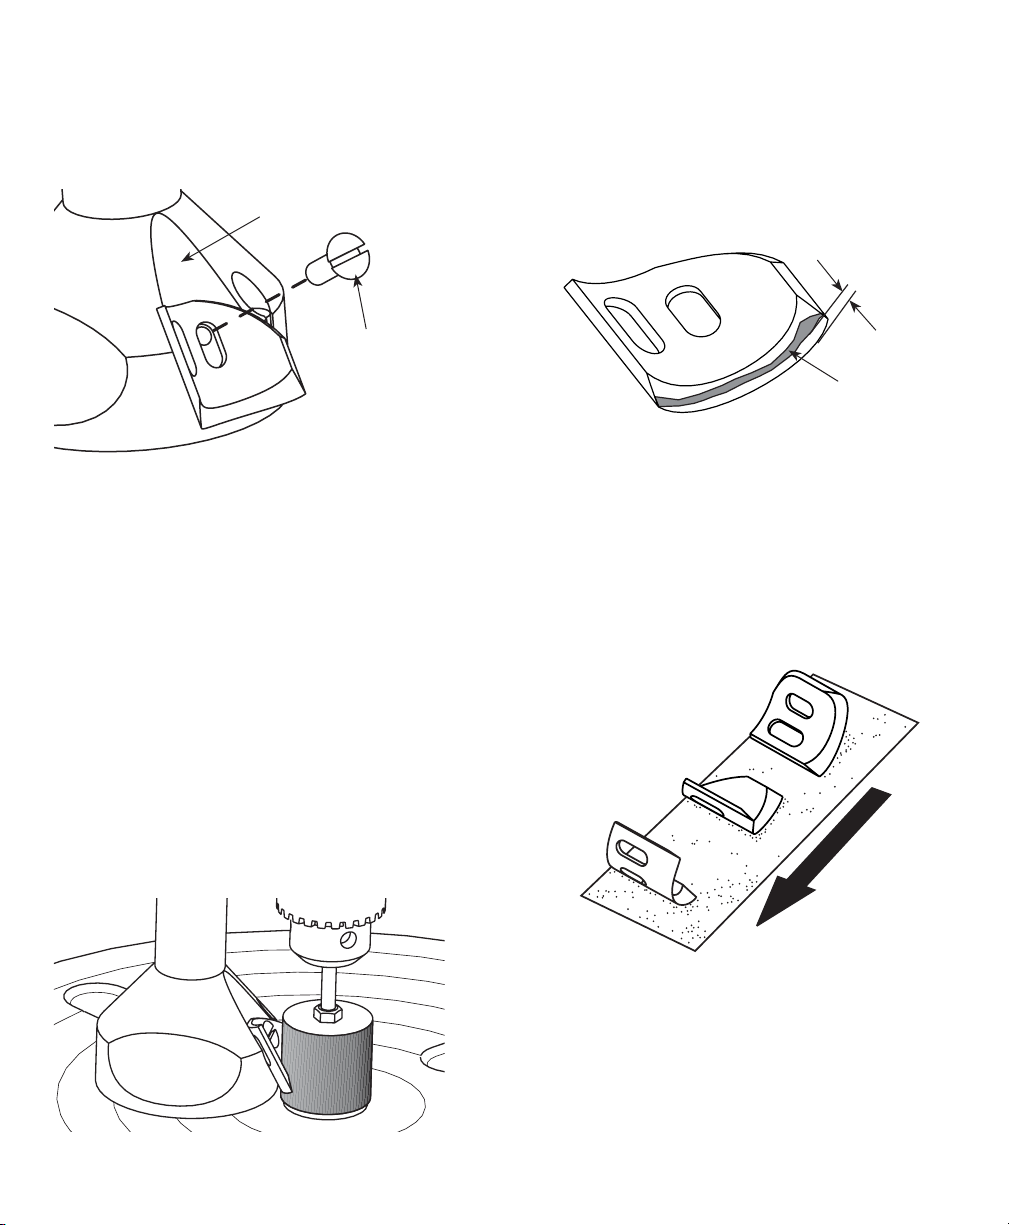
22. Handle blades with care.
23. Unless otherwise specified, always
insert the shank as far as possible into
the chuck in order to provide proper
support. Tighten the chuck securely.
24. Remove all nails from a workpiece
before performing any operation on it.
25. Hold workpiece firmly in a vise or clamp.
26. Ensure that depth and any other
adjustments are tight.
27. Remove adjusting keys and wrenches
before use.
28. Maintain good balance.
29. Do not remove workpiece or cut-off
pieces from tool during a cut while
the cutter is moving.
30. Do not leave tool until it comes to a
complete stop.
31. When not in use, power tools should
be stored in a dry area, elevated and
locked so that they are out of the
reach of children.
3
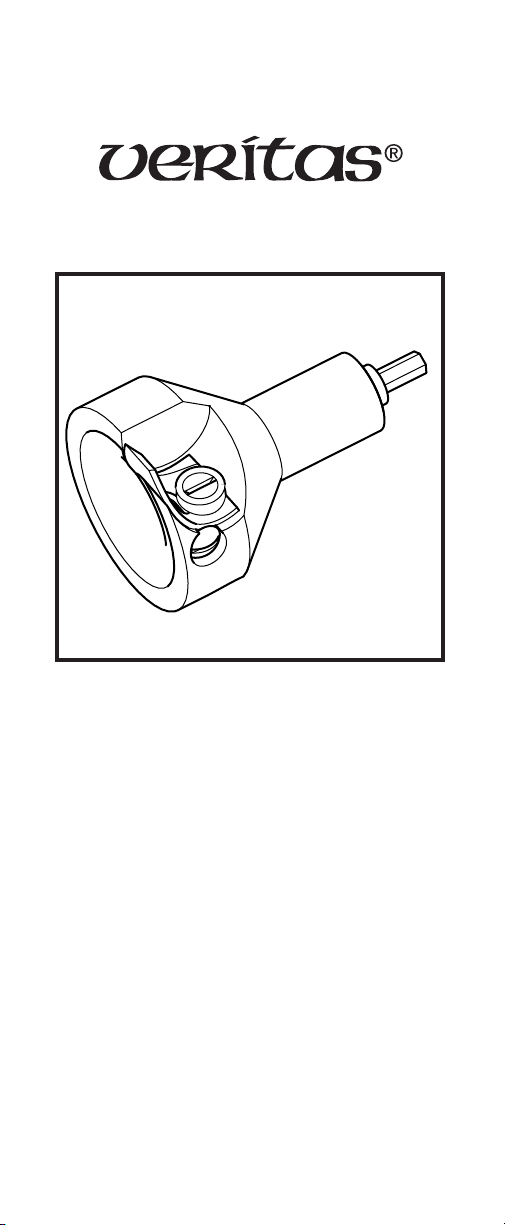
The Veritas®Power Tenon Cutters make
round tenon cutting for rustic furniture quick,
accurate and easy. Each has been balanced to
minimize vibration while being driven with
an electric drill, and an integral level vial
helps you keep the tenon cutter level. The
blade is adjustable to cut the exact size of
tenon required. It is easy to sharpen the blade
with the integral sharpening jig that holds the
blade at the optimum angle.
Veritas®Tenon Cutters are for use in a hand
electric drill. They are not to be used in a drill
press for several reasons.
1) Because the workpiece must be rigidly
clamped in line with the equally rigid
axis of the drill-press chuck, any
misalignment or movement can create
high side loads on the tenon cutter,
leading to the shank failing. Any quill
run-out in the drill press contributes
further to the problem.
2) Because there is much less feel as to how
the cutter is performing when using a
drill press, it is possible to overload the
tenon cutter without realizing it. This too
can lead to the shank failing.
3) Overloading the tenon cutter or operating
it at high speeds can also lead to
overheating the high-carbon steel blade,
resulting in edge failure, loss of hardness,
and a useless blade.
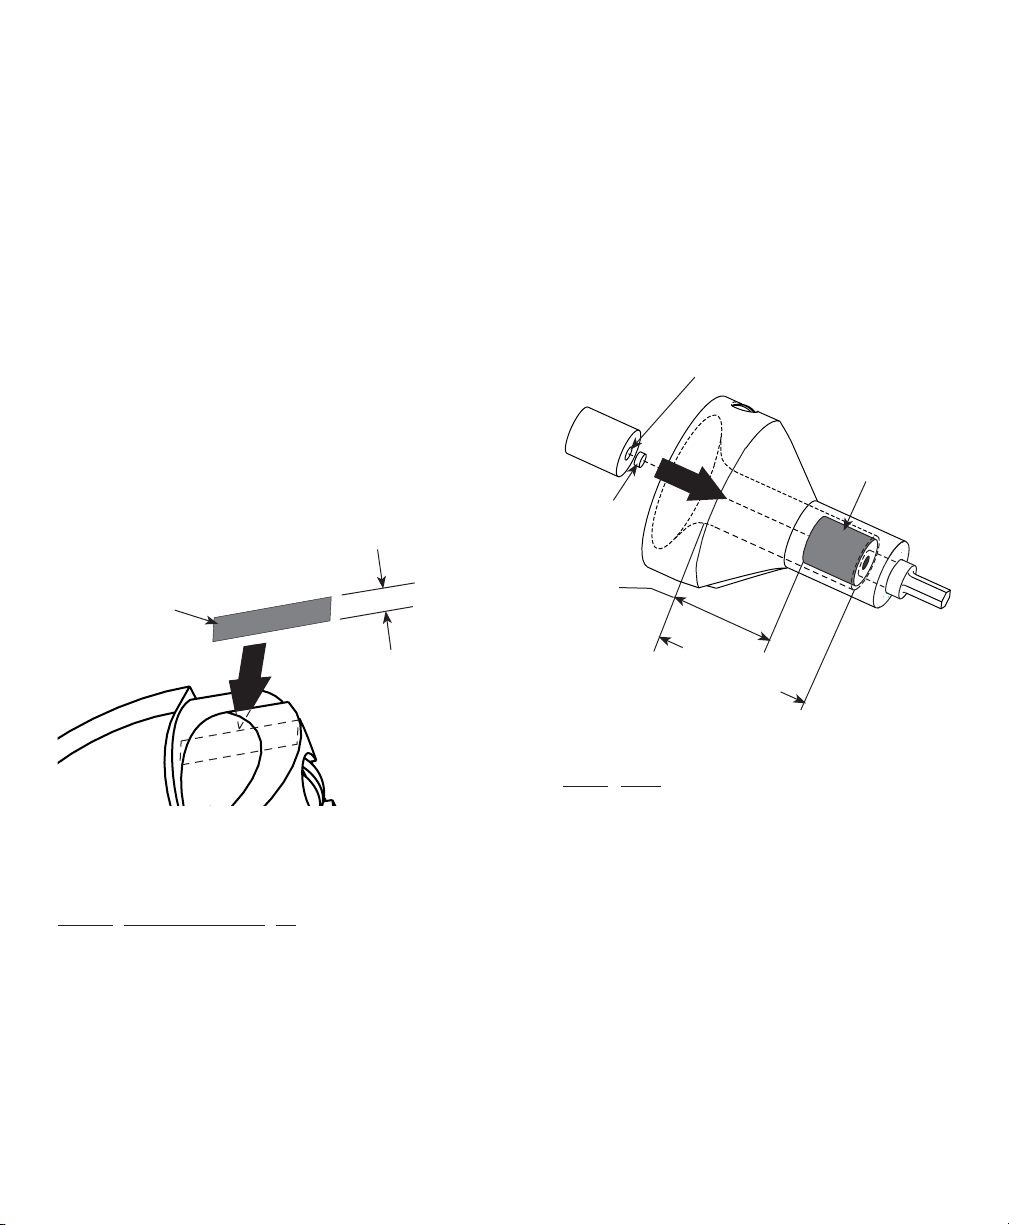
Taking a Test Cut
Firmly tighten the tenon cutter in the chuck
of an electric drill. For the large-size tenon
cutters (11/4"to 2"dia.) a minimum 1/2"
chuck is required, and a high-torque, low-
speed (~500 rpm) drill is recommended.
Clamp a piece of wood horizontally in a vise
at about waist height. Use a piece no larger
than the diameter specified in Table 1 for the
tenon cutter to be used. Ensure the end is cut
square. Putting a substantial chamfer on the
end of a piece of wood that is at or close to the
upper limit of the tenon cutter’s capacity will
make starting the cut much easier.
Table 1: Maximum Wood Diameter for Tenon
Cutter Diameter.
Hint: If you do not have a vise, you
can improvise with a piece of 2×4 with
various sizes of V-shaped notches cut in
it and two C-clamps. Place the piece of
wood in a notch slightly smaller than its
diameter, and clamp the 2×4 to a bench or
any large stable surface.
Place the tenon cutter on the end of the piece
of wood and rotate the tenon cutter by hand
until the level vial is at the top. Raise or lower
the drill until the bubble is centered in the
vial. Adjust the drill left or right by eye so that
it is in line with the piece of wood.
It is important to realize that the tenon cutter
will cut tenons in line with the axis of the
drill. If you wish to have a tenon come off the
end of the piece of wood at an angle, clamp
the piece in a vise at the desired angle (using
an inclinometer if necessary). Cut the tenon
while holding the tenon cutter straight and
level, using the level vial as an indicator.
4
Tenon Dia. Max. Stock Dia.
5/8"to 1"Tenon Dia. + 11/8"
1
1/4"to 2"Tenon Dia. + 11/2"