AVOCENT® LONGVIEW™ 5000 SERIES HIGH PERFORMANCE KVM EXTENDER SYSTEMS
Quick Installation Guide
2 590-1519-501A
If a microphone or other audio
input is required, use another 3.5
mm audio jack cable to connect
the Line Out port on the
transmitter to the analog Line In
port of the host computer.
DIGITAL AUDIO
Use either a mini-TOSLINK fiber
optic cable (or a full size
TOSLINK fiber optic cable with
a mini-TOSLINK adaptor) to
connect the Line In port on the
transmitter to the digital Line
Out port of the host computer.
NOTE: The digital input is fed
across the main CATx link to
the optical connection of the
Line Out port on the receiver
only. There is no crossover
between the analog and digital
audio subsystems of the
LongView™ 5000 extender
system installation.
4. Connecting to the serial
port on the transmitter
Use a serial cable to connect
the Options port on the rear
panel of the transmitter with a
vacant RS232 serial port on the
host computer.
5. Connecting the
transmitter to the receiver
CAUTION: The signals sent
through the link cables are not
compatible with standard
networking equipment and
could cause damage if
connected. Do not connect the
transmitter and receiver to any
other networking devices.
On the front of both the
transmitter and the receiver,
locate the two CATx cable ports
labeled A and B. Insert a CATx
cable into the A port on the
front of the transmitter and the
opposite end into the A port of
the receiver.
If Hi-Speed USB is required,
connect an optional CATx cable
from port B of the transmitter to
port B on the front panel of the
receiver.
NOTE: The transmitter and
receiver are linked by either one
or two CATx cables at a distance
of up to 150 meters (492 feet).
The type and quality of the
CATx cables used are crucial to
the mode of operation. CAT 7
cables are recommended.
6. Connecting transmitter
power
NOTE: There is no on/o switch
on the extender. Operation
begins as soon as a power
adaptor is connected.
Assemble the power adaptor
and the power cord. Insert one
end of the power cord into the
transmitter and plug the other
end into an appropriate power
source.
CAUTION: Both the unit and
its power supply generate heat
when in operation. Do not
operate the equipment in
ambient temperatures
exceeding 104O F (40O C). Do
not place the products in
contact with equipment whose
surface temperature exceeds
104O F (40O C).
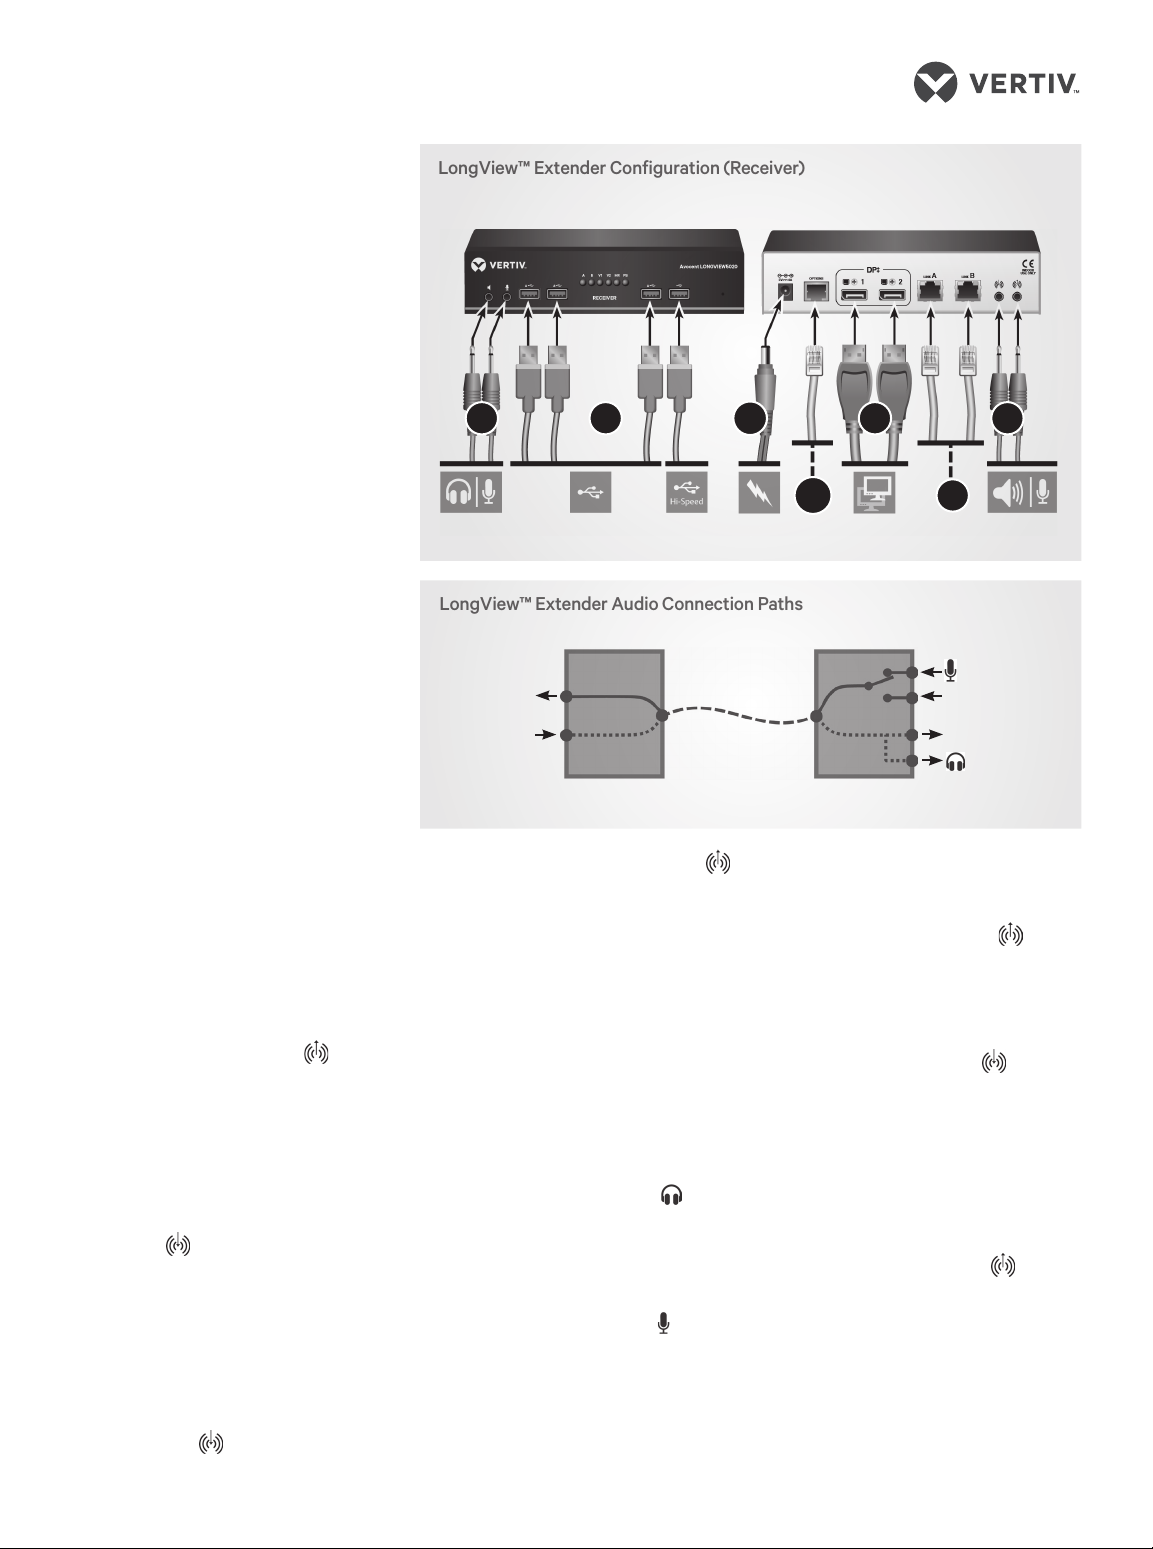
7. Connecting receiver
video
Connect a display port cable
from the primary video display
to DP++ port 1 on the rear of
the receiver.
If an adaptor is being used to
convert signals, connect it to
the DP++ port 1 and connect
the cable from the video display
to the output of the adaptor. If
an externally powered adaptor
is required, connect it to one of
the USB ports. Then, connect a
second display port cable from
the secondary video display to
LongView™ Extender USB Connection Paths
CATx Link A
CATx Link A
PC
TX RX
HUB
B
(Hi-Speed USB)
A
(Keyboard/mouse
True Emulation)
LongView™ Extender Configuration (Transmitter)
Front Back
13
2
4
6
5