Table of Contents Rev. 12/9/2020 VAN-J, MANUAL
Table of Contents Copyright 2017 Vestil Manufacturing Corp. Page 8 of 11
RECORD OF SATISFACTORY CONDITION (THE “RECORD”)
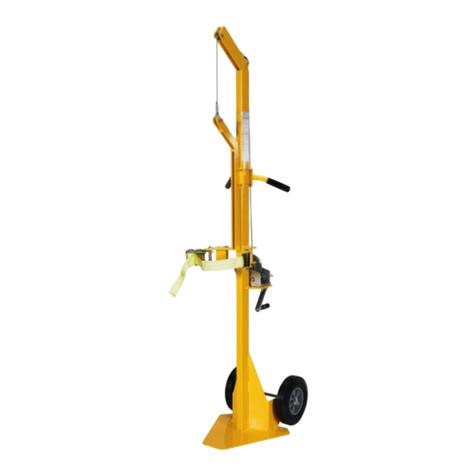
Before putting the crane into service, create a written record that describes the appearance of each part of the
crane and how it operates. Take photographs from multiple angles. Include close-range photos of all labeling,
mounting bolts, pulleys, pivot points, hooks, fasteners, and the winch. Cycle the winch up and down. Record your
observations about how the unit looks and sounds as the hook rises and lowers. Measure the throat opening of the
hook and record the measurement. Collect all writings and photographs into a single file. This file is a record of the
crane in satisfactory condition. Compare results of all inspections to this Record to determine whether a component is
in satisfactory condition or if it requires repair or replacement. Restore the unit to satisfactory condition before
returning it to service.
INSPECTIONS & MAINTENANCE
Inspections and repairs should only be performed by qualified persons. Compare the results of each inspection to
the RECORD OF SATISFACTORY CONDITION (the “RECORD”). Do not use the crane unless all parts are in
satisfactory condition. Replace parts that are not in satisfactory condition before returning the crane to service. DON’T
GUESS! If you have any questions about the condition of your crane, contact the TECHNICAL SERVICE
department. The phone number is provided on the cover page of this manual. Never make temporary repairs of
damaged or missing parts. Only use manufacturer-approved replacement parts. Inspect and maintain the unit as
described below to preserve normal operability. Remove it from service if it is damaged in any way that affects normal
operation. If the unit cannot be restored to satisfactory condition, disassemble it and dispose of the parts. The unit
must be retested at 125% of its rated capacity anytime the crane is repaired or modified. Inspect the following:
A. At least once per month
1. Winch and pulleys: cycle the winch up and down. Confirm that the cable winds off of and back onto the drum
smoothly. The hook should not lower on its own. The cable pulley should not be loose or severely worn and
should rotate freely as the cable passes over it.
2. Winch cable: check for reeving, fraying, thinning, birdcaging, and elongating regions. If the cable is
damaged, replace it.
3. [Powered units] Winch power cord: examine the cord for damage and areas where the outer sheath has
been damaged. Repair all damage before using the winch again.
4. Frame elements: examine the mast and both segments of the boom for damage, deformation, corrosion,
cracked welds, and severe wear. Inspect all pivot points for severe wear. All frame members should be
square, rigid, and free of significant rusting. Remove rust with steel wool or a metal bristle brush , clean the
areas to remove rust particles, and apply touchup paint to the affected areas.
5. Hook: visually inspect the hook before each use. Look for deformations and cracks. Immediately discard the
hook if it is cracked or if the throat opening is more than 15% in excess of the original throat opening. Discard
the hook if it is twisted more than 10° from the plane of the hook in its original condition. Confirm normal
operation and operation of the safety latch.
6. Vehicle: inspect the vehicle where the crane is mounted. Closely examine the area around the mounting
plate. Look for rust, corrosion, and metal fatigue. Check the mounting plate (base of the mast), the anchoring
hardware, and the vehicle bed/floor particularly around the anchor bolts. Make sure that the mast is securely
anchored (i.e. does not wobble). Confirm that anchoring hardware is in normal condition.
7. Labels: confirm that all labels are in good condition and in place as shown in the “Labeling Diagram” (p. 9).
B. At least every 6 months
Conduct a load test. Lift a test weight equal to 125% of the capacity (500 lb.). After the test, examine the crane,
winch, cable, and the vehicle where the crane is mounted. Look for deformations, cracks, and metal fatigue. Do
not continue to use the crane unless both it and the supporting vehicle are in normal condition.
TROUBLESHOOTING
Unload the crane and (if applicable) disconnect the winch from the power supply before troubleshooting an issue.
1) Winch doesn’t work when
button pressed
b. Bad connection in control circuit
c. Battery discharged
a. Test with meter. Check circuit protectors for
open condition. If circuit protection has
opened, test all parts of circuit with multimeter.
Verify pow
er supply cord and controller cord
are properly attached to winch.
b. Test with multimeter.
c. Test with volt meter. Charge battery is low
(12.65V = full charge).
2) Cable jumps or lurches as
the winch operates
d. Poor spooling on winch reel/drum
d. Spool out the cable and inspect it for kinks,
etc. Re-
spool cable onto winch reel. Replace
cable if damaged.
e. Replace cable if kinks cannot be
