ViatorPower eCABLE CAB-16-1-5T1 User manual

CAB-16-1-5T1, CAB-16-1-5T2, CAB-32-1-5T1, CAB-32-1-5T2,
CAB-16-3-5T2, CAB-32-3-5T2
ViatorPower eCABLE
EV Charging Station with built-in charging cable
USER MANUAL
Please read this user manual through carefully, before
using the EV Charging Station for the first time!
Manufacturer and distributor: ENCASE Ltd., H-2627 Zebegeny, 74 Dozsa Gyorgy ut, Hungary
Tel.: +36 30 95 24 003, e-mail: info@encase.hu , www.viatorpower.com

Thank you for purchasing our product!
Viatorpower eCABLE charging station is an EVSE (Electric Vehicle Supply Equipment) to charge the batteries of
full electric and plug-in-hybrid cars. eCABLE has its own integrated charging cable, which is built into the device,
and at its other end there is a Type1 or Type2 plug, depending on type of your car’s charging inlet.
eCABLE charging station is the ideal solution if you want to charge your electric car quickly and conveniently.
The device can be mounted onto the wall or to an optionally available EVSE pillar unit, preferably where your
vehicle is usually parked –such as in a garage, parking lot, parking space - both indoors and outdoors.
Please note that the installation of the appliance may only be carried out by a qualified electrician!
We hope that the device will help you in long run to enjoy the pleasure of electric driving and always have
enough energy at your disposal to reach your destination safely.
For more useful information on charging electric vehicles, please visit www.viatorpower.com. If you still have
questions about the use and operation of the device, please contact the manufacturer's customer service at
info@viatorpower.com, where they will be happy to answer your questions.
Quality guarantee: 2 years warranty
The device has been designed and manufactured to serve you without failure for long time. If, within two
years of purchase, it still fails and the defect is attributed to the defective design or manufacture, it will be
repaired or replaced at the manufacturer's own expense.
To use the warranty, you need the warranty card and / or a copy of the invoice. For details please refer to the
information on the warranty card or contact the distributor.

1.
Safety instructions
1.1. Notices
Observe the notices in the installation guide and the relevant legal regulations.
Mounting and installation specifications may differ depending on the installation location. It is the responsibility
of the installer to comply with safety regulations, standards, professional protocols and applicable legislation.
ATTENTION! RISK OF ELECTRIC SHOCK!
Touching live parts can result in accidents, life-threatening, and serious property
damage. Always de-energize the appliance and the network before installation and
pay special attention to comply with the electric shock protection and safety
regulations.
The appliance must be placed in a location that is not reachable by children!
Do not install or use the device in the presence of flammable and explosive gases!
THE APPLIANCE MUST BE INSTALLED BY A QUALIFIED ELECTRICIAN!
The device can only be used when it is permanently connected to the electric network. It is forbidden to
operate from a socket or outlet!
Use the device only for its intended purpose as described in the operating instructions!
WARNING! ALL RESPONSIBILITIES AND OBLIGATIONS OF THE MANUFACTURER AND DISTRIBUTOR CEASED IF
THE APPLIANCE IS NOT USED FOR ITS PURPOSE.
1.2. Fuses and cables
When installing the device, always use switching devices in accordance with the specifications and apply the
appropriate cables and wires according to the nominal voltage and current!
1.3. Repairs
The end-user must not carry out any repairs on the device!
Opening or removing the cover of the device by the end-user is life-threatening and prohibited!
Do not modify the device in any way!
WARNING! ALL RESPONSIBILITIES AND OBLIGATIONS OF THE MANUFACTURER AND DISTRIBUTOR CEASED
WITH ANY MODIFICATION / CHANGE OF THE APPLIANCE BY THE END USER.
1.4. Recycling
The device must be disposed of as hazardous waste at the end of its life cycle and / or as non-repairable device
and must be disposed at an electronic recycle point.

2.
General description
eCABLE charger is used tocharge batteries of full electric and plug-in hybrid cars (EVSE - Electric Vehicle Supply
Equipment).
The eCABLE has its own charging cable, which is integrated into the charger. At the other end of the charging
cable (which is connected to the vehicle) is a Type1 or Type2 plug installed, depending on type of your car’s
charging inlet. You do not need a separate charging cable for charging, just use the built-in cable.
Electric vehicle’s original accessories are usually including a 230V outlet chargers. These usually charge the
vehicle from a household socket for a very long time because their charging power is limited (usually not
exceed 2… 2.5kW - 10… 12A charging current). The eCABLE is significantly more powerful, so it can be used to
charge electric vehocle much faster than with the low power household-socket charger.
The device is available in six versions, which are capable of delivering different power and are equipped with
different connectors.
Charging station
(Article number)
Connector
type
Charging
cable
Voltage
Phase
Max.
current
Max.
power
Key
locker
eCABLE töltőpontok
CAB-16-1-5T1
T1
5m
230VAC
1
16A
3,7kW
optional
CAB-16-1-5T2
T2
5m
230VAC
1
16A
3,7kW
optional
CAB-32-1-5T1
T1
5m
230VAC
1
32A
7,4kW
optional
CAB-32-1-5T2
T2
5m
230VAC
1
32A
7,4kW
optional
CAB-16-3-5T2
T2
5m
400VAC
3
3x16A
11kW
optional
CAB-32-3-5T2
T2
5m
400VAC
3
3x32A
22kW
optional
Abbreviations of the article numbers
CAB-16-1-5T2
12 3 4
1. CAB = eCABLE fixed cable charger, does not include overcurrent (RCO) and current protection (RCB switches
2. 16 = Maximum charging current 16A
32 =Maximum charging current 32A
3. 1 = 1 phase (230VAC)
3= 3 phase (400VAC > 3x230VAC)
4. The length of the fixed cable installed into the charger and the plug type mounted on it
5 = 5m long cable, T1 = Type 1 connector, T2 = Type 2 connector

Which type of charger shall be used for your car depends on two important factors:
1. What is the max. power (max. charging current) the vehicle’s on-board charger can accept
2. The max. load of local grid at the installation site
During the process of charging electric vehicles, data is exchanged and communication is going on between
the charging point and the on-board charger that is built into the vehicle. This data exchange covers (among
other things) the maximum charging current that the charging station can deliver and the current that the
vehicle's on-board charger able to accept and handle. Therefore, for example, it is not possible to charge a
car with 11kW power in case its on-board charger can handle only max. 6kW charging power. Some vehicles
can be charged with a three-phases, others with only a single-phase current. If the performance of the
external charging point differs from the performance of the car’s on-board charger, that’s not a problem,
but charging will always be at the lower of these two. So the maximum charging current (maximum power)
only indicates the maximum power that the charger is capable to deliver. However, whether you can take
full advantage of the maximum charging power depends on the specifications of the vehicle's on-board
charger.
It has to be considered that an electrical network of a property is a complex system. The wires, the electrical
utility connections are sized for the general needs of the household and there may not be enough reserve in
the system to connect an additional high-power consumer such as an EV charger to the grid. It may not be
possible to use certain electrical consumers during charging process because of overload in the network.
Poorly sized wires can become hot and, in extreme cases, ignite, causing serious property damage and death.
Therefore, be sure to have the property's electrical system inspected by a professional electrician before
installing the EV charger. It may also be necessary to request the electricity supplier to increase the electrical
capacity of the property. (To use eCABLE devices, 3.7kW (1x16A), 7.4kW (1x32A), 11kW (3x16A), or 22kW
(3x32A) electrical power shall be available in the electrical network of the property.)
Techincal specifications
Nominal voltage 230V AC (1 phase), or 400V AC (3 phases)
Maximum charging current 16A or 32A*
Max. charging power 3,7kW, 7,4kW, 11kW, 22kW*
Overcurrent- and electric shock protection Not built-in, must be installed at the installation site separately
Charging cable Fixed built-in
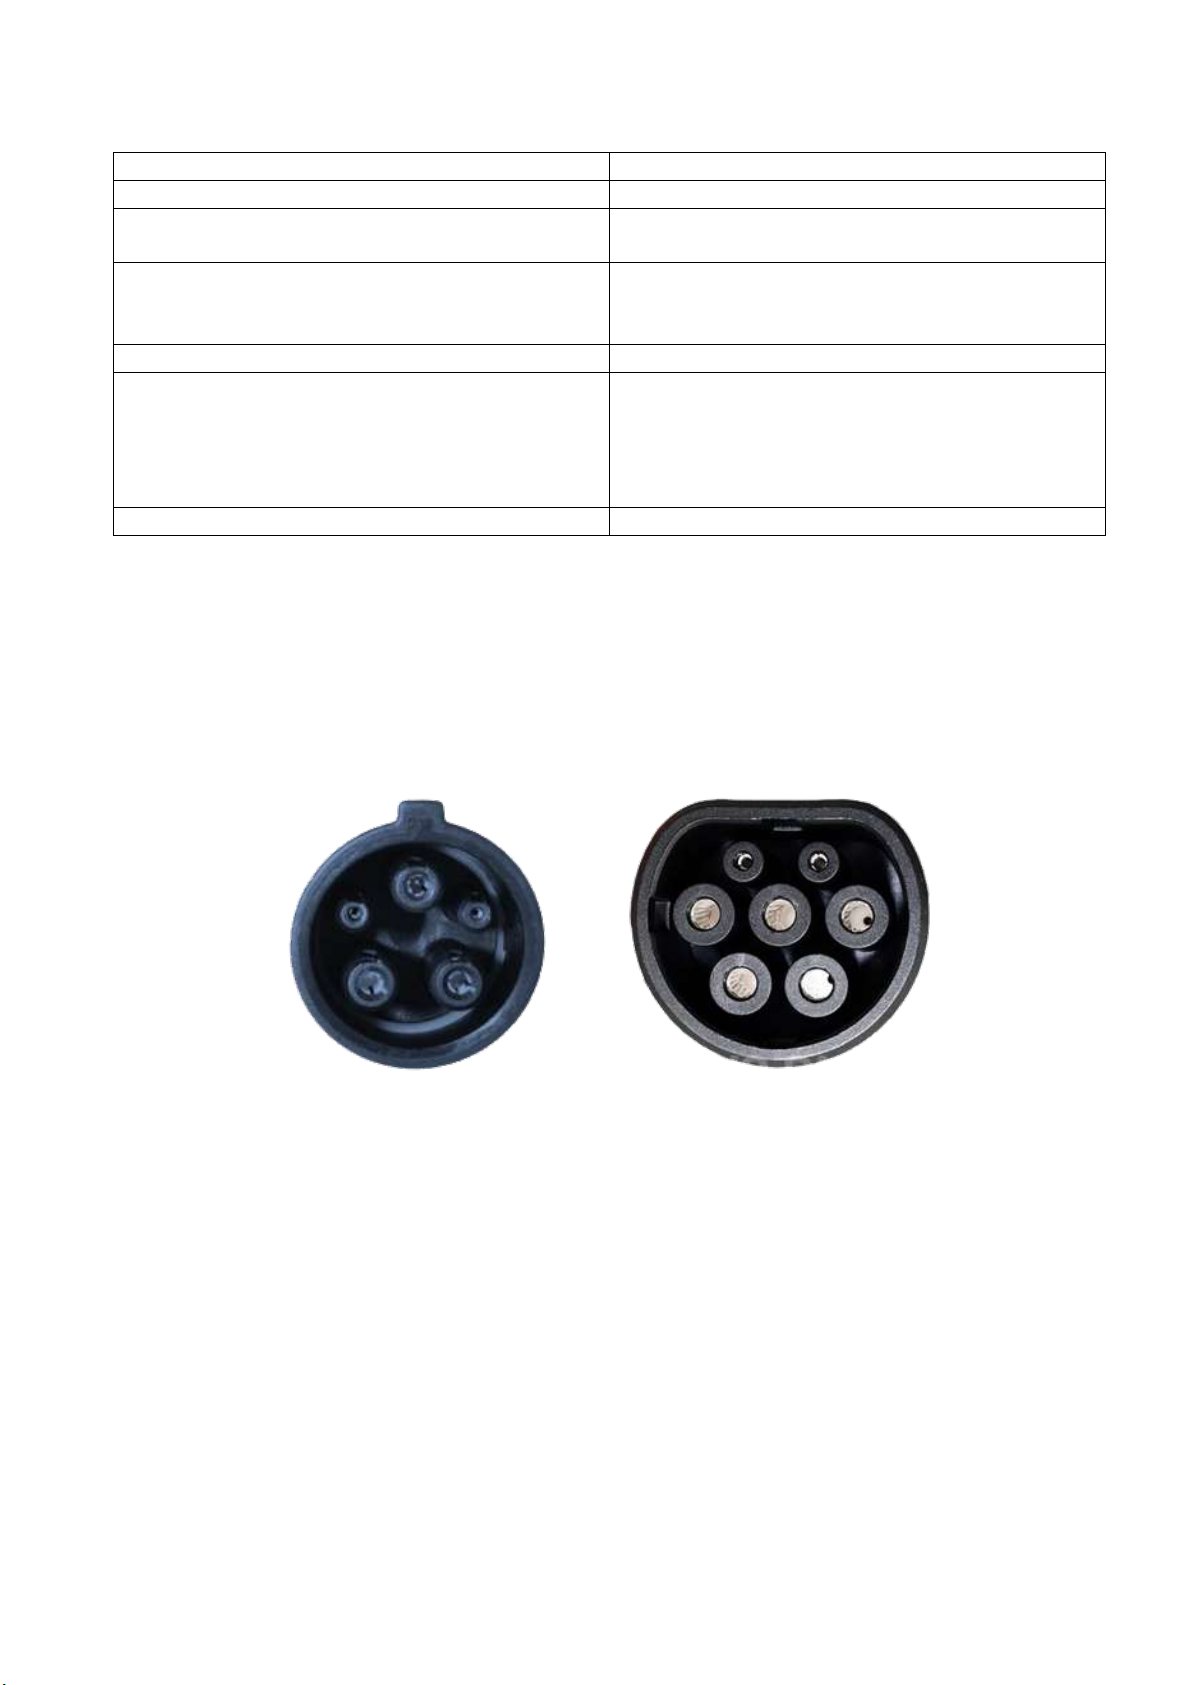
Plug type Type1 or Type2*
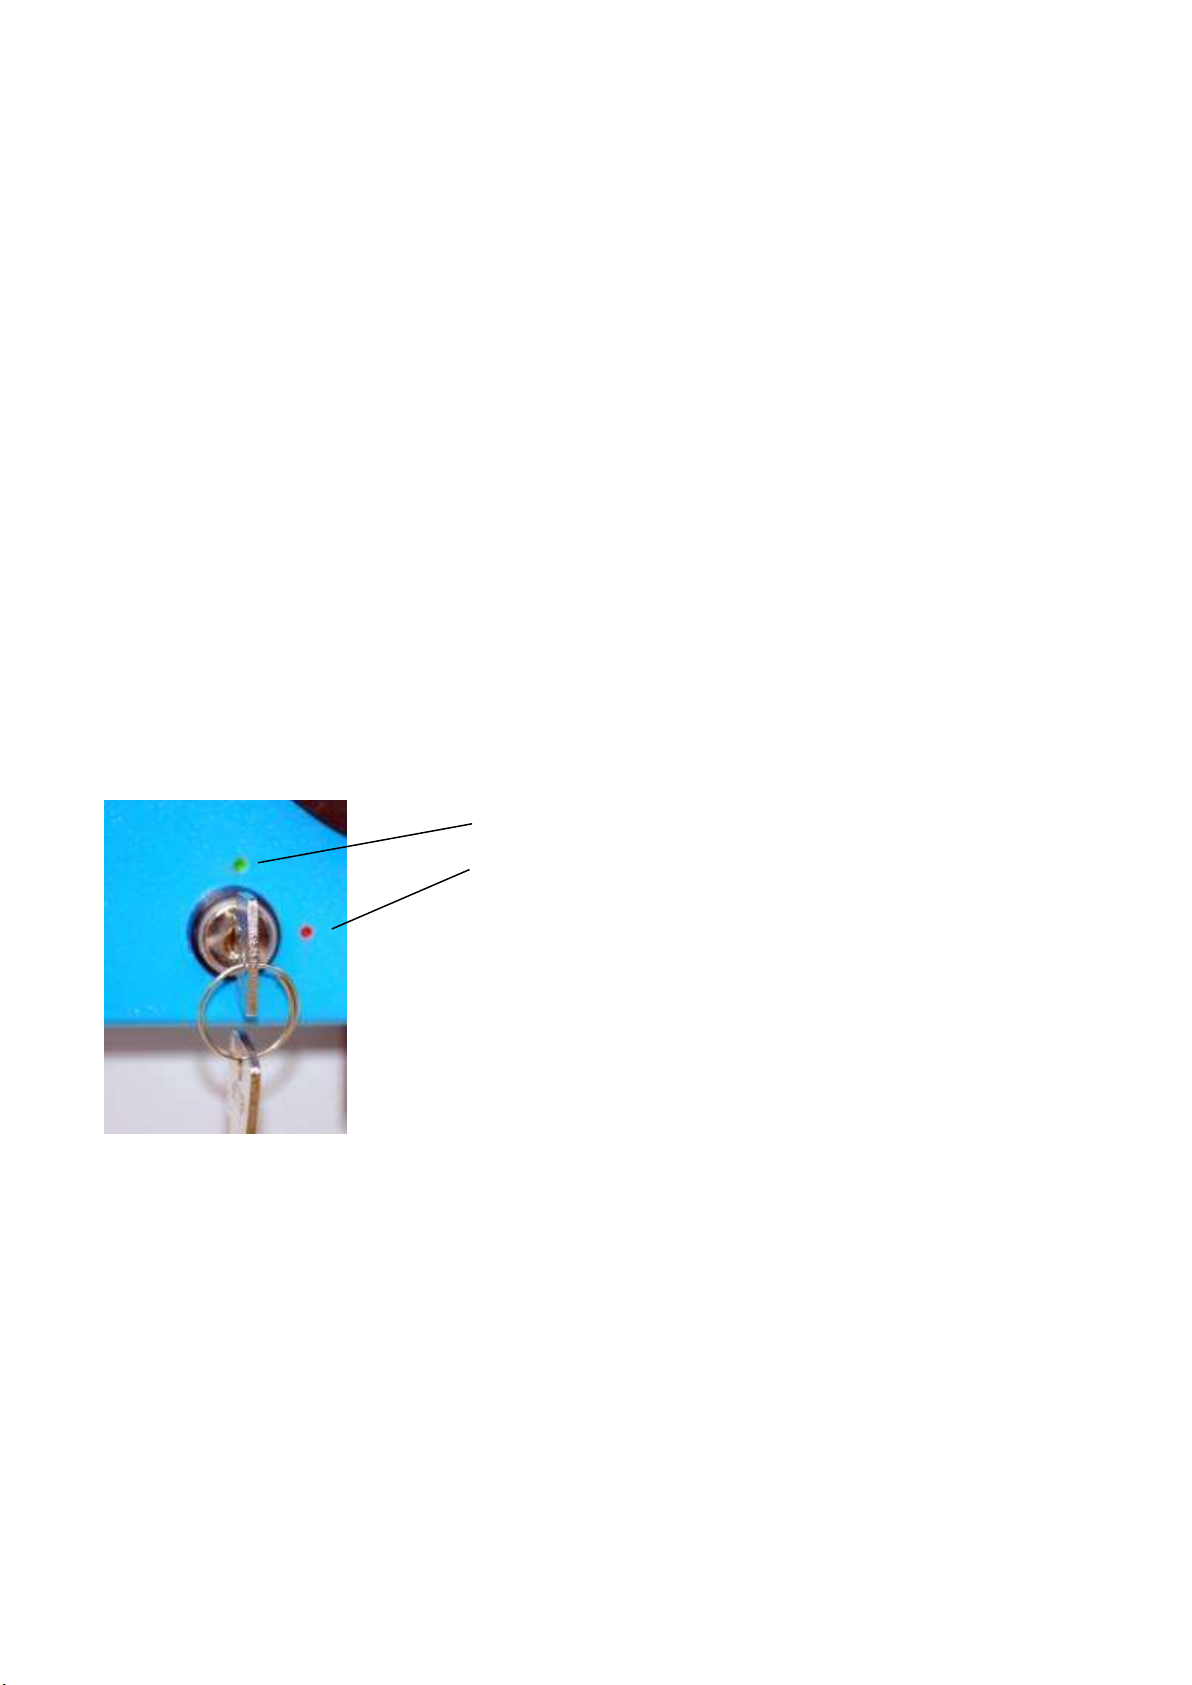
Display Tri-color LED
Housing Flame and impact resistant, fiberglass reinforced, extruded
polyester, painted
IP protection IP 54
Operational temperature -20...+50ºC
Enclosing dimensions 160x260x150mm
Weight cca.7,0kg
*Depending on the appliance type
THE APPLIANCE SHOULD ONLY BE INSTALLED BY A QUALIFIED ELECTRICIAN!
In accordance with the relevant standards, electrical safety devices (RCO, RCB) have to be installed in the
charging circuit during installation. These devices are not included with the charger and must be purchased
separately. The distributor offers them in optional installation kits which can be ordered from the distributor.

3.
Using the device
3.1. Introducing the device
3.2. Indications of the LED indicator
The LED indicator shows the status of the device and the charging process. The LED is located inside the device,
its light is clearly visible from a distance through a small window mounted on the front panel.
When the device is powered, the control electronics runs initialization and self-test program. This takes about
5…10 seconds and during this initialization process the LED flashes in different colors. The device then enters
standby mode and waits for a vehicle to get connected.
Charging plug
Tri-color LED display

The LED indicator indicates the following statuses:
LED status
Meaning
Not lighting
The charger is not powered. It is out of service.
Flashes blue (approximately in every second)
The charger is in standby mode and a vehicle can be
connected to it.
Solid blue
A vehicle is connected to the charger, the data
exchange between the vehicle and the charger is in
progress.
Solid green
Vehicle charging is in progress.
Solid red
You have connected a vehicle to the charger that
may release hazardous gases while charging (an
older lead-acid battery electric vehicle) and requires
a fan control. Such vehicles cannot be charged with
this charger!
Flashes red (approximately in every second)
Failure recognized.
3.3. Connecting and charging the EV
You can connect your electric vehicle to the charger with the built-in charging cable. At the end of the charging
cable (which is connected to the vehicle) there is installed a Type1 or a Type2 plug (depending on the type of
your car’s charging inlet). You need to order the device with the right type of plug for your EV.
Type1 connector Type2 connector
1.The LED flashes in blue (approximately in every second)
2. Connect the charging cable to the vehicle. Push the plug into the socket in correct position and push it
perpendicular to the socket until it stops. Do not pull or force, the plug should slide easily and smoothly into the
socket. Be sure to push the plug all the way in. Be sure to run the cable loosely, lying on the ground. Never
stretch, pull, force the cable, but stand closer to the charger with the car if neccessary!
If the device is equipped with an optional key locker, then turn the key to ON position (indicated by a green dot).
The charger will not connect to the vehicle until the key lock is turned ON.
3.Lock the vehicle and / or allow charging according to the vehicle's owner's manual, if necessary - the LED
should light solid blue.

Do not try to unplug the appliance while charging!
4. When the charging process starts, you will hear a clicking sound from the device and the LED will start to light
up continuously green. Charging lasts until the car battery is fully charged or the charging is being stopped.
5. When the car battery is fully charged, the device enters into standby mode (the LED lights solid blue). You can
then disconnect the cable from the vehicle, the charging process is complete. (In some cars, you can only
disconnect the cable by opening the doors and / or stopping charging according to the vehicle's instruction
manual.)
6. If the charging process is still on-going but you want to stop it, then always stop it in the vehicle first! Open
the vehicle’s doors and / or stop charging according to the vehicle's operating instructions. (On some vehicles,
a latch does not allow the cable to be unplugged while charging is in progress.)
When charging is complete, you may unplug the cable from the vehicle or leave it plugged in (the last is
strongly recommended for some car models, as the vehicle can use charger’s AC power to temper the battery
in this case). Place the cable and the plug to the cable holder so that the plug shall not touch the floor. The plug
and cable must be protected from mechanical damages and dirt. Never stand on the charging cable with the
car, as its internal wires may be damaged! If the plug and/or its contact terminals are damaged or dirty, do
not use the appliance until it has been properly repaired!
3.4. Key lock (optional)
If you ordered the device with this option, there is a key lock installed on the front
panel. The key lock does not de-energize or switch off the charger! The key lock in
the charger control activates electronics that prevents the charger from connecting
(exchanging data) with the vehicle. Thus, even if an unauthorized person connects
your vehicle to the charger with the charging cable, the LED will flash blue and will
not charge the vehicle until enabled with the key lock.
If you turn off the key lock while charging (turning it to the disable charging
position), the charger continuously reduces the charging current to 6A in about 5 seconds and then completely
shuts off the charging current from the output. The charging cable can then be unplugged from the vehicle
socket) and the charger switches to standby mode, the LED starts flashing blue.
3.5. De-energizing the appliance
If it is necessary for any reason, you can only disconnect the appliance and the lead-in cable with the circuit
breaker switch installed in the local electrical distribution cabinet by the installer. Label this power switch!
3.6. Limiting the maximum charging current
Charging your vehicle with the maximum charging current of the charger sometimes may overload your home
electrical network. This can especially happen if several high-power consumers operate in the property in
parallel (e.g., electric boiler, electric oven, air conditioner, washing machine, dishwasher, and car charging, etc.)
then the electrical overcurrent protection of the property is activated and one or more fuses (circuit breakers)
green dot (ON - charging enabled)
red dot (OFF - charging disabled)

in the electrical distribution cabinet are switching off. If this is rare, it turns occasionally then turn off one of the
consumers and turn the fuse back on. Avoid using high-power consumers in your household at the same time
as charging the vehicle.
However, if you regularly overload the home network while charging your car, you have the following options:
• Ask your electricity supplier to increase the electrical performance of the property (this might be an additional
paid service)
• The maximum charging current of the charger shall be limited. This means that the charger will charge the
vehicle with less power (and of course little slower).
The maximum charging current of the device can be reduced in one ampere steps up to 6A. To do this, the
removal of the cover of the appliance is required, hence only a qualified electrician shall do it!
Setting the charging current limit is described in the installation guide supplied with the device.

3.7. Troubleshooting guide
Symptom
Cause of error / Remediation
LED indicator is off
The device is not receiving power, it’s out of service.
• Check with your service provider wheter you have
a power failure,
• Check that the overcurrent and / or current
protection switch in the electrical cabinet is not
switched off - switch it on again!
LED flashes blue, but the charger is not connected to
the vehicle
The charging cable is not connected properly
• Check that the charging cable is properly
connected (as far as it will go) to the charger and the
vehicle;
The key lock is off
• Enable charging with the key switch.
LED is solid blue, but the charging does not start
Not an error. The vehicle battery is fully charged and
no additional charge is required
When the vehicle is connected, the LED is solid red
You want to charge an electric vehicle (old, lead-acid
battery) whose batteries can release hazardous
gases while charging, so you need to control a
ventilation fan.
• The charger can not be used to charge such
vechicles.
LED flashes red
Other error
• This fault usually indicates a fault in the electric
vehicle (on-board charger).
The charging cable cannot be unplugged, the LED is
solid blue or solid green
Not an error - during the charging process, the car's
charging input locks the connector to prevent the
charging cable from being accidentally unplugged.
• Wait for the charging process to end, or stop
charging and then unplug the charging cable.
When charging, one or more circuit brakers / fuses
in the electrical distribution cabinet are regularly
switched off
The property network is overloaded.
• The maximum charging current of the charger
must be limited.

4.
Repair and maintenance
4.1. Repair
The end-user shall not make any repairs on the device. Opening or removing the cover
of the device by the end-user is life-threatening and strictly prohibited!
The appliance may only be installed and repaired by a qualified electrician. Repairs may only be carried out by
replacing the defective part.
During the warranty period, repairs may only be carried out by a person authorized by the manufacturer. Notify
the distributor or manufacturer of any damage with the device during the warranty period.
Modification of the device in any form is strictly prohibited!
WARNING! ALL RESPONSIBILITIES AND OBLIGATIONS OF THE MANUFACTURER AND DISTRIBUTOR CEASED
WITH ANY MODIFICATION / CHANGE OF THE APPLIANCE BY THE END USER.
4.2. Maintenance
The device requires no maintenance other than regular (monthly) testing of the electric shock protection (RCB).
4.3. Cleaning
The outer cover of the appliance shall only be cleaned with a dry cloth. No other type of cleaning is required.
Do not clean the device with wet cloth or with chemicals!
This manual suits for next models
5
Table of contents