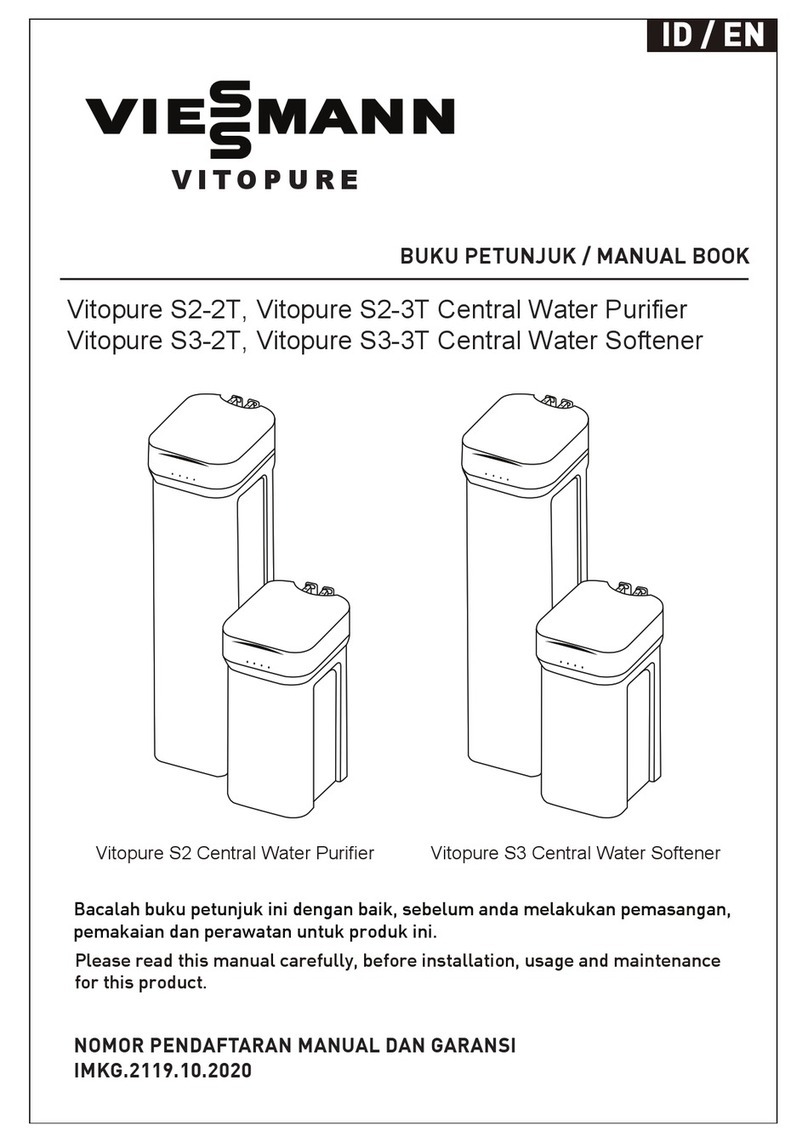
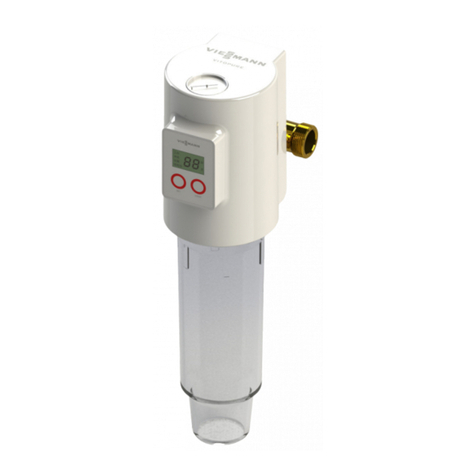
Viessmann Vitopure S6-T Product guide

NOMOR PENDAFTARAN MANUAL DAN GARANSI
IMKG.2119.10.2020
VITOPURE S6-T VITOPURE S6-S
Faucet Filter Water Purifier Vitopure S6-T
Shower Filter Water Purifier Vitopure S6-S
DIIMPOROLEH/ IMPORTEDBY :
PT. ADITYA SARANA GRAHA,
JL. DAAN MOGOT KM. 18, KAWASANPERGUDANGAN
SEMANAN MEGAHKAV. 7/A-7/F
JAKARTA BARAT -INDONESIA NEGARA PEMBUAT / MADE IN: CHINA
CUSTOMER CARE
VIESSMANN SINGAPORE PTE.LTD
25 INTERNATIONAL BUSINESS PARK # 03-109
GERMAN CENTRE
SINGAPORE (609916)
VIESSMANN GROUP
VIESSMANNSTRASSE 1, 35108 ALLENDORF (EDER),
GERMANY
VITOPUR E
12
VITOPUR E
ID / EN
BUKU PETUNJUK / MANUAL BOOK
Bacalah buku petunjuk ini dengan baik, sebelum anda melakukan pemasangan,
pemakaian dan perawatan untuk produk ini.
Please read this manual carefully, before installation, usage and maintenance
for this product.

2
DAFTAR ISI
DIAGRAM PEMASANGAN
CATATAN :
Petunjuk Keselamatan
Petunjuk Keselamatan ............................................................................................... 3
Installasi Diagram
Installasi diagram .............................................................................2
Sasaran ............................................................................................................................ 3
Peraturan dan regulasi pemasangan .................................................................... 3
Perhatian sebelum pemasangan, pemakaian dan
penggunaan.................................................................................................................... 3
Informasi produk
Deskripsi produk ........................................................................................................... 4
data teknik ....................................................................................................................... 4
Bagian-bagian produk ................................................................................................ 5
Petunjuk Pemasangan
Kemasan produk .............................................................................................. 8
unit dan aksesories ......................................................................................... 8
Hal yang perlu di perhatikan pada saat pemasangan ....................... 8
Langkah-langkah pemasangan .................................................................. 8
Pemakaian pertama
Pemeriksaan installasi ..................................................................................... 11
Penggunaan pertama dan pengaturan ................................................... 11
Penggantian Filter
-
Diagram instalasi hanya menjelaskan deskripsi skematis dari
urutan penempatan perangkat. untuk pemasangan di tempat
pelanggan, disesuaikan dengan lokasi dan mengacu pada buku
petunjuk ini
VITOPUR E
23
NOTED :
......................................................................................................................................................................................................
......................................................................................................................................................................................................
......................................................................................................................................................................................................
......................................................................................................................................................................................................
......................................................................................................................................................................................................
......................................................................................................................................................................................................
......................................................................................................................................................................................................
......................................................................................................................................................................................................
......................................................................................................................................................................................................
......................................................................................................................................................................................................
......................................................................................................................................................................................................
......................................................................................................................................................................................................
......................................................................................................................................................................................................
......................................................................................................................................................................................................
......................................................................................................................................................................................................
......................................................................................................................................................................................................
......................................................................................................................................................................................................
......................................................................................................................................................................................................
......................................................................................................................................................................................................
......................................................................................................................................................................................................
......................................................................................................................................................................................................
......................................................................................................................................................................................................
......................................................................................................................................................................................................
......................................................................................................................................................................................................
......................................................................................................................................................................................................
......................................................................................................................................................................................................
......................................................................................................................................................................................................
......................................................................................................................................................................................................
......................................................................................................................................................................................................
......................................................................................................................................................................................................
.....................................................................................................................................................................................................
.....................................................................................................................................................................................................
.....................................................................................................................................................................................................
.....................................................................................................................................................................................................
.....................................................................................................................................................................................................
.....................................................................................................................................................................................................
.....................................................................................................................................................................................................
.....................................................................................................................................................................................................
.....................................................................................................................................................................................................
.....................................................................................................................................................................................................
.....................................................................................................................................................................................................
ID
Vitopure S6-T
Faucet lter waer
purier
Service
valve
Main inlet
valve
Water
meter
Vitopure S1-B
Pre-filter
Service
valve
Water purification pipeline
Kitchen faucet
Purified wateer faucet
r faucet
Drain pipe
Soft water pipe
Drain
pipe
Vitopure S3-3T
Water softe ner
Vitopure S2-3T
Central water purifier
Drain
pipe
Water heater
Vitopure S6-S
Shower lter water
purier

3
PETUNJUK KESELAMATAN
Bahaya Peringatan Catatan
Harap ikuti dengan seksama tip keselamatan ini untuk mengurangi risiko sengatan listrik, cedera, kebakaran,
kematian, dan kerusakan properti.
Ini menunjukkan potensi bahaya yang sangat
mungkin menyebabkan cedera serius atau
kematian
Ini menunjukkan potensi bahaya yang sangat
mungkin menyebabkan cedera serius
atau kematian.
Ini menunjukkan bahaya yang dapat
mengakibatkan cedera ringan atau kerusakan
properti
Simbol ini digunakan untuk
mengingatkan pengguna
tentang langkah-langkah
operasi yang dilarang
Simbol ini digunakan untuk
mengingatkan pengguna
tentang langkah-langkah
pengoperasian yang harus
diikuti untuk mengoperasikan
produk ini dengan aman
CATATAN
SASARAN
PERHATIAN SEBELUM PEMASANGAN PERAWATAN DAN
PEMAKAIAN
Vitopure S6-T
Perangkat ini digunakan untuk menyaring air kran dan air
bersih olahan. Hasil penyaringan dari perangkat ini tidak
bisa diminum langsung.
Perangkat dipasang di keran air dalam rumah.
Lokasi pemasangan diharuskan jauh dari bahan bahan
seperti asam, alkali dan gas untuk menghindari korosi.
Jika perangkat ini tidak digunakan dalam jangka waktu
yang lama, stop kran harus ditutup atau dimatikan.
Jika perangkat ini sudah lama tidak digunakan, untuk
pemakaian pertama kali mohon buka stop kran secara
perlahan pada flowmeter, dan bersihkan kotoran
sebelum digunakan.
Penggunaan spare part yang tidak kompatibel pada
perangktat ini bisa menyebabkan perangkat ini tidak
bekerja dengan baik
Penggunaan spare part yang tidak original atau yang
dimodifikasi bisa menyebabkan perangkat ini tidak
berfungsi dengan baik dan menghilangkan status garansi
perangkat tersebut.
Jika ada penggantian spare part, Spare part pengganti
harus spare part original dari Viessmann.
Vitopure S6-S
Perangkat ini digunakan untuk menyaring air kran dan air
bersih olahan. Hasil penyaringan dari perangkat ini tidak
bisa diminum langsung.
Perangkat dipasang pada katup kran mixer keran perawatan
harus dipasang di antara perangkat dan meter air utama
serta antara perangkat dan bagian belakang perangkat.
Lokasi pemasangan diharuskan jauh dari bahan bahan
seperti asam, alkali dan gas untuk menghindari korosi.
Jika perangkat ini tidak digunakan dalam jangka waktu
yang lama, stop kran harus ditutup atau dimatikan.
Jika perangkat ini sudah lama tidak digunakan, untuk
pemakaian pertama kali mohon buka stop kran secara
perlahan pada flowmeter, dan bersihkan kotoran sebelum
digunakan.
Penggunaan spare part yang tidak kompatibel pada
perangkat ini bisa menyebabkan perangkat ini tidak
bekerja dengan baik
Penggunaan spare part yang tidak original atau yang
dimodifikasi bisa menyebabkan perangkat ini tidak
berfungsi dengan baik dan menghilangkan status garansi
perangkat tersebut.
Jika ada penggantian spare part, Spare part pengganti
harus spare part original dari Viessmann.
ATURAN DAN REGULASI
Buku petunjuk ini di tujukan bagi pelanggan untuk mempermudah
pengoperasian perangkat ini.
Untuk perawatan dan perbaikan disarankan untuk menghubungi
tenaga profesional atau menghubungi service center
Peraturan tentang instalasi air bersih
Peraturan tentang perlindungan keselamatan kerja
Peraturan tentang perlindungan lingkungan
Produk ini direkomendasikan untuk sumber air PAM
Jangan menyambungkan atau menggunakan perangkat
ini dengan sumber air yang tidak direkomendasikan.
Perangkat ini bekerja pada range temperature 1 - 39oC.
Ruang yang cukup diperlukan untuk pemasangan dan
penggunaan perangkat ini pada saat instalasi
Jika perangkat harus dipasang di ruangaan terbuka, maka
perangkat harus dibuatkan pelindung supaya tida terkena
langsung sinar matahari, hujan atau ancaman - ancaman lainnya
Perangkat dan kelengkapan lainya seperti pipa sambungan
sebaiknya ditempatkan di area yang sejuk untuk mencegah
kerusakan pada perangkat dan kelengkapan lainnya
Setiap pergantian spare part, akan mempengaruhi safety
dari perangkat ini, maka pergantian spare part harus
menggunakan sparepart original dari Viessmann
Produk ini direkomendasikan untuk sumber air PAM
Jangan menyambungkan atau menggunakan perangkat
ini dengan sumber air yang tidak direkomendasikan.
Ruang yang cukup diperlukan untuk pemasangan dan
penggunaan perangkat ini pada saat instalasi
Jika perangkat harus dipasang di ruangaan terbuka, maka
perangkat harus dibuatkan pelindung supaya tidak terkena
langsung sinar matahari, hujan atau ancaman - ancaman lainnya
Perangkat dan kelengkapan lainya seperti pipa sambungan
sebaiknya ditempatkan di area yang sejuk untuk mencegah
kerusakan pada perangkat dan kelengkapan lainnya
Setiap pergantian spare part, akan mempengaruhi safety
dari perangkat ini, maka pergantian spare part harus
menggunakan sparepart original dari Viessmann
Harap mengikuti peraturan atau regulasi tentang tata cara
pemasangan pipa air, listrik dan sanitasi selama pemasang.
Direkomendasikan menggunakan fiting pipa yang sesuai
dengan standar nasional.
VITOPUR E
22
NOTED :
......................................................................................................................................................................................................
......................................................................................................................................................................................................
......................................................................................................................................................................................................
......................................................................................................................................................................................................
......................................................................................................................................................................................................
......................................................................................................................................................................................................
......................................................................................................................................................................................................
......................................................................................................................................................................................................
......................................................................................................................................................................................................
......................................................................................................................................................................................................
......................................................................................................................................................................................................
......................................................................................................................................................................................................
......................................................................................................................................................................................................
......................................................................................................................................................................................................
......................................................................................................................................................................................................
......................................................................................................................................................................................................
......................................................................................................................................................................................................
......................................................................................................................................................................................................
......................................................................................................................................................................................................
......................................................................................................................................................................................................
......................................................................................................................................................................................................
......................................................................................................................................................................................................
......................................................................................................................................................................................................
......................................................................................................................................................................................................
......................................................................................................................................................................................................
......................................................................................................................................................................................................
......................................................................................................................................................................................................
......................................................................................................................................................................................................
......................................................................................................................................................................................................
......................................................................................................................................................................................................
.....................................................................................................................................................................................................
.....................................................................................................................................................................................................
.....................................................................................................................................................................................................
.....................................................................................................................................................................................................
.....................................................................................................................................................................................................
.....................................................................................................................................................................................................
.....................................................................................................................................................................................................
.....................................................................................................................................................................................................
.....................................................................................................................................................................................................
.....................................................................................................................................................................................................
.....................................................................................................................................................................................................
ID

4
DESKRIPSI PRODUK
DATA TEKNIS
Perangkat ini dipasang di keran air rumah. Elemen filter digunakan untuk menahan kotoran seperti endapan lumpur,
karat, dan kandungan padat di dalam air. Perangkat juga menghilangkan warna dan bau dari air. Setelah elemen
penyaring mencapai usianya, maka akan diganti dengan yang baru.
Vitopure S6-T Faucet Filter Water Purifier
21
NOTES : NOTES :
MAINTENANCE AND USE
FIRST USEREPLACE FILTER ELEMENT
■After installation, slowly turn on water mixer.
Inspect all pipeconnections involved in the installation
process for water leakage.
■
.
The device is used to reduce sand, gravel, debris and other
sediments contained in water or accumulated on pipe wall.
If the water sourceitself contains viscous sediment, such as
silt andclay etc., it is necessary to replace filter element on a
regularly
Replace filter element
Initial use and start-up
S6-T
S6-S
■Turn off water faucet and put outlet knob to the position
"Raw Water" or "Raw Water Sprinkler".
Unscrew the used filter element from water purifier.
Mount new filter element.
Turn on water faucet.
Turn off water faucet after it is found that water flow
is stable.
Check all pipe connections involved for water leakage and
tighten again if necessary.
When filter element is replaced, pay attention to measuring
the height and angle. No obvious stress is allowed after
connection, so as to avoid water purifier being damaged due
to stress during long-term use.
■
■
■
■
■
■
■Turn off water mixer.
Unscrew the shower from shower hose and water mixer.
Open the upper cover of shower, take out the used filter
element, put in a new filter element and screw the upper
cover.
Connect shower to shower hose and water mixer.
Turn on water mixer. Turn off it after it is found that water
flow is stable.
Check all connections for water leakage and tighten again
if necessary.
When filter element is replaced, pay attention to measuring
the height and angle. No obvious stress is allowed after
connection, so as to avoid water purifier being damaged due
to stress during long-term use.
■
■
■
■
■
■
Mount new filter elementand finish the
replacement step.
Unscrew filter element from the device
Check Tightness
When the device is used for the first time, please check all
connecting fittings to make sure there is no water leakage.
Slowly turn on the mixer knob and check whether the
drainage goes smoothly.
Do not allow water temperature to exceed 50°C when raw
water (tap water) is used.
Since carbon-contained water may flow out when water
purifier is used for the first time, please make water flow
for 60 seconds before use.
Before daily use, please make water flow for 10 seconds.
If water purifier is not used for a long time, please make
water flow for 60 seconds before use.
When filter element is installed or replaced, make sure to
turn off water mixer. Upon the completion of replacement,
please make water flow for 60 seconds to remove carbon
powder.
It is necessary to replace filter element, especially when
inflow water contains more clay or silt, it is required to
replace filter element frequently
ID
EN
Nama produk : Faucet Filter Water Purifier
Model : Vitopure S6-T
Air masuk : Air PAM
Filter : Coconut shell activated carbon filter
Kapasitas air : 83 liter/menit
Tekanan Kerja : 1.5 - 6.5 Bar
Pipa air Masuk / keluar : DN20
Temperatur Air Masuk : 1- 39ºC

5
Vitopure S6-T Faucet Filter Water Purifier
Alat - Alat Penyambung
Inner coarse coupling
Fixing nut
Inner fine coupling
Outer coarse coupling
Outer fine coupling
Raw water sprinkler outlet
Wrench
Outlet knob
Filter element
Raw water outlet
Purified water sprinkler outlet
DESKRIPSI BAGIAN PERANGKAT
Produk terdiri dari housing,filter element, fixing
nut,conversion & connection accessory kit, dan bagian lainnya
20
PRODUCT INSTALLATION
NOTES : NOTES :
External packaging and visual inspection
Check whether the packing box is damaged, detached
or loose during transportation or loading. Inspection on
items contained in packing box Check whether the device
is damaged in the packing box. Check whether there is any
missing of the items contained in packing box.
Inspection on installation environment
Installation Steps
Use Adapter
Installation requirements
Please prepare allnecessary materials and tools required
for installation.
Follow the steps requiredin the Installation and Service
Manual for proper installation.
Please consciously abide by national and localregulations
on plumbing, electrical appliances and sanitation during
installation.
It is recommendedto use the pipe fittings that meet the
requirements specified in national standard Specifications for
Evaluation on Sanitation and Safety of DrinkingWater
Distribution Equipment and Protective Materials.
Install water purifier on the
water outlet pipe of shower
mixer, andthen connect it
to the water inlet nut of
shower springkler
Unscrewthewater
nlet nut connecting to shower
hose and shower mixer
The device is suitable for municipal tap water.
Do not connect unsafe or unknown water source to
the device for filtering.
The device is used to pre-filter tap water and the
treated water is not available for direct drinking.
Do not allow water temperature to exceed 50°C when
raw water (tap water) is used.
The device is installed at the rear of showermixer.
Sufficient space is left during installation.
The installation should be away from acid and alkaline
substances orgases to avoid corrosion.
If it is required to install the devi ce outdoors, the device
room should be built to avoid the device exposure to sun,
rain, snow and otherdamages.
The device and connecting fittings should be insulated in
cold areas to prevent the deviceand connecting fittings
frombeing broken. .
Where it is not convenient to directly install
water purifier, firstly install adapter and then
connect to shower and sprinkler.
Turn off shower mixer valve. Install the device in the
selected position. Follow the direction of water inlet
and outlet during installation.
Where it is not convenient to directly install the device,
use adapter for connection.
When it is connected, pay attention to measuring the
height and angle.Noobvious stress is allowed after
ID
EN
1 Shower Filter Water Purifier
2 Filter Elements
2 Adapters
1 Installation And Service Manual
1 Quality Certificate
1 Warranty Card

6
DESKRIPSI PRODUK
DATA TEKNIS
Perangkat dipasang setelah katup shower. Perangkat menggunakan kombinasi material pemurni untuk memisahkan karat,
klorin, kotoran, khloroform, dan komponen berbahaya lainnya dari air mandi
Vitopure S6-S Shower Filter Water Purifier
Vitopure S6-S Shower filter water purifier
19
PRODUCT INSTALLATION
NOTES :
Installation Steps
■
■
1. Unscrew the filter mesh on water faucet.
2. .
Unscrew the fixing nut on water purifier. 3. Select the suitable thread coupling for
water faucet and insert the fixing nut into
water faucet.
4. Take the wrench in the conversion
& connection accessory kit to screw
the thread coupling into water faucet.
5. Make the thread coupling firmly
installed on water faucet.
6. Unscrew the filter element from the device.
7. Connect to water purifier with a fixing
nut.
8. Re-mount the filter element and
complete the installation.
Please prepare all necessary materials and tools required for installation.
Follow thesteps requiredin the Installation and ServiceManual for proper installation
ID EN
Nama produk : Shower Filter Water Purifier
Model : Vitopure S6-S
Air masuk : Air PAM
Filter : Compound filter
Kapasitas air : 83 liter/menit
Tekanan Kerja : 1.5 - 6.5 Bar
Pipa air Masuk / keluar : DN20
Temperatur Air Masuk : 1- 50ºC

7
DESKRIPSI BAGIAN PERANGKAT
Produk terdiri dari housing, filter element, adapter and other parts.
Vitopure S6-S Shower Filter Water Purifier
b
etween water
Upper cover
Filter element
Lower cover
Water inter
Adapter
18
PRODUCT INSTALATION
NOTE : NOTE :
NOTE :
External packaging and visual inspection
Installation requirements
Inspection on installation environment
Pemilihan Outlet
Raw Water, Raw Water Sprinkler and Purified Water are
optional.
Raw water spinkler
outlet
Raw water outlet
Purified water spinkler
outlet
Check whether the packing box is damaged, detached
or loose during transportation or loading. Inspection on
items contained in packing box. Check whether the
device is damaged in the packing box. Check whether
there is any missing of the items contained in packing
box.
The device is suitable for municipal tap water.
Do not connect unsafe or unknown water source to the
device forfiltering.
The device is used to pre-filter tap water and the treated
water is not available for direct drinking.
The device is installed on water faucet.
The installation should be away from acid and
alkaline substances orgases to avoid corrosion.
If it is required to install the deviceoutdoors, the device
room should be built toavoid the device exposuretosun,
rain, snow and other damages.
The device and connecting fittings should be insulatedin
cold areas to prevent the device and connecting fittings
from being broken.
Please prepare all necessary materials and tools
required
for installation. Follow the steps required in the
Installation and Service Manual for proper installation.
Please consciously abide by national and local
regulations on plumbing, electricalappliances and
sanitation during installation.
It is recommended to use the pipe fittings that meet the
requirements specified in national standard Specifications
for Evaluation on Sanitation and Safety of Drinking Water
Distribution Equipment and Protective Materials.
Turn off water faucet and leave outlet knob to the position
of raw water or raw water sprinkler.
Unscrew the filter mesh on water faucet.
Unscrew the fixing nut on the device.
Select the suitable thread coupling for water faucet from
the conversion & connection accessory kit.
Insert the fixing nut into water faucet.
Takethe wrenchin the conversion & connection
accessory kit to screw the thread coupling into water
faucet.
Make the thread coupling firmly installed onwater faucet.
Unscrew the filter element from the device.
Connect to the device with afixing nut.
When the fittings is connected, pay attention to
measuring the height and angle. No obvious stress is
allowed after connections, so as toavoid pipeline damage
and leakage
The knob can be rotated in an angle of 360°. Three water
outlet options are available
ID
EN
1 Faucet Filter Water Purifier
1 Conversion & Connection Accessory Kit
1 Installation And Service Manual
1 Quality Certificate
1 Warranty Card

8
PEMASANGAN PRODUK
CATATAN : CATATAN :
CATATAN :
Kemasan Produk
periksa apakah kemasan rusak, terlepas atau longgar
selama perjalanan atau pada saat bongkar muat
Periksa unit dan aksesories yang ada dikemasan
periksa apakah unit rusak di dalam kemasan.
periksa apakah ada barang yang hilang di dalam kemasan
Hal yang perlu dilakukan pada saat
Pemasangan
Syarat pemasangan
Pemilihan Outlet
Perangkat ini digunakan untuk membersihkan air
shower, tetapi air tidak bisa langsung diminum.
Perangkat dipasang di keran air
Proses instalasi sebaiknya jauh dari asam, basa, dan
gas untuk menghindari korosi.
Persiapkan material dan alat kerja untuk melakukan
pemasangan perangkat ini.
Harap mengikuti peraturan atau regulasi tentang tata
cara pemasangan pipa air, listrik dan sanitasi selama
pemasangan
iausesgnayapipgnittifnakanuggnemnakisadnemokeriD
dengan standar nasional.
Matikan keran air, dan putar tombol outlet di posisi
penyiram air.
Lepaskan jala filter di keran air.
Lepaskan fixing nut dari perangkat.
Pilih konektor yang benar untuk keran air dari kotak
aksesoris
Masukkan fixing nut ke dalam keran air.
Gunakan pengunci dari kotak aksesoris untuk
menggabungkan konektor ke keran air.
Pastikan konektor terpasang dengan pasangannya yang
benar di keran air
Lepaskan elemen filter dari perangkat.
Hubungkan ke perangkat dengan fixing nut.
Saat terpasang, perhatikan tinggi dan sudut. Hindari
penggunaan berlebih untuk mencegah kerusakan pada
pipa aliran dan kebocoran dalam jangka panjang
Katup dapat diputar dalam sudut 360°. Outlet air memiliki 3
pilihan:
Raw Water, Raw Water Sprinkler and Purified Water are
optional.
Raw water spinkler
outlet
Raw water outlet
Purified water spinkler
outlet
Produk ini direkomendasikan untuk sumber air PAM
Jangan menyambungkan atau menggunakan perangkat
ini dengan sumber air yang tidak direkomendasikan.
Jika perangkat harus dipasang di ruangaan terbuka, maka
perangkat harus dibuatkan pelindung supaya tida terkena
langsung sinar matahari, hujan atau ancaman - ancaman lainnya
Perangkat dan kelengkapan lainya seperti pipa sambungan
sebaiknya ditempatkan di area yang sejuk untuk mencegah
kerusakan pada perangkat dan kelengkapan lainnya
Ikuti langkah langkah yang ada di buku petunjuk
ini guna menghasilkan pemasangan yang benar.
17
PART DESCRIPTION
Vitopure S6-S Shower Filter Water Purifier
b
etween water
Upper cover
Filter element
Lower cover
Water inter
Adapter
The deviceconsists of housing, filter element, adapter and other parts.
ID EN
1 Faucet Filter Water Purifier
1 Conversion & Connection Accessory Kit
1 Installation And Service Manual
1 Quality Certificate
1 Warranty Card

9
PEMASANGAN PRODUK
CATATAN :
Langkah Pemasangan
■
■
1.Lepaskan jaring fil
ter pada keran air
2. .
Harap siapkan semua bahan dan alat yang diperlukan untuk pemasangan
Ikuti langkah-langkah yang diperlukan dalam Instalasi dan Manual Servis untuk instalasi yang benar.
buka sekrup pengunci pada pemurni air 3. pilih sambungan ulir yang sesuai untuk
keran air dan masukkan mur pengunci ke
dalam keran air
4. Ambil kunci pas di kit aksesori konversi &
koneksi untuk mengencangkan sambungan
ulir ke keran air.
5. Buat sambungan ulir terpasang kuat
pada keran air.
6. Lepaskan elemen filter dari perangkat.
7. Hubungkan ke pemurni air dengan mur
pengencang
8. pasang kembali elemen filter dan selesai
kan pemasangan
16
PRODUCT DESCRIPTION
TECHNICAL DATA
The device is installed after the shower mixer. It uses a composite purification material to remove rust, impurities,
residual chlorine, chloroform and other harmful components contained in water and provide clean bath water
Vitopure S6-S Shower Filter Water Purifier
Vitopure S6-S Shower Water Purifier
ID
EN
Product Name : Shower Filter Water Purifier
Model : Vitopure S6-S
Inlet Water : Municipal tap water
Filter : Compound filter
Flow Rate : 83 litre/minutes
Working Pressure : 1.5 - 6.5 Bar
Water inlet / output pipe : DN20
Inlet Water Temperature : 1- 50ºC

CATATAN :
Kemasan Produk
Pemasangan
Cara Pemasangan
dipipa saluran
alat penyiram.
10
PEMASANGAN PRODUK
CATATAN :
periksa apakah kemasan rusak, terlepas atau longgar
selama perjalanan atau pada saat bongkar muat
Periksa unit dan aksesories yang ada dikemasan
periksa apakah unit rusak di dalam kemasan.
periksa apakah ada barang yang hilang di dalam kemasan
Hal yang perlu dilakukan pada saat
Langkah - langkah pemasangan
Gunakan adaptor
Jangan memasang peralatan yang tidak aman dan sumber
air yang tidak diketahui ke perangkat ini
Perangkat ini digunakan untuk membersihkan air shower,
tetapi air tidak bisa untuk diminum.
.C°05ihibelemriauhusnakraibnagnaJ
Perangkat dipasang di belakang keran shower.
Proses instalasi sebaiknya jauh dari asam, basa, dan gas
untuk menghin dari korosi.
Matikan keran shower. Lalu pasang perangkat dengan
posisi yang diinginkan.
Ikuti arah dari inlet dan outlet air saat pemasangan.
Jika pemasangan tidak bisa dilakukan secara langsung,
Gunakan adaptor sebagai penghubung.
Saat terpasang, perhatikan tinggi dan sudut. Hindari
penggunaan berlebih untuk mencegah kerusakan pada
pipa aliran dan kebocoran jangka panjang.
Siapkan material dan alat kerja untuk melakukan
pemasangan perangkat ini.
Ikuti langkah langkah yang ada di buku petunjuk ini
guna menghasilkan pemasangan yang benar.
Harap mengikuti peraturan atau regulasi tentang tata
cara pemasangan pipa air, listrik dan sanitasi selama
pemasangan
Direkomendasikan menggunakan fitting pipa yang
sesuai dengan standar nasional.
Lepaskan mur
saluran masuk air
menghubungkan
ke selang shower dan
mixer shower.
Pasang pemurni air
keluar air mandi mixer,
lalu sambungkan ke
mur saluran air mandi
Jika tidak bisa untuk langsung memasang
pemurni air, pertama pasang adaptor dan
sambungkan ke pancuran dan penyiram.
Produk ini direkomendasikan untuk sumber air PAM
Ruang yang cukup diperlukan untuk pemasangan dan
penggunaan perangkat ini pada saat instalasi
Jika perangkat harus dipasang di ruangaan terbuka, maka
perangkat harus dibuatkan pelindung supaya tida terkena
langsung sinar matahari, hujan atau ancaman - ancaman lainnya
Perangkat dan kelengkapan lainya seperti pipa sambungan
sebaiknya ditempatkan di area yang sejuk untuk mencegah
kerusakan pada perangkat dan kelengkapan lainnya
15
Vitopure S6-T Faucet Filter Water Purifier
Conversion & connection
accessory kit
Inner coarse coupling
Fixing nut
Inner fine coupling
Outer coarse coupling
Outer fine coupling
Raw water sprinkler outlet
Wrench
Outlet knob
Filter element
Raw water outlet
Purified water sprinkler outlet
PART DESCRIPTION
The deviceconsists of housing, filter element,
fixing nut, conversion & connectionaccessory kit
and other parts.
ID
EN
1 Shower Filter Water Purifier
2 Filter Elements
2 Adapters
1 Installation And Service Manual
1 Quality Certificate
1 Warranty Card

11
CATATAN : CATATAN :
PERAWATAN & PEMAKAIAN
Pemakaian Pertama Penggantian Elemen Filter
■Setelah instalasi, perlahan - lahan putar keran untuk
menyalakan sumber air dari saluran utama.
■Periksa semua sambungan pipa untuk mencegah
kebocoran.
Perangkat ini digunakan untuk mengurangi pasir, kerikil,
puing, dan lainnya sedimen yang terkandung dalam air atau
terakumulasi di dinding pipa. Jika Sumber air sendiri
mengandung endapan kental, seperti lumpur, tanah liat
dll. Perlu mengganti elemen filter secara teratur.
Penggantian elemen filter
Elemen filter perlu diganti, terutama saat aliran masuk
air mengandung lebih banyak tanah liat atau lumut, itu
diperlukan
untuk mengganti filter elemen lebih sering.
Untuk mencegah sedimen dalam jumlah besar menghalangi
katup pembuangan, harap bersihkan saringan secara
manual.
Penggunaan pertama dan pengaturan
Perlahan - lahan nyalakan keran shower dan periksa
kondisi aliran.
Jangan biarkan suhu air melebihi 50°C saat air keran
digunakan.
Karena air mengandung karbon. Pada saat penggunaan
pertama, pastikan air mengalir 1 menit sebelum
pemakaian
Sebelum penggunaan setiap hari, biarkan air mengalir
10 detik.
Jika penyaring air lama tidak dipakai, pastikan air
mengalir terlebih dahulu selama 1 menit sebelum
pemakaian.
Saat elemen penyaring dipasang atau diganti, matikan
keran air. Setelah penggantian, nyalakan keran untuk
memastikan air mengalir selama 1 menit agar kandungan
bubuk karbon hilang.
S6-T
S6-S
■Matikan keran air dan ubah keran saluran keluar ke
posisinya "Air Mentah" atau "Penyiram Air Mentah".
■Lepaskan elemen filter bekas dari pemurni air.
■Pasang elemen filter baru.
■Nyalakan keran air.
■Matikan keran air setelah didapatkan aliran air stabil.
■Periksa semua sambungan pipa yang terhubung untuk
memastikan tidak ada kebocoran air dan kencangkan
kembali jika perlu.
■Saat elemen filter diganti, perhatikan jarak ketinggian
dan sudut. Tidak ada lekukan setelah sambungan.
untuk menghindari pemurni air rusak selama penggunaan
jangka panjang.
■Matikan air shower.
■Lepaskan shower dari selang shower dan keran air.
■Buka penutup shower, keluarkan elemen penyaring yang
sudah terpakai, ganti dengan yang baru, lalu tutup dan
kencangkan penutup.
■Sambungkan selang shower dan keran air.
■Nyalakan keran air. Jika aliran air sudah stabil, matikan
keran.
■Periksa semua koneksi untuk memastikan tidak ada
kebocoran.
■Saat terpasang, perhatikan tinggi dan sudut. Hindari
penggunaan berlebih untuk mencegah kerusakan pada pipa
aliran dan kebocoran jangka panjang.
Pasang elemen filter baru dan
selesaikan langkah penggantian
Lepaskan elemen filter dari perangkat.
Pemeriksaan instalasi
Saat perangkat digunakan untuk pertama kali,
periksa perangkat dan semua sambungan untuk
memastikan tidak ada kebocoran air.
14
PRODUCT DESCRIPTION
TECHNICAL DATA
Vitopure S6-T Faucet Filter Water Purifier
The device is installed on faucet in house. The filter element is used to intercept the impurities such as silt, rust and large
suspended solids contained in water. It also can absorb abnormal colors and odors containedin water. The filter element
should be replaced after the use for a certain period
ID
EN
Product Name : Faucet Filter Water Purifier
Model : Vitopure S6-T
Water Inlet : Municipal tap water
Filter : Coconut shell activated carbon filter
Flow Rate : 83 liter / minutes
Working Pressure : 1.5 - 6.5 Bar
Water Inlet / Output Pipe : DN20
Water Inlet Temperature : 1- 39ºC

13
SAFETY TIPS
Danger Warning Note
Please strictly follow these safety tips to reduce the risk of electric shock, injury, fire, death and
property damage.
It indicates a potential hazard that is highly
likely to cause serious
injury or death.
It indicates a potential hazard that
could result in serious injury or
death.
It indicates a danger
that could result in minor injury or property
damage.
This symbol is used to remind
user of the prohibited
operation steps.
This symbol is used to remind user
of the operation steps that must
be followed in order to operate this
product in a safe manner
NOTE
TARGETS
Precautions for installation,
maintenance and use for S6-T
Vitopure S6-S
RULES AND REGULATION TO BE OBSERVED DURING
INSTALATION
This manual is intended for use only by the designated
installer or its designated professionals.
National regulations on installation
Regulations on accident safety protection
Regulations on environmental protection
The deviceis suitable for municipal tap water and
Do not connect unsafe or unknownwater sourceto
the device for filtering.
The deviceis used to pre-filter tap water andthe
treated water is not available for direct drinking.
The working water temperature is 1-39ºC.
The deviceis installed on water faucet in the house.
Sufficient space is required for installation and operation
duringinstallation.
The installationshould be away from acid and alkaline
substances or gases to avoid corrosion.
If it is required to install the device outdoors, the device
room should be built to avoid the device exposuretosun,
rain, snow and other damages.
The deviceand connecting fittings should be insulated in
cold areas to prevent the deviceand connecting fittings
from
being broken.
Turn off the main water valve when the device is not used
for a long time or the user is absent from home.
Pleaseslowly turn on the main water valve before
resuming
use when the device is not used for a long time. Drain
sewageandrinse the device once before re-use.
The spare parts and wearing parts that do not compatible
withthe device or are not subject to inspection may affect
the device function.
The installation of unauthorized components or
The state issues special regulations on the disposal of
discarded electronic and electrical products. Such
regulations will vary from country to region. Please
properly dispose the used filter in accordance with relevant
national and local regulations.
Please contact a qualified plumber or local dealer
The deviceis suitable for municipal tap water.
Do not connect unsafe or unknown water sourceto the
device for filtering.
The deviceis used to pre-filter tap water and the treated
water is not available for direct drinking.
The deviceis installed on shower mixing valve.
Maintenance valves shouldbe installed between the
deviceand main water meterand between the device
andrear wading devices. Sufficient space is required for
installation and operation during installation.
The installation shouldbe away from acid and alkaline
substances or gases to avoid corrosion.
If it is required to installthe device outdoors, the device
room shouldbebuilt to avoid the device exposure to
sun, rain, snow and otherdamages.
The deviceand connecting fittings should beinsulatedin
cold areas to prevent the device and connecting fittings
from being broken.
Turn off the main water valve when the deviceis not
used for a long time or the user is absent from home.
Pleaseslowly turn on the main water valve before
resuming use when the device is not used for a long
time. Drainsewage and rinse the device once before
re-use.
The spare parts and wearing parts that do not
compatiblewith the device or are not subject to
inspection may affect
the device function.
The installation of unauthorized components or
unauthorized changes or modifications to the device
may affect operational safety and reduce warranty
coverage.
When any part is replaced, it is only allowed to use
Viessmann original parts or the spare parts approved by
Viessmann.
Repairing thecomponents with safety features may
affect the safe operation of the device.
Defective parts must be replaced withthe original
Viessmann parts.
12
Content
INSTALLATION DIAGRAM
NOTE :
SafetyTips
InstallationDiagram
Installation Diagram ................................................................................................................ 12
Safety Tips.................................................................................................................................... 13
Target groups ........................................................................................................... 13
Rules and Regulations to be observed .......................................................................... 13
Precautions for installations, maintenance and use ............................................. 13
Product Information
Product Description .............................................................................................. 14
Technical Parameter .............................................................................................. 14
Part description ........................................................................................................ 15
Product Installation
External Packaging and visual inspections .......................... 18
Inspection on installation environment ................................ 18
Installation Requirements .................................................... 18
Outlet Selection .................................................................... 18
First Use
Check Tightness ................................................................... 21
Initial use and start-up ........................................................... 21
Replace Filter element
Replace Filter element .......................................................... 21
Vitopure S6-S
The installation diagram provides only a schematic description of
installation sequence and location. Final installation must be
done in the installation environment
EN EN
Vitopure S6-T
Faucet lter waer
purier
Service
valve
Main inlet
valve
Water
meter
Vitopure S1-B
Pre-filter
Service
valve
Water purification pipeline
Kitchen faucet
Purified wateer faucet
r faucet
Drain pipe
Soft water pipe
Drain
pipe
Vitopure S3-3T
Water softe ner
Vitopure S2-3T
Central water purifier
Drain
pipe
Water heater
Vitopure S6-S
Shower lter water
purier

11
CATATAN : CATATAN :
PERAWATAN & PEMAKAIAN
Pemakaian Pertama Penggantian Elemen Filter
■Setelah instalasi, perlahan - lahan putar keran untuk
menyalakan sumber air dari saluran utama.
■Periksa semua sambungan pipa untuk mencegah
kebocoran.
Perangkat ini digunakan untuk mengurangi pasir, kerikil,
puing, dan lainnya sedimen yang terkandung dalam air atau
terakumulasi di dinding pipa. Jika Sumber air sendiri
mengandung endapan kental, seperti lumpur, tanah liat
dll. Perlu mengganti elemen filter secara teratur.
Penggantian elemen filter
Elemen filter perlu diganti, terutama saat aliran masuk
air mengandung lebih banyak tanah liat atau lumut, itu
diperlukan
untuk mengganti filter elemen lebih sering.
Untuk mencegah sedimen dalam jumlah besar menghalangi
katup pembuangan, harap bersihkan saringan secara
manual.
Penggunaan pertama dan pengaturan
Perlahan - lahan nyalakan keran shower dan periksa
kondisi aliran.
Jangan biarkan suhu air melebihi 50°C saat air keran
digunakan.
Karena air mengandung karbon. Pada saat penggunaan
pertama, pastikan air mengalir 1 menit sebelum
pemakaian
Sebelum penggunaan setiap hari, biarkan air mengalir
10 detik.
Jika penyaring air lama tidak dipakai, pastikan air
mengalir terlebih dahulu selama 1 menit sebelum
pemakaian.
Saat elemen penyaring dipasang atau diganti, matikan
keran air. Setelah penggantian, nyalakan keran untuk
memastikan air mengalir selama 1 menit agar kandungan
bubuk karbon hilang.
S6-T
S6-S
■Matikan keran air dan ubah keran saluran keluar ke
posisinya "Air Mentah" atau "Penyiram Air Mentah".
■Lepaskan elemen filter bekas dari pemurni air.
■Pasang elemen filter baru.
■Nyalakan keran air.
■Matikan keran air setelah didapatkan aliran air stabil.
■Periksa semua sambungan pipa yang terhubung untuk
memastikan tidak ada kebocoran air dan kencangkan
kembali jika perlu.
■Saat elemen filter diganti, perhatikan jarak ketinggian
dan sudut. Tidak ada lekukan setelah sambungan.
untuk menghindari pemurni air rusak selama penggunaan
jangka panjang.
■Matikan air shower.
■Lepaskan shower dari selang shower dan keran air.
■Buka penutup shower, keluarkan elemen penyaring yang
sudah terpakai, ganti dengan yang baru, lalu tutup dan
kencangkan penutup.
■Sambungkan selang shower dan keran air.
■Nyalakan keran air. Jika aliran air sudah stabil, matikan
keran.
■Periksa semua koneksi untuk memastikan tidak ada
kebocoran.
■Saat terpasang, perhatikan tinggi dan sudut. Hindari
penggunaan berlebih untuk mencegah kerusakan pada pipa
aliran dan kebocoran jangka panjang.
Pasang elemen filter baru dan
selesaikan langkah penggantian
Lepaskan elemen filter dari perangkat.
Pemeriksaan instalasi
Saat perangkat digunakan untuk pertama kali,
periksa perangkat dan semua sambungan untuk
memastikan tidak ada kebocoran air.
14
PRODUCT DESCRIPTION
TECHNICAL DATA
Vitopure S6-T Faucet Filter Water Purifier
The device is installed on faucet in house. The filter element is used to intercept the impurities such as silt, rust and large
suspended solids contained in water. It also can absorb abnormal colors and odors containedin water. The filter element
should be replaced after the use for a certain period
ID
EN
Product Name : Faucet Filter Water Purifier
Model : Vitopure S6-T
Water Inlet : Municipal tap water
Filter : Coconut shell activated carbon filter
Flow Rate : 83 liter / minutes
Working Pressure : 1.5 - 6.5 Bar
Water Inlet / Output Pipe : DN20
Water Inlet Temperature : 1- 39ºC

CATATAN :
Kemasan Produk
Pemasangan
Cara Pemasangan
dipipa saluran
alat penyiram.
10
PEMASANGAN PRODUK
CATATAN :
periksa apakah kemasan rusak, terlepas atau longgar
selama perjalanan atau pada saat bongkar muat
Periksa unit dan aksesories yang ada dikemasan
periksa apakah unit rusak di dalam kemasan.
periksa apakah ada barang yang hilang di dalam kemasan
Hal yang perlu dilakukan pada saat
Langkah - langkah pemasangan
Gunakan adaptor
Jangan memasang peralatan yang tidak aman dan sumber
air yang tidak diketahui ke perangkat ini
Perangkat ini digunakan untuk membersihkan air shower,
tetapi air tidak bisa untuk diminum.
.C°05ihibelemriauhusnakraibnagnaJ
Perangkat dipasang di belakang keran shower.
Proses instalasi sebaiknya jauh dari asam, basa, dan gas
untuk menghin dari korosi.
Matikan keran shower. Lalu pasang perangkat dengan
posisi yang diinginkan.
Ikuti arah dari inlet dan outlet air saat pemasangan.
Jika pemasangan tidak bisa dilakukan secara langsung,
Gunakan adaptor sebagai penghubung.
Saat terpasang, perhatikan tinggi dan sudut. Hindari
penggunaan berlebih untuk mencegah kerusakan pada
pipa aliran dan kebocoran jangka panjang.
Siapkan material dan alat kerja untuk melakukan
pemasangan perangkat ini.
Ikuti langkah langkah yang ada di buku petunjuk ini
guna menghasilkan pemasangan yang benar.
Harap mengikuti peraturan atau regulasi tentang tata
cara pemasangan pipa air, listrik dan sanitasi selama
pemasangan
Direkomendasikan menggunakan fitting pipa yang
sesuai dengan standar nasional.
Lepaskan mur
saluran masuk air
menghubungkan
ke selang shower dan
mixer shower.
Pasang pemurni air
keluar air mandi mixer,
lalu sambungkan ke
mur saluran air mandi
Jika tidak bisa untuk langsung memasang
pemurni air, pertama pasang adaptor dan
sambungkan ke pancuran dan penyiram.
Produk ini direkomendasikan untuk sumber air PAM
Ruang yang cukup diperlukan untuk pemasangan dan
penggunaan perangkat ini pada saat instalasi
Jika perangkat harus dipasang di ruangaan terbuka, maka
perangkat harus dibuatkan pelindung supaya tida terkena
langsung sinar matahari, hujan atau ancaman - ancaman lainnya
Perangkat dan kelengkapan lainya seperti pipa sambungan
sebaiknya ditempatkan di area yang sejuk untuk mencegah
kerusakan pada perangkat dan kelengkapan lainnya
15
Vitopure S6-T Faucet Filter Water Purifier
Conversion & connection
accessory kit
Inner coarse coupling
Fixing nut
Inner fine coupling
Outer coarse coupling
Outer fine coupling
Raw water sprinkler outlet
Wrench
Outlet knob
Filter element
Raw water outlet
Purified water sprinkler outlet
PART DESCRIPTION
The deviceconsists of housing, filter element,
fixing nut, conversion & connectionaccessory kit
and other parts.
ID
EN
1 Shower Filter Water Purifier
2 Filter Elements
2 Adapters
1 Installation And Service Manual
1 Quality Certificate
1 Warranty Card

9
PEMASANGAN PRODUK
CATATAN :
Langkah Pemasangan
■
■
1.Lepaskan jaring fil
ter pada keran air
2. .
Harap siapkan semua bahan dan alat yang diperlukan untuk pemasangan
Ikuti langkah-langkah yang diperlukan dalam Instalasi dan Manual Servis untuk instalasi yang benar.
buka sekrup pengunci pada pemurni air 3. pilih sambungan ulir yang sesuai untuk
keran air dan masukkan mur pengunci ke
dalam keran air
4. Ambil kunci pas di kit aksesori konversi &
koneksi untuk mengencangkan sambungan
ulir ke keran air.
5. Buat sambungan ulir terpasang kuat
pada keran air.
6. Lepaskan elemen filter dari perangkat.
7. Hubungkan ke pemurni air dengan mur
pengencang
8. pasang kembali elemen filter dan selesai
kan pemasangan
16
PRODUCT DESCRIPTION
TECHNICAL DATA
The device is installed after the shower mixer. It uses a composite purification material to remove rust, impurities,
residual chlorine, chloroform and other harmful components contained in water and provide clean bath water
Vitopure S6-S Shower Filter Water Purifier
Vitopure S6-S Shower Water Purifier
ID
EN
Product Name : Shower Filter Water Purifier
Model : Vitopure S6-S
Inlet Water : Municipal tap water
Filter : Compound filter
Flow Rate : 83 litre/minutes
Working Pressure : 1.5 - 6.5 Bar
Water inlet / output pipe : DN20
Inlet Water Temperature : 1- 50ºC

8
PEMASANGAN PRODUK
CATATAN : CATATAN :
CATATAN :
Kemasan Produk
periksa apakah kemasan rusak, terlepas atau longgar
selama perjalanan atau pada saat bongkar muat
Periksa unit dan aksesories yang ada dikemasan
periksa apakah unit rusak di dalam kemasan.
periksa apakah ada barang yang hilang di dalam kemasan
Hal yang perlu dilakukan pada saat
Pemasangan
Syarat pemasangan
Pemilihan Outlet
Perangkat ini digunakan untuk membersihkan air
shower, tetapi air tidak bisa langsung diminum.
Perangkat dipasang di keran air
Proses instalasi sebaiknya jauh dari asam, basa, dan
gas untuk menghindari korosi.
Persiapkan material dan alat kerja untuk melakukan
pemasangan perangkat ini.
Harap mengikuti peraturan atau regulasi tentang tata
cara pemasangan pipa air, listrik dan sanitasi selama
pemasangan
iausesgnayapipgnittifnakanuggnemnakisadnemokeriD
dengan standar nasional.
Matikan keran air, dan putar tombol outlet di posisi
penyiram air.
Lepaskan jala filter di keran air.
Lepaskan fixing nut dari perangkat.
Pilih konektor yang benar untuk keran air dari kotak
aksesoris
Masukkan fixing nut ke dalam keran air.
Gunakan pengunci dari kotak aksesoris untuk
menggabungkan konektor ke keran air.
Pastikan konektor terpasang dengan pasangannya yang
benar di keran air
Lepaskan elemen filter dari perangkat.
Hubungkan ke perangkat dengan fixing nut.
Saat terpasang, perhatikan tinggi dan sudut. Hindari
penggunaan berlebih untuk mencegah kerusakan pada
pipa aliran dan kebocoran dalam jangka panjang
Katup dapat diputar dalam sudut 360°. Outlet air memiliki 3
pilihan:
Raw Water, Raw Water Sprinkler and Purified Water are
optional.
Raw water spinkler
outlet
Raw water outlet
Purified water spinkler
outlet
Produk ini direkomendasikan untuk sumber air PAM
Jangan menyambungkan atau menggunakan perangkat
ini dengan sumber air yang tidak direkomendasikan.
Jika perangkat harus dipasang di ruangaan terbuka, maka
perangkat harus dibuatkan pelindung supaya tida terkena
langsung sinar matahari, hujan atau ancaman - ancaman lainnya
Perangkat dan kelengkapan lainya seperti pipa sambungan
sebaiknya ditempatkan di area yang sejuk untuk mencegah
kerusakan pada perangkat dan kelengkapan lainnya
Ikuti langkah langkah yang ada di buku petunjuk
ini guna menghasilkan pemasangan yang benar.
17
PART DESCRIPTION
Vitopure S6-S Shower Filter Water Purifier
b
etween water
Upper cover
Filter element
Lower cover
Water inter
Adapter
The deviceconsists of housing, filter element, adapter and other parts.
ID EN
1 Faucet Filter Water Purifier
1 Conversion & Connection Accessory Kit
1 Installation And Service Manual
1 Quality Certificate
1 Warranty Card

7
DESKRIPSI BAGIAN PERANGKAT
Produk terdiri dari housing, filter element, adapter and other parts.
Vitopure S6-S Shower Filter Water Purifier
b
etween water
Upper cover
Filter element
Lower cover
Water inter
Adapter
18
PRODUCT INSTALATION
NOTE : NOTE :
NOTE :
External packaging and visual inspection
Installation requirements
Inspection on installation environment
Pemilihan Outlet
Raw Water, Raw Water Sprinkler and Purified Water are
optional.
Raw water spinkler
outlet
Raw water outlet
Purified water spinkler
outlet
Check whether the packing box is damaged, detached
or loose during transportation or loading. Inspection on
items contained in packing box. Check whether the
device is damaged in the packing box. Check whether
there is any missing of the items contained in packing
box.
The device is suitable for municipal tap water.
Do not connect unsafe or unknown water source to the
device forfiltering.
The device is used to pre-filter tap water and the treated
water is not available for direct drinking.
The device is installed on water faucet.
The installation should be away from acid and
alkaline substances orgases to avoid corrosion.
If it is required to install the deviceoutdoors, the device
room should be built toavoid the device exposuretosun,
rain, snow and other damages.
The device and connecting fittings should be insulatedin
cold areas to prevent the device and connecting fittings
from being broken.
Please prepare all necessary materials and tools
required
for installation. Follow the steps required in the
Installation and Service Manual for proper installation.
Please consciously abide by national and local
regulations on plumbing, electricalappliances and
sanitation during installation.
It is recommended to use the pipe fittings that meet the
requirements specified in national standard Specifications
for Evaluation on Sanitation and Safety of Drinking Water
Distribution Equipment and Protective Materials.
Turn off water faucet and leave outlet knob to the position
of raw water or raw water sprinkler.
Unscrew the filter mesh on water faucet.
Unscrew the fixing nut on the device.
Select the suitable thread coupling for water faucet from
the conversion & connection accessory kit.
Insert the fixing nut into water faucet.
Takethe wrenchin the conversion & connection
accessory kit to screw the thread coupling into water
faucet.
Make the thread coupling firmly installed onwater faucet.
Unscrew the filter element from the device.
Connect to the device with afixing nut.
When the fittings is connected, pay attention to
measuring the height and angle. No obvious stress is
allowed after connections, so as toavoid pipeline damage
and leakage
The knob can be rotated in an angle of 360°. Three water
outlet options are available
ID
EN
1 Faucet Filter Water Purifier
1 Conversion & Connection Accessory Kit
1 Installation And Service Manual
1 Quality Certificate
1 Warranty Card

6
DESKRIPSI PRODUK
DATA TEKNIS
Perangkat dipasang setelah katup shower. Perangkat menggunakan kombinasi material pemurni untuk memisahkan karat,
klorin, kotoran, khloroform, dan komponen berbahaya lainnya dari air mandi
Vitopure S6-S Shower Filter Water Purifier
Vitopure S6-S Shower filter water purifier
19
PRODUCT INSTALLATION
NOTES :
Installation Steps
■
■
1. Unscrew the filter mesh on water faucet.
2. .
Unscrew the fixing nut on water purifier. 3. Select the suitable thread coupling for
water faucet and insert the fixing nut into
water faucet.
4. Take the wrench in the conversion
& connection accessory kit to screw
the thread coupling into water faucet.
5. Make the thread coupling firmly
installed on water faucet.
6. Unscrew the filter element from the device.
7. Connect to water purifier with a fixing
nut.
8. Re-mount the filter element and
complete the installation.
Please prepare all necessary materials and tools required for installation.
Follow thesteps requiredin the Installation and ServiceManual for proper installation
ID EN
Nama produk : Shower Filter Water Purifier
Model : Vitopure S6-S
Air masuk : Air PAM
Filter : Compound filter
Kapasitas air : 83 liter/menit
Tekanan Kerja : 1.5 - 6.5 Bar
Pipa air Masuk / keluar : DN20
Temperatur Air Masuk : 1- 50ºC

5
Vitopure S6-T Faucet Filter Water Purifier
Alat - Alat Penyambung
Inner coarse coupling
Fixing nut
Inner fine coupling
Outer coarse coupling
Outer fine coupling
Raw water sprinkler outlet
Wrench
Outlet knob
Filter element
Raw water outlet
Purified water sprinkler outlet
DESKRIPSI BAGIAN PERANGKAT
Produk terdiri dari housing,filter element, fixing
nut,conversion & connection accessory kit, dan bagian lainnya
20
PRODUCT INSTALLATION
NOTES : NOTES :
External packaging and visual inspection
Check whether the packing box is damaged, detached
or loose during transportation or loading. Inspection on
items contained in packing box Check whether the device
is damaged in the packing box. Check whether there is any
missing of the items contained in packing box.
Inspection on installation environment
Installation Steps
Use Adapter
Installation requirements
Please prepare allnecessary materials and tools required
for installation.
Follow the steps requiredin the Installation and Service
Manual for proper installation.
Please consciously abide by national and localregulations
on plumbing, electrical appliances and sanitation during
installation.
It is recommendedto use the pipe fittings that meet the
requirements specified in national standard Specifications for
Evaluation on Sanitation and Safety of DrinkingWater
Distribution Equipment and Protective Materials.
Install water purifier on the
water outlet pipe of shower
mixer, andthen connect it
to the water inlet nut of
shower springkler
Unscrewthewater
nlet nut connecting to shower
hose and shower mixer
The device is suitable for municipal tap water.
Do not connect unsafe or unknown water source to
the device for filtering.
The device is used to pre-filter tap water and the
treated water is not available for direct drinking.
Do not allow water temperature to exceed 50°C when
raw water (tap water) is used.
The device is installed at the rear of showermixer.
Sufficient space is left during installation.
The installation should be away from acid and alkaline
substances orgases to avoid corrosion.
If it is required to install the devi ce outdoors, the device
room should be built to avoid the device exposure to sun,
rain, snow and otherdamages.
The device and connecting fittings should be insulated in
cold areas to prevent the deviceand connecting fittings
frombeing broken. .
Where it is not convenient to directly install
water purifier, firstly install adapter and then
connect to shower and sprinkler.
Turn off shower mixer valve. Install the device in the
selected position. Follow the direction of water inlet
and outlet during installation.
Where it is not convenient to directly install the device,
use adapter for connection.
When it is connected, pay attention to measuring the
height and angle.Noobvious stress is allowed after
ID
EN
1 Shower Filter Water Purifier
2 Filter Elements
2 Adapters
1 Installation And Service Manual
1 Quality Certificate
1 Warranty Card
This manual suits for next models
1
Table of contents
Languages:
Other Viessmann Water Filtration System manuals
Popular Water Filtration System manuals by other brands

unGer
unGer HiFlo RO-Mobil Installation & operating instructions

Viega
Viega 4970 Instructions for use

Hydac
Hydac OLF-5/Z Installation and maintenance instructions

ELECTROSEA
ELECTROSEA CLEARLINE CL-2000-X2.0 installation manual

Anua
Anua Aerocell A Series owner's manual

Waterdrop
Waterdrop WD-C05 installation instructions

Hellenbrand
Hellenbrand HRO 6 Series user manual

EcoWater
EcoWater ESM11CE owner's manual

APSWATER
APSWATER RO10D1 OPERATING AND INSTALLATION Manual

Miele professional
Miele professional A 800 operating instructions

Aquaox
Aquaox FLECK 5800 XTR2 Quick start manual

BRUEL & KJAER
BRUEL & KJAER 1612 Instructions and applications