manuals.online logo
Brands
  1. Home
  2. •
  3. Brands
  4. •
  5. Viking
  6. •
  7. Cooktop
  8. •
  9. Viking DGCU165 User manual

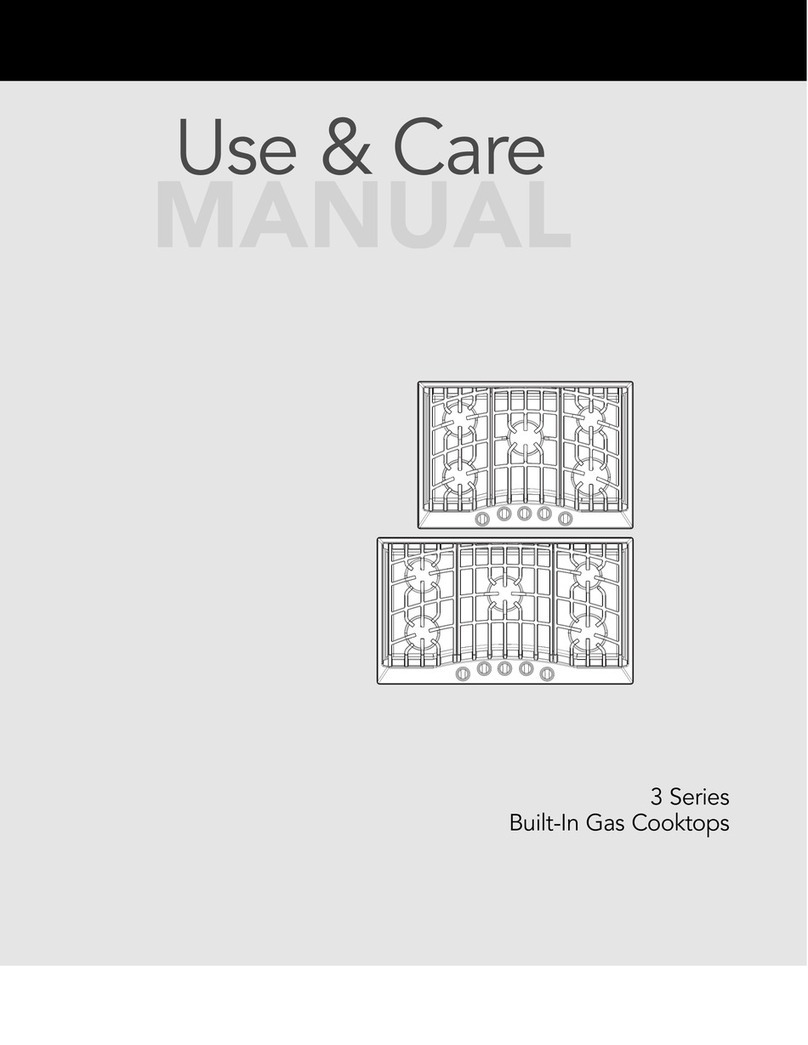
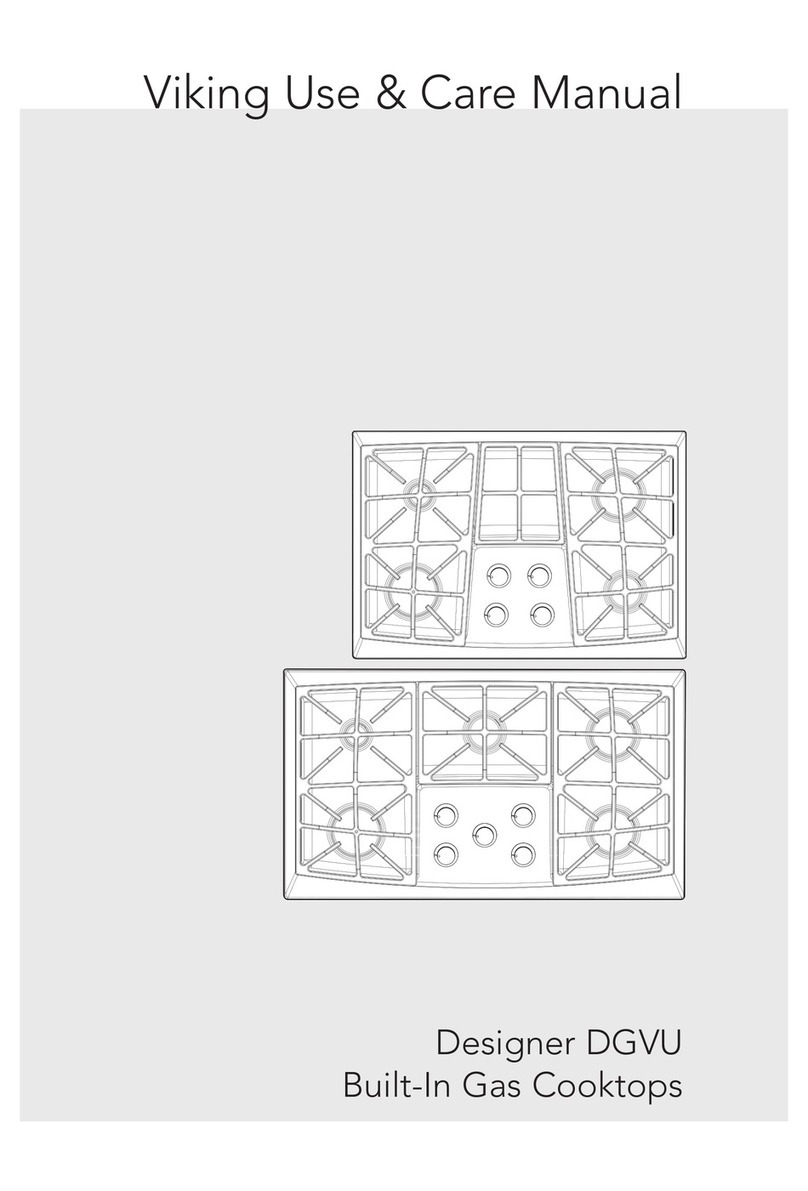
Viking DGCU165 User manual

Built-In Gas Surface Units
F20333A (072407J)
Viking Use & Care Manual
Viking Rang Corporation
111 Front Str t
Gr nwood, Mississippi 38930 USA
(662) 455-1200
For product information
call 1-888-VIKING1 (845-4641),
or visit th Viking W b sit at
vikingrang .com
3
--DDoo nnoott ssttoorr oorr uuss ggaassoolliinn oorr ootthhrr ffllaammmmaabbll vvaappoorrss aanndd lliiqquuiiddss iinn
tthh vviicciinniittyy ooff tthhiiss oorr aannyy ootthhrr aapppplliiaanncc..
WHAT TO DO IF YOU SMELL GAS
--DDoo nnoott ttrryy ttoo lliigghhtt aannyy aapppplliiaanncc
--DDoo nnoott ttoouucchh aannyy llccttrriiccaall sswwiittcchh;; ddoo nnoott uuss aannyy pphhoonn iinn yyoouurr
bbuuiillddiinngg..
--IImmmmddiiaattllyy ccaallll yyoouurr ggaass ssuupppplliirr ffrroomm aa nniigghhbboorr’’ss pphhoonn.. FFoollllooww
tthh ggaass ssuupppplliirr’’ss iinnssttrruuccttiioonnss..
--IIff yyoouu ccaannnnoott rraacchh yyoouurr ggaass ssuupppplliirr,, ccaallll tthh ffiirr ddppaarrttmmnntt..
--IInnssttaallllaattiioonn aanndd ssrrvviicc mmuusstt bb pprrffoorrmmdd bbyy aa qquuaalliiffiidd iinnssttaallllrr,,
ssrrvviicc aaggnnccyy,, oorr tthh ggaass ssuupppplliirr..
WARNING
IIff tthh iinnffoorrmmaattiioonn iinn tthhiiss mmaannuuaall iiss nnoott ffoolllloowwdd xxaaccttllyy,, aa ffiirr oorr
xxpplloossiioonn mmaayy rrssuulltt ccaauussiinngg pprroopprrttyy ddaammaagg,, pprrssoonnaall iinnjjuurryy oorr
ddaatthh..
WARNING
11.. RRaadd aallll iinnssttrruuccttiioonnss bbffoorr uussiinngg tthh pprroodduucctt..
22.. IInnssttaallll oorr llooccaatt tthh pprroodduucctt oonnllyy iinn aaccccoorrddaanncc wwiitthh tthh
pprroovviidddd IInnssttaallllaattiioonn IInnssttrruuccttiioonnss..
2
Your purchas of this product att sts to th importanc you
plac upon th quality and p rformanc of th major applianc s
you us . With minimal car , as outlin d in this guid , this
product is d sign d to provid you with y ars of d p ndabl
s rvic . Pl as tak th f w minut s n c ssary to l arn th
prop r and ffici nt us and car of this quality product.
W appr ciat your choosing a Viking product, and hop that
you will again s l ct our products for your oth r major applianc
n ds.
Con ratulations . . .
Table of Contents
Warning . . . . . . . . . . . . . . . . . . . . . . . . . . . . . . . . . . . . . . . . 3
Important Saf ty Instructions . . . . . . . . . . . . . . . . . . . . . . . . . 4
B for Using Your Surfac Unit . . . . . . . . . . . . . . . . . . . . . . . 6
Using Your Surfac Unit . . . . . . . . . . . . . . . . . . . . . . . . . . . . . 6
Cl aning and Maint nanc . . . . . . . . . . . . . . . . . . . . . . . . . . 8
S rvic Information . . . . . . . . . . . . . . . . . . . . . . . . . . . . . . . 11
Warranty . . . . . . . . . . . . . . . . . . . . . . . . . . . . . . . . . . . . . . . 12
11. Us prop r pan siz . S l ct ut nsils having flat bottoms larg
nough to cov r th burn r. Using und rsiz d ut nsils allows th
flam to com up th sid of th ut nsil, scorching th outsid of
th ut nsil and making cl anup hard r. Do not us d corativ
cov rs or triv ts ov r th burn rs.
12. Th flam of th surfac burn r should b adjust d to just cov r th
bottom of th pan or pot. Exc ssiv burn r s tting may caus
scorching of adjac nt count rtop surfac s, as w ll as th outsid of
th ut nsil. This is bas d on saf ty consid rations.
13. K p ar a cl an and fr from combustibl mat rial, gasolin , and
oth r flammabl liquids.
14. Do not h at unop n d food contain rs; buildup of pr ssur may
caus th contain r to xplod . Th hot cont nts could caus burns
and contain r particl s could caus injury.
15. To r duc th risk of burns, ignition of flammabl mat rials, and
spillag du to unint ntional contact with th ut nsil, th handl of
th ut nsil should b position d so that it is turn d inward toward
th c nt r of th applianc , and so that it do s not xt nd ov r
adjac nt burn rs. This will h lp r duc th chanc of burns, igniting
of flammabl mat rials, and spills du to bumping of pans.
16. Surfac ar as n ar burn rs may b com hot nough to caus burns.
During and aft r us , do not touch ar as n ar burn rs until th y
hav had suffici nt tim to cool.
17. Cl an unit with car . Som cl an rs can produc noxious fum s if
appli d to a hot surfac . If a w t, pap r tow l is us d to wip spills
on a hot cooking ar a, b car ful to avoid st am burns.
18. Storag cabin t ar as abov th applianc must b a minimum of
36” (91.4 cm) abov th applianc and cannot proj ct mor than
13” (33.0 cm) outward from th r ar wall. B war of pot ntial
hazards associat d with r tri ving it ms from such cabin ts wh n th
applianc is in op ration.
19. Onc th unit is install d as outlin d in th Installation Instructions, it
is important that th fr sh air supply is not obstruct d. Th us of a
gas cooking applianc r sults in th production of h at and moistur
in th room in which it is install d. Ensur that th kitch n is w ll-
v ntilat d. K p natural v nting hol s op n or install a m chanical
v ntilation d vic . Prolong d or int nsiv us of th applianc may
call for additional (such as op ning a window) or mor ff ctiv
v ntilation (such as incr asing th l v l of a m chanical v ntilation if
pr s nt).
20. Disconn ct l ctrical supply b for s rvicing th unit.
-SAVE THESE INSTRUCTIONS-
4
1. Your unit should b install d by a qualifi d t chnician. Th
applianc must b install d and l ctrically ground d according to
national or local cod s. Hav this t chnician show th th location
of th gas shut-off valv on th applianc so you know wh r and
how to turn off th gas if n c ssary.
2. Do not att mpt to r pair or r plac an part of this applianc unl ss
sp cifically r comm nd d in this manual. All s rvicing should b
r f rr d to a qualifi d t chnician. A qualifi d t chnician is r quir d
for any adjustm nts or conv rsions to Nat. or LP gas.
3. Do not op rat th unit if it is not working prop rly, or if it has b n
damag d or dropp d.
4. Th “push-to-turn” knobs of this applianc ar d sign d to b child-
saf . How v r, childr n should not b l ft alon in th kitch n whil
th applianc is in us . Do not stor it ms of int r st to childr n
ov r th unit. CAUTION:: Childr n climbing to r ach it ms could
b s riously injur d.
5. GREASE is flammabl and should b handl d car fully. Do not us
wat r on gr as fir s. N v r pick up a flaming pan. Smoth r
flaming pan by cov ring ut nsil compl t ly with w ll-fitting lid,
cooki sh t or flat tray. Do not us wat r on gr as fir s. Flaming
gr as outsid of ut nsil can b xtinguish d with baking soda or, if
availabl , a multipurpos dry ch mical or foam typ xtinguish r.
6. W ar prop r appar l. Loos -fitting or hanging garm nts should
n v r b worn whil using th applianc .
7. N v r us your unit for warming or h ating a room. P rsons could
b burn d or injur d, or a fir could start. This is bas d on saf ty
consid rations.
8. Us dry pot hold rs. Moist or damp pot hold rs on hot surfac s
may r sult in burns from st am. Do not us a tow l or oth r bulky
cloth.
9. N v r l av surfac ar a unatt nd d at high h at s tting. Boilov rs
caus smoking and gr asy spillov rs which may ignit .
10. If you ar “flaming” liquor or oth r spirits und r an xhaust hood,
TURN THE FAN OFF. Th draft could caus th flam s to spr ad
out of control.
5
Important Safety Instructions
WARNING
To r duc th risk of fir , l ctrical shock, injury to p rsons, or damag
wh n using th unit, follow basic pr cautions, including th following:
7
Surface Cookin Tips
•Th simm r lin on th control pan l is th b ginning of th vvaarriiaabbll
simm r s tting and produc s a high simm r s tting. Turn th knob slowly
towards “OFF” and th flam will adjust to a low r simm r s tting.
•Us low or m dium flam h ights wh n cooking in ut nsils that ar poor
conductors of h at, such as glass, c ramic, and cast iron. R duc th
flam h ight until it cov rs approximat ly 1/3 of th ut nsil diam t r. This
will nsur mor v n h ating within th ut nsil and r duc th lik lihood
of burning or scorching of food.
•R duc th flam if it is xt nd d b yond th bottom of th ut nsil. A
flam that xt nds along th sid s of th ut nsil is pot ntially dang rous,
h ats th ut nsil handl and kitch n inst ad of th food, and wat s
n rgy.
•R duc th flam h ight to th minimum l v l n c ssary to p rform th
d sir d cooking proc ss. R m mb r that food cooks just as quickly at a
g ntl boil as it do s at a rolling boil. Maintaining a high r boil than is
n c ssary caus s a loss in food flavor and nutri nts.
6
Cookin Utensils
Each cook has th ir own pr f r nc for th particular cooking
ut nsils that ar most appropriat for th typ cooking b ing don .
Any and all unit saf cooking ut nsils ar suitabl for us on th
applianc , making it unn c ssary to r plac your pr s nt dom stic
ut nsils with comm rcial cookwar . This is a matt r of p rsonal choic .
As with any cookwar , yours should b in good condition and fr from
xc ssiv d nts on th bottom to provid maximum p rformanc and
conv ni nc .
NOTE: When usin bi pots and/or hi h flames, it is recommended to use
the front burners. There is more room in the front and potential
cleanup of rear of appliance due to stainin or discoloration will
be minimized.
Usin Your Surface Unit
To light th surfac burn rs, push and turn th appropriat control
knob count r-clockwis to any indicat d position. This control is both a
gas valv and l ctric switch. Burn rs will ignit at any “on” position with
th automatic r ignition syst m. If th flam go s out for any r ason, th
burn rs will automatically r ignit if th gas is still flowing. Wh n th gas
is p rmitt d to flow to th burn rs, th l ctric ignit rs start sparking. On
all surfac ignit rs you should h ar a “clicking” sound. If you do not, turn
off th control and ch ck that th unit is plugg d in and that th fus or
circuit br ak r is not blown or tripp d.
Within a f w mom nts, nough gas will hav trav l d to th
burn r to b abl to light. Wh n th burn r lights, turn th control to any
position to adjust th flam . Th control knobs do not hav fix d postions
b tw n Hi and Simm r. Th y can b turn d to any s tting indicat d or to
any position in b tw n as long as it is past th ignition position. Th
ignitor will turn off and th clicking will stop wh n th burn r ignit s. If th
unit is not prop rly ground d, th ignitior will b com ground d and click
int rmitt ntly v n aft r th burn r has ignit d. If this occurs, hav a
qualifi d t chnician ch ck th wall r c ptacl and wiring.
IMPORTANT: The i nitors may click a number of times before the burner
i nites. This is normal. All i nitors will spark re ardless of
which burner is bein operated.
Before Usin Your Surface Unit
All products ar wip d cl an with solv nts at th factory to
r mov any visibl signs of dirt, oil, and gr as which may hav
r main d from th manufacturing proc ss. B for starting to cook,
cl an th unit thoroughly with hot, soapy wat r.
TEMPERATURE SETTING GUIDELINES*
HEAT SETTING USE
Simm r M lting small quantiti s. St aming ric .
Low M lting larg quantiti s. Simm ring sauc s
M d - Low Low t mp ratur frying ( ggs, tc.).
Simm ring larg quantit s.
H ating milk, cr am sauc s, gravi s.
M d Saut ing and browing.
Maintaining slow boil on larg quantiti s.
Hi - M d High t mp ratur frying.
Pan broiling.
Maintaining fast boil on larg quantiti s.
Hi Boiling liquids quickly.
D p fat frying in larg ut nsil.
*Note: The above information is iven as a uide only. You may need to
vary the heat settin s to suit your personal requirements.
98
Cleanin and Maintenance
Any pi c of quipm nt works b tt r and lasts long r wh n
maintain d prop rly and k pt cl an. Cooking quipm nt is not
xc ption. Your applianc must b k pt cl an and maintain d
prop rly.
Porcelain Parts
Wash with warm soapy wat r. Do not use st l wool, abrasiv
cl ans rs, ammonia, or acids which may damag th finish.
Glass Ceramic (If Applicable)
Cl aning of glass c ramic tops is diff r nt from cl aning a standard
porc lain finish. To maintain and prot ct th surfac of your glass
c ramic top, follow th s basic st ps:
For normal light soil:
Rub a f w drops of a glass c ramic cr am to th cool soil d ar a
using a damp pap r tow l. Wip until all soil and cr am ar r mov d.
Fr qu nt cl aning l av s a prot ctiv coating which is ss ntial in
pr v nting scratch s and abrasions.
For h avy, burn d soil:
1. Apply a f w drops of glass c ramic cl aning cr am to th cool
soil d ar a.
2. Using a damp pap r tow l, rub cr am into burn d on ar a.
3. Car fully scrap r maining soil with a razor scrap r. Hold th
scrap r at a 300angl against th c ramic surfac .
4. If any soil r mains, r p at th st ps list d abov . For additional
prot ction, aft r all soil has b n r mov d, polish th ntir surfac
with th cl aning cr am .
5. Buff with a dry pap r tow l. As th cl aning cr am cl ans, it
l av s a prot ctiv coating on th glass surfac . This coating h lps
to pr v nt build-up of min ral d posits (wat r spots) and will mak
futur cl aning asi r. Dishwashing d t rg nts r mov this
prot ctiv coating and th r for mak th glass c ramic top mor
susc ptibl to staining.
PPrroobbllmmCCaauussTToo PPrrvvnnttTToo RRmmoovv
Brown str aks Cl aning with spong Us cl aning cr am Us a light application of
and sp cks or cloth containing with cl an damp cl aning cr am with a cl an
soil-lad n d t rg nt pap r tow l damp pap r tow l
wat r
Black n d burn d Spatt rs or spillov rs Wip all spillov rs as Cl an ar a with cl aning cr am
on spots onto a hot cooking soon as it is saf and and a damp pap r tow l, non-
ar a or accid ntal to not put plastic abrasiv nylon pad or scouring
m lting of a plastic it ms on a warm brush. If burn-on is not r mov d,
film, such as a br ad cooking ar a cool unit, and car fully scrap
ar a with a singl dg d razor
blad h ld at a 30oangl .
Fin brown/gray Coars particl s (salt Wip th bottom of Fin scratch s ar not r movabl
lin s or fin scratch s sugar) can g t caught cookwar b for but can b minimiz d by daily
or abrasions which on th bottom of cooking. Cl an top us of cl aning cr am .
hav coll ct d soil cookwar and daily with cl aning
b com mb dd d cr am . Do not us
into top. Using c ramic or c ramic
abrasiv cl aning coat d cookwar .
mat rials. Scratch s
from rough c ramic
glass, or c ramic
coat d cookwar .
Sm aring or Us of too much Us a small amount Damp n pap r tow l with a
str aking cl aning cr am of cr am . Rins mixtur of vin gar and wat r
or us of a soil d throughly b for and wip surfac . Wip ar a
dishcloth drying. Us only with damp pap r tow l and dry
pap r tow ls or nylon with a pap r tow l or lint fr
scrub pad or brush. cloth.
M tal markings Sliding or scraping Do not slid m tal R mov m tal marks b for th
silv r/gray marks m tal ut nsils on obj cts across top glasstop is us d again. Apply
glasstop cl aning cr am with a damp
pap r tow l and scrub with a
nylon scrub pad or brush. Rins
thoroughly and dry.
Hard wat r spots Cond nsation from Mak sur th bottom Mix cl aning cr am with wat r
cooking may caus of ut nsils ar dry and apply a thick past to
min rals found in b for cooking. stain d ar a. Scrub vigorously.
wat r and acids to Daily us of cl aning If stain is not r mov d, r apply
to drip on glasstop cr am will h lp k p cl an r and r p at proc ss.
and caus gray top fr from hard Also try cl aning proc dur for
d posts. Th spots wat r min ral sm aring and str aking.
ar oft n so thin th y d posits and food
app ar to b in or discoloration
th glasstop.
Pitting or flaking Boil ov r of sugar Watch sugar and Turn l m nt to LO; using
syrup on glasstop. syrups car fully to s v ral pap r tow ls to wip th
This can caus avoid boilov rs. spill imm diat ly. L t glasstop
pitting if not cool and car fully scrap off
r mov d r maind r of burn-off with a
imm diat ly singl dg d razor h ld at a 300
angl .
Cleanin Problems on Glass Ceramic Top
10
Service Information
If your unit should fail to op rat :
1. Is th l ctrical cord s cur ly ins rt d in th l ctrical outl t?
2. Is th circuit br ak r op n, or is th fus blown?
3. Is th r a gas supply to th unit?
If s rvic is r quir d:
1. Call your d al r or authoriz d s rvic ag ncy. Th nam of th
authoriz d s rvic ag ncy can b obtain d from th d al r or distributor
in your ar a.
2. Hav th following information r adily availabl :
a. Mod l Numb r
b. S rial Numb r
c. Dat of Purchas
d. Nam of d al r from whom purchas d
3. Cl arly d scrib th probl m that you ar having.
If you ar unabl to obtain th nam of an authoriz d s rvic ag ncy, or if
you continu to hav s rvic probl ms, contact Viking at (888) 845-4641 or
writ to:
VIKING RANGE CORPORATION
PREFERRED SERVICE
111 Front Str t
Gr nwood, Mississippi 38930 USA
R cord th following information indicat d b low. You will n d it if s rvic
is v r r quir d. Th s rial numb r and mod l numb r for your surfac unit
is locat d on th xt rior bottom pan l of th burn r box in th right r ar
corn r.
Mod l Numb r S rial Numb r
Dat of Purchas Dat Install d
D al r’s Nam
Addr ss
If s rvic r quir s installation of parts, us only authoriz d parts to nsur
prot ction und r th warranty.
PLEASE RETAIN THE MANUAL FOR FUTURE REFERENCE
11
Stainless Steel Parts / Control knobs
All stainl ss st l parts should b wip d r gularly with hot soapy
wat r at th nd of th cooling p riod and with a liquid cl an r d sign d for
stainl ss st l. Do not use st l wool, abrasiv cloths, abrasiv cl ans r or
powd rs. If it is n c ssary to scrap stainl ss st l to r mov ncrust d
mat rial, soak th ar a with hot tow ls to loos n th mat rial, th n us a
wood n or nylon spatula or scrap r. Do not use a m tal knif , spatula, or
any oth r m tal tool to scrap stainl ss st l. Do not p rmit citrus or
tomato juic to r main on stainl ss st l surfac , as citric acid will
p rman ntly discolor stainl ss st l. Wip up any spills imm diat ly.
Power Failure
Sinc l ctronic ignition is us d, l ctrical pow r failur will aff ct
th unit. Th l ctric ignit rs will not work. Th unit surfac burn rs can still
b us d, but only wh n th burn rs ar lit manually with a match.
Surface Burner Grates
Mak sur all surfac burn rs ar off and th surrounding parts ar
cool. Lift off th burn r grat s. Wash th grat s with warm, soapy wat r.
Us non-abrasiv plastic scrubbing pad for h avily-soil d ar as. Rins and
dry w ll. For b st cl aning and to avoid possibl rusting of unfinish d
surfac s, do not cl an in a dishwash r. R plac th burn r grat s aft r
cl aning.
Surface Burners / Porcelain Caps
Th porc lain caps on th burn rs should b routin ly r mov d and
cl an d. Always cl an aft r a spillov r. K ping th burn r caps cl an will
pr v nt improp r ignition and an un v n flam .
To cl an, pull th burn r straight up from th burn r bas . Wip off
surfac burn r caps with warm, soapy wat r and a soft cloth aft r ach us .
Us a plasitc scrubbing pad for cook d on foods. For b st cl aning and to
avoid possibl rusting of unfinish d surfac s, do not cl an in dishwash r. If
ports ar clogg d, cl an with a straight pin. Do not enlar e or distort the
ports. Do not us a toothpick to cl an th ports sinc th y will hav a
t nd ncy to br ak. Wh n r placing burn rs, car fully align th tab
und rn ath th cap with th slot in th burn r bas .
Aluminum Base
Th aluminum bas should b wip d r gularly with hot soapy wat r
at th nd of ach cooling p riod. Do not use st l wool, abrasiv cloths,
cl ans r, or powd rs. To r mov ncrust d mat rials, soak th ar a with a
hot tow l to loos n th mat rial, th n us a wood n or nylon spatula. Do
not use a m tal knif , spatula, or any oth r mat rial tool to scrap th
aluminum bas .
1312
Notes . . . .
BUILT-IN GAS SURFACE UNIT WARRANTY
ONE YEAR FULL WARRANTY
Built-in gas surfac units and all of th ir compon nt parts, xc pt as d tail d b low*, ar warrant d to b fr from
d f ctiv mat rials or workmanship in normal hous hold us for a p riod of tw lv (12) months from th dat of
original r tail purchas . Viking Rang Corporation, warrantor, agr s to r pair or r plac , at its option, any part which
fails or is found to b d f ctiv during th warranty p riod.
*Paint d, porc lain and d corativ it ms ar warrant d to b fr from d f ctiv mat rials or workmanship for a
priod of nin ty (90) days from th dat of original r tail purchas . ANY DEFECTS MUST BE REPORTED TO THE
SELLING DEALER WITHIN NINETY (90) DAYS FROM DATE OF ORIGINAL RETAIL PURCHASE.
Viking Rang Corporation us s th most up-to-dat proc ss s and b st mat rials availabl to produc all color
finish s. How v r, slight color variation may b notic d b caus of th inh r nt diff r nc s in paint d parts and
porc lain parts as w ll as diff r nc s in kitch n lighting, product locations, and oth r factors.
FIVE YEAR LIMITED WARRANTY
Any surfac burn r which fails du to d f ctiv mat rials or workmanship in normal hous hold us during th s cond
through fifth y ar from th dat of original r tail purchas will b r pair d or r plac d, fr of charg for th part its lf,
with th own r paying all oth r costs, including labor.
NNIINNEETTYY ((9900)) DDAAYY RREESSIIDDEENNTTIIAALL PPLLUUSS WWAARRRRAANNTTYYThis warranty appli s to applications wh r us of th product
xt nds b yond normal r sid ntial us . Exampl s ar , but not limit d to, b d and br akfasts, fir stations, privat
clubs, church s, tc. This warranty xclud s all comm rcial locations such as r staurants, food s rvic locations and
institutional food s rvic locations.
This warranty shall apply to products purchas d and locat d in th Unit d Stat s and Canada. Products must b
purchas d in th country wh r s rvic is r qu st d. Warranty labor shall b p rform d by an authoriz d Viking
Rang Corporation s rvic ag ncy or r pr s ntativ . Warranty shall not apply to damag r sulting from abus ,
accid nt, natural disast r, loss of l ctrical pow r to th product for any r ason, alt ration, outdoor us , improp r
installation, improp r op ration, or r pair or s rvic of th product by anyon oth r than an authoriz d Viking Rang
Corporation s rvic ag ncy or r pr s ntativ . This warranty do s not apply to comm rcial usag . Warrantor is not
r sponsibl for cons qu ntial or incid ntal damag wh th r arising out of br ach of warranty, br ach of contract, or
oth rwis . Som jurisdictions do not allow th xclusion or limitation of incid ntal of cons qu ntial damag s, so th
abov limitation or xclusion may not apply to you.
Own r shall b r sponsibl for prop r installation, providing normal car and maint nanc , providing proof of
purchas upon r qu st, and making th applianc r asonably acc ssibl for s rvic . If th product or on of its
compon nt parts contains a d f ct or malfunction during th warranty p riod, aft r a r asonabl numb r of att mpts
by th warrantor to r m dy th d f cts or malfunctions, th own r is ntitl d to ith r a r fund or r plac m nt of th
product or its compon nt part or parts. Warrantor’s liability on any claim of any kind, with r sp ct to th goods or
s rvic s cov r d h r und r, shall in no cas xc d th pric of th goods or s rvic or part th r of which giv s ris
to th claim.
WWAARRRRAANNTTYY SSEERRVVIICCEE: Und r th t rms of this warranty, s rvic must b p rform d by a factory authoriz d Viking
Rang Corporation s rvic ag nt or r pr s ntativ . S rvic will b provid d during normal busin ss hours, and labor
p rform d at ov rtim or pr mium rat s shall not b cov r d by this warranty. To obtain warranty s rvic , contact th
d al r from whom th product was purchas d, an authoriz d Viking Rang Corporation s rvic ag nt, or Viking Rang
Corporation. Provid mod l and s rial numb r and dat of original purchas . For th nam of your n ar st
authoriz d Viking Rang Corporation s rvic ag ncy, call th d al r from whom th product was purchas d or Viking
Rang Corporation. IIMMPPOORRTTAANNTT: R tain proof of original purchas to stablish warranty p riod.
Th r turn of th Own r R gistration Card is not a condition of warranty cov rag . You should, how v r, r turn th
Own r R gistration Card so that Viking Rang Corporation can contact you should any qu stion of saf ty aris which
could aff ct you.
Any impli d warranti s of m rchantability and fitn ss applicabl to th abov d scrib d surfac burn r ar limit d in
duration to th p riod of cov rag of th applicabl xpr ss writt n limit d warranti s s t forth abov . Som
jurisdictions do not allow limitations on how long an impli d warranty lasts, so th abov limitation may not apply to
you. This warranty giv s you sp cific l gal rights, and you may also hav oth r rights which may vary from jurisdiction
to jurisdiction.
Sp cifications subj ct to chang without notic .
14 15
Notes . . . . Notes . . . .

Other manuals for DGCU165

2

This manual suits for next models

10

Other Viking Cooktop manuals

Viking 3 Series Troubleshooting guide

Viking

Viking 3 Series Troubleshooting guide

Viking DGCU105-4B User manual

Viking

Viking DGCU105-4B User manual

Viking DECU105-4B 30"W User manual

Viking

Viking DECU105-4B 30"W User manual

Viking VGRT480-6G User manual

Viking

Viking VGRT480-6G User manual

Viking RDGSU2005B User manual

Viking

Viking RDGSU2005B User manual

Viking Professional Custom VGRT548-4GQSS User manual

Viking

Viking Professional Custom VGRT548-4GQSS User manual

Viking F20111 User manual

Viking

Viking F20111 User manual

Viking VGSU104 User manual

Viking

Viking VGSU104 User manual

Viking DGSU1004BSS User manual

Viking

Viking DGSU1004BSS User manual

Viking VGRT5606GQSS User manual

Viking

Viking VGRT5606GQSS User manual

Viking VECU1064BSB User manual

Viking

Viking VECU1064BSB User manual

Viking VGRT482-4G User manual

Viking

Viking VGRT482-4G User manual

Viking Designer DECU1054BSB User manual

Viking

Viking Designer DECU1054BSB User manual

Viking 30” W. Radiant / Induction Rangetop User manual

Viking

Viking 30” W. Radiant / Induction Rangetop User manual

Viking RVGC3301 User manual

Viking

Viking RVGC3301 User manual

Viking VGRT530 User manual

Viking

Viking VGRT530 User manual

Viking VECU1064BSB User manual

Viking

Viking VECU1064BSB User manual

Viking Designer DGVU User manual

Viking

Viking Designer DGVU User manual

Viking VCCU106-4B User manual

Viking

Viking VCCU106-4B User manual

Viking Designer DERT301-4B User manual

Viking

Viking Designer DERT301-4B User manual

Viking VCRT301-4B Series User manual

Viking

Viking VCRT301-4B Series User manual

Viking Designer DERT362-5B User manual

Viking

Viking Designer DERT362-5B User manual

Viking RDGSU2005B User manual

Viking

Viking RDGSU2005B User manual

Viking Designer DECU1054B User manual

Viking

Viking Designer DECU1054B User manual

Popular Cooktop manuals by other brands

Frigidaire FEFL89CCB Wiring diagram

Frigidaire

Frigidaire FEFL89CCB Wiring diagram

Verona VECTIM365 installation manual

Verona

Verona VECTIM365 installation manual

Kenmore 4280 - Elite 30 in. Electric Induction... installation instructions

Kenmore

Kenmore 4280 - Elite 30 in. Electric Induction... installation instructions

LG Studio LSCE365ST owner's manual

LG

LG Studio LSCE365ST owner's manual

Frigidaire FEC32S6H Factory parts catalog

Frigidaire

Frigidaire FEC32S6H Factory parts catalog

DeLonghi NSL 460 X Installation and service instructions

DeLonghi

DeLonghi NSL 460 X Installation and service instructions

Miele MasterChef KM421 operating instructions

Miele

Miele MasterChef KM421 operating instructions

Frigidaire FEF369CGTD Wiring diagram

Frigidaire

Frigidaire FEF369CGTD Wiring diagram

Kenmore 318201469 installation instructions

Kenmore

Kenmore 318201469 installation instructions

Frigidaire FGFL87DSG Wiring diagram

Frigidaire

Frigidaire FGFL87DSG Wiring diagram

Kenmore 9119592594 Use Use, care, safety manual

Kenmore

Kenmore 9119592594 Use Use, care, safety manual

Coffee Queen V-2 user manual

Coffee Queen

Coffee Queen V-2 user manual

Frigidaire GLGC30S8EBA installation instructions

Frigidaire

Frigidaire GLGC30S8EBA installation instructions

Jenn-Air JGD3536WS01 installation instructions

Jenn-Air

Jenn-Air JGD3536WS01 installation instructions

Thermador MASTERPIECE CIT36XKB installation instructions

Thermador

Thermador MASTERPIECE CIT36XKB installation instructions

Waring XPRESS WSC300CE/K manual

Waring

Waring XPRESS WSC300CE/K manual

Dometic PI8022 Installation and operating manual

Dometic

Dometic PI8022 Installation and operating manual

Frigidaire FEC32S6HB Specifications

Frigidaire

Frigidaire FEC32S6HB Specifications

manuals.online logo
manuals.online logoBrands
  • About & Mission
  • Contact us
  • Privacy Policy
  • Terms and Conditions

Copyright 2025 Manuals.Online. All Rights Reserved.