manuals.online logo
Brands
  1. Home
  2. •
  3. Brands
  4. •
  5. Viking
  6. •
  7. Wine Cooler
  8. •
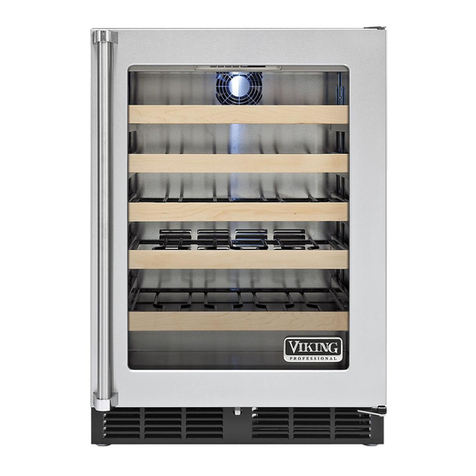
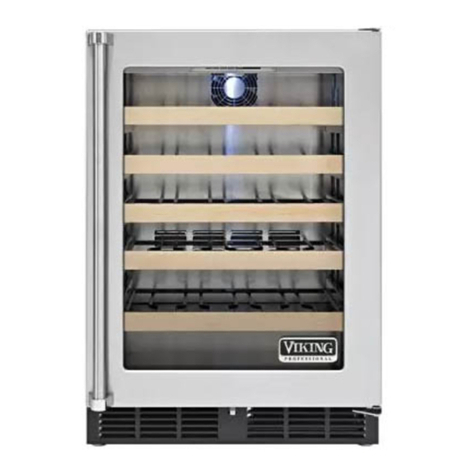
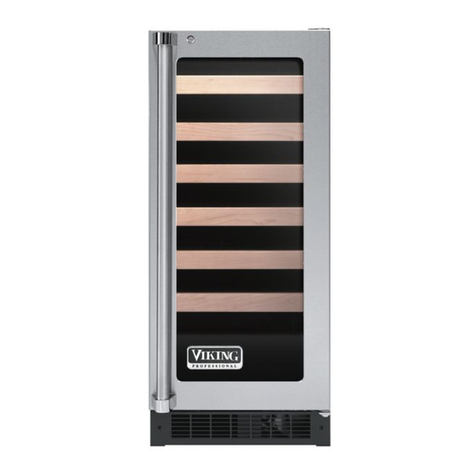
  9. Viking 15" (38.1 cm) Technical manual

Viking 15" (38.1 cm) Technical manual

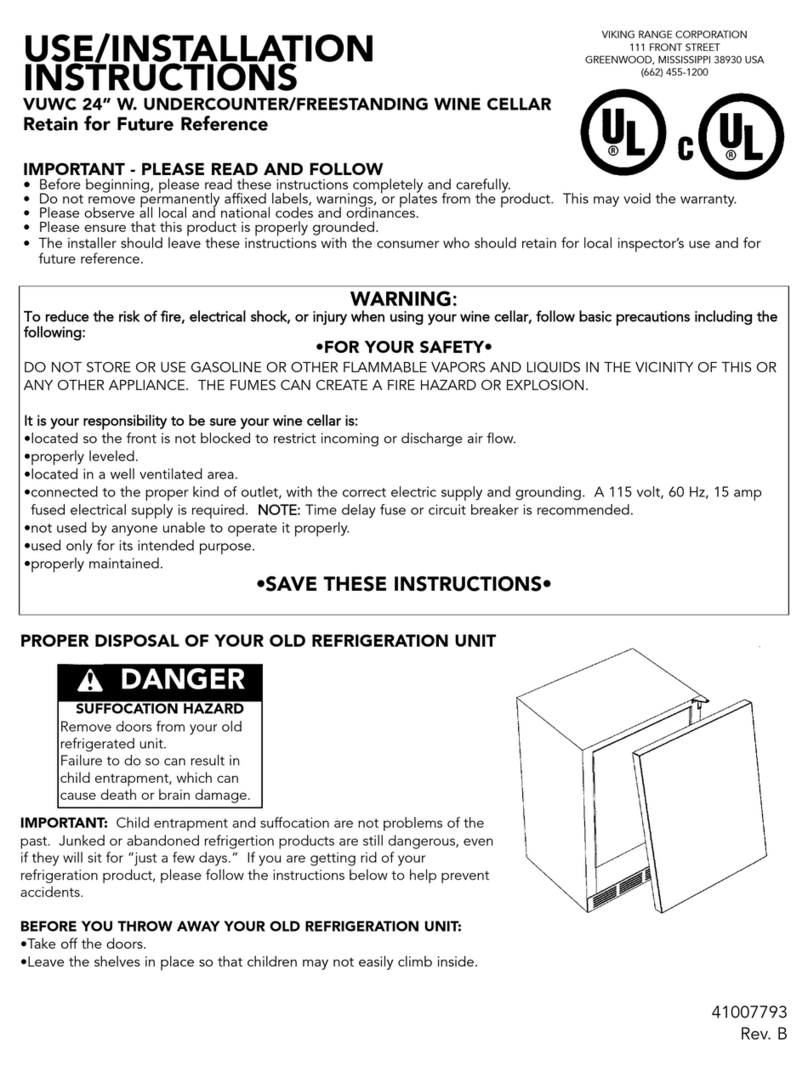
Viking Use/Installation Guide
Undercounter/Freestanding Wine Cellars
2
IMPORTANT - PLEASE READ AND FOLLOW
•• Before beginning, please read these instru tions ompletely and arefully.
• Do not remove permanently affixed labels, warnings, or plates from the produ t. This may void the warranty.
• Please observe all lo al and national odes and ordinan es.
• Please ensure that this produ t is properly grounded.
• The installer should leave these instru tions with the onsumer who should retain for lo al inspe tor’s use and for future referen e.
It is your responsibility to be sure your wine cellar is:
• lo ated so the front is not blo ked to restri t in oming or dis harge air flow.
• properly leveled.
• lo ated in a well ventilated area.
• onne ted to the proper kind of outlet, with the orre t ele tri supply and grounding. A 115V, 60 Hz, 15 amp fused ele tri al
supply is required. NOTE: Time delay fuse or circuit breaker is recommended.
• not used by anyone unable to operate it properly.
• used only for its intended purpose.
• properly maintained.
•SAVE THESE INSTRUCTIONS•
PROPER DISPOSAL (OF OLD REFRIGERATION UNIT)
WARNING
To re uce the risk of fire, electric shock, or injury when using your unit, follow these basic precautions:
• Read all instru tions before using the unit.
• Never allow hildren to operate, play with, or rawl inside the unit.
• Never lean unit parts with flammable fluids. The fumes an reate a fire hazard or explosion.
• Always turn the power on/off swit h (lo ated behind the air grille on top right side) to the OFF position before attempting to hange
light bulbs, lean, or servi e the unit.
FOR YOUR SAFETY
DO NOT STORE OR USE GASOLINE OR OTHER FLAMMABLE VAPORS AND LIQUIDS IN THE VICINITY OF THIS OR ANY OTHER
APPLIANCE. THE FUMES CAN CREATE A FIRE HAZARD OR EXPLOSION.
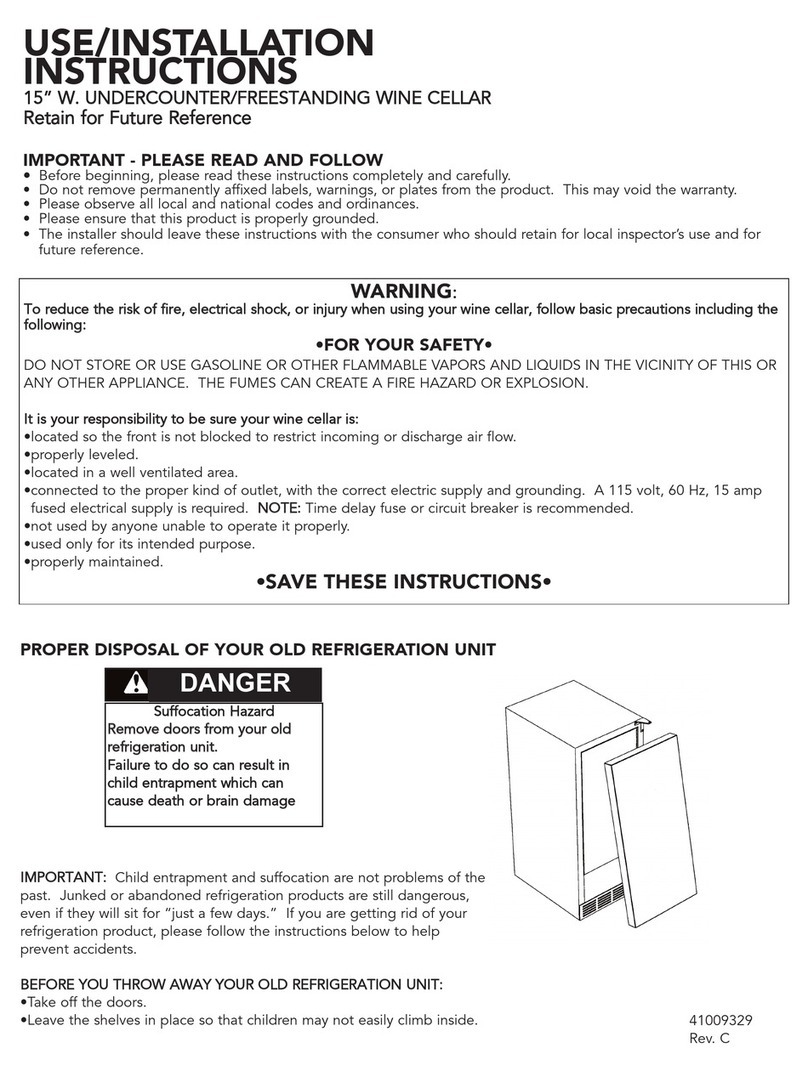
DANGER
RISK OF CHILD ENTRAPMENT
Before You Throw Away Your Ol Refrigeration Unit:
• Take off the doors.
• Leave the shelves in pla e so that hildren may not easily
limb inside.
IMPORTANT: Child entrapment and suffo ation are not problems of the past.
Junked or abandoned refrigeration units are still dangerous... even if they will sit for
“just a few days.”
IMPORTANT:
Now that you have a new wine ellar, it is extremely important that you dispose of your
old applian e in a way that minimizes the possibility that hildren will find it. There
have been many ases in years past of hildren rawling inside junked and abandoned
refrigeration units and be oming trapped or suffo ated.
Conta t your muni ipal waste disposal authority to find out the best and safest way to
dispose of your old refrigeration unit.
A GFI shall be used if required by NFPA-70 (National Electric Code), federal state local laws, or local
ordinances.
• The required use of a GFI is normally related to the lo ation of a re epta le with respe t to any
signifi ant sour es of water or moisture.
• Viking Range Corporation will NOT warranty any problems resulting from GFI outlets whi h are not
installed properly or do not meet the requirements below.
If the use of a GFI is required, it should be:
• Of the re epta le type (breaker type or portable type NOT re ommended)
• Used with permanent wiring only (temporary or portable wiring NOT re ommended)
• On a dedi ated ir uit (no other re epta les, swit hes or loads in the ir uit)
• Conne ted to a standard breaker of appropriate size (GFI breaker of the same size NOT re ommended)
• Rated for Class A (5 mA +/- 1 mA trip urrent) as per UL 943 standard)
• In good ondition and free from any loose-fitting gaskets (if appli able in outdoor situations)
• Prote ted from moisture (water, steam, high humidity) as mu h as reasonably possible
3
GENERAL INFORMATION
Unpack
1. Remove banding from bottom of arton. Lift arton up and off of the wine ellar
2. Remove all tape and pa kaging material from the outside and inside of the abinet.
3. Keep all arton pa kaging until your wine ellar has been thoroughly inspe ted and found to be in good ondition.
AREA REQUIREMENTS
1. Pla e unit so the front side will be ompletely unobstru ted to provide proper air flow. The unit may be losed in
on the top and three sides, but the front MUST BE unobstru ted for air ir ulation and proper operation.
Installation should be su h that the abinet an be moved for servi ing if ne essary.
2. Unit should be in a well ventilated area with temperature above 55°F (13°C) and below 110°F (43°C). Best results
are obtained at temperatures between 65°F (18°C) and 80°F (27°C) for built-in models and 65°F (18°C) and 90°F
(32°C) for freestanding models.
3. Provisions for ele tri ity should be determined before pla ing unit in proper pla e.
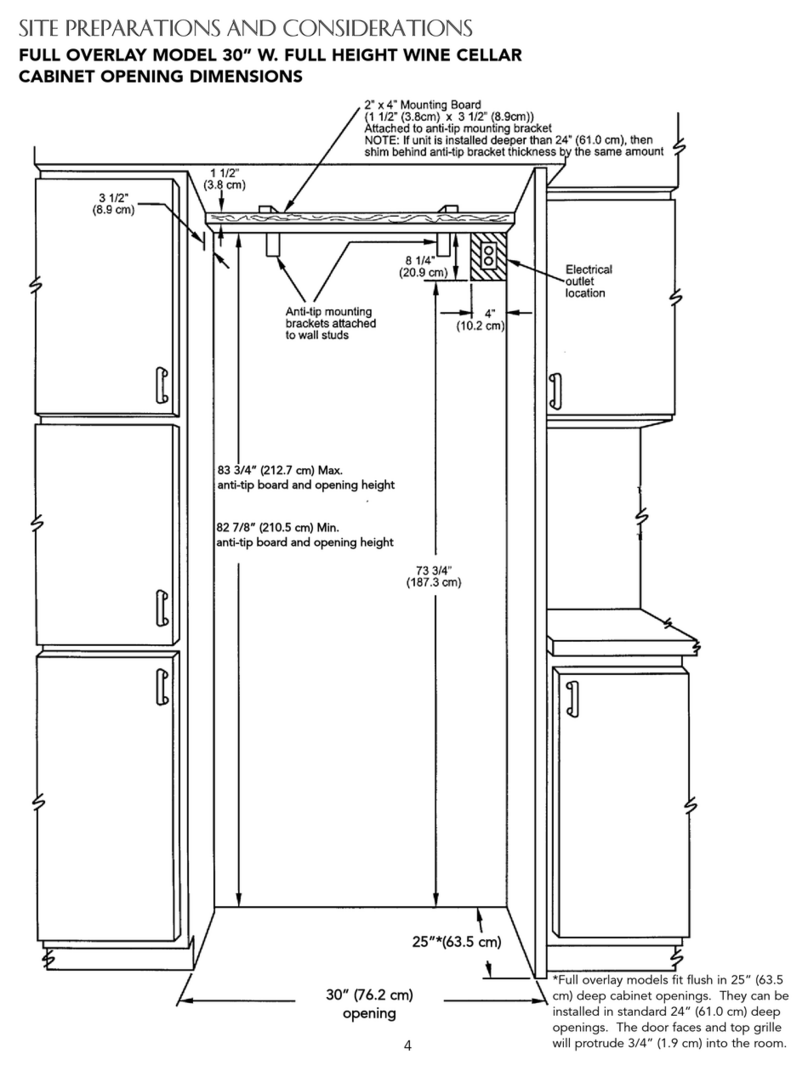
24” W. Mo els
15” W. Mo els
*Add 1/4” (.64 m) to utout width if door is re essed between abinets.
A 15” (38.1 m)* 24” (61.0 m)*
BMin. 34-1/2” (87.6 m)
Max. 35-1/8” (89.2 m)
Min. 34-1/2” (87.6 m)
Max. 35-1/8” (89.2 m)
C 24” (61.0 m) 24” (61.0 m)
Units Certifie for Out oor Use - out oor mo els contain a T after the base mo el number (ex. VUWC144T) an
have a stainless steel outer cabinet.
1. Pla e unit so the front side will be ompletely unobstru ted to provide proper air flow. The unit may be losed in
on the top and three sides, but the front MUST BE unobstru ted for air ir ulation and proper operation.
Installation should be su h that the abinet an be moved for servi ing if ne essary.
2. Unit should be in a well ventilated area with temperature above 40°F (4.4°C) and below 110°F (43°C). Best results
are obtained at temperatures between 60°F (16°C) and 100°F (38°C).
3. Provisions for ele tri ity should be determined before pla ing unit in proper pla e.
A
B
C
UNDERCOUNTER CABINET CUTOUT
4
SPECIFICATIONS/DIMENSIONS
PROFESSIONAL - 15”W. Models
Basic Electric Data
•115 VAC/60 Hz
•Maximum amps - 3.0
Approximate Shipping Weight - 110 lbs. (49.5 kg)
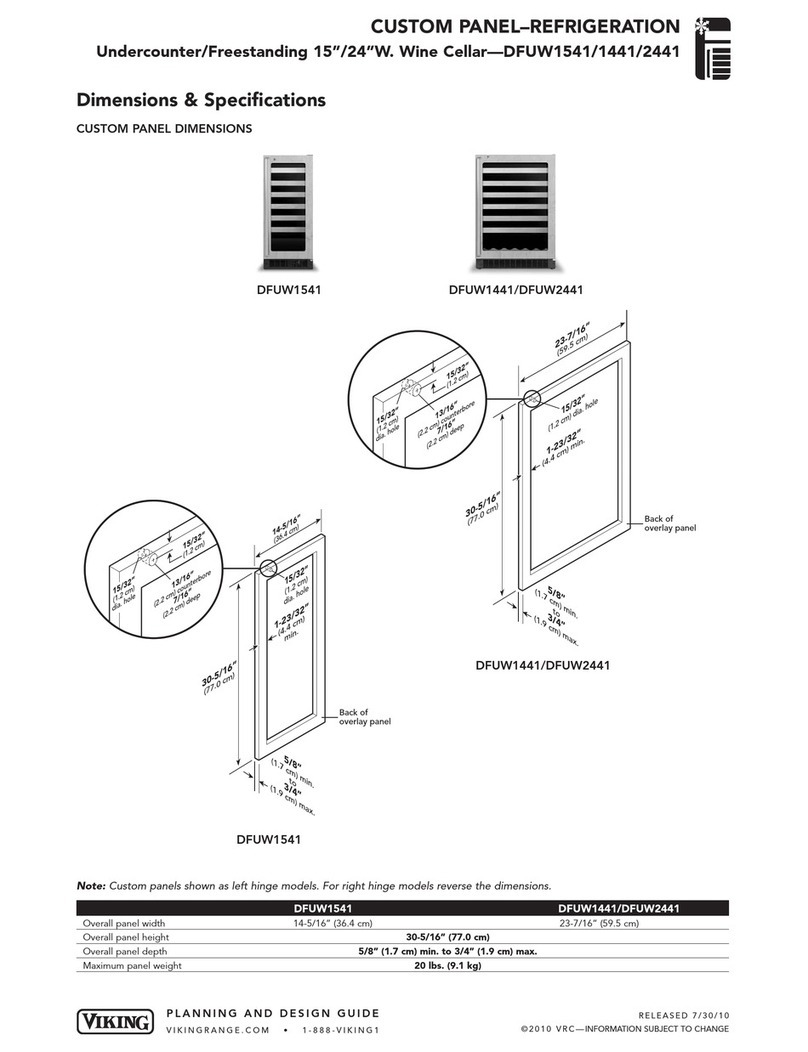
14-3/4”
(37.5 cm)
90.0°
37-3/16”
(94.5 cm)
2-1/2”
(6.4 cm)
21-3/16”
(53.8 cm)
26-1/8”
(66.4 cm)
23-5/8”
(60.0 cm)
Dimensions
VUWC 15”W.
Door Swing
VUWC 15”W.
21-3/16”
(53.8cm)
23-5/8”
(60.0cm)
26-1/8”
(66.4cm)
34-1/4”
(87.0cm)
min.
to
35”
(88.9cm)
max.
(withleveling
legsfully
extended)
14-3/4”
(37.5cm)
14-3/4”
(37.5 cm)
14-3/4”
(37.5cm)
30-3/4”
(78.1cm)
5
SPECIFICATIONS/DIMENSIONS
DESIGNER - 15”W. Models
Basic Electric Data
•115 VAC/60 Hz
•Maximum amps - 3.0
Approximate Shipping Weight - 110 lbs. (49.5 kg)
23-5/8”
(60.0cm)
21-3/16”
(53.8cm)
30-3/4”
(78.1cm)
14-3/4”
(37.5cm)
14-3/4”
(37.5 cm)
14-3/4”
(37.5cm)
34-1/4”
(87.0cm)
min.
to
35”
(88.9cm)
max.
(withleveling
legsfully
extended)
26-1/8”
(66.4cm)
14-3/4”
(37.5 cm)
37-3/16”
(94.5cm)
2-1/2”
(6.4 cm)
21-3/16”
(53.8 cm)
26-1/8”
(66.4 cm)
23-5/8”
(60.0 cm)
90.0°
Door Swing
DUWC 15”W.
Dimensions
DUWC 15”W.
90.0°
14-3/4”
(37.5 cm)
37-3/16”
(94.5cm)
21-3/16”
(53.8 cm)
23-7/16”
(59.5 cm)
to front of
locally supplied
custom panel
Door Swing
DFUW 15”W.
21-3/16”
(53.8cm)
23-7/16”
(59.5cm)
(tofrontof
locallysupplied
custompanel)
30-3/4”
(78.1cm)
14-3/4”
(37.5cm)
14-3/4”
(37.5 cm)
14-3/4”
(37.5cm)
34-1/4”
(87.0cm)
min.
to
35”
(88.9cm)
max.
(withleveling
legsfully
extended)
Dimensions
DFUW 15”W.
6
23-7/8”
(60.6 cm)
90.0°
2-1/2”
(6.4 cm)
47-1/4”
(120.0 cm)
22”
(55.9 cm)
26-7/8”
(68.3 cm)
24-3/8”
(61.9 cm)
30-3/4”
(78.1cm)
22”
(55.9cm)
24-3/8”
(61.9cm)
23-7/8”
(60.6cm)
23-7/8”
(60.6 cm)
23-7/8”
(60.6cm)
26-7/8”
(68.3cm)
34-1/4”
(87.0cm)
min.
to
35”
(88.9cm)
max.
(withleveling
legsfully
extended)
Dimensions VUWC 2 ”W. - Single Zone
SPECIFICATIONS/DIMENSIONS
PROFESSIONAL - 2 ” W. Models
Basic Electric Data
• 115 VAC/60 Hz
• Maximum amps - 3.3
• Approximate Shipping Weight
Single Zone - 140 lbs. (63.2 kg)
Dual Zone - 170 lbs. (76.5 kg)
23-7/8”
(60.6 cm)
90.0°
2-1/2”
(6.4 cm)
46-1/2”
(118.1 cm)
21-1/2”
(54.6 cm)
26-3/8”
(67.0 cm)
23-7/8”
(60.7 cm)
Door Swing VUWC 2 ”W. - Single Zone Door Swing VUWC 2 ”W. - Dual Zone
30-3/4”
(78.1cm)
21-1/2”
(54.6cm)
23-7/8”
(60.7cm)
23-7/8”
(60.6cm)
23-7/8”
(60.6 cm)
23-7/8”
(60.6cm)
26-3/8”
(67.0cm)
34”
(86.4cm)
min.
to
34-3/4”
(88.3cm)
max.
(withleveling
legsfully
extended)
Dimensions VUWC 2 ”W. - Dual Zone
7
23-7/8”
(60.6 cm)
90.0°
47-1/4”
(120.0 cm)
2-1/2”
(6.4 cm)
26-7/8”
(68.3 cm)
24-3/8”
(61.9 cm)
22”
(55.9 cm)
30-3/4”
(78.1cm)
22”
(55.9cm)
24-3/8”
(61.9cm)
23-7/8”
(60.6cm)
23-7/8”
(60.6 cm)
23-7/8”
(60.6cm)
26-7/8”
(68.3cm)
34-1/4”
(87.0cm)
min.
to
35”
(88.9cm)
max.
(withleveling
legsfully
extended)
SPECIFICATIONS/DIMENSIONS
DESIGNER - 2 ” W. Models
Basic Electric Data
• 115 VAC/60 Hz
• Maximum amps - 3.3
• Approximate Shipping Weight
Single Zone - 140 lbs. (63.2 kg)
Dual Zone - 170 lbs. (76.5 kg)
Dimensions DUWC 2 ”W. - Single Zone
Door Swing DUWC 2 ”W. - Single Zone Door Swing DFUW 2 ”W. - Single Zone
23-7/8”
(60.6 cm)
90.0°
47-1/4”
(120.0 cm)
22”
(55.9 cm)
24-3/16”
(61.4 cm)
to front of
locally supplied
custom panel
30-3/4”
(78.1cm)
21-1/2”
(54.6cm)
23-7/8”
(60.7cm)
23-7/8”
(60.6cm)
23-7/8”
(60.6 cm)
23-7/8”
(60.6cm)
34”
(86.4cm)
min.
to
34-3/4”
(88.3cm)
max.
(withleveling
legsfully
extended)
SPECIFICATIONS/DIMENSIONS
DESIGNER - 2 ” W. Models
Basic Electric Data
•115 VAC/60 Hz
•Maximum amps - 3.3
•Approximate Shipping Weight
Single Zone - 140 lbs. (63.2 kg)
Dual Zone - 170 lbs. (76.5 kg)
Dimensions DFUW 2 ”W. - Dual Zone
Door Swing DFUW 2 ”W. - Dual Zone
23-7/8”
(60.6 cm)
90.0°
46-1/2”
(118.1 cm)
21-1/2”
(54.6 cm)
23-11/16”
(60.2 cm)
to front of
locally supplied
custom panel
8
9
FIGURE 1 FIGURE 2
Typical Top and Bottom Door
Hinge Bracket Assembly
Door Front
Surface
Shoulder Bushing
Door
Hinge
Bracket
#10-32
Machine
Screw
Door Hinge
Screw Holes
This surface parallel to the unit.
(Right hinge door shown.)
CUSTOM WOOD FRAME INSTALLATION (DFUW Model)
NOTE: Weight of ood panel must not exceed 20 lbs.
Woo Screws
1. A #10 pan head wood s rew should be used to properly se ure the wood panel. A total of 8 s rews will be needed.
2. Only use pan head s rews.
3. DO NOT sele t a s rew that is longer than the wood thi kness at
the s rew lo ations.
4. Use re ommended pilot holes for the frame material. (See hart)
Working Material Woo Screw Size #10
Hardwood 3/32 (0.24 m)
Softwood 5/64 (0.20 m)
Assembling Door Hinge Brackets
(Disregard if hinge bra kets are already atta hed)
1. Atta h the top and bottom door hinge bra kets to the door with the #10-32 ma hine s rews and a 1/8” allen head
driver as shown in Figure 1 below.
2. Press in the shoulder bushings to the top and bottom door hinge bra kets. Make ertain that the shoulder is to the
outside of the door as shown in Figure 1 below.
3. Test fit the door to the unit to make ertain door will hang orre tly. The door is hung orre tly when the top of the
door is parallel to the top of the unit. Adjustments an be made by loosening the door hinge ma hine s rews and
moving the door hinge bra kets on the door.
4. Tighten all four (4) ma hine s rews after adjustments have been made.
5. Remove the door from the unit by removing the units top hinge set s rew and angling the door off of the bottom
hinge pin.
10
BACKVIEWOF
OVERLAYPANEL
TOP
OF
DOOR
Pre-drilled pilot holes -
8 places
22-1/2”
(57.2 cm)
TYP
15-5/32”
(38.5 cm)
TYP
7-13/16”
(19.8 cm)
TYP
23/32”
(1.8 cm)
TYP
1-23/32” (4.4 cm)
min. width to cover
door extrusion
30-5/16”
(77.0 cm)
TYP
23/32”
(1.8 cm)
TYP
15/32”
(1.2 cm)
14-5/16”
(36.4 cm)
7-5/32”
(18.2 cm)
Mounting Surface
(non-face) side
Mounting Surface
(non-face) side
Mounting Surface
(non-face) side
1/4” x 3/8” deep hinge screw clearance hole. Locate and drill using
door hinge hole after the door has been aligned to the unit and when
the wood is positioned on door.
Min. 5/8” (1.7 cm)
Max. 3/4” (1.9 cm)
1/4” x 3/8” deep hinge screw clearance hole. Locate and drill using
door hinge hole after the door has been aligned to the unit and when
the wood is positioned on door.
3-7/32”
(8.1cm)
13/16”
(2.1 cm)
counterbore 7/16”
(1.1 cm) deep
15/32”
(1.2 cm)
Diameter
Hole
FOR 3-1/2” TOE KICK
(COVERS THE ENTIRE DOOR EXTRUSION - LEFT HINGE)
Selecting and Preparing the Wood Frame - 15”W. DFUW Model
11
FOR 3-1/2” TOE KICK
(COVERS THE ENTIRE DOOR EXTRUSION - RIGHT HINGE)
Selecting and Preparing the Wood Frame - 15”W. DFUW Model
BACKVIEWOF
OVERLAYPANEL
TOP
OF
DOOR
Pre-drilled pilot holes -
8 places
22-1/2”
(57.2 cm)
TYP
15-5/32”
(38.5 cm)
TYP
7-13/16”
(19.8 cm)
TYP
23/32”
(1.8 cm)
TYP
1-23/32” (4.4 cm)
min. width to cover
door extrusion
30-5/16”
(77.0 cm)
TYP
23/32”
(1.8 cm)
TYP
15/32”
(1.2 cm)
14-5/16”
(36.4 cm)
7-5/32”
(18.2 cm)
Mounting Surface
(non-face) side Mounting Surface
(non-face) side
1/4” x 3/8” deep hinge screw clearance hole. Locate and
drill using door hinge hole after the door has been aligned
to the unit and when the wood is positioned on door.
1/4” x 3/8” deep hinge screw clearance hole. Locate and drill
using door hinge hole after the door has been aligned to the
unit and when the wood is positioned on door.
Min. 5/8” (1.7 cm)
Max. 3/4” (1.9 cm)
3-7/32”
(8.1cm)
Mounting Surface
(non-face) side
15/32”
(1.2 cm)
Diameter
Hole
13/16”
(2.1 cm)
counterbore
7/16” (1.1 cm)
deep
12
30-5/16”
(77.0 cm)
Mounting Surface
(non-face) side
Mounting Surface
(non-face) side
1/4” x 3/8” deep hinge screw clearance hole. Locate and
drill using door hinge hole after the door has been aligned
to the unit and when the wood is positioned on door.
Pre-drilled pilot holes -
10 places
BACKVIEWOF
OVERLAYPANEL
TOP
OF
DOOR
1-23/32” (4.4 cm)
min. width to cover
door extrusion
23/32”
(1.8 cm)
TYP
23/32”
(1.8 cm)
TYP
13/16”
(2.1 cm)
counterbore
7/16” (1.1 cm)
deep
22-1/2”
(57.2 cm)
TYP
15-5/32”
(38.5 cm)
TYP
7-13/16”
(19.8 cm)
TYP
15/32”
(1.2 cm)
15/32” (1.2 cm)
Diameter Hole
7-13/16” (19.8 cm)
15-5/8” (39.7 cm) TYP
23-7/16” (59.5 cm)
1/4” x 3/8” deep hinge screw clearance hole. Locate and drill
using door hinge hole after the door has been aligned to the
unit and when the wood is positioned on door.
Min. 5/8” (1.7 cm)
Max. 3/4” (1.9 cm)
3-7/32”
(8.1cm)
Mounting Surface
(non-face) side
FOR 3-1/2” TOE KICK
(COVERS THE ENTIRE DOOR EXTRUSION - LEFT HINGE)
Selecting and Preparing the Wood Frame - 2 ”W. DFUW Model
13
30-5/16”
(77.0 cm)
Mounting Surface
(non-face) side
Mounting Surface
(non-face) side
1/4” x 3/8” deep hinge screw clearance hole. Locate and
drill using door hinge hole after the door has been aligned
to the unit and when the wood is positioned on door.
Pre-drilled pilot holes -
10 places
BACKVIEWOF
OVERLAYPANEL
TOP
OF
DOOR
1-23/32” (4.4 cm)
min. width to cover
door extrusion
23/32”
(1.8 cm)
TYP
23/32”
(1.8 cm)
TYP
13/16” (2.1 cm)
counterbore
7/16” (1.1 cm)
deep
22-1/2”
(57.2 cm)
TYP
15-5/32”
(38.5 cm)
TYP
7-13/16”
(19.8 cm)
TYP
15/32”
(1.2 cm)
15/32”
(1.2 cm)
Diameter Hole 7-13/16” (19.8 cm)
15-5/8” (39.7 cm) TYP
23-7/16” (59.5 cm)
1/4” x 3/8” deep hinge screw clearance hole. Locate and drill
using door hinge hole after the door has been aligned to the
unit and when the wood is positioned on door.
Min. 5/8” (1.7 cm)
Max. 3/4” (1.9 cm)
3-7/32”
(8.1cm)
Mounting Surface
(non-face) side
FOR 3-1/2” TOE KICK
(COVERS THE ENTIRE DOOR EXTRUSION - RIGHT HINGE)
Selecting and Preparing the Wood Frame - 2 ”W. DFUW Model
14
Attaching the Wood Frame to the Door - DFUW Model
1. If the door is atta hed to the unit, remove by uns rewing the top Allen head set s rew at the top hinge. Remove the door by
angling the door off of the bottom hinge pin.
2. Install the supplied lo k body into the wood panel. Se ure the lo k body by using the supplied 15mm lo k retaining nut. S rew
the retaining nut onto the lo k body’s threaded se tion. Make sure the lo k’s key slot is verti al, then tighten the nut with a
15mm deep well so ket.
3. Peel ba k the door gasket to expose the s rew holes and lo k lo ation hole.
4. Set the wood frame flush to the front of the door in the desired lo ation. Clamp the wood frame to the door if ne essary.
Che k to make sure the ba k of the lo k in the wood frame lines up with the hole in the door.
5. Insert the wood s rews through the ba k of the door into the pilot holes in the wood frame and tighten.
6. Assemble the door lo k’s Phillips head s rew, lo k extension, and lo k am. Mount them to the ba k of the lo k body. The am
should be oriented verti ally. Tighten the Phillips head s rew to se ure the lo k assembly.
7. Reinstall the door gasket by pressing into the door hannel. Make ertain the orners are inserted fully. Insert the key into the
lo k and make sure lo k operates properly.
8. Install the door to the unit. Use the supplied plasti washer as shown in the figure below.
9. Realigning the door may be ne essary. Any final door adjustments an be made using a 1/8” Allen head driver to adjust the
door’s hinges. (See figure below.)
10. Atta h the door to the unit by reversing step number 1 above.
11. Insert the key into the lo k and verify that the lo k am works properly with the at h bra ket on the abinet front.
Attaching the Handle
Atta h the handle of your hoi e by drilling mounting holes through panel. Countersink or ounterbore holes from
ba kside of panel for handle s rew heads to be flush.
Hinge Hardware Installation Details
(2) NYLON
HARDWARE
COMPONENTS
AT TOP HINGE
TOP HINGE COVER
WOOD FRAME
DOOR HINGE
SHOULDER
BUSHING
5/8” X 7/32 ID
WASHER
BOTTOM HINGE COVER
3/4” OD X 7/16”
ID WASHER
3/4” OD X 1/4”
ID WASHER
CABINET HINGE
(3) NYLON HARDWARE
COMPONENTS AT
BOTTOM HINGE
DOOR HINGE
WOOD FRAME
SHOULDER
BUSHING
ATTACHED WOOD
FRAME
REAR OF DOOR
MAGNETIC
DOOR GASKET
BOTTOM
OF DOOR
1/8” ALLEN HEAD SCREWS
FOR HINGE ADJUSTMENT
Ø 3/8” CLEARANCE
HOLES FOR FRAME
WOOD SCREWS -
10 HOLES
DOOR HINGE
ADJUSTMENT SCREWS
CAUTION
Door an be ome disengaged if washers are not installed.
CAUTION
Door may not swing properly if all nylon omponents are not
installed as shown.
15
Lock Installation Details
L
Lo
o
k
k
B
Bo
od
dy
y
LLookk CCaamm
P
Ph
hi
il
ll
li
ip
ps
s
S
S
r
re
ew
w
L
Lo
o
k
k
E
Ex
xt
te
en
ns
si
io
on
n
L
Lo
o
k
k
R
Re
et
ta
ai
in
ne
er
r
N
Nu
ut
t
KKEEYY
D
Do
oo
or
r
G
Ga
as
sk
ke
et
t
G
Gllaassss DDooo
orr
WWoooodd PPaanneell
LEG LEVELER INSTALLATION
RReeaadd BBeeffoorree IInnssttaalllliinngg LLeegg LLeevveelleerrss
1. Four leveling legs are pre-installed in the base of the unit at the fa tory.
2. The unit should be leveled from front to ba k and side to side. If floor
onditions do not allow the unit to sit level, adjust the leg levelers by turning
the required leg leveler ounter- lo kwise to in rease the height and lo kwise
to redu e the height.
WARNING
Do not lay unit on top, side, ba k, or front. If unit is a identally laid in
any position other than right side up, then the unit must remain in the
upright position for at least 24 hours before plugging the unit in.
16
FINAL PREPARATION
1. Some stainless steel parts may have a plasti prote tive wrap whi h must be peeled off. The interior of the wine
ellar should be washed thoroughly with hot, soapy water, rinsed and wiped dry to remove film residue and any
installation dust or debris before being used. Solutions stronger than soap and water are rarely needed.
2. All stainless steel parts should be wiped with hot soapy water. If buildup o urs, do not use steel wool, abrasive
loths, leaners, or powders. If it is ne essary to s rape stainless steel to remove en rusted materials, soak with hot,
wet loths to loosen the material, then use a wood or nylon s raper. Do not use a metal knife, spatula, or any other
metal tool to s rape stainless steel; s rat hes are almost impossible to remove.
ELECTRICAL CONNECTION
Electrical Requirements
A 115 volt, 60 Hz, AC only 15 amp fused ele tri al supply is required. (A time
delay fuse or ir uit breaker is re ommended.) It is re ommended that a
separate ir uit, serving only this applian e, be provided.
•ELECTRICAL GROUND IS REQUIRED ON THIS APPLIANCE.
•DO NOT UNDER ANY CIRCUMSTANCES REMOVE THE POWER SUPPLY
CORD GROUND PLUG.
•DO NOT USE AN EXTENSION CORD.
Recommen e Groun ing Metho s
For your personal safety, this refrigeration produ t must be grounded. This applian e is equipped with a 5’ power
supply ord having a 3-prong grounding plug. To minimize possible sho k hazard, the ord must be plugged into a
mating 3-prong grounding type wall re epta le grounded in a ordan e with the National Ele tri al Code and lo al
odes and ordinan es. If the ir uit does not have a grounding type re epta le, it is the responsibility and obligation of
the ustomer to ex hange the existing re epta le in a ordan e with the National Ele tri al Code and appli able lo al
odes and ordinan es. The third ground plug SHOULD NOT, under any ir umstan es, be ut or removed. All UL listed
refrigerated produ ts are equipped with this type of plug.
WARNING
ELECTRICAL SHOCK HAZARD
Failure to follow these instru tions ould result in fire or ele tri al sho k.
Grounding type
wall receptacle
Power Supply
with 3-prong
grounding plug
LIGHT ASSEMBLY REPLACEMENT - 15” W. Models
NOTE:Please contact your local Viking Range
Corporation parts distributor or dealer to order a
ne light assembly.
To repla e the light, first dis onne t the unit’s power
ord. Next, remove both the green ground wire
s rew lo ated on the left of the light assembly and
the other s rew lo ated on the right of the light assembly with a 5-16” hex head s rewdriver. (See drawing). Unplug
the light unit and remove omplete light assembly.
To install the new light assembly, s rew in the green ground wire s rew and the s rew lo ated on the right with a 5/16”
hex head s rewdriver and plug the light unit in.
Plug
Hex head
screw
Light
assembly
Green
ground wire
Hex head
screw
DANGER
ELECTRICAL SHOCK HAZARD
Failure to to dis onne t the power ord when hanging the light tube,
ould result in fire or ele tri al sho k.
17
LIGHT TUBE REPLACEMENT - 2 ” W. Dual Zone Models
NOTE: Please contact your Viking Range Corporation parts distributor or dealer to order ne light tubes. Use only
approved replacement light tubes from your dealer or manufacturer.
This produ t uses two light tubes to illuminate the interior of the wine ellar. There is one light tube lo ated behind the
ontrol housing in the the upper ompartment and one light tube atta hed to the underside of the abinet divider in
the lower ompartment.
Use repla ement instru tions and drawing from the 15”W. Models for this Dual Zone produ t.
DANGER
ELECTRICAL SHOCK HAZARD
Failure to to dis onne t the power ord when hanging the light tube,
ould result in fire or ele tri al sho k.
LIGHT TUBE REPLACEMENT - 2 ” W. Single Zone Models
NOTE: Please contact your Viking Range Corporation parts distributor or dealer to order ne light tubes. Use only
approved replacement light tubes from your dealer or manufacturer.
This produ t uses two 6-watt light tubes to illuminate the interior
of the wine ellar. The light tubes are very reliable ele tri al
omponents, but should either or both light tubes not fun tion
properly, please all your lo al dealer for repla ement light tubes.
To repla e the light tube:
•Use a small Phillips head s rewdriver to remove the two s rews
holding the over plate over the ba k se tion of the light tube.
Set the s rews and over plate aside for re-assembly later.
•Using a small flat-blade s rewdriver, gently lever the front se tion
of the light tube down to allow it to be pulled lear of the light
housing. Dis onne t the two insulated ele tri al onne tors from
the abinet's ele tri al able and dis ard the old light tube.
•Re onne t the insulated ele tri al onne tor of the new light tube
to the abinet's ele tri al able onne tors. Make sure they are
se ure and fully inserted.
•Carefully realign the light tube's ele tri al terminals ba k into the rear of the light en losure hannel making sure not
to rimp them. Gently insert the light tube along the length of the light en losure hannel. Press the light tube gently
into the light en losure hannel. Only a small part of the light tube should proje t below the eiling of the unit. DO
NOT USE A HAMMER TO FIT THE LIGHT TUBE.
•Pla e the light tube terminal over plate ba k in its original position on the light en losure's flange. Re-use the original
two s rews to se ure the over in pla e. Plug the unit into the ele tri al so ket. Che k to see if the light tubes operate
properly.
Light tube
Conne tors
Cover plate
S rews
DANGER
ELECTRICAL SHOCK HAZARD
Failure to to dis onne t the power ord when hanging the light tube,
ould result in fire or ele tri al sho k.
18
SETTING THE CONTROLS - SINGLE ZONE
The temperature of the wine ellar ranges from 40ºF (4ºC) to 65°F (18ºC).
Solid Door Single Zone Models:
TruProtect™ “Basic” Function “Quick” Reference
ON
OFF SET
WARMER
COLDER
F/C
PRESS AND HOLD
POWER FAILURE - Flashing Amber
HIGH/LOW TEMP - Red
PRESS ON/OFF - Reset
ALARMS OFF - Steady Amber
TruProtect System
55
˚
F
FFuunnttiioonnFFuunnttiioonn AAeessss
TTuurrnn UUnniitt OOnn && OOffffPPrreessssiinngg aanndd hhoollddiinngg tthheekkeeyy ffoorr 55--sseeoonnddss wwiillll ttuurrnn tthhee uunniitt ““OONN”” oorr ““OOFFFF””..
AAddjjuusstt TTeemmppeerraattuurree SSeett--PPooiinnttTToo aaddjjuusstt tteemmppeerraattuurree sseett--ppooiinntt,, ttoouuhhkkeeyyppaadd aanndd uurrrreenntt sseett--ppooiinntt wwiillll bbee ddiissppllaayyeedd..
UUssee tthheeoorrkkeeyyppaaddss ttoo aaddjjuusstt sseett--ppooiinntt tteemmppeerraattuurree..
DDiissppllaayy ““AAttuuaall”” TTeemmppeerraattuurreeDDiissppllaayy rreepprreesseennttss ““rreeaall--ttiimmee”” mmoonniittoorriinngg ooff tthhee oommppaarrttmmeennttss ssttoorreedd wwiinnee aanndd//oorr
oonntteennttss.. SSoommee tteemmppeerraattuurree fflluuttuuaattiioonn aarroouunndd yyoouurr ddeessiirreedd sseett--ppooiinntt iiss nnoorrmmaall..
SSeelleett ººFF oorr ººCC DDiissppllaayyPPrreessssiinngg tthheekkeeyyppaadd wwiillll ttooggggllee tthhee ddiissppllaayy bbeettwweeeenn FFaahhrreennhheeiitt aanndd CCeennttiiggrraaddee
tteemmppeerraattuurree ddiissppllaayy..
BBllaakk--OOuutt MMooddeeDDiissppllaayy aauuttoommaattiiaallllyy sshhuuttss ooffff wwhheenn ddoooorr iiss lloosseedd..
DDiissppllaayy LLiigghhttiinnggDDiissppllaayy LLiigghhttiinngg aann bbee eennaabblleedd wwiitthh tthhee ddoooorr lloosseedd bbyy pprreessssiinngg tthheekkeeyyppaadd..
SSaabbbbaatthh MMooddeePPrreessss aanndd hhoolldd tthheekkeeyyppaadd wwhhiillee pprreessssiinngg tthheekkeeyyppaadd ffoouurr ((44)) ttiimmeess..
TTrruuPPrrootteett™SSyysstteemmSSyysstteemm mmoonniittoorriinngg iiss aauuttoommaattiiaallllyy eennaabblleedd uunnlleessss ssyysstteemm hhaass bbeeeenn ddiissaabblleedd.. ((SSeeee
bbeellooww..))
DDoooorr AAjjaarr AAllaarrmmNN//AA
HHiigghh//LLooww TTeemmpp AAllaarrmmNNoottee::AAllaarrmm mmaayy oouurr wwhheenn hhaannggiinngg sseett--ppooiinnttss iinn eexxeessss ooff 1100ººFF,, aanndd//oorr hhiigghh uussaaggee,,
tthhiiss iiss nnoorrmmaall..
PPoowweerr FFaaiilluurree AAllaarrmmNNoottee::AAllaarrmm wwiillll oouurr uuppoonn iinniittiiaall iinnssttaallllaattiioonn,, ssiinnee uunniitt wwaass rruunn aatt ffaattoorryy ttoo vveerriiffyy
qquuaalliittyy,, tthhiiss iiss nnoorrmmaall..
RReesseett AAllaarrmmssCClloossee ddoooorr ttoo rreesseett DDoooorr AAjjaarr aallaarrmm.. PPrreesssskkeeyyppaadd ttoo rreesseett aallll ootthheerr aallaarrmmss..
DDiissaabbllee//EEnnaabbllee TTrruuPPrrootteett™PPrreessss aanndd hhoolldd tthheekkeeyyppaadd ffoorr 55--sseeoonnddss ttoo ““ddiissaabbllee”” oorr ““eennaabbllee”” TTrruuPPrrootteett™
SSyysstteemm..
ON
OFF SET
WARMER
COLDER
˚
F/C LIGHT
55
˚
F
13
˚
C
38
˚
F
4
˚
C
SA
ON
OFF SET
WARMER
COLDER
˚
F/C LIGHT
55
˚
F
13
˚
C
38
˚
F
4
˚
C
SA
ON
OFF SET
WARMER
COLDER
˚
F/C LIGHT
55
˚
F
13
˚
C
38
˚
F
4
˚
C
SA
ON
OFF SET
WARMER
COLDER
˚
F/C LIGHT
55
˚
F
13
˚
C
38
˚
F
4
˚
C
SA
ON
OFF SET
WARMER
COLDER
˚
F/C LIGHT
55
˚
F
13
˚
C
38
˚
F
4
˚
C
SA
ON
OFF SET
WARMER
COLDER
˚
F/C LIGHT
55
˚
F
13
˚
C
38
˚
F
4
˚
C
SA
ON
OFF SET
WARMER
COLDER
˚
F/C LIGHT
55
˚
F
13
˚
C
38
˚
F
4
˚
C
SA
ON
OFF SET
WARMER
COLDER
˚
F/C LIGHT
55
˚
F
13
˚
C
38
˚
F
4
˚
C
SA
ON
OFF SET
WARMER
COLDER
˚
F/C LIGHT
55
˚
F
13
˚
C
38
˚
F
4
˚
C
SA
ON
OFF SET
WARMER
COLDER
˚
F/C LIGHT
55
˚
F
13
˚
C
38
˚
F
4
˚
C
SA
19
Glass Door Single Zone Models:
ON
OFF SET
PRESS AND HOLD
POWER FAILURE - Flashing Amber
HIGH/LOW TEMP - Red
PRESS ON/OFF - Reset
ALARMS OFF - Steady Amber
TruProtect System
WARMER
COLDER
˚
F/C
LIGHT
55
˚
F
55˚
CCoonnttrrooll CCoonnffiirrmmaattiioonn//CCoommmmeenntt
DDiissppllaayy wwiillll bbee bbllaannkkwwhheenn rreeffrriiggeerraattiioonn ssyytteemm iiss ooffff.. LLiigghhttss wwiillll ssttiillll ffuunnttiioonn,, bbuutt wwiillll ttiimmee--oouutt 1155 mmiinnuutteess aafftteerr
eeaahh aattiivvaattiioonn,, iiff ddoooorr iiss lleefftt ooppeenn oorr ddiissppllaayy lliigghhttiinngg iiss oonn,, ttoo pprreevveenntt oovveerrhheeaattiinngg..
““SSeett”” wwiillll aappppeeaarr iinn ddiissppllaayywwhheenn iinn sseett--ppooiinntt mmooddee.. ““SSEETT”” mmooddee wwiillll aauuttoommaattiiaallllyy ttiimmee--oouutt iinn 1100 sseeoonnddss iiff nnoo
kkeeyyppaadd aattiivviittyy oouurrss,, oorr yyoouu mmaayy eexxiitt ““SSEETT”” mmooddee bbyy pprreessssiinngg tthheekkeeyyppaadd aa sseeoonndd ttiimmee..
TTeemmppeerraattuurree vvaarriiaattiioonn iinn ““oommppaarrttmmeenntt aaiirr””,, aabboovvee aanndd bbeellooww sseett--ppooiinntt,, iiss aa nnoorrmmaall eeffffeett ooff rreeffrriiggeerraattiioonn ssyysstteemm
yylliinngg oonn aanndd ooffff.. SSttoorreedd iitteemmss wwiillll nnoott eexxppeerriieennee tthhee ffuullll tteemmppeerraattuurree sswwiinngg ooff tthhee oommppaarrttmmeenntt aaiirr dduuee ttoo tthhee
ddaammppeenniinngg eeffffeett ooff tthheeiirr tthheerrmmaall mmaassss..
==
IInn aaddddiittiioonn,, tthhee oonnttrrooll ppaanneell iiss hhiiddddeenn wwhheenn ddoooorr iiss lloosseedd..
OOppttiioonn aavvaaiillaabbllee oonn GGllaassss DDoooorr MMooddeellss oonnllyy..
DDiissppllaayy wwiillll ffllaasshhttoo oonnffiirrmm yyoouurr sseelleettiioonn,, tthheenn uunniitt wwiillll eenntteerr SSaabbbbaatthh MMooddee.. TThhee ddiissppllaayy,, aauuddiibbllee aallaarrmmss,, LLEEDD
aanndd lliigghhttss wwiillll bbee ddiissaabblleedd.. SSaabbbbaatthh MMooddee wwiillll aauuttoommaattiiaallllyy ttiimmee--oouutt iinn 3366 hhoouurrss,, oorr aann bbee eexxiitteedd bbyy rreeppeeaattiinngg tthhee
eennaabbllee kkeeyyppaadd rroouuttiinnee..
LLEEDD ddiissppllaayyss sstteeaaddyy ggrreeeennwwhheenn TTrruuPPrrootteett™ iiss eennaabblleedd..
AAuuddiibbllee aallaarrmm wwiillll ssoouunndd 33--ttiimmeess eevveerryy 3300--sseeoonnddss,, LLEEDD wwiillll ffllaasshh ggrreeeenn..
AAllaarrmm wwiillll ssoouunndd 66--ttiimmeess eevveerryy mmiinnuuttee aanndd LLEEDD wwiillll ffllaasshh rreeddiiff pprroodduutt tteemmppeerraattuurree eexxuurrssiioonnss oouurr ffoorr aa dduurraattiioonn
oouuttssiiddee aaeeppttaabbllee lliimmiittss..
LLEEDD wwiillll ffllaasshh aammbbeerrwwhheenneevveerr ppoowweerr iiss iinntteerrrruupptteedd ttoo uunniitt.. NNoo aauuddiibbllee ssiiggnnaall..
NNoottee tthhaatt aalltthhoouugghh pprreessssiinngg tthheekkeeyyppaadd wwiillll rreesseett tthhee aallaarrmmss,, tthhee aallaarrmm wwiillll rreessuummee iiff tthhee ““aallaarrmm oonnddiittiioonn”” ssttiillll
eexxiissttss..
LLEEDD ddiissppllaayyss sstteeaaddyy ggrreeeennwwhheenn aallaarrmmss eennaabblleedd.. LLEEDD ddiissppllaayyss sstteeaaddyy aammbbeerrwwhheenn ddiissaabblleedd..
ON
OFF SET
WARMER
COLDER
˚
F/C LIGHT
55
˚
F
13
˚
C
38
˚
F
4
˚
C
SA
ON
OFF SET
WARMER
COLDER
˚
F/C LIGHT
55
˚
F
13
˚
C
38
˚
F
4
˚
C
SA
ON
OFF SET
WARMER
COLDER
˚
F/C LIGHT
55
˚
F
13
˚
C
38
˚
F
4
˚
C
SA
ON
OFF SET
WARMER
COLDER
˚
F/C LIGHT
55
˚
F
13
˚
C
38
˚
F
4
˚
C
SA
ON
OFF SET
WARMER
COLDER
˚
F/C LIGHT
55
˚
F
13
˚
C
38
˚
F
4
˚
C
SA
ON
OFF SET
WARMER
COLDER
˚
F/C LIGHT
55
˚
F
13
˚
C
38
˚
F
4
˚
C
SA
ON
OFF SET
WARMER
COLDER
˚
F/C LIGHT
55
˚
F
13
˚
C
38
˚
F
4
˚
C
SA
ON
OFF SET
WARMER
COLDER
˚
F/C LIGHT
55
˚
F
13
˚
C
38
˚
F
4
˚
C
SA
ON
OFF SET
WARMER
COLDER
˚
F/C LIGHT
55
˚
F
13
˚
C
38
˚
F
4
˚
C
SA
ON
OFF SET
WARMER
COLDER
˚
F/C LIGHT
55
˚
F
13
˚
C
38
˚
F
4
˚
C
SA
ON
OFF SET
WARMER
COLDER
˚
F/C LIGHT
55
˚
F
13
˚
C
38
˚
F
4
˚
C
SA
ON
OFF SET
WARMER
COLDER
˚
F/C LIGHT
55
˚
F
13
˚
C
38
˚
F
4
˚
C
SA
ON
OFF SET
WARMER
COLDER
˚
F/C LIGHT
55
˚
F
13
˚
C
38
˚
F
4
˚
C
SA
20
SETTING THE CONTROLS - DUAL ZONE
The temperature of the wine ellar ranges from 40ºF (4ºC) to 65°F (18ºC).
ON
OFF
SET
ON
OFF
Control Confirmation/Comment
SET
WARMER
COLDER
˚F/C
LIGHT
˚F/C
SET
=
55û
Place new control here when I get it from Ray
64
û
F
42
û
F
ON
Hi/Low Temp Upper
Hi/Low Temp Lower
64
û
F
42
û
F
ON
Hi/Low Temp Upper
Hi/Low Temp Lower
13
û
C
55
û
F
SA
Turn Unit On & Off
Adjust Temperature Set-Point
Display “Actual” Temperature
Select °F or °C Display
Black-Out Mode
Display Lighting
Sabbath Mode
TruProtect™ System
Door Ajar Alarm
High/Low Temp Alarm
Power Failure Alarm
Reset Alarms
Disable/Enable TruProtect™
Function Function Access
Pressing and holding the key for 5-seconds will turn the unit “ON” or “OFF”.
To adjust temperature set-point, press the key. When a compartment is in “SET”
mode, a “SET” icon will be displayed. Pressing either the or keys located
on the display pad will raise or lower the set temperature by one (1) °F or °C (depending
on your setting).
Display represents “real-time” temperature of each compartment’s stored wine and/or
contents. Some minor temperature fluctuation around your desired set-point is normal.
Pressing the key will toggle the display between Fahrenheit and Centigrade
temperature display.
Display automatically shuts off when the door is closed.
Display lighting can be enabled with the door closed by pressing the key.
Press and hold the key while pressing the key four (4) times in seven (7) seconds.
System monitoring is automatically enabled unless system has been shut off (see below).
N/A
NOTE: This alarm may occur when changing set-points in excess of 10 °F, and/or high
usage, this is normal.
NOTE: This alarm may occur upon initial installation since the unit was run at the factory
to verify quality, this is normal.
Close door to reset “DOOR AJAR” Alarm. Press the key to reset all other alarms.
Press and hold the key for five (5) seconds to enable or disable the TruProtect™
System.
Display will be blank when the refrigeration system is off. Lights will still function, but will time-out in 15 minutes after
each activation if door is left open or display lighting is on, to prevent overheating.
“SET” mode will automatically time-out in ten (10) seconds and default to actual content temperature if no keypad
activity occurs, or you may exit “SET” mode by pressing the key until “SET” icon disappears.
Temperature variation in “compartment” air, above and below set-point, is a normal effect of the refrigeration system
cycling on and off. Stored items will not experience the full temperature swing of the compartment air due to the
dampening effect of their thermal mass.
In addition, the control panel is hidden when the door is closed.
Display lighting stays on continuously.
The display will flash to confirm your selection, then the unit will enter Sabbath Mode. The display, audible alarms,
message center and lights will be disabled. Sabbath Mode will automatically time-out in 72 hours, or can be exited by
repeating the enabling process.
TruProtect™ System message center displays a green “ON” when TruProtect™ is enabled and an amber “OFF” when
TruProtect™ is disabled.
An audible alarm will sound 3 times every 30 seconds and the message center will display an amber “DOOR AJAR”.
An audible alarm will sound 6 times every minute and the message center will display a red “HI/LOW TEMP UPPER” or
a red “HI/LOW TEMP LOWER” if product temperature excursions occur for a duration outside acceptable limits.
The message center will display an amber “POWER FAILURE” whenever power is interrupted to the unit. There is no
audible alarm with a power failure.
Although pressing the key resets the alarms, the alarm will resume if the “alarm condition” still exists.
The message center displays a green “ON” when the alarms are enabled.
Solid Door Dual Zone Models:
TruProtect™ “Basic” Function “Quick” Reference

This manual suits for next models

4

Other Viking Wine Cooler manuals

Viking FWCI1240GR Manual

Viking

Viking FWCI1240GR Manual

Viking Designer DFWB300 User manual

Viking

Viking Designer DFWB300 User manual

Viking VUWC15"W Technical manual

Viking

Viking VUWC15"W Technical manual

Viking VUWC144T User manual

Viking

Viking VUWC144T User manual

Viking Designer DDWB300 User manual

Viking

Viking Designer DDWB300 User manual

Viking VCWB301 User manual

Viking

Viking VCWB301 User manual

Viking VCWB301LSS User manual

Viking

Viking VCWB301LSS User manual

Viking VCWB301R User manual

Viking

Viking VCWB301R User manual

Viking Designer DFWB300 Operating instructions

Viking

Viking Designer DFWB300 Operating instructions

Viking VCWB301 User manual

Viking

Viking VCWB301 User manual

Viking VCWB300RSS Reference guide

Viking

Viking VCWB300RSS Reference guide

Viking Designer DDWB300 User manual

Viking

Viking Designer DDWB300 User manual

Viking Professional VCWB300 User manual

Viking

Viking Professional VCWB300 User manual

Viking 24" Technical manual

Viking

Viking 24" Technical manual

Viking F20050 EN Technical manual

Viking

Viking F20050 EN Technical manual

Viking VWUI5151G User manual

Viking

Viking VWUI5151G User manual

Viking Designer DFUW1441CR Manual

Viking

Viking Designer DFUW1441CR Manual

Viking VWUI5150 User manual

Viking

Viking VWUI5150 User manual

Viking VCWB301 User manual

Viking

Viking VCWB301 User manual

Viking FDWB301R User manual

Viking

Viking FDWB301R User manual

Viking DFWB300R User manual

Viking

Viking DFWB300R User manual

Viking Designer DDWB300 User manual

Viking

Viking Designer DDWB300 User manual

Viking FWCI1150GR Manual

Viking

Viking FWCI1150GR Manual

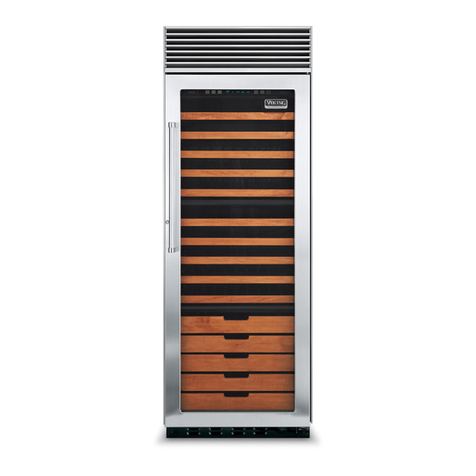
Viking UNDERCOUNTER/FREESTANDING WINE CELLAR Technical manual

Viking

Viking UNDERCOUNTER/FREESTANDING WINE CELLAR Technical manual

Popular Wine Cooler manuals by other brands

V-ZUG WineCooler V6000 Supreme operating instructions

V-ZUG

V-ZUG WineCooler V6000 Supreme operating instructions

Avantgarde LBWC-44SWE instruction manual

Avantgarde

Avantgarde LBWC-44SWE instruction manual

WHISPER KOOL Mini Split Tech  manual

WHISPER KOOL

WHISPER KOOL Mini Split Tech manual

WHISPER KOOL XLT SERIES XLT 1600 owner's manual

WHISPER KOOL

WHISPER KOOL XLT SERIES XLT 1600 owner's manual

WHISPER KOOL Mini Split Quick reference guide

WHISPER KOOL

WHISPER KOOL Mini Split Quick reference guide

BLACK DECKER BD60316 manual

BLACK DECKER

BLACK DECKER BD60316 manual

Glastender BB24 Operation manual, parts directory, and price list

Glastender

Glastender BB24 Operation manual, parts directory, and price list

Wine cellr BORDEAUX WC-09 user manual

Wine cellr

Wine cellr BORDEAUX WC-09 user manual

WHISPER KOOL SLIMLINE LS owner's manual

WHISPER KOOL

WHISPER KOOL SLIMLINE LS owner's manual

WHISPER KOOL 17-1103 owner's manual

WHISPER KOOL

WHISPER KOOL 17-1103 owner's manual

New Air AW-121E owner's manual

New Air

New Air AW-121E owner's manual

VALERA BLANC ET ROUGE datasheet

VALERA

VALERA BLANC ET ROUGE datasheet

Northbeam WNR0011720800 Care Instructions

Northbeam

Northbeam WNR0011720800 Care Instructions

Salton WC2002 Instruction booklet

Salton

Salton WC2002 Instruction booklet

Ariston WL 36 A/HA user guide

Ariston

Ariston WL 36 A/HA user guide

Caple WC6216 instruction manual

Caple

Caple WC6216 instruction manual

Vintec VWS050SBB-X user manual

Vintec

Vintec VWS050SBB-X user manual

Bosch KUW20 Series INFORMATION FOR USE

Bosch

Bosch KUW20 Series INFORMATION FOR USE

manuals.online logo
manuals.online logoBrands
  • About & Mission
  • Contact us
  • Privacy Policy
  • Terms and Conditions

Copyright 2025 Manuals.Online. All Rights Reserved.