manuals.online logo
Brands
  1. Home
  2. •
  3. Brands
  4. •
  5. Viking
  6. •
  7. Wine Cooler
  8. •
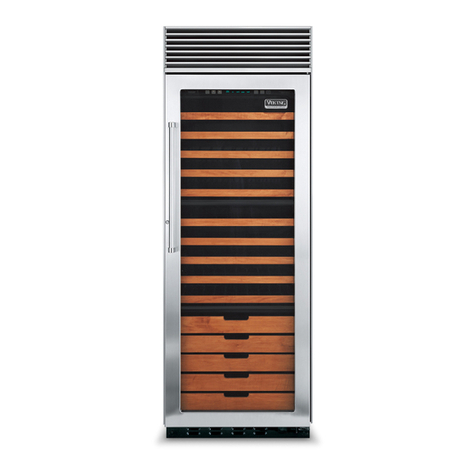
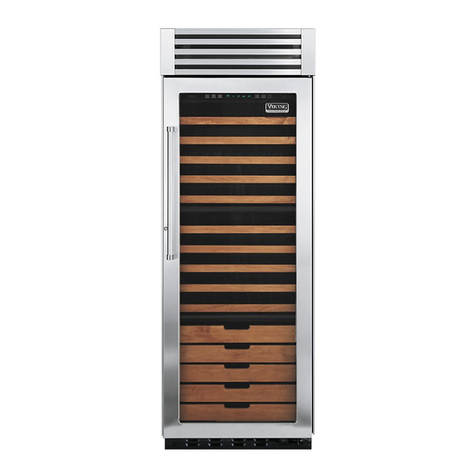
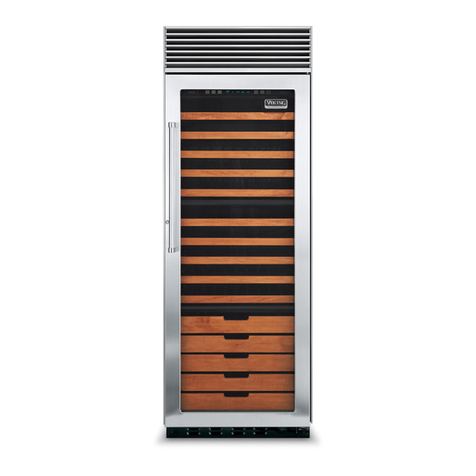
  9. Viking DDWB301CRSS User manual

Viking DDWB301CRSS User manual

Other manuals for DDWB301CRSS

5

Other Viking Wine Cooler manuals

Viking VDUI5241 User manual

Viking

Viking VDUI5241 User manual

Viking VWUI5151 User manual

Viking

Viking VWUI5151 User manual

Viking VCWB301LSS User manual

Viking

Viking VCWB301LSS User manual

Viking F20050 Technical manual

Viking

Viking F20050 Technical manual

Viking Designer DFUW142 User manual

Viking

Viking Designer DFUW142 User manual

Viking VCWB301RSS User manual

Viking

Viking VCWB301RSS User manual

Viking Designer DFUW2441CR Manual

Viking

Viking Designer DFUW2441CR Manual

Viking Designer DFUW1441CR Manual

Viking

Viking Designer DFUW1441CR Manual

Viking Designer DDWB300 User manual

Viking

Viking Designer DDWB300 User manual

Viking Designer DFUW1541CR Manual

Viking

Viking Designer DFUW1541CR Manual

Viking VUWC144T User manual

Viking

Viking VUWC144T User manual

Viking FDWB301R User manual

Viking

Viking FDWB301R User manual

Viking Designer DFUW142 User manual

Viking

Viking Designer DFUW142 User manual

Viking VUWC15"W Technical manual

Viking

Viking VUWC15"W Technical manual

Viking VWUI5150 User manual

Viking

Viking VWUI5150 User manual

Viking DFUW154 User manual

Viking

Viking DFUW154 User manual

Viking PW200001 Service manual

Viking

Viking PW200001 Service manual

Viking Designer DFUW1441CR Technical manual

Viking

Viking Designer DFUW1441CR Technical manual

Viking Designer DFUW142 User manual

Viking

Viking Designer DFUW142 User manual

Viking VCWB300RSS Reference guide

Viking

Viking VCWB300RSS Reference guide

Viking Designer DDWB300 User manual

Viking

Viking Designer DDWB300 User manual

Viking Professional VCWB300 User manual

Viking

Viking Professional VCWB300 User manual

Viking 24" Technical manual

Viking

Viking 24" Technical manual

Viking VWUI5151G User manual

Viking

Viking VWUI5151G User manual

Popular Wine Cooler manuals by other brands

Caple WI152 technical information

Caple

Caple WI152 technical information

Sub-Zero WS-30 Specification sheet

Sub-Zero

Sub-Zero WS-30 Specification sheet

Rotel U903CH1 Instructions for use

Rotel

Rotel U903CH1 Instructions for use

Esatto EWC46 quick start guide

Esatto

Esatto EWC46 quick start guide

Sub-Zero Classic Series installation guide

Sub-Zero

Sub-Zero Classic Series installation guide

U-Line Echelon Wine Captain 2075WC Features & benefits

U-Line

U-Line Echelon Wine Captain 2075WC Features & benefits

Haier WS50GA user manual

Haier

Haier WS50GA user manual

Caple WC6511 instruction manual

Caple

Caple WC6511 instruction manual

Cavist 62 instruction manual

Cavist

Cavist 62 instruction manual

Kenmore 461.99130 owner's manual

Kenmore

Kenmore 461.99130 owner's manual

Caple Wi6128 instruction manual

Caple

Caple Wi6128 instruction manual

Danby DWC113BLSDB owner's manual

Danby

Danby DWC113BLSDB owner's manual

Avanti WC1001 instruction manual

Avanti

Avanti WC1001 instruction manual

Frigidaire FFWC38F6LS Factory parts catalog

Frigidaire

Frigidaire FFWC38F6LS Factory parts catalog

Titan TT-W2454SZ User guide & service manual

Titan

Titan TT-W2454SZ User guide & service manual

Klarstein Botella 166 Uno manual

Klarstein

Klarstein Botella 166 Uno manual

Costway FP10130WL manual

Costway

Costway FP10130WL manual

Lemair LWC59 instruction manual

Lemair

Lemair LWC59 instruction manual

manuals.online logo
manuals.online logoBrands
  • About & Mission
  • Contact us
  • Privacy Policy
  • Terms and Conditions

Copyright 2025 Manuals.Online. All Rights Reserved.

F20857 EN (061011)
Viking Use & Care Manual
Viking Range Corporation
111 Front Street
Greenwood, Mississippi 38930 USA
(662) 455-1200
For produ t information
all 1-888-VIKING1 (845-4641)
or visit the Viking Web site at
vikingrange. om
Designer Built-In Full Height
Wine Cellar
32
Congratulations
Your pur hase of this produ t attests to the importan e you pla e upon
the quality and performan e of the major applian es you use. With
minimal are, as outlined in this guide, this produ t is designed to
provide you with years of dependable servi e. Please take the few
minutes ne essary to learn the proper and effi ient use and are of this
quality produ t.
We appre iate your hoosing a Viking Range Corporation produ t, and
hope that you will again sele t our produ ts for your other major
applian e needs.
Table of Contents
Warnings............................................ 3
Important Safety Instru tions . . . . . . . . . . . . . . . . . . . . . . . . . . . . 3
Proper Disposal of Your Old Refrigerated Produ t . . . . . . . . . . . 4
FeaturesofYourWineCellar ............................ 6
Before Using Your Wine Cellar . . . . . . . . . . . . . . . . . . . . . . . . . . . 8
Ele troni ControlCenter............................... 9
WineStorageSystem..................................11
WineStorageGuidelines ...............................17
CleaningandMaintenan e..............................19
Troubleshooting ......................................20
Servi eInformation....................................21
Warranty............................................22
YYoouurr ssaaffeettyy iiss iimmppoorrttaanntt ttoo uuss.. This use and are manual ontains
safety symbols and statements. Please pay spe ial attention to these
symbols and follow any instru tions given.
This symbol alerts you to hazards su h as fire, ele tri al sho k
or other injuries.
•Read all instru tions before using
the wine ellar.
•Never allow hildren to operate,
play with, or rawl inside the wine
ellar.
•Never lean wine ellar parts with
flammable fluids. The fumes an
reate a fire hazard or explosion.
•Always turn the power on/off
swit h (lo ated behind the air
grille on top right side) to the
OFF position before attempting
to hange light tubes, lean, or
servi e the wine ellar.
--SSAAVVEE TTHHEESSEE IINNSSTTRRUUCCTTIIOONNSS--
TToo rreedduuee tthhee rriisskk ooff ffiirree,, eelleettrrii sshhookk,, oorr iinnjjuurryy wwhheenn uussiinngg yyoouurr wwiinnee
eellllaarr,, ffoollllooww tthheessee bbaassii pprreeaauuttiioonnss::
••FFOORR YYOOUURR SSAAFFEETTYY••
DO NOT STORE OR USE
GASOLINE OR OTHER
FLAMMABLE VAPORS AND
LIQUIDS IN THE VICINITY OF
THIS OR ANY OTHER
APPLIANCE. THE FUMES CAN
CREATE A FIRE HAZARD OR
EXPLOSION.
EELLEECCTTRRIICCAALL SSHHOOCCKK HHAAZZAARRDD
PPlluugg iinnttoo aa ggrroouunnddeedd 33--pprroonngg oouuttlleett.. IIff aa 22--pprroonngg wwaallll rreeeeppttaallee iiss
eennoouunntteerreedd,, oonnttaatt aa qquuaalliiffiieedd eelleettrriiiiaann
DDoo nnoott rreemmoovvee ggrroouunndd pprroonngg.. UUnniitt mmuusstt bbee ggrroouunnddeedd aatt aallll ttiimmeess..
DDoo nnoott uussee aann aaddaapptteerr..
DDoo nnoott uussee aann eexxtteennssiioonn oorrdd..
FFaaiilluurree ttoo ffoollllooww tthheessee iinnssttrruuttiioonnss aann rreessuulltt iinn ddeeaatthh,, ffiirree,, oorr eelleettrriiaall
sshhookk..
WARNING
WARNING
54
RRiisskk ooff CChhiilldd EEnnttrraappmmeenntt
BBEEFFOORREE YYOOUU TTHHRROOWW AAWWAAYY AANNYY WWIINNEE CCEELLLLAARR,, RREEFFRRIIGGEERRAATTOORR OORR
FFRREEEEZZEERR::
•Take off the doors.
•Leave the shelves in pla e so that hildren may not easily limb
inside.
IIMMPPOORRTTAANNTT::Child entrapment and suffo ation are not problems of
the past. Junked or abandoned refrigerated produ ts are still
dangerous... even if they will sit for “just a few days.”
Proper Disposal of Your Old Refrigerated
Product
Safety/Installation Tips
•Install and level the wine ellar on a floor that will hold the weight and
in an area suitable for its size and use.
•Do not install the wine ellar near an oven, radiator, or other heat
sour e.
•Keep the wine ellar out of the weather.
•Conne t the wine ellar only to the proper type of outlet, with the
orre t ele tri al supply and grounding. (Refer to the ele tri al
requirements se tion of the Installation Instru tions).
•Properly maintain the wine ellar.
•Be sure the wine ellar is not used by anyone unable to operate
properly.
DANGER
76
Features of Your Wine Cellar (1)TriTempTM Storage System
Your wine ellar has three independent temperature zones separated by
gaskets and tempered glass shelves to seal the zones. This allows you to
set the temperatures in your wine ellar to mat h your wine storage
needs. Ea h zone has its own fan, allowing for true air ir ulation within
the zone. One ontrol, onveniently lo ated at the top of the unit, allows
you to pre isely ontrol the temperature in ea h zone separately.
BBoottttoomm ZZoonnee- The bottom zone is designed for longer term wine
storage with no lighting and raised wood fa ings to add further UV
prote tion. This is the perfe t pla e to store your most deli ate and
pre ious wine.
150 Bottle Capacity
Your wine ellar will a ommodate 150 bottles of wine on the 15 shelves.
Ea h shelf has a 10 bottle apa ity.
(2)Electronic Control Center
The ele troni ontrol enter allows you to set and monitor the
operations of the wine ellar easily and a urately.
(3)Versatile Shelving System
Your wine ellar's shelving system is designed for optimal wine storage.
This system in ludes two onvertible display shelves that lay flat for
normal storage or onvert to display shelves to beautifully display your
wine. All shelves are oated to absorb vibration and prevent unne essary
movement. Shelves pull forward on roller bearing glides and remain level
at full extension allowing for easy loading and unloading and are fully
removable for easy leaning. Shelves are designed to a ommodate
different bottles sizes and shapes in luding standard bottle, half-size
bottles and magnums.
(4)Energy Efficient & UV Resistant Glass Doors
Glass door units are energy effi ient and UV resistant. The doors are
insulated and oated to prote t against UV rays.
(5)Low Intensity Lighting
The low intensity lighting system allows wines to be displayed without
ompromising wine integrity. Lights an be set so that they stay on for
display purposes or to only ome on when the door is opened.
(9)Home Se urity System
Conne tion
(behind grille)
(2)Ele troni Control
Center
(1)TriTempTM
Storage System
(150 Bottle
Capa ity)
(4)Energy
Effi ient/UV
Resistant Glass
(5)Low Intensity
Lighting
(3)Versatile
Shelving
System
(6)Bla k Interior
(10)Door Stop Settings -
90°, 110°, 120°
(7)High Temperature Alarm
(behind grille)
(8)Open Door Alarm
(behind grille)
(11) Door Lo k
(on front of door)
98
(6)Black Interior
The wine ellar's bla k interior not only provides a stylish ba kdrop for
your prized wines but absorbs harmful light and prote ts your wines.
(7)High Temperature Alarm
Your wine ellar has a high temperature alarm feature that will sound if
temperatures within your wine ellar flu tuate outside of your set point
by 5 degrees for an extended period of time.
(8)Door Alarm
The door alarm feature alerts you if you have left the wine ellar's door
open for more than 3 minutes.
(9)Connection to Home Security System
For added pea e of mind, your wine ellar an be onne ted to your
home se urity system to alert you while away from home if the
temperatures within your wine ellar flu tuate outside of your set point
by 5 degrees for an extended period of time.
(10)Door Stop Settings
For utmost flexibility, the wine ellar door stop an easily be set to 90,
110, or 120 degrees, allowing it to be used in many different
appli ations.
(11)Door Lock
A keyed door lo k omes standard with the wine ellar. The door lo k
provides added prote tion for your wine olle tion.
Before Using Your Wine Cellar
To obtain the best possible results from your wine ellar, it is important
that you operate it properly.
Power ON/OFF Switch
The power on/off swit h is used to turn the power off to the wine ellar
when leaning it or hanging the light tubes. The wine ellar is shipped
with the power on/off swit h in the on position. To turn the power off,
remove the enter grille assembly by grasping the three enter louvers,
lifting up and pulling outward. Press the power on/off swit h to the “Off”
position. To turn the power ba k on, press the power on/off swit h to the
“On” position. Repla e the enter grille assembly by aligning the hooks
in the assembly with the slots in the bra kets whi h are atta hed to the
grille. Push in over the hooks and slide grille assembly downward.
Showroom Switch
The showroom swit h allows ele troni ontrols and interior lights to
fun tion independently of the refrigeration system. Your wine ellar is
shipped with the showroom swit h in the “Off” position. To use the
showroom mode, remove enter grille assembly and turn the showroom
swit h to the “On” position. Showroom mode will be engaged.
IMPORTANT
Be sure the power on/off swit h is in the ON position after leaning
the wine ellar or hanging the light tubes.
With the TriTempTM Storage System, you an set the temperature in ea h
of the three zones within a range of 43°F to 65°F (6°C to 18°C). The unit
is fa tory set at 43° F (6°C) in the top two zones and 55°F (13°C) in the
bottom zone. Sele t the zone you wish to adjust by pressing the "ZONE"
key. The lighted bar on the ontrol enter will toggle between the upper,
middle, and lower zones. When the bar above the zone you wish to
adjust is lit, press the lower temp or higher temp key to sele t the
desired temperature. The set temperature will flash on the ontrol enter.
After 7 se onds, the temperature displayed will revert to the ACTUAL
zone temperature and will no longer flash. To again view the set
temperature, press the "ZONE" key. Refer to pages 17-18 for wine
storage guidelines and suggested serving temperatures.
Electronic Control Center
Power On/Off
Swit h
Showroom
Swit h
TriTemp Wine Storage
150 Bottle Capacity
UPPER MIDDLE LOWER
LOWER
TEMP HIGHER
TEMP
Three Independent Temperature Areas
Electronic Control Center
ZONE LIGHTSDISPLAY ALARM
T iTemp Wine Sto age
150 Bottle Capacity
UPPER MIDDLE LOWER
ZONE LIGHTSDISPLAY ALARM
LOWER
TEMP HIGHER
TEMP
Th ee Independent Tempe atu e A eas
Elect onic Cont ol Cente
1110
Higher Temp
The higher temp key allows you to in rease the temperature in the
sele ted zone by one degree in rements.
Lights
The lights key allows you to turn the lighting on independent of the door
opening for displaying the ontents of the upper and middle zones. To
turn the lights on, press the button on e. Lights should not be left on for
extended periods of time, as long term light exposure will affe t the
quality of your wine.
Display
The display key will turn the power to the display off. Press this button if
you do not wish for the ontrol panel to be illuminated. To turn the
display on, press the display key.
Alarm
Your wine ellar is equipped with two alarms: High Temperature alarm
and Open Door alarm. The High Temperature alarm will signal if the
temperature in any zone flu tuates 5 degrees from your set point for an
extended period of time. To set this alarm, press and hold the alarm key
for two se onds. A bell will appear on the display when the alarm has
been su essfully enabled. When the alarm is triggered, a beeping noise
will be heard and the wine ellar’s display will flash and show an alarm
message. To turn the alarm off, press the alarm key. To ompletely
disengage the alarm, press and hold the alarm key for two se onds. The
Open Door alarm is set automati ally. The Open Door alarm will signal if
the wine ellar’s door has been left open for three minutes. A beeping
noise will be heard and an alarm message will appear on the display. The
wine ellar’s door must be losed in order to turn the alarm off.
Temperature Unit Conversion
Your wine ellar is fa tory set to display degrees Farenheit. If you prefer
Celsius, press and hold the alarm key and display key for 5 se onds.
Versatile Shelving System
Your wine ellar's shelving system makes it easy to store standard,
magnum and half-size bottles easily. There are a total of fifteen wine
shelves whi h will ea h a ommodate 10 bottles of wine, alternately
displayed. Two onvertible wine shelves adjust to allow bottles to be
displayed.
Loading the Shelves
To load a shelf, pull the
shelf forward and pla e
the bottles on the shelf
with the ne k in the
enter of the shelf.
Alternate the dire tion of
the next bottle. Note the
illustration to the right
for maximum bottle
storage.
Holiday Mode for Sabbath Observance
Pressing and holding the display button ontinuously for 10 se onds
a esses this mode. The display will ontinue to be on as long as the
button is pressed and at the end of 10 se onds, the display will turn off
and holiday mode will be engaged. NOTE: To enter Holiday Mode, the
display must be on prior to initiating the Holiday Mode. To an el
Holiday Mode, press and hold the display button ontinuously for 10
se onds. At the end of 10 se onds the display will turn on. When Holiday
Mode is sele ted: a random time delay will be applied to the ompressor
relay start and stop. The hamber lights relay will remain de-energized.
The display will not be illuminated. Audible sound (beep) from the
ontrol will be disabled. Fan outputs will not be affe ted by opening or
losing of the door swit h. All front panel buttons will be inoperative
ex ept a 10 se ond press of the display button ausing the ontrol to exit
Holiday Mode. All other fun tions will ontinue as in normal ooling.
To store magnum or oversized bottles, the shelf dire tly above must be
removed. Failure to do so ould result in bottle breakage. See page 12
for proper shelf removal.
Lower Temp
The lower temp key allows you to de rease the temperature in the
sele ted zone in one degree in rements.
Wine Storage System
CAUTION
1312
Shelf Removal
To remove a wine shelf:
Wood Facings
Maple wood fa ings are in luded with ea h shelf. These fa ings may be
left unfinished, finished and sealed, or repla ed with other wood to
mat h your abinetry. Refer to the wine ellar installation instru tions on
how to repla e the wood fa ings.
Convertible Display Shelves
Your wine ellar has two onvertible display shelves - one in ea h of the
top two ompartments. To use the display shelf, first remove any wine
bottles stored on the shelf. Next, remove the wine shelf dire tly above
(see shelf removal instru tions on page 12). Lift the shelf up, rotate the
shelf support up and lo k shelf into pla e with legs (see illustration
below).
Remove wine bottles from shelves before removing shelves. Failure to
do so ould result in bottle breakage.
1) Pull the shelf forward
until it is fully
extended.
2) Lift up the front of
the shelf.
3) Remove from the
glide.
To repla e the shelf, line shelf up with glide, lower into pla e and push
shelf ba k.
Wood
Front
Shelf Support
NNOOTTEE:: Some finishes may ause undesirable odors. The re ommended
pro edure is to test a sample in the wine ellar on s rap material before
making permanent hanges to wine ellar fronts.
CAUTION
1514
Changing the Light Tube in the Top Zone
To hange the light tube, first remove the enter grille assembly and
turn the power ON/OFF swit h to the OFF position (see page 9).
NNOOTTEE:: Please onta t your Viking Range Corporation parts distributor
or dealer to order new light tubes.
1. Remove the four s rews from the lamp holder atta hing the lamp
holder to the underside of the ontrol panel.
2. Rotate the rear of the lamp holder down and forward then pull the
front tabs that engage into the ontrol out of the ontrol panel.
3. Set the lamp holder and s rews to the side.
4. Pull the wires atta hed to the lamp tube through the hole in the
ontrol panel and dis onne t the wires atta hing the lamp to the
abinet wire harness.
5. The lamp tube is to be onne ted to one white wire and one
yellow/red wire.
6. Pla e tubes in lamp holder. Feed wires ba k into ontrol panel and
reassemble in reverse order.
CCoonnttrrooll PPaanneell
Changing the Light Tube in the Middle Zone
To hange the light tube, first remove the enter grille assembly and
turn the power ON/OFF swit h to the OFF position (see page 9).
1. Remove the lamp wire over by removing the two s rews lo ated on
the upper left side of the middle zone. (NOTE: ONLY REMOVE
THE TWO SCREWS HOLDING THE WIRE COVER; DO NOT
REMOVE SHELF MOUNTING SCREWS).
2. Set the wire over and s rews to the side.
3. Dis onne t the lamp by dis onne ting one yellow and one white
wire from ea h lamp.
4. Remove the lamp and s rew lo ated at the end of the lamp. The
lamp is lo ated on the underside of the middle mullion shelf.
5. Carefully unsnap light tube from shelf and snap new light tube into
pla e.
6. Reassemble in reverse order.
Ligh
Clamps
Wire Cover
Screws
16
Door Stop Adjustment
Your wine ellar is fa tory set at 110° door stop position. To hange to
either the 90° or 120° position, remove door stop pin lo ated in the
bottom hinge using a 3/16” allen wren h. For 120° swing, move pin to
utmost forward stop hole. For 90° swing, move pin to utmost rear stop
hole.
90° stop
(farthest from unit)
Home Security System Connection
The wine ellar may be onne ted to your home se urity system to
prote t your wine while away from home. Conta t a qualified te hni ian
or your home se urity system representative and refer to the wine ellar
installation instru tions.
17
Wine Storage Guidelines
Wines that are stored for a long period of time should be stored at a
stable temperature in a dark, vibration free environment. Wines stored
for a short term (six months) an be stored at 55°F (13°C), or they an be
stored at temperatures optimal for serving. The hart on the next page
provides re ommended serving temperatures for different types of
wines.
•The ambient temperature of the room you lo ate your wine ellar in
ould affe t the temperature in your wine ellar if the room
temperature is lower than the wine ellar ompartment setting. The
wine ellar is designed to ool, not heat the stored wines.
Temperatures inside the wine ellar annot be higher than room
temperatures outside of the wine ellar. The wine ellar is designed
to perform at room temperatures of 70°F (21°C) and above.
•In ertain onditions, the temperature of the middle zone an vary up
to 5°F (2.8°C) from your sele ted temperature setting.
Optimal Wine Serving Temperatures
Red wines are generally served from ool to room temperatures (55°F -
65°F [13°C - 18°C]). White wines are served at ellar temperatures (50°F
- 55°F [10°C - 13°C]), and sparkling wines are served at the oolest
temperatures (45°F - 50°F [7°C - 10°C]).
120° stop
( losest to unit)
18
©O topus Publishing Group. From The World Atlas of Wine by Hugh
Johnson and Jan is Robinson, published by Mit hell Beazley.
Recommended Wine Serving Temperatures
19
Cleaning and Maintenance
Exterior
SSttaaiinnlleessss SStteeeell - Clean with a non-abrasive stainless steel leaner and
soft loth.
PPaaiinntteedd DDoooorrss - Clean with mild detergent, warm water and sponge or
soft loth. Hand wash, wipe and dry thoroughly.
GGllaassss- Clean with glass leaner and a soft loth or paper towel.
Interior
IInntteerriioorr ((lliinneerr aanndd sshheellvveess))- Clean with a baking soda or mild detergent
and water solution and a sponge or soft loth. Wipe and dry thoroughly.
Take are not to get water on the lights, ontrol panel or wood fa ings
of the shelves. DO NOT USE ABRASIVE CLEANERS.
GGaasskkeettss- Clean with a mild detergent and water solution and a sponge,
soft loth or paper towel. Wash, wipe, and dry thoroughly. Apply a thin
oat of petroleum jelly to keep gasket pliable. Do not use waxes,
on entrated detergents, or leaners ontaining hlorine blea h.
EElleettrroonnii CCoonnttrrooll CCeenntteerr- Clean with mild detergent, warm water, and
a sponge or soft loth.
DOMESTIC FRIDGE TEMP IDEAL CELLAR TEMPERATURE ROOM TEMPERATURE
SWEET WINES LIGHT REDS FULL-SCALE REDS