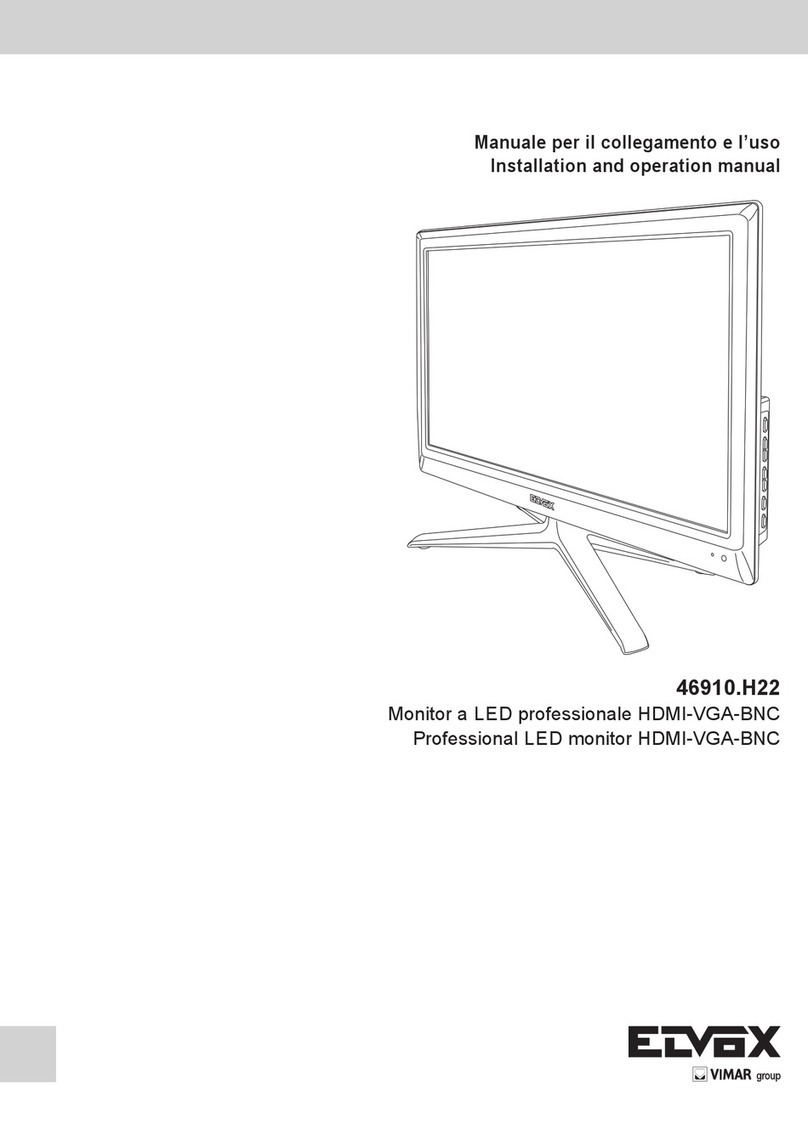
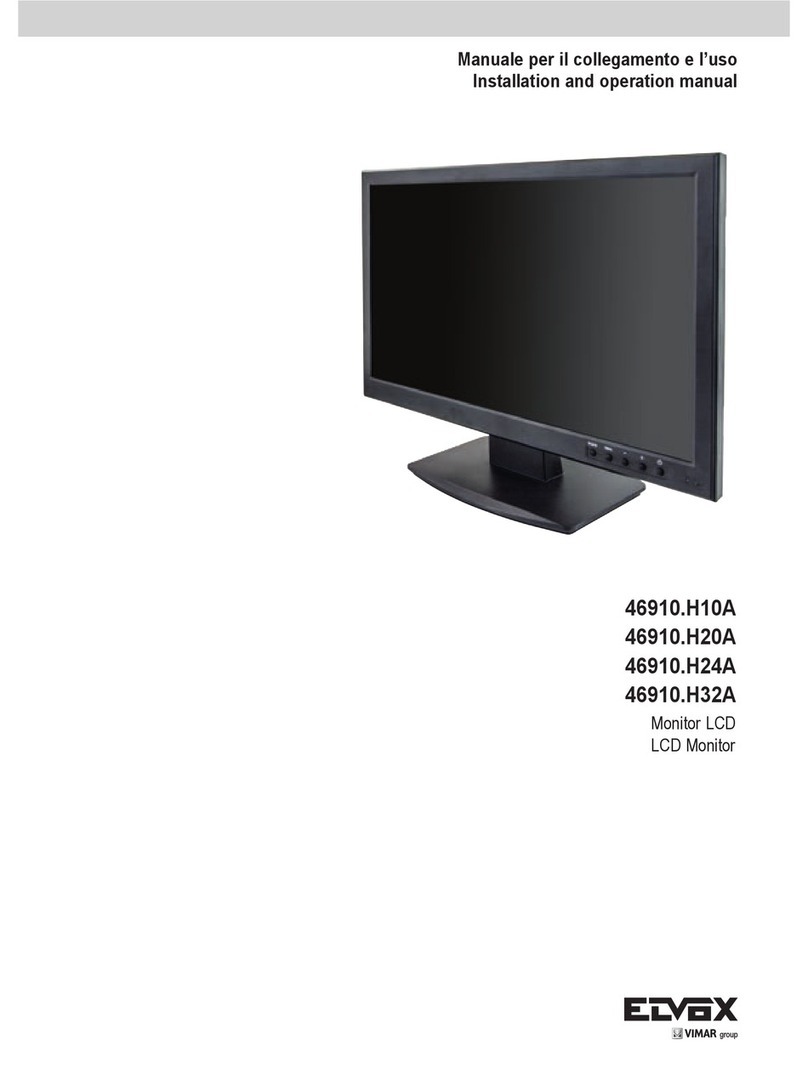
Vimar ELVOX 46910.H10A.01 User manual

Manuale per il collegamento e l’uso
Installation and operation manual
46910.H10A.01
MonitorLED10,1",ingressi video BNC/VGA/HDMI
LED 10.1" monitor, BNC/VGA/HDMI video inputs

2
46910.H10A.01
IT
Importanti informazioni di sicurezza
Ambiente
- Non installare il monitor all’esterno o in ambienti ostili. Non esporre il monitor a pioggia o umidità per prevenire il
rischio di incendio o di scossa elettrica. Evitare di collocare il monitor in aree soggette a temperature estreme come
la luce diretta del sole o vicino ad apparecchi/attrezzature che emettono calore (amplicatori, termosifoni, ecc.) che
potrebbero causare surriscaldamento e danni.
- Questo monitor è destinato all’utilizzo domestico o in uci. Non esporlo a vibrazioni, polvere o gas corrosivi.
- Per ottenere un’immagine chiara, non esporre lo schermo ad illuminazione diretta o luce solare. L’utilizzo del monitor
su un sfondo luminoso o in un punto in cui la luce solare o altre fonti luminose colpiscono direttamente il monitor può
aumentare l’aaticamento degli occhi.
Montaggio
- Posizionare sempre il monitor su un piano stabile o farlo montare correttamente a parete. Non appendere nulla sul
monitor.
- Accertarsi che il monitor si trovi vicino a una presa di corrente che sia facilmente accessibile, in quanto la rimozione
del cavo di alimentazione è il solo modo per escludere l’alimentazione.
Utilizzo di una staa per attacco a parete
Attenzione: per installare il monitor in sicurezza, la staa per attacco a parete deve sostenere almeno cinque volte il
peso netto del monitor. Per questo tipo di montaggio è necessario togliere prima la base.
1. Posizionare il monitor con lo schermo rivolto verso il basso su una supercie morbida ma abbastanza robusta da
sostenerlo.
2. Con un cacciavite rimuovere le viti dai quattro fori su ciascun lato sul fondo della base del monitor.
3. Accertarsi che tutti i cavi siano già collegati al monitor.
4. Seguire le istruzioni incluse con la staa di montaggio a parete per ssare il monitor alla parete.
Stoccaggio
- Scollegare il monitor se si prevede di non utilizzarlo per lunghi periodi di tempo.
Ventilazione
- Non coprire e non bloccare mai le aperture di ventilazione sul monitor. È necessario mantenere una distanza di
almeno 10 cm intorno all’apparecchio per garantire una corretta ventilazione.
- Non inserire mai corpi estranei, strumenti di metallo o liquidi nelle aperture di ventilazione per evitare il rischio di
incendio o di scossa elettrica.
- Non installare DVR o altre apparecchiature troppo vicino al monitor. Tenere tali apparecchiature ad almeno 30 cm di
distanza dal monitor.
Acqua e umidità
- Il monitor non deve essere esposto a umidità né venire a contatto con liquidi.
- Non utilizzare il monitor vicino all’acqua.
- Non toccare il monitor o il cavo con le mani bagnate per evitare il rischio di scossa elettrica o danni.
Pulizia
- Scollegare il monitot dalla presa a muro prima di pulirlo.
- Non utilizzare detergenti liquidi o spray. Usare un panno per pulizia morbido e asciutto e che non lasci pelucchi. In
caso di polvere persistente, passare un panno leggermente umido.

1
46910.H10A.01
IT
Conformità normativa
Direttiva BT, Direttiva EMC
Norme EN 60950-1, EN 55032, EN 55024, EN 61000-3-2, EN 61000-3-3.
RAEE - Informazione agli utilizzatori
Il simbolo del cassonetto barrato riportato sull’apparecchiatura o sulla sua confezione indica che il prodot-
to alla ne della propria vita utile deve essere raccolto separatamente dagli altri riuti. L’utente dovrà, per-
tanto, conferire l’apparecchiatura giunta a ne vita agli idonei centri comunali di raccolta dierenziata dei
riuti elettrotecnici ed elettronici. In alternativa alla gestione autonoma, è possibile consegnare gratuitamente l’ap-
parecchiatura che si desidera smaltire al distributore, al momento dell’acquisto di una nuova apparecchiatura
di tipo equivalente. Presso i distributori di prodotti elettronici con supercie di vendita di almeno 400 m2è inoltre
possibile consegnare gratuitamente, senza obbligo di acquisto, i prodotti elettronici da smaltire con dimensioni in-
feriori a 25 cm. L’adeguata raccolta dierenziata per l’avvio successivo dell’apparecchiatura dismessa al riciclag-
gio, al trattamento e allo smaltimento ambientalmente compatibile contribuisce ad evitare possibili eetti negati-
vi sull’ambiente e sulla salute e favorisce il reimpiego e/o riciclo dei materiali di cui è composta l’apparecchiatura.

2
46910.H10A.01
IT
Indice
1 Contenuto della confezione .....................................................................................................................................3
2 Collegamenti..............................................................................................................................................................3
2.1 Interfaccia posteriore.............................................................................................................................................3
2.2 Disposizione comandi ...........................................................................................................................................3
2.3 Collegamento del monitor .....................................................................................................................................3
3 Congurazione di base con OSD ............................................................................................................................4
3.1 Telecomando.........................................................................................................................................................4
3.2 AV - Congurazione ingresso................................................................................................................................5
3.3 HDMI - Congurazione ingresso...........................................................................................................................6
3.4 VGA - Congurazione ingresso.............................................................................................................................7
4 Speciche del monitor..............................................................................................................................................9

3
46910.H10A.01
IT
1 Contenuto della confezione
- 1 x monitor LCD
- 1 x adattatore CA
- 1 x cavo VGA
- 1 x cavo audio
- 1 x Manuale dell'utente
- 1 x comando IR
2 Connessioni
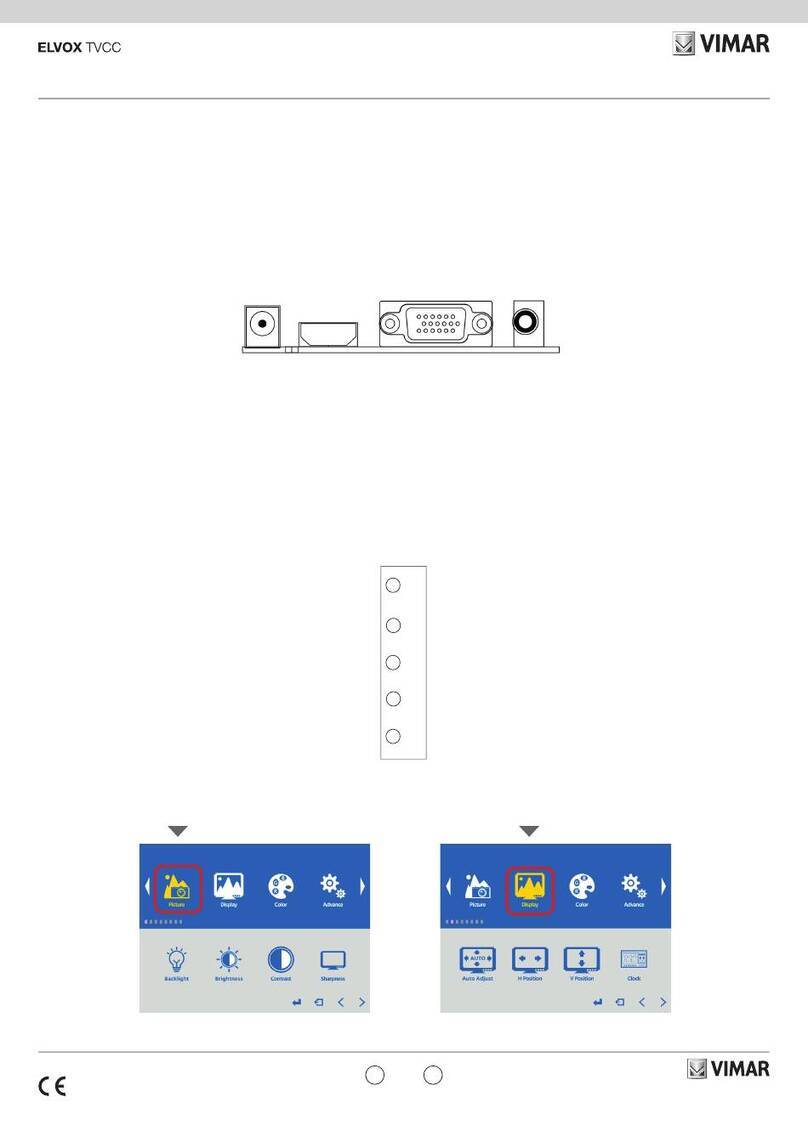
2.1 Interfaccia posteriore
※DC Usare esclusivamente l'alimentatore a 12V DC incluso con il monitor.
HDMI (High-Denition Multimedia Interface, interfaccia multimediale ad alta denizione) supporta video
digitali e collegamenti audio.
VGA Cavo D-sub a 15 pin per connessione VGA standard.
Audio IN Collegamento con jack stereo da 3,5 mm per l'ingresso audio quando si usa il connettore VGA/AV.
VIDEO/AV IN Collegamenti BNC compatibili con ingressi video compositi da apparecchi quali telecamere o DVR.
VIDEO/AV OUT Uscita loop per segnali video compositi, collegamento a un secondo monitor.
2.2 Disposizione comandi
I tasti di comando si trovano a destra, sul retro del monitor.
SOURCE MENU - + POWER
SOURCE Consente di selezionare il tipo di segnale di ingresso: AV, HDMI, VGA.
MENU Consente di accedere al menu visualizzato sullo schermo (OSD, On Screen Display).
+ e- Comandi per alzare/abbassare il volume, confermare la selezione del segnale in ingresso e navigare
nell'OSD.
POWER Consente di accendere o spegnere il monitor.
2.3 Collegamento del monitor
1. Collegamento con AV - Composite Video
Collegare il cavo video con il connettore BNC al connettore AV sul retro del monitor e l’altra estremità al DVR/
Videocamera, ecc.
Se è richiesto un ingresso audio, collegare il cavo audio stereo da 3,5 mm alla presa AUDIO INPUT sul retro del
monitor e al connettore Audio Output sul DVR/telecamera, ecc.
Collegare il monitor e la sorgente video all’alimentazione e accenderli. Premere più volte il tasto SOURCE no a
quando viene evidenziato “AV” (in base alla connessione usata) sul display, nella parte superiore dello schermo
del monitor, quindi premere “+” per eettuare la selezione.

4
46910.H10A.01
IT
2. Collegamento con HDMI
Collegare un'estremità del cavo HDMI (opzionale) al connettore HDMI sul retro del monitor, e l’altra estremità
all’uscita HDMI sul PC/DVR. Questa connessione supporta la trasmissione video e audio. Collegare il monitor e la
sorgente video all’alimentazione e accenderli. Premere più volte il tasto SOURCE no a quando viene evidenziato
“HDMI” sul display, nella parte superiore dello schermo del monitor, quindi premere “+” per eettuare la selezione.
3. Collegamento con VGA
Collegare un’estremità del cavo monitor a 15-pin al connettore VGA sul monitor e l’altra estremità al PC/DVR.
Nota: se la presa sul PC/DVR non è del tipo 15-pin D-sub potrebbe servire un adattatore per eseguire il
collegamento con questo cavo.
Se è richiesto il segnale audio, collegare un’estremità del cavo audio stereo da 3,5 mm (jack stereo da 1/8") al
connettore Audio IN sul retro del monitor e l’altra estremità all’uscita audio sul PC/DVR.
Collegare il monitor e la sorgente video all’alimentazione e accenderli. Premere più volte il tasto SOURCE no a
quando viene evidenziato “VGA” sul display, nella parte superiore dello schermo del monitor, quindi premere “+”
per eettuare la selezione.
Vericare che tutti i collegamenti siano ben saldi e serrare tutte le viti dei cavi. Il movimento e le vibrazioni
possono far uscire dalla sede i connettori se non sono stati inseriti correttamente. Passare i cavi lontano da
fonti di calore e bordi metallici taglienti per evitare di danneggiarli.
3 Congurazione di base con OSD
1. Per accedere al menu OSD premere "MENU".
2. Usare i tasti "+" o "-" per selezionare la voce di menu desiderata, quindi premere il tasto "SOURCE" per selezio-
nare il sottomenu.
3. Continuare a premere il tasto "SOURCE" per evidenziare il campo desiderato, quindi regolare l'impostazione con
i tasti "+" o "-".
4. Premere il tasto "MENU" per tornare al menu precedente.
5. Premere di nuovo il tasto "MENU" per uscire denitivamente dal menu OSD.
3.1 Telecomando
Power Accensione/spegnimento del monitor
Power-s Retroilluminazione: alta, media, bassa
Scala: normale, centrato, schermo intero
Mute Attivazione/disattivazione audio
Lock Blocco menu: blocco, sblocco
Freeze Blocco schermo
˄ / ˅ Spostamento verso l’alto/basso del riquadro di selezione
Menu Visualizza il menu OSD principale
< / > Premere per alzare o abbassare il volume
Auto Regolazione automatica (disponibile solo in modalità VGA)
INFO Premere per visualizzare le informazioni sullo schermo del
monitor
VGA Segnale VGA
HDMI Segnale HDMI
AV Segnale di ingresso
Source Premere per visualizzare e selezionare il segnale video dispo-
nibile
0~9 disponibili solo per immissione della password
NC Sensore PIP POP SWAP
EXIT Premere per uscire dal menu
Nota: accertarsi che il telecomando sia puntato verso il sensore del telecomando sul monitor. Non frapporre ostacoli
tra il telecomando e il sensore del telecomando sul monitor. L’ambito di ricezione del segnale è di 3 metri davanti al
sensore del telecomando.
1. Per garantire il normale funzionamento del telecomando, non farlo cadere e non danneggiarlo in alcun modo. Non
esporre il telecomando a liquidi o umidità e tenerlo lontano da fonti di calore.
2. Se il telecomando funziona in modo discontinuo o non aziona aatto il monitor LCD, è necessario sostituire le
batterie.

5
46910.H10A.01
IT
Scelta della sorgente di ingresso
Per visualizzare le immagini da una sorgente esterna, collegare i due dispositivi prima di selezionare la sorgente,
in caso contrario sul monitor apparirà il messaggio di assenza di segnale. Premere il tasto Source sul monitor e sul
telecomando per visualizzare il menu sullo schermo, quindi premere Source per selezionare la voce sul monitor, inne
premere “+/- (>)” per confermare.
VGA: sorgente in ingresso da un terminale di uscita VGA
HDMI: sorgente in ingresso da un terminale di uscita HDMI
AV: sorgente in ingresso da un terminale di uscita AV o di una telecamera
Nota: l'aspetto dell'OSD cambia in funzione dell'ingresso selezionato.
3.2 AV - Congurazione dell’ingresso
1. Video - Immagine
Smart picture: Consente di selezionare i valori predeniti o
salvare l’impostazione utente (Standard/Mo-
vie/ECO/Personal/Vivid)
Brightness: (0–100) imposta la luminosità dell’immagine
Contrast: (0–100) imposta la dierenza tra le aree
chiare e scure dell'immagine
Color: (0-100)
Sharpness: (0-100)
Tint: (0-100) disponibile solo per NTSC
Color temp.: Imposta la temperatura del colore (Normale/
Caldo/Freddo/Personalizzata)
Focus: ON/OFF
Controllo avanzato:
Noise reduction: Low/Medium/High/O (Basso/Medio/Alto/
OFF)
DCR: Dynamic Contrast Ratio (rapporto di contra-
sto dinamico), ON/OFF
DCC: Dynamic Color Control (Controllo colore
dinamico), ON/OFF
Mirror: (ON/OFF), immagine invertita verticalmente,
dopo l’impostazione è necessario riavviare
il monitor
Screen markers: 80%/85%/90%/93%/96%/OFF
Centre markers: (ON/OFF) marcatore a croce al centro
dell’immagine
Check eld: Red/Green/Blue/Black White/O (rosso/ver-
de/blu/monocromatico/OFF)
2. Audio
Sound mode: Imposta le congurazioni audio preimpostate
o utente (Standard/Music/Speech/Personal)
Balance: (da -50 a +50)
Bass: (0-100)
Treble: (0-100)
Virtual surround: (ON/OFF)
AVL: (ON/OFF) Automatic Volume Control (Con-
trollo automatico del volume)

6
46910.H10A.01
IT
3. OSD - Setting (Impostazione)
Menu language: Selezionare la lingua preferita per l’OSD
(En/Ch/Es/Fr/De/It/Pt/Pl/Ru/Ko)
Picture format: Full (schermo intero)/16:9/4:3/Zoom1/
Zoom2/3:2/1.85:1/2.35:1
Menu timeout: 10/20/30/40/50/60 Sec/O. specica dopo
quanti secondi l'OSD si chiude automati-
camente
Menu transparency: Imposta il livello di trasparenza dell’OSD
(Low/Medium/High/O) (Basso/Medio/
Alto/OFF)
Power on status: Imposta lo stato dopo l’accensione del
monitor (Power On/Keep Last Memory/
Standby) (Accensione/Memorizza ultimo/
Standby)
Blue screen: Imposta lo screensaver del monitor (ON/
OFF)
Color system: Imposta il formato colore CVBS
System reset: Ripristina tutte le impostazioni predenite
di fabbrica
3.3 HDMI - Congurazione ingresso
1. Video - Immagine
Smart picture: Consente di selezionare i valori predeniti
o salvare l’impostazione utente (Standard/
Movie/ECO/Personal/Vivid)
Brightness: (0–100) imposta la luminosità dell’imma-
gine
Contrast: (0–100) imposta la dierenza tra le aree
chiare e scure dell'immagine
Color: (0-100)
Sharpness: (0-100)
Color temp.: Imposta la temperatura del colore (Norma-
le/Caldo/Freddo/Personalizzata)
Focus: ON/OFF
Controllo avanzato:
Noise reduction: Low/Medium/High/O (Basso/Medio/Alto/
OFF)
DCR: Dynamic Contrast Ratio (rapporto di con-
trasto dinamico), ON/OFF
DCC: Dynamic Color Control (Controllo colore
dinamico), ON/OFF
Mirror: (ON/OFF), immagine invertita vertical-
mente, dopo l’impostazione è necessario
riavviare il monitor
Screen markers: 80%/85%/90%/93%/96%/OFF
Centre markers: (ON/OFF) marcatore a croce al centro
dell’immagine
Check eld: Red/Green/Blue/Black White/O (rosso/
verde/blu/monocromatico/OFF)

7
46910.H10A.01
IT
2. Audio
Sound mode: Imposta le congurazioni audio preimpo-
state o utente (Standard/Music/Speech/
Personal)
Balance: (da -50 a +50)
Bass: (0-100)
Treble: (0-100)
Virtual surround: (ON/OFF)
AVL: (ON/OFF) Automatic Volume Control
(Controllo automatico del volume)
Camera: (ON/OFF) modo telecamera
3. OSD - Setting (Impostazione)
Menu language: Selezionare la lingua preferita per l’OSD
(En/Ch/Es/Fr/De/It/Pt/Pl/Ru/Ko)
Picture format: Full (schermo intero)/16:9/4:3/Zoom1/
Zoom2/3:2/1.85:1/2.35:1
Menu timeout: 10/20/30/40/50/60 Sec/O. specica dopo
quanti secondi l'OSD si chiude automati-
camente
Menu transparency: Imposta il livello di trasparenza dell’OSD
(Low/Medium/High/O) (Basso/Medio/
Alto/OFF)
Power on status: Imposta lo stato dopo l’accensione del
monitor (Power On/Keep Last Memory/
Standby) (Accensione/Memorizza ultimo/
Standby)
Blue screen: Imposta lo screensaver del monitor (ON/
OFF)
Color system: Imposta il formato colore CVBS
System reset: Ripristina tutte le impostazioni predenite
di fabbrica
3.4 VGA - Congurazione ingresso
1. Video - Immagine
Brightness: (0–100) imposta la luminosità dell’imma-
gine
Contrast: (0–100) imposta la dierenza tra le aree
chiare e scure dell'immagine
Color temp.: Imposta la temperatura del colore (Norma-
le/Caldo/Freddo/Personalizzata)

8
46910.H10A.01
IT
Controllo avanzato:
Backlight: Low/Medium/High (Basso/Medio/Alto)
Mirror: (ON/OFF), immagine invertita verticalmente,
dopo l’impostazione è necessario riavviare
il monitor
Screen markers: 80%/85%/90%/93%/96%/OFF
Centre markers: (ON/OFF) marcatore a croce al centro
dell’immagine
Check eld: Red/Green/Blue/Black White/O (rosso/ver-
de/blu/monocromatico/OFF)
VGA (geometria):
Auto adjust: Consente di eseguire la regolazione auto-
matica di fase, clock, posizione orizzontale
e verticale
H-position: Imposta la posizione orizzontale dell'imma-
gine
V-position: Imposta la posizione verticale dell'immagine
Phase: Se la fase del monitor non è regolata, l'im-
magine potrebbe apparire instabile sull'asse
orizzontale. Usare questa opzione per
correggerla manualmente
Clock: Consente di regolare manualmente la sincro-
nizzazione del clock.
Se l'impostazione del clock dell'immagine
non è sincronizzata si potrebbero vedere pe-
riodicamente barre verticali dovute a rumore
video sull'immagine. Le barre di rumore in
genere si risolvono con una congurazione
automatica. Se le barre di rumore continuano
a essere presenti, si può usare questa impo-
stazione per rimuoverle
2. Audio
Sound mode: Imposta le congurazioni audio preimpostate
o utente (Standard/Music/Speech/Personal)
Balance: (da -50 a +50)
Bass: (0-100)
Treble: (0-100)
Virtual surround: (ON/OFF)
AVL: (ON/OFF) Automatic Volume Control (Con-
trollo automatico del volume)

9
46910.H10A.01
IT
3. OSD - Setting (Impostazione)
Menu language: Selezionare la lingua preferita per l’OSD
(En/Ch/Es/Fr/De/It/Pt/Pl/Ru/Ko)
Picture format: Full (schermo intero)/16:9/4:3/Zoom1/
Zoom2/3:2/1.85:1/2.35:1
Menu timeout: 10/20/30/40/50/60 Sec/O. specica dopo
quanti secondi l'OSD si chiude automati-
camente
Menu transparency: Imposta il livello di trasparenza dell’OSD
(Low/Medium/High/O) (Basso/Medio/
Alto/OFF)
Power on status: Imposta lo stato dopo l’accensione del
monitor (Power On/Keep Last Memory/
Standby) (Accensione/Memorizza ultimo/
Standby)
Blue screen: Imposta lo screensaver del monitor (ON/
OFF)
Color system: Imposta il formato colore CVBS
System reset: Ripristina tutte le impostazioni predenite
di fabbrica
4 Speciche del monitor
Specica del display
Modello 46910.H10A.01
Tipo di pannello Monitor 10,1'' (16:9) con
retroilluminazione a LED
Tipo di case Metallo
Risoluzione
migliore 1280 (H) x 800 (V)
Colori 16,7 milioni
Passo pixel 0,294 (H) x 0,294(V) mm
Rapporto contrasto 800:1
Luminosità 330 Cd/m2
Tempo di risposta 12 ms
Angolo di visione 160/160
Compatibilità
video Multi-Standard per NTSC/PAL
Rapporto d'aspetto 16:9
Diusori 1 x 2,5 W
Muto Si
Umidità di esercizio 20 - 70 %
Temperatura di
esercizio Da 10°C a +50°C
Interfaccia IN-OUT
Interfaccia video HDMI x 1, VGA x 1, BNC In x 1,
BNC Out x 1
Interfaccia audio Audio in x 1
Interfaccia
alimentazione DC In x 1
Certicazione Energy Star/CE/FCC/ROHS
Tipo supporto Tavolo
Colore Nero
Posizione tasti Lato anteriore
Dimensioni (mm)
LxAxP 250x175x35
Dim. (mm) LxAxP
+ Staa 250x175x145
Peso netto/lordo 1,3 Kg / 2 Kg
ALIMENTAZIONE
Tensione 12 Vcc
Assorbimento <12W

10
46910.H10A.01
EN
Important safety information
Environment
- Do not install the monitor outdoors or in any hostile environment. To prevent re or electric shock, do not expose
monitor to rain or moisture. Avoid placing the monitor in areas subject to extreme temperature such as direct sun-
light or near a heating appliances/equipment (such as ampliers, etc) as this may result in overheating and damage.
- This monitor is designed to be used in the oce or home. Do not subject it to vibrations, dust or corrosive gases.
- To obtain a clear picture, do not expose screen to direct illumination or sunlight. Using the monitor against a
bright background and where sunlight or other light sources shine directly on to the monitor can increase eye fatigue.
Mounting
- Always place the monitor on a secure table or have it properly mounted to the wall. Do not hang anything on the
monitor.
- Ensure the monitor is located close to a power outlet that is easily accessible, as removing the power cord is the only
way to isolate power
Using a wall mount
Caution: Any wall mount must bear a minimum of 5x the monitor’s net weight to mount safely. The stand must be
removed rst before mounting this way.
1. Place the monitor face down on a surface that is soft, yet strong enough to hold the monitor.
2. Use a screwdriver to remove the screws from the four holes on each side of the bottom of the monitor’s base.
3. Make sure all cables are already connected to the monitor.
4. Follow the directions included with the wall mount to x the monitor to the wall.
Storage
- Unplug the monitor if it will not be used for a long period.
Ventilation
- Never cover or block the ventilation slots in the monitor. A minimum distance of at least 10 cm should be maintained
around the unit for sucient ventilation.
- Never insert any foreign object, metal or liquid into the ventilation slots, as this could result in re or electric shock.
- Avoid installing a DVR or other equipment too close to the monitor. Keep such equipment at least 30 cm away
from the monitor.
Water and moisture
- The monitor should not be exposed to any moisture or liquid.
- Do not use the monitor near water.
- Do not touch the monitor or cable with wet hands as this may cause electric shock or damage.
Cleaning
- Unplug the unit from the wall outlet before cleaning.
- Do not use liquid or aerosol cleaners. Use a dry soft lint-free cloth for cleaning. If dust is persistent, wipe with a
slightly damp cloth.

11
46910.H10A.01
EN
Conformity to standards
LV Directive, EMC Directive
EN 60950-1, EN 55032, EN 55024, EN 61000-3-2, EN 61000-3-3 Standards.
WEEE - User information
If the crossed-out bin symbol appears on the equipment or packaging, this means the product must
not be included with other general waste at the end of its working life. The user must take the worn prod-
uct to a sorted waste center, or return it to the retailer when purchasing a new one. Products for dis-
posal can be consigned free of charge (without any new purchase obligation) to retailers with a sales
area of at least 400 m2, if they measure less than 25 cm. An ecient sorted waste collection for the environmen-
tally friendly disposal of the used device, or its subsequent recycling, helps avoid the potential negative eects on
the environment and people’s health, and encourages the re-use and/or recycling of the construction materials.

12
46910.H10A.01
EN
Index
1 In the box .................................................................................................................................................................13
2 Connections ............................................................................................................................................................13
2.1 Rear interface......................................................................................................................................................13
2.2 Control Layout.....................................................................................................................................................13
2.3 How to connect your monitor ..............................................................................................................................13
3 Basic on-screen display setup ..............................................................................................................................14
3.1 Remote control....................................................................................................................................................14
3.2 AV - Input Conguration ......................................................................................................................................15
3.3 HDMI Input Conguration....................................................................................................................................16
3.4 VGA Input Conguration .....................................................................................................................................17
4 Monitor specication ..............................................................................................................................................19

13
46910.H10A.01
EN
1 In the box
- 1 x LCD Monitor,
- 1 x AC adapter,
- 1 x VGA cable,
- 1 x Audio cable,
- 1 x User Manual
- 1 x IR control
2 Connections
2.1 Rear interface
※DC Only use the 12v DC power supply included with the monitor
HDMI (High-Denition Multimedia Interface) Supports digital video and audio connections
VGA 15 pin D-sub cable for standard VGA connection
Audio IN 3.5 mm stereo jack connection for audio input when using VGA /AV connector
VIDEO/AV IN BNC connections supporting composite video inputs from equipment such as Cameras or DVR’s
VIDEO/AV OUT Composite video loop though output – connect a second monitor
2.2 Control layout
The control buttons are located on the right hand rear side of the monitor.
SOURCE MENU - + POWER
SOURCE Selects input mode – AV, HDMI , VGA.
MENU Access to the On Screen Display (OSD) menu.
+ and - Volume controls up/down, conrm input source selection and navigation in the OSD.
POWER Turns the monitor on or o.
2.3 How to connect your monitor
1. Connecting using AV - Composite Video
Connect your video cable with BNC connector to the AV connector on the rear of the monitor, and the other end
to your DVR/Camera etc.
If audio input is required, connect the 3.5 mm stereo audio cable to the AUDIO INPUT on the rear of the monitor
and to the Audio Output connector on the DVR/Camera etc.
Connect power to the monitor and video source, and switch on. Using the SOURCE button, press repeatedly until
either ‘AV’ (depending on the connection used) is highlighted on the display at the top of the monitor's screen, and
press ‘+’ to select.

14
46910.H10A.01
EN
2. Connecting using HDMI
Connect one end of a HDMI cable (optional) to the HDMI connector on the rear of the monitor, and the other to
the HDMI out connector on the PC/DVR. This connection will support both video and audio transmission.
Connect power to the monitor and video source, and switch on. Using the SOURCE button, press repeatedly until
‘HDMI’ is highlighted on the display at the top of the monitor's screen, and press ‘+’ to select.
3. Connecting using VGA
Connect one end of a 15-pin monitor cable to the VGA connector on the monitor and the other end to the PC/DVR.
Note - if your PC/DVR connector isn't 15-pin D-sub you may need an adapter to connect with this cable.
If audio is required, connect one end of the 3.5 mm stereo audio cable (sometimes referred to as 1/8" stereo jack)
to the PC Audio IN connector on the back of the monitor and the other end to the audio output on the PC/DVR.
Connect power to the monitor and video source, and switch on. Using the SOURCE button, press repeatedly until
‘VGA’ is highlighted on the display at the top of the monitor's screen, and press ‘+’ to select.
Ensure all cable connections are secure - tighten all cable screws. Movement and vibration may dislodge ca-
bles that are improperly connected. Route all wiring and cabling away from any heat sources and sharp metal
edges to avoid damage.
3 Basic on-screen display setup
1. To access the OSD Menu press ‘MENU’.
2. Use the "+" or "-" buttons to select the required menu item, then press the ‘SOURCE’ button to select the Sub menu.
3. Continue to use the ‘SOURCE’ button to highlight the required eld, then press "+" or "-" to adjust the setting.
4. Press the ‘MENU’ button to return to previous menu.
5. Press the ‘MENU’ button again to exit the OSD Menu completely.
3.1 Remote control
Power Turn On & o the monitor
Power-s Back light: high, mid, low
Scale: normal, center, full
Mute Switches the sound on or o
Lock Menu lock: lock, unlock
Freeze Screen Freeze
˄ / ˅ Move Up / down highlight icon
Menu Display the main on-screen menu
< / > Press them to turn up or turn down the volume
Auto Auto adjust (available only VGA mode)
INFO Press it to display information on the monitor screen
VGA VGA signal
HDMI HDMI signal
AV AV input signal
Source Press it to display and select the available video signal
0~9 available only password entered
NC Sensor PIP POP SWAP
EXIT Press this button to exit the menu
Note: ensure the remote control is pointed toward the remote control window on the display. No obstacles should be
placed between the remote control and the remote control window. The eective receiving scope for the signal is 3
meters to the front of the remote control window.
1. To ensure a normal operation, the remote control should not be dropped or damaged in any way. It should also be
kept dry and away from all heat sources.
2. Battery replacement is necessary when the remote controller acts inconsistently or stops operating the LCD
display.

15
46910.H10A.01
EN
Choose the input source
If you hope to enjoy the picture from the external input source, before to select the source, you need to connect the
devices, otherwise, when you select the source, the none or no signal will appear on the screen, Press source button
on the monitor or remote control, the menu appears on the screen, then press source to select the monitor item, and
press “+/- (>)” to ensure it.
VGA: the input source from VGA terminal output
HDMI: the input source from HDMI in terminal output
AV: the input source from AV or video camera terminal output
Note: The layout of the OSD will change depending on the input that is selected.
3.2 AV - Input conguration
1. Video-Picture
Smart picture: Select defaults or save user setting (Stand-
ard/Movie/ECO/Personal/Vivid)
Brightness: (0–100) Set the brightness of the image
Contrast: (0–100) Set the dierence between the light
and dark areas of the picture
Color: (0-100)
Sharpness: (0-100)
Tint: (0-100) only available if NTSC
Color temp.: Select the color temperature (Normal/Warm/
Cool/Personal)
Focus: ON/OFF
Advanced control:
Noise reduction: Low/Medium/High/O
DCR: Dynamic Contrast Ratio, On/O
DCC: Dynamic color control, On/O
Mirror: (ON/OFF) Image upside mirroring, set up
after the need to restart the monitor
Screen markers: 80%/85%/90%/93%/96%/O
Centre markers: (ON/OFF) Image center cross mark
Check eld: Red/Green/Blue/Black White/O
2. Audio
Sound mode: Set user or preset audio congurations
(Standard/Music/Speech/Personal)
Balance: (-50 to +50)
Bass: (0-100)
Treble: (0-100)
Virtual surround: (ON/OFF)
AVL: (ON/OFF) Automatic Volume Control

16
46910.H10A.01
EN
3. OSD-Setting
Menu language: Select preferred language for OSD (En/
Ch/Es/Fr/De/It/Pt/Pl/Ru/Ko)
Picture format: Full/16:9/4:3/Zoom1/
Zoom2/3:2/1.85:1/2.35:1
Menu timeout: 10/20/30/40/50/60 Sec/O. Set seconds
for the OSD to automatically close
Menu transparency: Setting the transparency level of the OSD
(Low/Medium/High/O)
Power on status: Setting status after power on the monitor
(Power On/Keep Last Memory/Standby)
Blue screen: Setting up the monitor screensaver (ON/
OFF)
Color system: Setting CVBS color format
System reset: Restore all factory defaults
3.3 HDMI - Input Conguration
1. Video-Picture
Smart picture: Select defaults or save user setting
(Standard/Movie/ECO/Personal/Vivid)
Brightness: (0–100) Set the brightness of the image
Contrast: (0–100) Set the dierence between the
light and dark areas of the picture
Color: (0-100)
Sharpness: (0-100)
Color temp.: Select the color temperature (Normal/
Warm/Cool/Personal)
Focus: ON/OFF
Advanced control:
Noise reduction: Low/Medium/High/O
DCR: Dynamic Contrast Ratio, On/O
DCC: Dynamic color control, On/O
Mirror: (ON/OFF) Image upside mirroring, set up
after the need to restart the monitor
Screen markers: 80%/85%/90%/93%/96%/O
Centre markers: (ON/OFF) Image center cross mark
Check eld: Red/Green/Blue/Black White/O

17
46910.H10A.01
EN
2. Audio
Sound mode: Set user or preset audio congurations
(Standard/Music/Speech/Personal)
Balance: (-50 to +50)
Bass: (0-100)
Treble: (0-100)
Virtual surround: (ON/OFF)
AVL: (ON/OFF) Automatic Volume Control
Camera: (ON/OFF) Camera Mode
3. OSD-Setting
Menu language: Select preferred language for OSD (En/
Ch/Es/Fr/De/It/Pt/Pl/Ru/Ko)
Picture format: Full/16:9/4:3/Zoom1/
Zoom2/3:2/1.85:1/2.35:1
Menu timeout: 10/20/30/40/50/60 Sec/O. Set seconds
for the OSD to automatically close
Menu transparency: Setting the transparency level of the OSD
(Low/Medium/High/O)
Power on status: Setting status after power on the monitor
(Power On/Keep Last Memory/Standby)
Blue screen: Setting up the monitor screensaver (ON/
OFF)
Color system: Setting CVBS color format
System reset: Restore all factory defaults
3.4 VGA - Input Conguration
1. Video-Picture
Brightness: (0–100) Set the brightness of the image
Contrast: (0–100) Set the dierence between the
light and dark areas of the picture
Color temp.: Select the color temperature (Normal/
Warm/Cool/Personal)

18
46910.H10A.01
EN
Advanced control:
Backlight: Low/Medium/High
Mirror: (ON/OFF) Image upside mirroring, set up
after the need to restart the monitor
Screen markers: 80%/85%/90%/93%/96%/O
Centre markers: (ON/OFF) Image center cross mark
Check eld: Red/Green/Blue/Black White/O
VGA (geometry):
Auto adjust: Perform an automatic conguration of the
Phase, Clock, vertical and horizontal posi-
tion
H-position: Set horizontal image position
V-position: Set vertical image position
Phase: If the phase of your monitor is not ne-tuned,
you may observe the image being unstable
in the horizontal axis. Use this option to
manually correct
Clock: Manually adjust clock synchronisation.
(If the clock setting of your image is not
ne-tuned, you may observe periodic vertical
bars of video noise on your image. These
bars of noise are usually adjusted out when
an Auto Conguration is performed. If the
bars of noise are still present, this setting
can be used to remove them
2. Audio
Sound mode: Set user or preset audio congurations
(Standard/Music/Speech/Personal)
Balance: (-50 to +50)
Bass: (0-100)
Treble: (0-100)
Virtual surround: (ON/OFF)
AVL: (ON/OFF) Automatic Volume Control
Table of contents
Languages:
Other Vimar Monitor manuals
Vimar
Vimar ELVOX 46910.H18 User manual
Vimar
Vimar Elvox 46910.H32 User manual
Vimar
Vimar Elvox 7200 Series Assembly instructions
Vimar
Vimar PETRARCA 6020 Assembly instructions
Vimar
Vimar Elvox 6624 Assembly instructions
Vimar
Vimar ELVOX 46910.H22B User manual
Vimar
Vimar Elvox TVCC 46910.43K User manual
Vimar
Vimar ELVOX 41018 Assembly instructions
Vimar
Vimar ELVOX Due Fili Assembly instructions
Vimar
Vimar 46910.H10A User manual
