Vimar ELVOX 46910.H22 User manual

46910.H22
Monitor a LED professionale HDMI-VGA-BNC
Professional LED monitor HDMI-VGA-BNC
Manuale per il collegamento e l’uso
Installation and operation manual

2
INDICE Page
1. Introduzione ..............................................................................................................................................................1
1.1 Precauzioni d’uso / materiale a corredo .....................................................................................................................1
1.2 Caratteristiche tecniche ..............................................................................................................................................1
1.3 Controllo .....................................................................................................................................................................2
1.4 Connettori ...................................................................................................................................................................2
1.5 Telecomando ..............................................................................................................................................................3
1.6 Collegamenti delle apparecchiature esterne ..............................................................................................................3
2. Nessuna sincronizzazione .......................................................................................................................................4
3. Selezione dell’ingresso ............................................................................................................................................4
4. Menù OSD: selezione lingua / impostazioni...........................................................................................................4
IT

1
1. Introduzione
1.1 Precauzioni d’uso / materiale a corredo
- Assicurarsi dell’integrità dell’apparecchio dopo averlo tolto dall’imballo.
- Prima di effettuare qualsiasi operazione di pulizia o di manutenzione scollegare la rete di alimentazione elettrica. Non usare
prodotti spray per la pulizia dell’apparecchio.
- Evitare di appoggiare su di esso oggetti contenenti liquidi; non esporre in alcun modo il prodotto ad acqua e pioggia.
- Controllare che la temperatura d’esercizio sia nei limiti indicati e che l’ambiente non sia particolarmente umido. Provvedere a
un’idonea ventilazione.
- Si consiglia di scollegare il cavo di alimentazione qualora il monitor non dovesse essere utilizzato per parecchio tempo.
- In caso di guasto e/o cattivo funzionamento togliere alimentazione tramite l’interruttore generale.
- Il dispositivo deve essere aperto soltanto da personale tecnico qualicato .
Materiale a corredo
L’imballo contiene
• Un monitor TFT LCD con retroilluminazione a LED
• Un alimentatore 230/12 V.
• Un cavo di alimentazione
• Un cavo VGA
• Un manuale istruzioni
• Una staffa removibile
Struttura Case in plastica
Area di visualizzazione 474 x 265mm
Misura Pixel (mm) 0.294( H ) x 0.294( V )
Luminosità 300cd / m2
Contrasto 1000 : 1
Tempo di risposta 4ms (typ)
Visualizzazione a colori 16.7M
Risoluzione visualizzabile (max) su VGA 1280 x 1024
Risoluzione visualizzabile (max) su HDMI 1920 x 1080 , Full-HD
H-Posizione 30-80KHz
V-Posizione 60÷85Hz
Angolo di vista 170° / 160° (H/V)
Formato di visione 16:9
Dimensioni (escluso base) 537 x 343 x 50mm
Connettori 1xVGA In – 2xBNC In – 1xBNC out – 1xHDMI In – 1x Audio
In / 1x Audio Out (3,5mm stereo)
Alimentazione 12V dc , 2.5A (standby 0.04A)
Condizioni di utilizzo Temperatura: 0°C~ 40°C, Umidità: 20% ~ 80%
Condizioni di magazzino Temperatura: -10°C~ 50°C, Umidità:10%~ 90%
Peso 3.4 kg
1.2 Caratteristiche tecniche
COD – 21.5’’ LED
IT

2
1.3 Controllo - Pannello posteriore
N° Nome Funzione
1 POWER Premere per accendere / spegnere il monitor
2SOURCE Premere per accedere al menù ingressi
3MENU Premere per aprire il menù di programmazione
4/5 CH +/- In menù principale: premere per scorrere le voci relative a ogni icona
In menù ingressi: premere per selezionare la sorgente
6/7 VOL +/- Premere per aumentare/diminuire il volume audio.
Premere per spostarsi tra le icone del menù o per aumentare/diminuire i valori.
1.4 Connettori
N° Nome Funzione
1 POWER Presa di alimentazione DC
2HDMI INPUT Ingresso HDMI
3VGA INPUT Ingresso VGA
4AV1 INPUT Ingresso BNC1
5AV2 INPUT Ingresso BNC2
6AV OUT Uscita BNC
7AUDIO IN/OUT Ingresso/uscita audio (jack 3.5mm stereo)
IT

3
1.5 Telecomando
Alimentazione
Premere per accendere / spegnere il monitor
Mute
Premere per disattivare l’audio. Premere nuovamente o premere”◄ , ► “ per attivare l’audio
Tasti di direzione
Premere per aumentare / diminuire ◄ , ► o per selezionare ▲ ,▼
Menù
Premere per aprire il menù principale o uscire dal menù corrente
Input
Premere per visualizzare l’elenco degli ingressi, scorrere (▲ ,▼) e selezionare (◄ , ►)
In alternativa è possibile premere direttamente i tasti “VGA”, “HDMI”, “AV” . “AV”premuto una volta: permette la visione dell’in-
gresso BNC1. “AV” premuto 2 volte: permette la visione dell’ingresso BNC2
1.6 Collegamenti delle apparecchiature esterne
Cavo di connessione
Collegare il cavo di alimentazione come mostrato. Premere l’interruttore di alimentazione del monitor per accenderlo.
L’ accensione di un LED nel pannello frontale indicherà la presenza di alimentazione.
Ingresso VGA, ingresso HDMI
Questo monitor si adatta automaticamente alla risoluzione del segnale video presente su questi ingressi (sino al massimo valore
disponibile). Il monitor trasmette le informazioni di congurazione (EDID) alla sorgente utilizzando l’associazione elettronica
standard video (VESA).
Collegare l’ingresso VGA / HDMI del monitor all’uscita VGA / HDMI del DVR (o del p.c.). Accendere il monitor.
Selezionare l’ingresso VGA utilizzando i comandi sul monitor oppure INPUT o i tasti diretti sul telecomando.
IT

4
Ingressi BNC e uscita BNC
Ogni ingresso video composito (AV1 , AV2) è collegabile al segnale video proveniente da fonti quali telecamere TVCC, DVR, etc.
Il monitor è dotato di 2 ingressi BNC selezionabili.
Sull’uscita BNC compariranno le immagini dell’ultimo ingresso BNC selezionato.
Collegare l’ingresso BNC del monitor. Accendere il monitor
Selezionare l’ingresso BNC utilizzando i comandi SOURCE e CH+ /- (INPUT o i tasti diretti sul telecomando; una pressione del
tasto AV = BNC1, premere 2 volte per BNC2)
2. Nessuna sincronizzazione
Quando non c’è segnale d’ingresso o non può essere sincronizzato, compare la scritta NO SYNC / NO SIGNAL :
3. Selezione dell’ingresso
Sul lato del monitor è possibile selezionare l’ingresso premendo il tasto SOURCE .
Premere”SOURCE” e poi “CH+/-” per selezionare l’ingresso desiderato. Premere “VOL +/-” per confermare.
Sul telecomando premere INPUT e selezionare l’ingresso utilizzando le frecce oppure premere direttamente il tasto desiderato
(una pressione del tasto AV = BNC1, premere 2 volte per BNC2).
4. Menù OSD: selezione lingua, impostazioni.
Menù impostazione.
Nota: La prima volta che si utilizza il monitor, selezionare la lingua desiderata per la visualizzazione dei menù.
- Premere ”MENU” per accedere all’interfaccia del menù principale.
- Premere “VOL +/-”per selezionare l’icona “IMPOSTAZIONE”.
- Premere “CH+/-” per selezionare la lingua.
Nel menù “impostazione” e’ possibile regolare anche posizione menù, durata menù a schermo, trasparenza o effettuare il reset
di tutti parametri.
Nota: effettuando il reset, il linguaggio di default sarà inglese.
- Quando si è soddisfatti della regolazione, premere “MENU” per tornare al menù principale.
- Premere “MENU” per uscire dal menù
IT

5
Menù immagine
- Premere i tasti “VOL +/-” per selezionare il menù immagine. e “CH+/-” per selezionare la voce interessata: contrasto, lumi-
nosità, saturazione, denizione, tinta, colore,primo piano (scala) e modalità di visione.
- Quando si è soddisfatti della regolazione, premere “MENU” per tornare al menù principale.
- Premere MENU per uscire dal menù.
Menù audio
IT
- Premere i tasti “VOL +/-” per selezionare il menù audio e “CH+/-” per selezionare la voce interessata:
bassi, acuti, bilanciamento, modalità, equalizzatore.
- Quando si è soddisfatti della regolazione, premere “MENU” per uscire al menù principale.
- Premere “MENU” per uscire dal menù

6
- Premere i tasti “VOL +/-” per selezionare il menù funzione e “CH+/-” per selezionare la voce interessata:
NOISE REDUCTION (riduzione rumore) MPEG NR (riduzione rumore video su lmati mpeg), DLC, AlarmT (allarme tempe-
ratura monitor). Il monitor è dotato di sensore di temperatura richiamabile da telecomando con tasto °C.
- Quando si è soddisfatti della regolazione, premere “MENU” per uscire al menù principale.
- Premere “MENU” per uscire dal menù
AVVERTENZE PER L’INSTALLATORE
- Leggere attentamente le avvertenze contenute nel presente documento in quanto forniscono importanti indicazioni riguardanti la sicurezza di in-
stal la zio ne, d’uso e di ma nu ten zio ne.
- Dopo aver tolto l’imballaggio assicurarsi dell’integrità del l’ap pa rec chio. Gli ele men ti dell’imballaggio (sacchetti di pla sti ca, po li sti ro lo espanso, ecc.)
non devono essere lasciati alla portata dei bambini in quanto potenziali fonti di pericolo. L’esecuzione dell’impianto deve essere rispondente alle
norme CEI vigenti.
- È necessario prevedere a monte dell’alimentazione un appropriato interruttore di tipo bipolare facilmente accessibile con separazione tra i contatti
di almeno 3mm.
- Prima di collegare l’apparecchio accertarsi che i dati di targa siano rispondenti a quelli della rete di distribuzione.
- Questo ap pa rec chio dovrà essere de sti na to solo all’uso per il quale è stato espres sa men te concepito, e cioè per sistemi di T.V.C.C. Ogni altro uso
è da con si de rar si im pro prio e quindi pericoloso. Il costruttore non può essere con si de ra to re spon sa bi le per even tua li danni derivanti da usi impropri,
erronei ed irragionevoli.
- Prima di ef fet tua re qual si a si operazione di pu li zia o di ma nu ten zio ne, disinserire l’apparecchio dalla rete di ali men ta zio ne elettrica, spe gnen do
l’interruttore dell’impianto.
- In caso di guasto e/o di cattivo fun zio na men to del l’ap pa rec chio, togliere l’ali men ta zio ne me dian te l’interruttore e non ma no met tere l’apparecchio.
Per l’eventuale riparazione rivolgersi solamente ad un centro di assistenza tecnica autorizzato dal costruttore. Il mancato rispetto di quanto sopra
può compromettere la sicurezza dell’apparecchio.
- Non ostruire le aperture o fessure di ventilazione o di smaltimento calore e non esporre l’apparecchio a stillicidio o spruzzi d’acqua. Nessun oggetto
pieno di liquido, quali vasi, deve essere posto sull’apparecchio.
- L’installatore deve assicurarsi che le informazioni per l’utente siano presenti sugli apparecchi derivati.
- Tutti gli apparecchi costituenti l’impianto devono essere destinati esclusivamente all’uso per cui sono stati concepiti.
- ATTENZIONE: per evitare di ferirsi, questo apparecchio deve essere assicurato al pavimento/alla parete secondo le istruzioni di installazione.
- Questo documento dovrà sempre rimanere allegato alla documentazione dell’impianto.
Direttiva 2002/96/CE (WEEE, RAEE).
Il simbolo del cestino barrato riportato sull’apparecchio indica che il prodotto, alla ne della propria vita utile, dovendo essere trattato separa-
tamente dai riuti domestici, deve essere conferito in un centro di raccolta differenziata per apparecchiature elettriche ed elettroniche oppure
riconsegnato al rivenditore al momento dell’acquisto di una nuova apparecchiatura equivalente.
L’utente è responsabile del conferimento dell’apparecchio a ne vita alle appropriate strutture di raccolta. L’adeguata raccolta differenziata per l’avvio
successivo dell’apparecchio dismesso al riciclaggio, al trattamento e allo smaltimento ambientalmente compatibile contribuisce ad evitare possibili
effetti negativi sull’ambiente e sulla salute e favorisce il riciclo dei materiali di cui è composto il prodotto. Per informazioni più dettagliate inerenti i sistemi
di raccolta disponibili, rivolgersi al servizio locale di smaltimento riuti, o al negozio in cui è stato effettuato l’acquisto.
Rischi legati alle sostanze considerate pericolose (WEEE).
Secondo la nuova Direttiva WEEE sostanze che da tempo sono utilizzate comunemente su apparecchi elettrici ed elettronici sono considerate
sostanze pericolose per le persone e l’ambiente. L’adeguata raccolta differenziata per l’avvio successivo dell’apparecchio dismesso al riciclaggio, al
trattamento e allo smaltimento ambientalmente compatibile contribuisce ad evitare possibili effetti negativi sull’ambiente e sulla salute e favorisce il
riciclo dei materiali di cui è composto il prodotto.
Il prodotto è conforme alla direttiva europea 2004/108/CE e successive.
IT
Menù Funzione

7
TABLE OF CONTENTS Page
1. Introduction...............................................................................................................................................................8
1.1 User precautions / materials supplied.........................................................................................................................8
1.2 Technical characteristics.............................................................................................................................................8
1.3 Control - Rear panel ...............................................................................................................................................9
1.4 Connectors .................................................................................................................................................................9
1.5 Remote control: ........................................................................................................................................................10
1.6 Connection to external appliances............................................................................................................................10
2. Nessuna sincronizzazione .....................................................................................................................................11
3. Selezione dell’ingresso ..........................................................................................................................................11
4. OSD menu: language settings, settings..............................................................................................................11
EN

8
1. Introduction
1.1 User precautions / materials supplied
- Check that the appliance is in perfect condition when removing it from the packaging.
- Disconnect from the power supply before performing any cleaning or maintenance. Do not use spray products to clean the
appliance.
- Do not place any objects containing liquids on the appliance; do not expose the product to water or rain.
- Check that the working temperature is within the indicated limits and that the environment is not excessively humid. Make sure
there is appropriate ventilation.
- Disconnect the power cable if the monitor is not used for long periods.
- In the event of a malfunction and/or poor operation, switch off the power using the main switch.
- The appliance must only be opened by qualied technical staff.
Materials supplied
The package contains
- One TFT LCD monitor with LED backlighting
- One 230/12 V power supply.
- One power cable
- One VGA cable
- One Instruction manual
- One detachable bracket
Structure Plastic casing
Viewing screen 474 x 265mm
Pixel size (mm) 0.294(H) x 0.294(V)
Brightness 300cd / m2
Contrast 1000 to 1
Response time 4ms (typ)
Colour display 16.7M
Viewing resolution (max) on VGA 1280 x 1024
Viewing resolution (max) on HDMI 1920 x 1080, Full-HD
H-Position 30-80KHz
V-Position 60-85Hz
Viewing angle 170° / 160° (H/V)
Viewing format 16:9
Size (without base) 537 x 343 x 50mm
Connectors 1xVGA In – 2xBNC In – 1xBNC out – 1xHDMI In – 1x Audio
In / 1x Audio Out (3,5mm stereo)
Power supply 12V dc, 2.5A (standby 0.04A)
Conditions of Use Temperature: 0°C~ 40°C, Humidity: 20% ~ 80%
Storage conditions Temperature: -10°C~ 50°C, Humidity:10%~ 90%
Weight 3.4 kg
1.2 Technical characteristics
COD – 21.5’’ LED
EN

9
1.3 Control - Rear panel
No Name Function
1 POWER Press to switch the monitor on/off
2SOURCE Press to access the inputs menu
3MENU Press to open the programming menu
4/5 CH +/- In main menu: press to scroll through the items for each icon
In inputs menu: press to select the source
6/7 VOL +/- Press to increase/decrease the audio volume.
Press to scroll through the menu icons or increase/decrease the values
1.4 Connectors
No Name Function
1 POWER DC power socket
2HDMI INPUT HDMI input
3VGA INPUT VGA input
4AV1 INPUT BNC1 input
5AV2 INPUT BNC2 input
6AV OUT BNC output
7AUDIO IN/OUT Audio input/output (3.5mm stereo jack)
EN

10
1.5 Remote control
Power supply
Press to switch the monitor on/off
Mute
Press to disable the audio. Press again or press ”(◄ , ►)“ to enable the audio
Direction keys
Press to increase/decrease (◄ , ►) or to select (▲ ,▼)
Menu
Press to open the main menu or exit the current menu
Inputs
Press to view the list of inputs, scroll (▲ ,▼) and select (◄ , ►)
Alternatively, you can directly press “VGA”, “HDMI”, “AV” . “AV” pressed once: to view input BNC1. “AV” pressed twice: to view
input BNC2.
1.6 Connection to external appliances
Connection cable
Connect the power cable as shown. Press the power switch on the monitor to switch it on.
A LED will light up on the front panel to show that the appliance is powered.
VGA input, HDMI input
This monitor automatically adapts to the video signal resolution on these inputs (up to the maximum available value). The monitor
transmits the conguration information (EDID) to the source using the video electronics standards association (VESA).
Connect the VGA / HDMI input on the monitor to the VGA / HDMI output on the DVR (or PC). Switch on the monitor.
Select the VGA input using the controls on the monitor or INPUT or the buttons directly on the remote control.
EN

11
BNC inputs and BNC output
Each compound video input (AV1 , AV2) can be connected to the video signal from sources such as CCTV cameras, DVRs, etc.
The monitor has 2 BNC inputs to choose from.
The images of the last selected BNC input will appear on the BNC output.
Connect the BNC input on the monitor. Switch on the monitor
Select the BNC input using the controls SOURCE and CH+ /- (INPUT or remote control buttons; press AV once = BNC1, twice
for BNC2)
2. No synchronisation
If there is no input signal or it cannot be synchronised, NO SYNC / NO SIGNAL appears on the screen:
3. Selecting the input
On the side of the monitor you can select the input by pressing SOURCE.
Press ”SOURCE” and then “CH+/-” to select the required input. Press “VOL +/-” to conrm.
On the remote control, press INPUT and select the input using the arrow keys or directly press the required button (press AV
once = BNC1, twice for BNC2).
4. OSD menu: language settings, settings.
Settings menu.
Note: When you use the monitor for the rst time, select the required menu language.
- Press ”MENU” to access the main menu interface.
- Press “VOL +/-” to select the SETTINGS icon.
- Press “CH+/-” to select the language.
In the “settings” menu you can also adjust the menu position, menu on screen duration, transparency, or reset all parameters.
Note: the default language of the reset is English.
- When you have completed the settings, press “MENU” to return to the main menu.
- Press “MENU” to exit the menu
EN

12
Image menu
- Press “VOL +/-” to select the images menu and “CH+/-” to select the required item: contrast, brightness, saturation, sharpness,
hue, colour, foreground (scale) and picture mode.
- When you have completed the settings, press “MENU” to return to the main menu.
- Press “MENU” to exit the menu.
Audio menu
EN
- Press “VOL +/-” to select the audio menu and “CH+/-” to select the required item: bass, treble, balance, sound mode, equaliser.
- When you have completed the settings, press “MENU” to return to the main menu.
- Press “MENU” to exit the menu.

13
EN
- Press “VOL +/-” to select the functions menu and “CH+/-” to select the required item:
NOISE REDUCTION, MPEG NR (noise reduction lter for mpeg videos), DLC , AlarmT (monitor temperature alarm). The
monitor is tted with a temperature sensor which can be recalled by pressing °C on the remote control.
- When you have completed the settings, press “MENU” to return to the main menu.
- Press “MENU” to exit the menu.
SAFETY INSTRUCTIONS FOR INSTALLERS
- Carefully read the instructions on this leaet: they give important information on the safety, use and maintenance of the installation.
- After removing the packing, check the integrity of the set. Packing components (plastic bags, expanded polystyrene etc.) are dangerous for children.
Installation must be carried out according to national safety regulations.
- It is convenient to t close to the supply voltage source a proper bipolar type switch with 3 mm separation (minimum) between contacts.
- Before connecting the set, ensure that the data on the label correspond to those of the mains.
- This apparatus must only be used for the purpose for which it was expressly designed, e.g. for audio or video door entry systems. Any other use
may be dangerous. The manufacturer is not responsible for damage caused by improper, erroneous or irrational use.
- Before cleaning or maintenance, disconnect the set.
- In the event of faults and/or malfunctions, disconnect from the power supply immediately by means of the switch and do not tamper with the appa-
ratus.
- For repairs apply only to the technical assistance centre authorized by the manufacturer.
- Safety may be compromised if these instructions are disregarded.
- Do not obstruct opening of ventilation or heat exit slots and do not expose the set to dripping or sprinkling of water. No objects lled with liquids,
such as vases, should be placed on the apparatus.
- Installers must ensure that manuals with the above instructions are left on connected units after installation, for users’ information.
- All items must only be used for the purposes designed.
- WARNING: to prevent injury, this apparatus must be securely attached to the oor/wall in accordance with the installation instructions.
- This leaet must always be enclosed with the equipment.
Directive 2002/96/EC (WEEE)
The crossed-out wheelie bin symbol marked on the product indicates that at the end of its useful life, the product must be handled separately
from household refuse and must therefore be assigned to a differentiated collection centre for electrical and electronic equipment or returned
to the dealer upon purchase of a new, equivalent item of equipment.
The user is responsible for assigning the equipment, at the end of its life, to the appropriate collection facilities.
Suitable differentiated collection, for the purpose of subsequent recycling of decommissioned equipment and environmentally compatible treatment
and disposal, helps prevent potential negative effects on health and the environment and promotes the recycling of the materials of which the product
is made. For further details regarding the collection systems available, contact your local waste disposal service or the shop from which the equipment
was purchased.
Risks connected to substances considered as dangerous (WEEE).
According to the WEEE Directive, substances since long usually used on electric and electronic appliances are considered dangerous for people
and the environment. The adequate differentiated collection for the subsequent dispatch of the appliance for the recycling, treatment and dismantling
(compatible with the environment) help to avoid possible negative effects on the environment and health and promote the recycling of material with
which the product is compound.
Product is according to EC Directive 2004/108/CE and following norms.
Function Menu

Vimar SpA: Viale Vicenza, 14
36063 Marostica VI - Italy
Tel. +39 0424 488 600 - Fax (Italia) 0424 488 188
Fax (Export) 0424 488 709
www.vimar.com
49400694A0 00 14 05
VIMAR - Marostica - Italy
Table of contents
Languages:
Other Vimar Monitor manuals
Vimar
Vimar 46910.H10A User manual
Vimar
Vimar ELVOX 41018 Assembly instructions
Vimar
Vimar PETRARCA 6020 Assembly instructions
Vimar
Vimar ELVOX 46910.H18 User manual
Vimar
Vimar ELVOX 46910.H22B User manual
Vimar
Vimar ELVOX 46910.H10A.01 User manual
Vimar
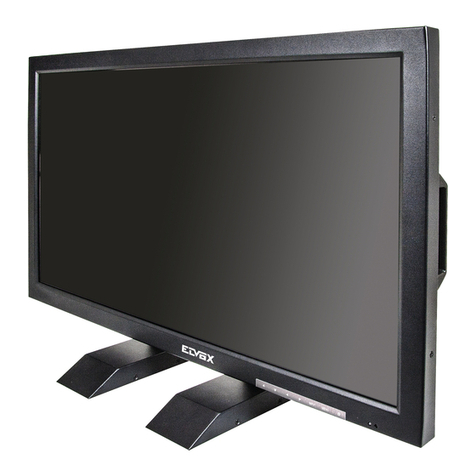
Vimar Elvox 46910.H32 User manual

Vimar
Vimar ELVOX 41018 User manual
Vimar
Vimar Elvox 7200 Series Assembly instructions
Vimar
Vimar ELVOX Due Fili Assembly instructions
