9
10) under the machine to raise it.
Place the table attachments in position:
• Some table attachments (S, Fig. 11) should be
arranged in the desired positions, so that the board
is supported while edgebanding, without the excess
loweredginghitting them whentheboard is moving.
Remove the trimmer
•RemovetheAK97NWtrimmerapplyingthemethod
used to mount it but in the reverse order. If it is
already incorporated, proceeds as indicated in 5.5
ASSEMBLY 5046703 AK97NW TRIMMER-ROLLER-
PRESSERS, in the reverse order
Remove the support guides:
• Remove the intake and exit guides from the table
(M and L, Fig. 2), by loosening the screws (R, Fig. 2).
Remove the pressers:
• When edgebanding circular boards, it is not pos-
sible to use the presser unit (F, Fig. 1). It should be
removed and placed upside down (F, Fig. 11) so that
it does not get lost.
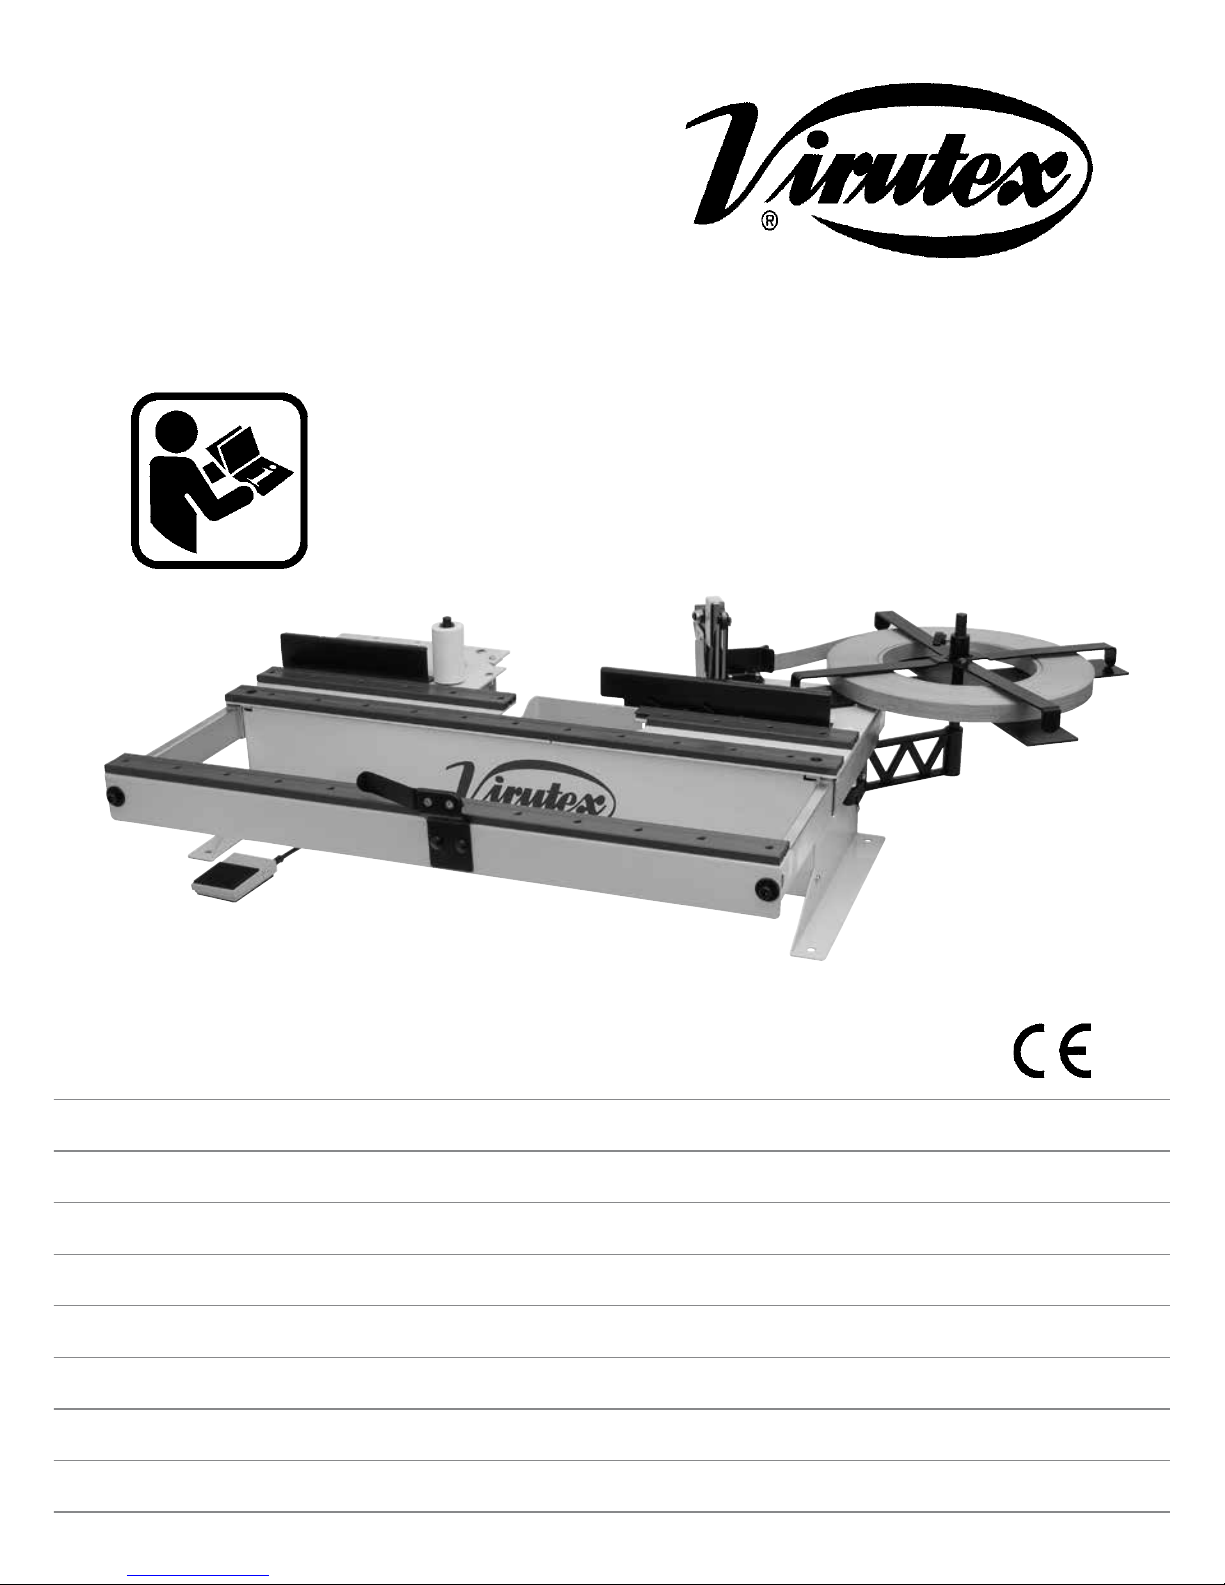
Edgbanding:
If the PEB200/PEB250 edgebander is ready to band
edges, as explained in section 6, follow the steps
below to edgeband a circular board:
• Turn on the advance switch (IJ, Fig. 2) for the
PEB200. This is located on the handle of the machine.
Turn the handle (IK, Fig. 2) on the PEB250 only and
select the working speed.
• Wait a few seconds for the glue to rise from the
tank to the gluing roller.
• Place the board on the worktop attachments (S.
Fig. 5, 11 and 13) and in front of the pressure roller
(N, Fig. 8 and 11).
• Push the edging through the guides until it reaches
the advance roller, which will transport the duly
glued edging until it exits over the pressure roller.
• Press the board against the edging located on the
pressure roller (N, Fig. 8 and 11), so that the rotating
movementofthelattersetstheboardadvancespeed.
• Push the board to the second roller and edgeband
the rest of the board by moving it between the two
rollers (Fig. 12), until the edgebanding process is
finished.
• When reaching the end, you should calculate the
excess to be left and cut the edge using the pedal
(IX, Fig. 2).
• Turn off the advance switch (IJ, Fig. 2) on the
PEB200,or put thehandle (IK, Fig.2) with thePEB250
into the (0) position.
• If you have finished working with the machine,
turn off the main switch (IG, Fig. 2), and press the
button (IY, Fig. 2).
9. EDGBANDING SMALL PIECES WITH RADII
AND SHAPES
Make the same adjustments as for edgebanding
circular pieces, as well as:
Additional adjustments:
Remove the auxiliary pressure roller and its shaft:
• Using a screwdriver, remove the safety ring (IL, Fig.
9) that holds the roller.
• Remove the roller (P, Fig. 9) and the roller shaft
(IM, Fig. 9), unscrewing it by inserting a 4 mm rod
in the hole.
Place the rear attachments in position:
• On some pieces it may be necessary to place some
rearattachments(V,Fig.2,5, 12and13)atthebottom
oftheboardexitpointandinthedesiredpositions,so
thatitissupportedduringedgebanding,andwithout
the excess edging hitting them as it advances.
Edgbanding:
If the PEB200/PEB250 edgebander is ready to glue
edges,asexplainedin section6,followthestepsbelow
to edgeband a small board with radii and shapes:
• Turn off the advance switch (IJ, Fig. 2) for the
PEB200. This is located on the handle of the machine.
Alternatively, for PEB250, turn the handle (IK, Fig. 2)
and select the working speed.
• Wait a few seconds for the glue to rise from the
tank to the gluing roller.
• Place the board on the worktop attachments (S,
Fig. 5, 11 and 13) and in front of the pressure roller
(N, Fig. 8 and 11).
• Push the edging through the guides until it reaches
the advance roller, which will transport the duly
glued edging until it exits over the pressure roller.
• Press the board against the edging located on the
pressure roller (N, Fig. 8 and 11), so that the rotating
movementofthelattersetstheboardadvancespeed,
keeping both hands on it (Fig. 13) and following its
shape until the end of the edgebanding process.
• When reaching the end, you should calculate the
excess to be left and cut the edge using the pedal
(IX, Fig. 2).
• Turn off the advance switch (IJ, Fig. 2) on the
PEB200,or put thehandle (IK, Fig.2) with thePEB250
into the (0) position.
• If you have finished working with the machine,