manuals.online logo
Brands
  1. Home
  2. •
  3. Brands
  4. •
  5. Visionhitech
  6. •
  7. Security Camera
  8. •
  9. Visionhitech VN6XEH User manual

Visionhitech VN6XEH User manual

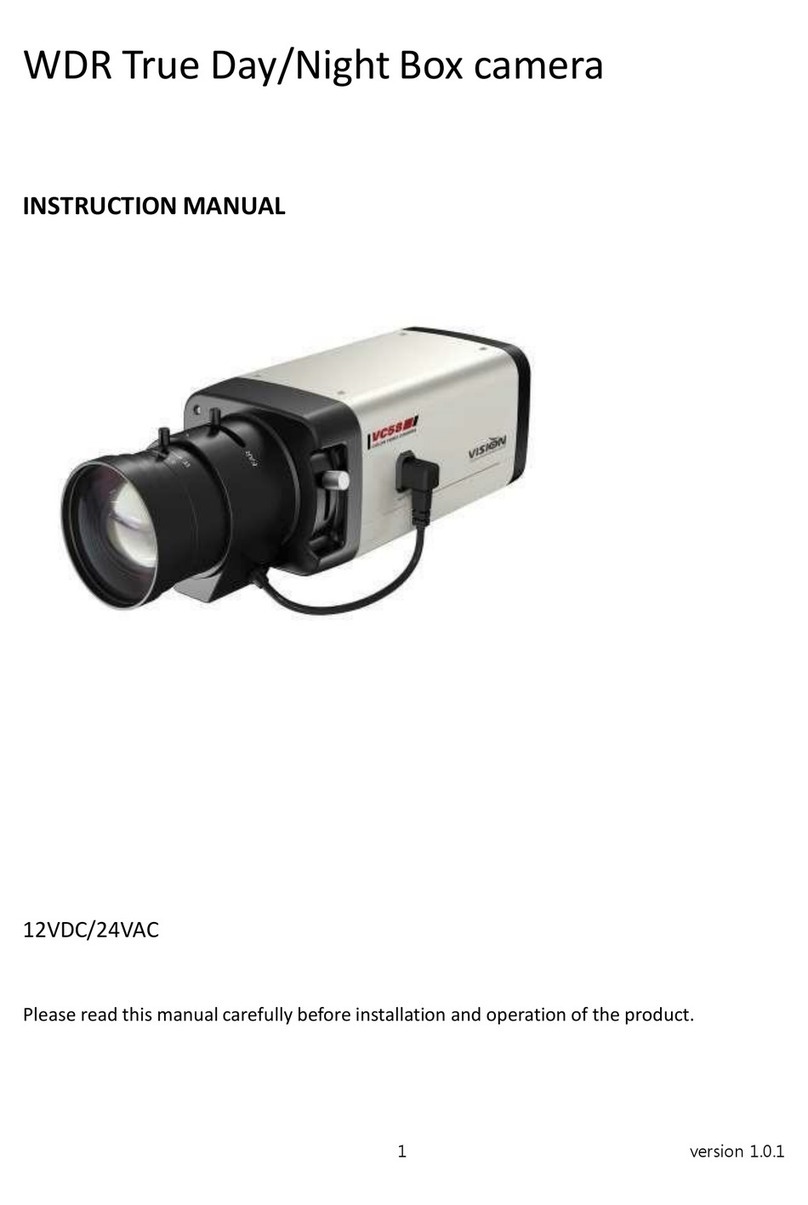
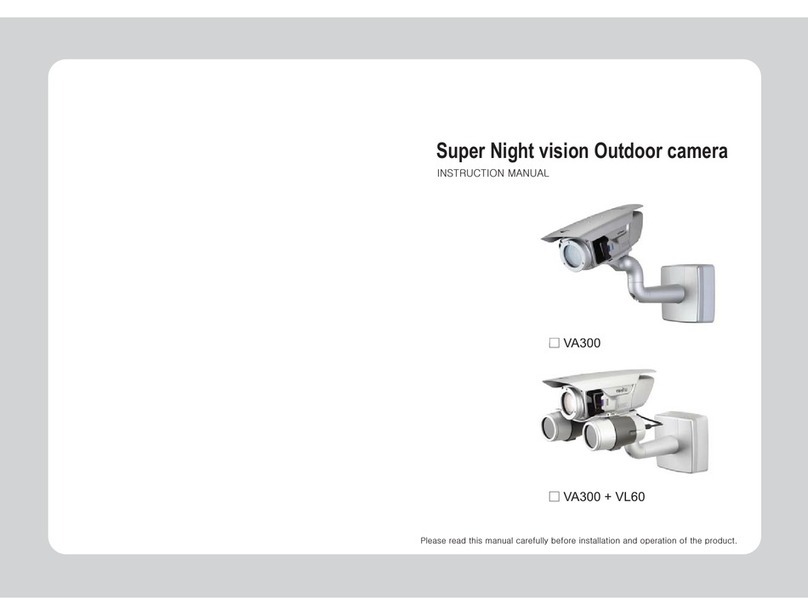
QUICK INSTALLATION GUIDE
Super Night Vision Outdoor Camera
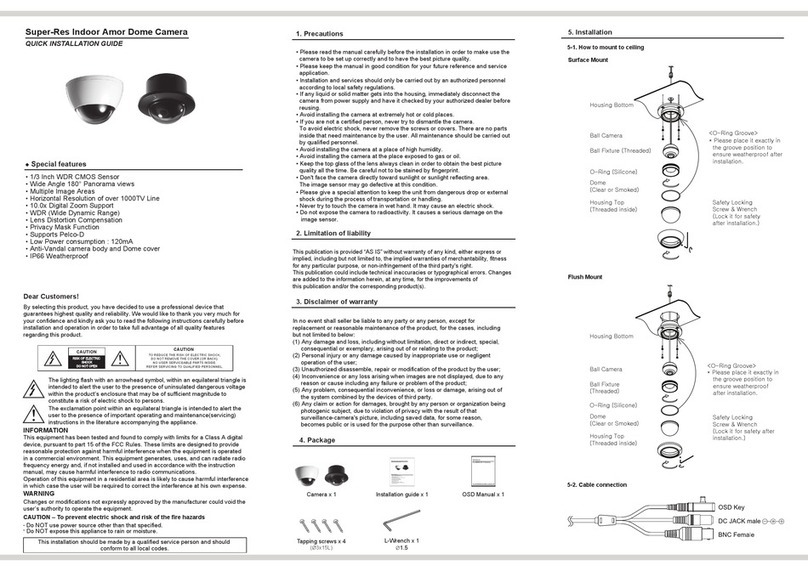
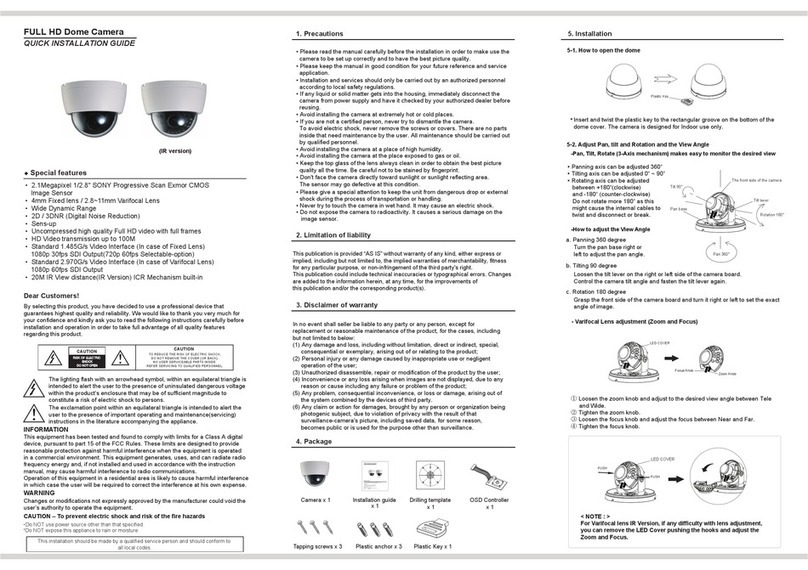
Special features
Dear Customers!
The lighting flash with an arrowhead symbol, within an equilateral triangle is
intended to alert the user to the presence of uninsulated dangerous voltage within
the product’s enclosure that may be of sufficient magnitude to constitute a risk of
electric shock to persons.
CAUTION
CAUTION
RISK OF ELECTRIC
SHOCK
TO REDUCE THE RISK OF ELECTRIC SHOCK,
DO NOT REMOVE THE COVER (OR BACK).
NO USER SERVICEABLE PARTS INSIDE.
REFER SERVICING TO QUALIFIED PERSONNEL.
INFORMATION
CAUTION – To prevent electric shock and risk of the fire hazards
This installation should be made by a qualified service person and should conform to
all local codes.
WARNING
Changes or modifications not expressly approved by the manufacturer could void
the user’s authority to operate the equipment.
Do NOT use power source other than that specified.
Do NOT expose this appliance to rain or moisture.
By selecting this product, you have decided to use a professional device that guarantees
highest quality and reliability. We would like to thank you very much for your confidence and
kindly ask you to read the following instructions carefully before installation and operation in
order to take full advantage of all quality features regarding this product.
●
2D DNR(Digital Noise Reduction)
●
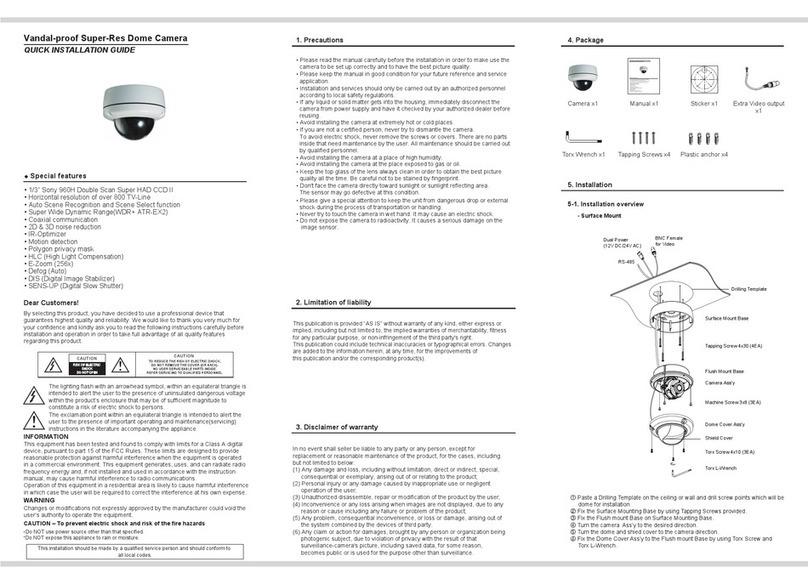
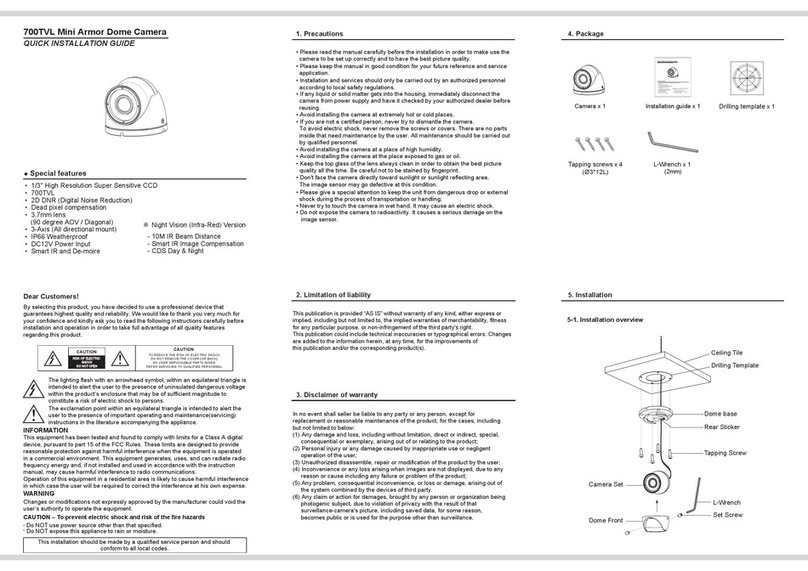
1/3” Sony 960H Ex-view HAD CCDⅡ
●
650TVL(D)/ 700TVL(N)
●
New Color Signal Processing for High Color Reproduction
●
Dynamic and Static White Blemish Compensation
●
Privacy Mosaic
●
Diverse White Balance
(ATW, Push, Push Lock, User 1/2, Anti Color Rolling, Manual)
●
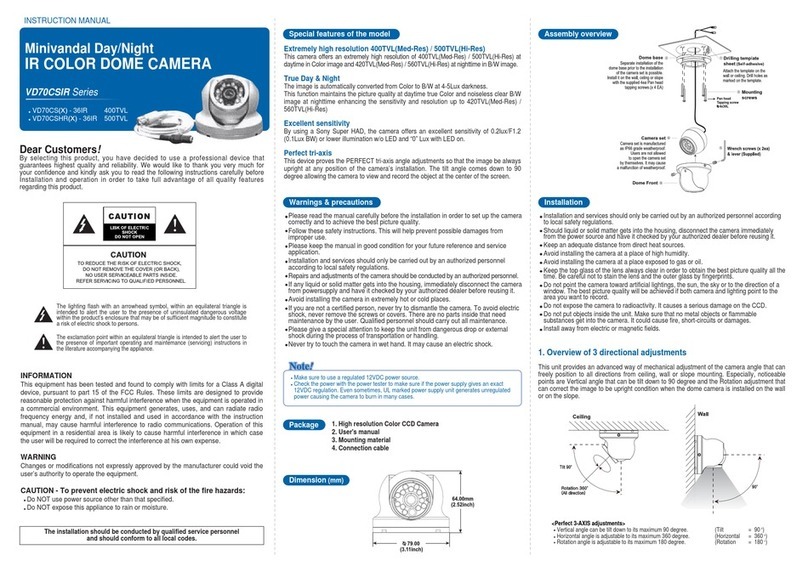
Intelligent IR Image Compensation
●
30M IR Beam Distance/2.8-12mm lens
●
True Day & Night(ICR)
●
Easy-to-play OSD button on the unit
●
Multi-Lingual OSD
●
Extra Video Out
●
External Focus Adjustment
●
Cable Managed Bracket
●
IP66 Weatherproof
●
RS-485 Interface(Pelco-D Protocol)
(English / German / French / Russian / Spanish / Portuguese / Japanese)
5-1. How to mount to Ceiling / Wall
5-2. 3-Axis adjustment
5-3. Lens external adjustment, EXT-Video
5. Installation
1. Precautions
• Avoid installing the camera at extremely hot or cold places.
• Avoid installing the camera at a place of high humidity.
• Avoid installing the camera at the place exposed to gas or oil.
• Never try to touch the camera in wet hand. It may cause an electric shock.
2. Limitation of liability
3. Disclaimer of warranty
4. Package
This publication is provided “AS IS” without warranty of any kind, either express or implied,
including but not limited to, the implied warranties of merchantability,fitness for any particular
purpose, or noninfringement of the third party's right.
This publication could include technical inaccuracies or typographical errors. Changes are
added to the information herein, at any time, for the improvements of this publication and/or the
corresponding product(s).
In no event shall seller be liable to any party or any person, except for replacement or
reasonable maintenance of the product, for the cases, including but not limited to below:
(1) Any damage and loss, including without limitation, direct or indirect, special,
consequential or exemplary, arising out of or relating to the product;
(2) Personal injury or any damage caused by inappropriate use or negligent
operation of the user;
(3) Unauthorized disassemble, repair or modification of the product by the user;
(4) Inconvenience or any loss arising when images are not displayed, due to any
reason or cause including any failure or problem of the product;
(5) Any problem, consequential inconvenience, or loss or damage, arising out of
the system combined by the devices of third party.
(6) Any claim or action for damages, brought by any person or organization being
photogenic subject, due to violation of privacy with the result of that
surveillance-camera's picture, including saved data, for some reason,
becomes public or is used for the purpose other than surveillance.
Tapping Screw
The exclamation point within an equilateral triangle is intended to alert the user to
the presence of important operating and maintenance (servicing) instructions in
the literature accompanying the appliance.
This equipment has been tested and found to comply with limits for a Class A digital device,
pursuant to part 15 of the FCC Rules. These limits are designed to provide reasonable
protection against harmful interference when the equipment is operated in a commercial
environment. This equipment generates, uses, and can radiate radio frequency energy and,
if not installed and used in accordance with the instruction manual, may cause harmful
interference to radio communications. Operation of this equipment in a residential area is
likely to cause harmful interference in which case the user will be required to correct the
interference at his own expense.
• Please read the manual carefully before the installation in order to make use the camera to
be set up correctly and to have the best picture quality.
• Please keep the manual in good condition for your future reference and service application.
• Installation and services should only be carried out by an authorized personnel according
to local safety regulations.
• If any liquid or solid matter gets into the housing, immediately disconnect the
camera from power supply and have it checked by your authorized dealer before reusing.
• Keep the top glass of the lens always clean in order to obtain the best picture quality all the
time. Be careful not to be stained by fingerprint.
• Don't face the camera directly toward sunlight or sunlight reflecting area. The sensor may
go defective at this condition.
• Please give a special attention to keep the unit from dangerous drop or external shock
during the process of transportation or handling.
• Do not expose the camera to radioactivity. It causes a serious damage on the sensor.
• If you are not a certified person, never try to dismantle the camera. To avoid electric shock,
never remove the screws or covers. There are no parts inside that need maintenance by
the user. All maintenance should be carried out by qualified personnel.
Camera x 1
Tapping screws x 3
(Ø4x30L)
Plastic anchors x 3 L-Wrench x 1
(Ø2)
L-Wrench
Ext-Video Cable x 1
Instruction manual x 1
Plastic Anchor
(A)
(B)
(C)
Right turn
(Tightening)
Left turn
(Loosening)
(A)
(B)
(C)
(Ceilling)
(Wall)
①Drill three screw holes on the wall plate to fix three plastic anchors (supplied) in the holes.
②Fix the plastic anchors in the holes.
③Position the mounting bracket on the screw points.
④Fix the mounting bracket by tightening the screws.
⑤ Slightly loosen bolt (A) then adjust tilt(180˚) and rotation(360˚) of the camera using a
serration on the bracket and tighten the bolt firmly.
⑥ Slightly loosen bolt (B) then adjust pan(360˚) of the camera and tighten the bolt firmly.
PAN 360°
TILT 180°
ROTATE 360°
Tilt bolt
Pan bolt
Rotation bolt
① Pan 360˚
Slightly loosen Pan bolt then adjust pan of
the camera using a serration on the bracket
and tighten the bolt firmly.
② Tilt 180˚
Slightly loosen Tilt bolt then adjust tilt of
the camera using a serration on the
bracket and tighten the bolt firmly.
③ Rotation 360˚
Slightly loosen Tilt bolt then adjust rotation
of the camera using a serration on the
bracket and tighten the bolt firmly.
ZOOM FOCUS
OSD Button (B)
Ext-Video (A)
•
ZOOM & FOCUS
Make your adjustments by turning the
Zoom & Focus dials at the underside
front end of the camera
- How to use
Connect Extra video output
(BNC cable) to LCD monitor as
a picture.
QUICKINSTALLATION GUIDE
SuperNight Vision Outdoor Camera
Specialfeatures
●
2DDNR(Digital Noise Reduction)
●
1/3”Sony 960H Ex-view HAD CCDⅡ
●
650TVL(D)/700TVL(N)
●
NewColor Signal Processing for High Color Reproduction
●
Dynamicand Static White Blemish Compensation
●
PrivacyMosaic
●
DiverseWhite Balance
(ATW,Push, Push Lock, User 1/2, Anti Color Rolling, Manual)
●
IntelligentIR Image Compensation
●
30MIR Beam Distance/2.8-12mm lens
●
TrueDay & Night(ICR)
●
Easy-to-playOSD button on the unit
●
Multi-LingualOSD
●
ExtraVideo Out
●
ExternalFocus Adjustment
●
CableManaged Bracket
●
IP66Weatherproof
●
RS-485Interface(Pelco-D Protocol)
(English/ German / French / Russian / Spanish / Portuguese / Japanese)
5. Installation
8. Specification
Problems Troubleshooting
Nothing appears on the
screen.
The image on the
screen is dim.
The image on the
screen is dark.
The camera is not working
properly, and the surface
of the camera is hot.
The screen flickers
continually.
RS-485
Communic-ation fails.
Color is not correct.
*Specications are subject to change without prior notice for better improvement.
6. Troubleshooting
7. Dimension (mm)
- How to use tactile switch on the OSD control
DOWN (D)
UP (U) MENU
(PUSH)
LEFT (L) RIGHT (R)
Push – to enter the menu or to save settings.
Push up or down – select functions.
Push left or right – to adjust levels.
5-4. OSD Manual for functions control
(Menu Tree)
For detailed information regarding OSD menu, refer to ‘OSD Manual for
Effio-E Cameras’.
95.7
122
85.2
Ø88
74.8
179.5
247.3
White Balance 1,800˚K ~ 10,500˚K Auto
(ATW/ Push/ Push lock/ User 1/2, Anti CR, Manual)
Gain Control Standard : -6dB ~ 44.8dB Auto
Smear Effect 0.005%
Power source 12VDC
Operating current 120mA/12VDC(IR Off), 340mA/12VDC(IR On)
Lens(Standard) 2.8-12mm Varifocal DC Auto Iris lens
Lens(Option) 3.6mm/ 6mm Fixed lens
LED Spectrum 850nm
Viewable Distance Up to 30M at Moonless Night
MTBF of IR 20,000 hours
Iris Control Auto
Operating temp
./Humidity
-10°C ~ 50°C (Humidity : 0% RH ~ 90% RH),
Option : -40°C ~ 50°C(-40°F ~ 122°F)
IP Rating 66
Measurement (mm) 88(D) x 247.3(L)
Weight (Approx.g) 1,000
Image sensor
Effective Pixels NTSC : 976(H) x 494(V), PAL : 976(H) x 582(V)
H. Resolution 650TV Lines(Color) / 700TV Lines(B/W)
Synchronizing system Internal
Scanning system NTSC : 525 Lines PAL : 625 Lines 2:1 Interlaced
Video output 1.0Vp-p Composite 75 Ohms
S/N ratio More than 52dB (AGC Off)
Min. Illumination 0Lux
Shutter Speed NTSC:1/60~1/10,000 sec. PAL:1/50~1/10,000 sec.
Gamma Correction Standard γ = 0.45
Class Supuer Night Vision Outdoor Camera
1/3" Sony 960H Ex-view HAD CCDⅡ
5-5. Waterproof processing of cable end connection
Make sure to use a butyl tape. (Do not use a sealing material on those parts)
① It is useful to connect the cable ends from camera to the extension cable for waterproof.
② Connect and tape the power cables (Power-Power/Ground-Ground).
③Bind the power cables together with the tape. When DC-Jack is used, tape the DC-DC joint.
④Connect and tape the RS485 cables (RS485+_TRX+ /RS485- _TRX-)
⑤Tape the BNC-BNC joint.
a. Power cable
b. RS-485 : Same as above
c. Video output cable
(Red)
(Black)
Please make sure to seal these places
with a tape tightly enough to prevent
water smearing into the cable.
A lot of actual damages are happening by
doing improper finish on the spot.
* Caution
If there are problems in operating, please refer to the checklist below.
If the problem persists, please contact the agent where this product is purchased.
· Please check that the power cord and line connection between the
camera and the monitor are fixed properly.
· Please check that you have properly connected VIDEO cable to the
camera VIDEO output jack.
· Please check that you have properly connected the camera to
an appropriate power source.
· Please check the setting of WHITE BAL Setup menu .
·Please check that direction of camera turns toward the Sun.
·Please check the polarity between RS-485 Control Port and
RS-485 cable.
·Please check if the initial value of the RS-485 Communication setup
matches between camera and OSD Controller or DVR.
·RS-485 Communication establishment initial value.
· We recommend that you make ground connection between camera
and controller for safe communication control.
·When RS-485 cable is not properly connected, A warning message
‘ERROR RS-485 Connection. Please reconnect and Reboot’ is
displayed.
Then please turn off the power and connect the cable again.
· Adjust the contrast feature of the monitor.
· If you have an intermediate device, set the 75Ω / Hi-Z properly
(Please check the impedance)
· Is the lens stained with dirt? Clean your lens with soft,clean cloth.
· Set the monitor to proper condition.
· If the camera is exposed to too strong light, change the camera
position.
485 Control Board Connection Port
(+)CONNECTION TERMINAL(TRX+)
( )CONNECTION TERMINAL(TRX )
RS-485 Control Port
485+
485
Item
Initial value 1 9600 8-NONE-1 ENABLE
Camera ID BAUD RATE UART MODE RET PKT
Shutter/ AGC Auto / Manual
White Balance ATW / Push / Push Lock / User 1, 2/ Anti CR/ Manual
Picture Adjust Mirror(On/Off), Brightness, Contrast, Sharpness, HUE, Gain
ATR On / Off
Privacy Mosaic
Back Light Off / BLC / HLC
On / Off (4 Zone setting available)
Day / Night AUTO / COLOR / B/W
NR NR Mode / Y Level / C Level
Camera ID On / Off
Language English / Germany / French / Russian / Spanish
Portuguese / Japanese
FUNCTION
SHUTTER/AGC
AUTO HIGHLUMINANCE
MODE
BRIGHTNESS
LOW LUMINANCE
MODE
BRIGHTNESS
RETURN
MANUAL MODE
SHUTTER
AGC
RETURN
WHITE BAL
ATW SPEED
DELAY CNT
ATW FRAME
ENVIROMENT
RETURN
PUSH
USER1
B-GAIN
R-GAIN
RETURN
USER2
B-GAIN
R-GAIN
RETURN
ANTI CR
MANUAL LEVEL
RETURN
PUSHLOCK
PICT ADJUST
MIRROR
BRIGHTNESS
CONTRAST
SHARPNESS
HUE
GAIN
RETURN
BACKLIGHT
OFF / BLC / HLC
ATR
LUMINANCE
CONTRAST
RETURN
OFF
ON
LANGUAGE
CAMERA RESET
SAVE ALL
PRIVACY ON
OFF
AUTO
DAY/NIGHT
BURST
DELAY CNT
DAY NIGHT
NIGHT DAY
RETURN
COLOR
B/W BURST
IR OPTIMIZER
MODE
LEVEL
NR NR MODE
Y LEVEL
C LEVEL
RETURN
CAMERA ID ON
OFF
English / Germany / French / Russian / Spanish
Portuguese / Japanese
120924-1

Other Visionhitech Security Camera manuals

Visionhitech VC56TH -12 User manual

Visionhitech

Visionhitech VC56TH -12 User manual

Visionhitech VB21S3 User manual

Visionhitech

Visionhitech VB21S3 User manual

Visionhitech VC58EHi Manual

Visionhitech

Visionhitech VC58EHi Manual

Visionhitech VDA100EHi Manual

Visionhitech

Visionhitech VDA100EHi Manual

Visionhitech VD70S3 Series User manual

Visionhitech

Visionhitech VD70S3 Series User manual

Visionhitech VD120TH-12 User manual

Visionhitech

Visionhitech VD120TH-12 User manual

Visionhitech VPD200SM2i Manual

Visionhitech

Visionhitech VPD200SM2i Manual

Visionhitech VC58S User manual

Visionhitech

Visionhitech VC58S User manual

Visionhitech VD80SFHD2-VF User manual

Visionhitech

Visionhitech VD80SFHD2-VF User manual

Visionhitech VD70CS(X) - 36IR User manual

Visionhitech

Visionhitech VD70CS(X) - 36IR User manual

Visionhitech VDA101S3-VFIR User manual

Visionhitech

Visionhitech VDA101S3-VFIR User manual

Visionhitech VQ29SFHD2 User manual

Visionhitech

Visionhitech VQ29SFHD2 User manual

Visionhitech VDA30PN User manual

Visionhitech

Visionhitech VDA30PN User manual

Visionhitech VD101SMi Manual

Visionhitech

Visionhitech VD101SMi Manual

Visionhitech VC58EP-12 User manual

Visionhitech

Visionhitech VC58EP-12 User manual

Visionhitech VN6XSFHD2 User manual

Visionhitech

Visionhitech VN6XSFHD2 User manual

Visionhitech VD80AHD User manual

Visionhitech

Visionhitech VD80AHD User manual

Visionhitech VA300 User manual

Visionhitech

Visionhitech VA300 User manual

Visionhitech VD70CSHR-36IR User manual

Visionhitech

Visionhitech VD70CSHR-36IR User manual

Visionhitech VC58SMi User manual

Visionhitech

Visionhitech VC58SMi User manual

Popular Security Camera manuals by other brands

Tarrington House WTT-1015 instruction manual

Tarrington House

Tarrington House WTT-1015 instruction manual

Teledyne Piranha4 user manual

Teledyne

Teledyne Piranha4 user manual

Sony Ipela SNC-DH210T specification

Sony

Sony Ipela SNC-DH210T specification

Foscam G2EP user guide

Foscam

Foscam G2EP user guide

ALIBI ALI-BC1720EC Quick installation guide

ALIBI

ALIBI ALI-BC1720EC Quick installation guide

Toshiba teli CS3910BH Specifications

Toshiba teli

Toshiba teli CS3910BH Specifications

Adirondack Spas Speed Dome Camera user manual

Adirondack Spas

Adirondack Spas Speed Dome Camera user manual

Panasonic WV-CP300 Series Preliminary

Panasonic

Panasonic WV-CP300 Series Preliminary

urmet domus 1099/212 user manual

urmet domus

urmet domus 1099/212 user manual

Milesight MS-C5364-PB user manual

Milesight

Milesight MS-C5364-PB user manual

ClearView IPD-81A quick start guide

ClearView

ClearView IPD-81A quick start guide

Home Advances Solar 6RHAS100LGR user manual

Home Advances Solar

Home Advances Solar 6RHAS100LGR user manual

TRENDnet TV-IP121W Quick installation guide

TRENDnet

TRENDnet TV-IP121W Quick installation guide

Eneo VKCD-12100F2810IR Installation and operating instructions

Eneo

Eneo VKCD-12100F2810IR Installation and operating instructions

Dahua Technology IPC-HFW5449T1-ASE-D2-0360B quick start guide

Dahua Technology

Dahua Technology IPC-HFW5449T1-ASE-D2-0360B quick start guide

Novus NVAHD-2DN3202MH/IR-1 user manual

Novus

Novus NVAHD-2DN3202MH/IR-1 user manual

Speco O4VB1M quick start guide

Speco

Speco O4VB1M quick start guide

Arecont Vision MegaBall 2 Specifications

Arecont Vision

Arecont Vision MegaBall 2 Specifications

manuals.online logo
manuals.online logoBrands
  • About & Mission
  • Contact us
  • Privacy Policy
  • Terms and Conditions

Copyright 2025 Manuals.Online. All Rights Reserved.